After buying all the available O-rings within a 10 mile radius from our marina (only slightly joking), David was able to find one that fit, and with much effort was able to get everything back together! With the oil leak fixed, we were finally ready to head out of St. Augustine. Our last stop in Florida was Fernandina. Despite this being quite a popular spot for loopers, we have yet to actually see the town. We dropped anchor and since it was both a weekday and we didn’t even slightly trust our repairs, we didn’t leave the boat!
However, I did enjoy a lovely sunset from the cockpit and a quiet evening with my kindle.
Since David had Friday off, and the weather was good, we decided to run outside the ICW for a stretch. We wanted to do do some anchoring, and also get to Charleston, and unfortunately most of Georgia waters in the ICW fall into a no-anchoring zone (silly laws that were intended to reduce the number of derelict boats on anchor but make it impossible for boaters like us to stay one night anywhere). The weather and conditions were about as good as you could hope for, and while I discovered that working in David’s office with only a very high window while underway makes me a bit queasy there were no other incidents.
Next up, we made a reservation at Isle of Hope Marina, the marina just south of Savannah. Since we spent several days in Savannah, moored right in the historical district, on our way South we decided we didn’t care too much about visiting the city this time around. At this point, we are only partially vaccinated and in the downtown area the restaurants were crowded, with limited options for outdoor dining – most on the street right by passers by. We pulled in to the marina right behind another looper boat and had a good conversation with the couple aboard. I blew her mind by running off to pick up my grocery delivery that I had placed while we were underway!
More sunsets! From our anchorage outside of Charleston
Next up, we were headed to Charleston where we had made a reservation for the latter half of the week. Unfortunately the marina could not accommodate us to arrive early, but we decided to take advantage of the weekend weather and do another hop outside the ICW. These two hops outside the ICW meant we basically blew past Georgia in a weekend :). There are plenty of anchorages around Charleston, so we planned to hang out on anchor for a couple of days until we could fit in the marina.
While underway, our high water alarm on the port side kept going off. Since we purchased the boat, there had always been a fair amount of water in the port engine bay, so we knew we had an issue somewhere that we’d eventually need to debug. I went downstairs to run the bilge and this time took a look in the engine bay. To my great dismay, I saw a LOT of water spewing in from the spot where the propeller shaft goes through the hull to the propellor outside the hull. David went downstairs to take a look while I took the helm and he confirmed that we definitely had an issue with our prop shaft seal. Luckily our bilge pump was easily able to keep up with the water and David had spotted that we did have a spare seal around the shaft.
We were about 8 miles offshore and all of the nearby inlets were pretty sketchy, so we had to make a call on what to do — risk an inlet or keep going to Charleston. After checking with some more experienced boaters on the risks of running on a dying shaft seal, we decided to maintain our plan to reach Charleston, and try to replace the seal when we arrived. If needed, we’d be in a populated area to arrange for further intervention if required.
After we dropped anchor, David prepared to make the swap. This was a little risky, being after 5pm, and afloat, but he felt that he had it in hand after watching a youtube video on the process. The swap went smoothly and after a quick test of running the prop forwards and reverse while still on anchor, it looked like there was no further leaking! Huzzah!
Everything seemed to hold for our quick run to the marina where we set up shop for the rest of the week. We both had extremely busy meeting days through the rest of the week and basically didn’t emerge from the boat until Friday evening when we headed into town on our scooters for dinner.
On Saturday we did a scooter ride around town, had a delicious brunch, hit a distillery for a tasting (oops, purchased some vodka and gin) and then settled in to a brewery to play some cards. It was a lovely day!
This game is Hanabi, where you don’t get to look at the cards in your hand. People who have played this game before will understand David’s pain at my current hand.
Though we tried to extend our stay for another couple of days, unfortunately the marina was already booked, so we headed out as we originally planned on Sunday to a familiar anchorage, Butler Island, just at the southern end of the Waccamaw River.
Sunset selfie at Butler
The last couple of weeks have been marked by a lot of very busy working days, a focus on progressing northward, much coordination around vaccinations (I’ll tell that story in the next post!) and ongoing boat projects/fixing issues; hence the decided lack of photos in this post! We’ve mostly completed the large projects at this point, so I’m very much looking forward to getting back to “normal” as much as is possible when you live on a a boat!
Note: This post has been superceded by an extensive newer post going into the details as the system has evolved over time.
We’ve been running the power system at full strength for over a month now, with a couple weeks away from a marina at this point. Improvements will continue over the year, I’m sure, but it’s final enough to share with the world at this point. I also apologize that this post kinda looks like a giant Victron ad. While I wish that they’d paid me a dime (or two) to do this, they actually didn’t. It’s just a great set of equipment that I’m super pleased with and think you should buy the same stuff if you go down this path.
Around the time we decided to buy the Endeavour, I had come around to the idea that, if we instead committed to sticking with our old boat, I was going to have to redo batteries to non-lead-based technology of some sort. I was tired of always running out of power, managing/timing generator runs, carefully running as absolutely little as possible, timing showers to after we made a travel hop, etc. and wanted a change for our next year+ of east coast cruising.
When we looked over this Endeavour, in the electronics cabinet I found mostly original equipment with a few awkward slightly newer pieces thrown in. I quickly came to the conclusion that, if we bought it, it was a good excuse to do a complete writeoff of what it came with, and go nuts with something I’d be really happy with for years.
The electronics cabinet of the Endeavour as we bought it. A whole bunch of older cobbled-together stuff. And a stereo amp, because, well, why not, or something.
A couple weeks before we looked at the Endeavour, Kevin @ Airship posted a fantastic blog post talking about their power system. They’d been working on it over the last year, and were finally pretty happy with it. They had decided to do what most boaters consider pretty crazy — run 100% of their AC power through inverters. I’d been contemplating a system like that for a while but it seemed like absolutely no one did it, so it had been simmering on my back burner throughout 2020. However, when this article came out, it validated all of my beliefs about a modern power system for uses like ours:
Lithium really does live up to the hype in liveaboard boating usage
Heavily load your generator if you’re going to bother starting it — running a 9-12kW generator and pulling 1kW slowly charging batteries is inefficient and bad for your generator
Run everything through inverters and use power boost as needed if shore power isn’t enough
Get to a place where you barely have to think about power on the boat anymore
Throughout 2020, every day we weren’t plugged in at a marina, power was a foremost concern and dictated much of our scheduling. When are we going to generate so we can time our showers around the limited duration hot water? Are there people around us? Crap it’s 8pm we should probably not generate at this point, but our batteries are getting lowish so we have to either go to bed early or just read books or whatever to avoid using too much power overnight and drawing the batteries down too low.
Early in the trip, the mental load of managing all this was a little fun, even though we were already used to it from before we came out east. To semi-quote JFK, we don’t do these things because they’re easy, we do them because they are hard. But at some point it’s basically just an algorithm and it gets old to manage. So I decided I was done with it.
Victron Quattros
The Slowboat article led me to a newer suite of products from Victron called the Quattros that are a bit of a godsend for this sort of marine off-grid system. These actually go above and beyond the standard age-old inverter/charger combo unit. There’s two AC inputs, so you can put your generator in one, fix the current limit (50A for us), and then plug the second one to shore power, and, from a monitoring panel, easily update the current limit depending on whether you plug into 50, 30, or even 20A at a marina. Then it would use whatever power source was available as input.
Our boat has one 230VAC device currently: the older watermaker that came with it. While I may replace it someday, I wanted to make sure that we could support it, so I needed to keep the full split-phase system that the boat came with. I also figured I’d probably upgrade the heating/cooling to a chiller system that would much rather be on 230VAC than 120VAC. While there’s a few options for accomplishing this, I decided to go with using two slightly smaller Quattros (5KVA) in a split-phase configuration, so that if one of them broke, I’d be able to quickly rewire/reconfigure the system to still function off the one remaining unit until we could get a replacement.
The Quattro has a bunch of neat features, not least of which is the PowerAssist functionality, which is part of what really sold me on the system. If you’re plugged into shore power of a certain amperage, and your panel needs to draw more power than the shore power can provide, the Quattro will fill in current from the batteries. So if you’re in a smaller marina with single-phase 30 amp, you can run the microwave for a while or the air conditioning, and it will fill in any extra power requirements over the limit. Then, whenever you drop below 30 amps again, it’ll go back to charging the batteries up with whatever spare current is left. This is really useful for marine air conditioning units, which traditionally require huge loads at startup (30-40 amps) for a few seconds, which tends to blow breakers, but this system totally avoids that problem.
So pretty early on, I decided to pick up a couple Quattros, and was able to move on to figuring out what to do for batteries. The first step down the carefree-power path I’m heading down is getting a silly amount of battery capacity, so this was going to likely be the most expensive part of the new setup, and hence required a ton of research.
Why Lead Batteries Are Terrible
Lead batteries have a bunch of nasty characteristics for long-term usage. When you start at 100% charge, you can only really bring them down to around 50% before you risk dangerously shortening their life span. So you start charging there. Then, once they get back up to ~80% charge state, they start increasing internal resistance and accepting charge slower and slower. Traditional logic is that to get from 85% to 100% takes ~3-4 hours for lead acid batteries. So you just don’t do it if you’re at anchor. You cycle between ~50% and ~85%. We had our auto-generator-management on the Meridian to cycle from 55-85%. So if you have, say, 1000 Ah of capacity, you get to use ~300 Ah of it from your main cycle. Not a great return.
But wait, it gets worse. The chemistry of the anodes in lead batteries is such that, when you run them down, on the exposed areas (where the electrolyte goes down), they get a little lead sulfate coating that you need higher voltage to get through. And you only uncover that surface up to the % that you charge back up to. So when you cycle up to 85% and then back down again, 15% of the anode starts building an ever-thicker coating on it and starts to crystallize. The next time you charge back up, to get back to 85%, it takes even more time than last time. By the time you cycle 50-85% ~4-5 times, you’ve lost 10% or more of your battery capacity, and you’re actually cycling between 50 and 75% — now you get 200-250 Ah of your 1000Ah bank to avoid damaging your batteries.
The only way to restore that capacity is to get back to 100% with a really long generator run as soon as possible, and every few weeks you need to run an “equalize” cycle that runs very high voltage through the batteries to “break through” that crusty shell on the anode and get your lost capacity back. It’s a pretty terrible system, all in all. And so not only are you constantly just managing these tiny-range % cycles on your batteries, you’re also managing plating that you need to work these really-long generator cycles in to break through, and every few weeks get a full ~8-10 hour generator run (or be in a marina) in place to do an equalize cycle.
Even being “nice” to your batteries and following things by the book, even “good” AGM lead batteries only get around 500 cycles down to 50% before they’re at a fraction of their initial capacity. So, doing 1-2 cycles a day, we basically had a year or so before we were working with a pittance of capacity. After a year of this game, and changing out the batteries once already, I was pretty tired of it and ready for a change.
I spent some time looking into Firefly (carbon foam-based) batteries and a couple other intermediate chemistries, but very quickly settled on a much better option.
Lithium Batteries
Lithium, specifically LiFePO4 chemistry, is in a category of its own in the battery world. These batteries can be around 1/4 the weight of traditional lead-acid batteries (either FLA or AGM) for the same capacity, and around half of even a carbon foam-based setup. So on things like boats, where weight is the devil, if you want a ton of capacity, you go Lithium, or you end up putting a thousand pounds of lead somewhere on the boat. The weight consideration is a nice boost in and of itself, but the biggest wins with Lithium are actually in usable power.
Remember my rant above about the fun 55-85% cycles on AGM and how you can’t get back to 100% without a ton of time, and the memory effects you need to counter? Yeah, those are gone with Lithium. You can safely draw them down to 20% and charge right back up to 100% and get 2000-3000 of these 80%-capacity cycles out of them. If you only draw down to 50%, you get 5000 or more. Better yet, that 20-to-100% cycle is at full speed the whole way. The batteries accept an essentially full rate of current from the bottom of the barrel right up to the last topoff. So you can really just use them as a reservoir like a fresh water tank — top off when it’s easy, let it live low if you want to and understand the risks, and add a little bit if you want here and there.
To do a little math here, the Endeavour came with 800Ah of AGM. With a 55-85% standard cycle, that gives us 240Ah of capacity to burn through in between running the generator. Getting the same weight of Lithium batteries gives us 2400Ah, and with a 20-100% standard cycle, that’s 1920Ah. That’s an eight-fold improvement in usable capacity for the same weight. Plus you’ll get many years out of the packs with the 2000+ cycle lifetime. The primary complaint about Lithium batteries is up-front price, and rightfully so. They’re expensive. But especially if you’re going to spend any significant time on your boat, do all parts of the math — cycle time and cycle count. You might find that lithium batteries actually save you significant money over several years.
So, I’ve convinced you to buy a pile of Lithium batteries, right? Great. I’ve been watching Lithium (LiFePO4, not Li-ion) batteries for years, and they primarily break down into two main camps: US-assembled-and-warrantied packs for around 1000$-per-kwh; and Chinese-assembled-and-basically-un-warrantied packs for around 300$-per-kwh. Forum posts for years have talked about the Russian Roulette of trying the latter — sometimes you get some gold, often you get half-capacity packs, and one dies a few months later and the company has completely disappeared. So, if you go that route, way over-buy for your intended capacity and still pray. For what’s actually our home, I didn’t like either of these approaches. I wanted at least 20 kWh and preferably closer to 30, which was putting the cost of option 1 well into stupid territory, and option 2 still at expensive enough to be a real investment, without any guarantee of success.
The other problem is form factor. Many makers have been making drop-in battery replacements instead of taking advantage of the big improvement that Lithium gets you on power density (capacity per space). So you get, for example, a Group 31-shaped battery for 700-1000$, and it’s still the size of a full Group 31 battery, is only 100 Ah, and is packed full of foam to fill out the space. So, for most of the better units, if you want to get up to 20 kWh or beyond, you end up with a huge amount of space.
A pretty common type of arrangement for a DIY Lithium battery pack
Many people go the DIY route, where you buy bulk Lithium cells from China, throw your own battery management system on it, and solder it all together. But especially for a liveaboard marine environment, I wanted something slightly less hand-crafted than that with at least a vague weatherproofing certification claim. I had confidence I could make the DIY approach work, but at what cost, when every time I screw up a little bit we could be in a pretty bad situation?
The BestGo Preferred battery pack — pretty solid, weatherproof case, and energy-dense
In the last few months, however, Electric Car Parts Company, a company that’s been around in the US for quite a while, and imports and sometimes warranty-backs various overseas options, came up with a new option: the BestGo “Preferred” packs — 12V, 400Ah, a hair under 2000$ each, with integrated battery management (a whole different topic, but suffice it to say you want this). That’s 5kWh for under 2000$ — slightly more expensive than the cheap-chinese-pack option, but a huge discount on all of the US-backed packs. It comes with a reasonable warranty, backed by the US company, and the form factor is awesome.
The pile of lead that came on the boat
When I did the math, I’d be able to swap the four 4D batteries that came with the boat with four of these packs in a virtually identical rectangle (1″ wider, exactly the same length, and about an inch taller). I’d go from 9 kWh of AGM up to 20 kWh in the same space, at 2/3s the weight. And there was a nice little space next to the current battery area to put 2 more if I wanted, to get up to 30 kWh and have weight parity, with 4x the capacity. A plan started coming together. Shipping was going to be a little complicated, since they get “dropshipped” directly from China with a ~6 week lead time. So, we knew that as soon as possible after closing on the boat, we’d have to place the order and sit somewhere for a while.
12V? Bleh. Maybe 24V?
Up until recently, the only thing that made sense on your boat was sticking with whatever its native house bank was. Most boats are 12V, some larger boats are 24V, and none are 48V. You don’t want to change your house voltage. Everything on your boat is designed around it — lights, relays, toilets, macerators, electronics, your engine computers — virtually everything electric that you interact with on a daily basis.
For the longest time, I’d been assuming I’d get a huge stack of 12V battery power, run enormous cables to some huge inverters, just like Slowboat did, and that’s just life on a boat. But there’s a big downside to this approach. 12V is a terrible voltage. Humanity has been using it on mobile vehicles for decades and decades, and it’s so ubiquitous that it’s hard to change at this point. But especially for larger power demands and physically larger installations, it’s terrible. You lose so much voltage over such a short distance that everything is heat management and giant cables. Running, for example, 8 kW of power through 12V to power your inverter means pushing around 1000 amps continuous. That safely requires four 4/0 cables per lead (4 for positive, 4 for negative), and is still converting a bunch of electricity directly to heat. It didn’t excite me, either from a cable management perspective nor from a safety one. Doable, but really not ideal.
Pictures from the Slowboat article I linked above — this is a carefully-temperature-optimized system running their inverters off a 12V bank. So much scary heat everywhere.
This runs into our next problem. With lithium batteries, due to some nuances of the battery chemistry, you really need to run a battery management system on top of the raw battery cells. However, most of the BMS systems don’t really support continuous draws over 100 amps. Even with 6 batteries, that’s only a 600 amp continuous draw. At 12V, that actually isn’t enough to fully feed the inverter behemoth I was looking at doing — I need around 1000 amps. However, BMSs tend to work at the same amp rates independent of voltage. So while the BestGo 12V 400Ah pack supports 100 amp draw rates, the 24V 200Ah pack also supports a 100 amp draw rate, but that’s getting twice the energy out of the pack.
I started investigating running a 24V subsystem — a main large house bank at 24V, with a tiny setup at 12V, and running converters to run power both ways. When the alternators were running, it’d charge up to the 24V house bank, otherwise the 24V house bank would live-convert down to 12V to handle constant loads. Victron makes a bunch of Orion units to deal with exactly this sort of problem, and it’s pretty manageable. However, at the end of the day, I was struggling to convince myself it was worth it. 24V halves the current requirements, but it still adds all the complexity of a new voltage level, and chargers are still fairly low-current. Even going ballistic on chargers, it was going to be ~8 hours on generator to refill a 25kWh drop. There had to be a better way.
48 Volts
Most home off-grid solutions use 48V. It’s still “low voltage” so it’s safe to work with, you get much easier and safer wire runs, and it’s a lot closer to 120V than 12V, so inverting it back to AC is a more efficient process. For off-grid home solutions, no one has 12V to deal with — you’re just storing energy to convert back to AC all day for your house. However, the more I thought about it, the more it seemed like this off-grid usage was actually pretty analogous to our higher-demand usage on the boat. We ALSO have a 12V system that has low-but-constant demands, but, over the course of a day, we lose way more power to an inverter than we do to the 12V loads. Computers, cooking in the convection oven, running the air conditioning, hair dryer, water heater, etc. It all adds up to an order of magnitude more usage than the DC stuff. So what happens if we optimize around that AC load instead of the DC load?
Well, as it turns out, the Victron Quattro comes in a few different sizes at 48V, one of which actually looks great for our needs. Significantly higher power conversion efficiency than the 12 or 24 volt models, actually smaller size and lower weight, and, best of all, a 70A battery charger in each unit (remember 70A at 48V is a lot of power). This started looking pretty compelling. For this to work, though, I needed some way to get, at a minimum, power from 48V to 12V to power the hungry fridges and electronics of the boat.
The Victron Orion line has a cheap and simple 48->12V 30 amp DC-DC converter, which would easily run our house loads 98+% of the time, at very low conversion loss. There’s also a whole pile of 12->48V battery chargers around the world to be able to charge the 48V bank from the motors. I fairly quickly pieced out a set of devices that would entirely solve this problem for me. You keep a small 12V starter “house” battery as a power sink in case you, say, run the toilet and water pump at the same time, the 30A DC-DC converter runs load the rest of the time and quickly recharges any actual over-30A-usage from the small battery.
This seemed like a slam dunk. It was a silly project, but I liked it, and it also seemed like it could be genuinely awesome. Fast charging from the generator, run anything on the boat off the inverters with pretty small size cable runs. Let’s do it. I went with six of the BestGo 48V/100Ah batteries from ECPC and got them ordered up, and got an order together from a Victron supplier for a stack of stuff.
Wakespeed WS3000
As I was about a day from pulling the trigger on a whole slew of stuff, I just kept searching for an even more efficient way to do the 12<–>48 conversions. I had an answer that I found satisfactory, but it still just felt like there had to be a better way. Something interesting popped up on one of my google searches — a PDF of a brochure that didn’t seem to be linked to anywhere. It was from Wakespeed, a company mostly known for their line of alternator external regulators. It mentioned a new product coming soon, a “WS3000”, with this picture, and no other details:
It had to be too good to be true, right?.. I immediately sent Wakespeed an email describing what I was trying to put together, and that it seemed like this WS3000 was the magic bullet to tie my whole system together, but I wanted to confirm that this was what they were going after. Amazingly, that night, I get an email back from the co-owners of the company, “The WS3000 sounds like an excellent solution for your application!”, and offered a phone call the next day to discuss a potential collaboration.
Well, turns out, what I wanted was exactly what they’re trying to build. No one has a good way to bridge legacy 12V systems and high-energy lithium 24 or 48V power banks, so they saw a market opening, and jammed a 3000 watt crowbar into it. Their timeline was getting super-early alpha hardware assembled in a month or so, which was around when my batteries were going to show up, so our needs aligned very well, if I was willing to tolerate early development software and hardware and help them tweak it all. We started planning how things would go by email while we waited for our respective ducks to get in a row.
One interesting insight Al had was to just use my port start battery as the “12V house” battery. With only a 30A converter, I needed some sort of middle buffer, especially since the windlass pulls off the house setup by default on this boat. However, with a 3000 watt converter always at the ready, that changes the game. The idea seemed interesting enough to at least try for a while, so I went ahead with that plan — merge the port start battery with the “house” positive bus, and then feed the house off the WS3000, with the port battery as just a backup/energy sink a 15 foot wire run away. As a safety measure, add an ACR setup to keep the starboard engine+battery isolated from the port/house battery, so that if something went to hell and the port side fully drained, we’d still be just fine to fire up either the starboard side or the generator and restart the rest of the boat from there to get back on our feet.
With the rough circuitry figured out, I started ordering things.
The Build
I had 6 weeks to wait for the batteries to show up, but also a ton of other projects to do on the boat in the meantime. And also, converting over to the “no-12V-house” setup was going to involve a bunch of rewiring. Finally, even when the batteries arrived, there was too much to change to possibly do in one big full day, or even a full weekend, to ensure that we’d be ready for working again Monday morning. So I had to figure out how to stage things out to give myself the best chance for success.
I spent several days going through the two engine bays and simplifying things. The factory and modded wiring in here was incredibly inefficient. Really long large-diameter wire runs to junction points that then had really long large-diameter wire runs back to near where the run started in the first place. Very questionable choices. At the end, I was able to pull out ~80 lbs of cable and end up with a more resilient setup, and get actual wire runs that were topologically similar to my ideal-state block diagram from above. I got to a place where I had both engine bays happily wired up with an ACR between them and the port loads all run to a set of terminal posts on the firewall that I could later run 4/0 cables up to the main electrical panel area when I was ready.
It’s not pretty, but it does work. This’ll all need cleanup once I get the setup more finalized and decide on whether to keep re-using the port battery as “house” or go back to another isolated “house” setup.
Once the engine bays were ready, which took way longer than I expected, I started dismantling everything possible from inside the electrical panel area to get down to the bare minimum needed to run the boat every day — basically, just the existing mastervolt 12V inverter/charger.
So much extra stuff to pull out…
Eventually, over the course of a few days, two freight shipments showed up with the batteries and a stack of Victron stuff, and I was ready to go. I made a pretty serious tactical error here, and despite my plans to first merge the port battery in as the “house” battery, get that working, and then move onto installing the 48V setup, I got cocky. I can just dismantle the panel, throw the batteries in, mount up the Quattros, and be off to the races later in the day to do cleanup, right? How hard can it be. Well, turns out, quite hard, when you forget some important nuances.
Mid-day state: Hannah’s favorite — a floor full of tools, batteries, and spare parts, and the power on the boat not working
To get through the day, when it came time to pull the plug on the charger setup, I wired the house setup to the Port battery, but didn’t really think about how small capacity the port battery was, nor did I have a good idea of what our steady state DC power usage was, since the factory gauges were really inaccurate and I hadn’t measured with a good ammeter or anything. So, barely a few hours into the rewire job, I realized I’d heavily drained the port battery, and quickly threw the manual switch on the ACR to join to the starboard battery to buy me some time. But this kicked off a frantic battle to get something, anything, in place that could keep the 12V system charged while I worked. I’d thought I had several more hours before I needed to be in this state, but now quickly needed a solution, or to revert to throwing the old house batteries back in to buy myself some time.
Tick tock tick tock — nothing’s charging those batteries, and the fridges are thirsty…
I decided to just go straight to throwing a couple of the 48V batteries in place, adding the Orion (48-12V DC-DC converter), quickly wiring it in, and using that to get the system into a recovered state so I could breathe and more thoroughly finish other aspects of the install. For those paying attention, why do I have an Orion when the WS3000 is coming? Backup. Given how utterly dependent we are on 12V power, I want at least 2 ways to keep 12V power going, especially given that one of them is in an alpha-level development phase.
Operation emergency-throw-in-some-batteries
Eventually, late into the night, I got one of the inverter/chargers up and running enough to start charging the 48V batteries from shore power, as well as power outlets on the boat, so we were in a breathable steady-state. I’d misjudged the length of 8 gauge triplex I needed to make nice-looking wire runs between the Quattros and the panel, as well as that I needed a stack of 8 gauge ring terminals, so I had to hack stuff together for a few days while I waited for more parts to arrive in the mail. But several lessons were learned, and a few days later, everything was finally in a full-power-usable state, though not cleaned up very well.
With the last final-gauge wiring hooked up, I was able to disconnect shore power and run about 4000 watts through the inverters for an hour before we got bored of how uneventful it was, and also the boat was really cold since we were running all the air conditioners at full blast on a not particularly warm day, so Hannah wasn’t thrilled. Then I flicked the shore power switch back on, it started charging back up at 120 amps into the 48V bank, and we were back to full in under an hour. It was a pretty magical experience to see it all come together in the end.
I spent the next many days getting the batteries properly hooked up together and secured for rough seas and cleaning up a bunch of wiring in anticipation of someday soon actually leaving a marina.
Love only having to use 4 AWG wire for battery hookups. Still crazy to me that’s the equivalent of 2400Ah of 12V capacity for only 480 lbs of weight.
Panel Considerations
One thing I didn’t think about until much later than I should have was the electrical panel. Boats are usually designed with a front-door circuit breaker breaker + selector panel. You can select shore power (1 or multiple inputs around the boat) or generator, so that, just like with a home installation, you don’t back-feed into the grid. Then, you have a small AC panel that the inverter covers — usually outlets on the boat and the microwave. Then larger AC panels with the bigger loads on the boat that the inverter can’t cover — air conditioning, stove, water heater, etc.
This new strategy blows both of those systems out of the water. As mentioned above, the Quattro takes the generator input straight into itself, so you don’t need to “select” the generator anymore — it can just always be enabled, and can never back-feed into the grid. Also, we’re running the entire load through the inverter, so your runs go from shore power/generator through a front-door breaker, and then straight into the Quattros. Then the output from the Quattros go back and drive the entire AC panel. No more thinking about what works on the inverter or having to fire up the generator. Everything is battery-backed, usable no matter where you are.
This is neat and all, but since no one does a setup like this, there are no off the shelf panel building blocks to do anything like this. So, for now, I’ve kinda hacked my panels to do what I want — joined the “inverter” panel to the rest of one leg of the AC panel, removed the physical block between the generator and shore power connectors and now just use them as breakers, and ran the source wires back to the Quattro output for the panels. It required running a bunch of pretty large-gauge triplex wire (8 AWG for safe continuous 50 amp AC over these distances) back and forth ~6 feet between the panel and the back wall, but it worked out in the end.
Finally, I repurposed one of the 120VAC panels for 48VDC for now, mostly just to coordinate my two DC-DC converters for now, but hopefully over time I can get more 48V-native devices (like a windlass!), since it’s such a better power transport voltage.
Ignore my totally final ACR switch arrangement in the top left there.
Once I get everything more final in the coming months, I’ll probably end up contracting with Paneltronics’ custom panel wing to build a new custom AC management panel for the new reality, but this all works quite well for now, in the end.
Monitoring/Observability
As a total dork, one of the parts of this system I was most excited about was the monitoring/observability aspect. On the old boat, there was pretty much just a voltage display, current in/out display, and state of charge number to the nearest whole % point. This new system is a little different.
Screenshot of my cloud-based dashboard showing several days at anchor followed by a marina stay
The Cerbo GX is a cheap addon for your Victron network that lets you connect all of the individual pieces of your power setup and upload all the data to the internet for observing, as well as convert it to NMEA 2000 messages so the rest of your boat network, like chartplotters and Maretron displays, can display all the power information as well. It has a little touchscreen addon, the Touch 50, you can get for it as well that nicely mounts into your power panel and gives you quick access to all of the info on your power system as well as deep configurability through a touchscreen. It’s a pretty great little setup.
One of the key parts of the observability is the Victron SmartShunt, which is a nice little all-in-one current shunt plus electronics to measure it and integrate it into your Victron network. So I can monitor voltage and current in and out of the low side and high side battery banks and alarm on a whole slew of different characteristics, which was really helpful in the early WS3000 debugging days. It also allows monitoring an auxiliary battery, so I can monitor the otherwise-isolated starboard battery bank from next to the port one.
It’s a nice little interface that even does a calculation of how much power is “disappearing” outside of what it knows about for generation/consumption, and calls that “DC Power”, which happens to nicely correspond to how much power is going from the 48V bank to the 12V house loads. So, at a glance, I can see how much AC power and DC power we’re using, as well as the solar generation and house battery bank levels. Then I show the 12V port/house battery voltage and SOC levels on the little Maretron display at left there, along with our two holding tank levels.
The level of insight this system provides is amazing, both live and using the VRM portal to go back in time and see what everything was doing throughout the day, even showing holding tank level history.
Generator Management
One of the primary tenets of the new system was around effectively utilizing the generator when we do run it, and another was getting to the point of just not really thinking about power usage. So, I wanted to make the generator control fully automatic.
The generator is a 12kW Northern Lights unit, and has a pretty manual panel — you have to hold the preheat button for a few seconds, then hold the start button until it catches, then keep holding the preheat button for a few more seconds until it’s running nicely, then you can let it run until you press the stop button. Being a fully-manual two-handed operation, automatic generator start/stop wasn’t going to be as easy as it was on the Onan generator from our last boat, so I had to go digging.
I found an affordable unit by Dynagen, the TG-410, which you can see mounted in the picture above in the monitoring/observability section, that allowed custom generator control basically through plugging the oil pressure/water temp sensors in as inputs and then running the start/stop/preheat outputs through relays. Setting it up was fairly trivial, once I reverse-engineered the current generator wiring harness and made a new plug-and-play harness to the Dynagen that would let me fall back to the stock controller in a few seconds of swapping a big 8-pin connector. Getting the preheater timing, start-detection conditions, and sensor curves right took a little while (and I still don’t have the temperature one quite dialed in yet), but now it starts and runs without a hint of complaint, and stops when you ask it to. The next step was external control based on battery conditions.
The Dynagen supports taking an input where 12V = generator should be running, ground = generator should be stopped; and its job is to make those conditions happen. The Cerbo GX actually supports a complicated automatic generator management system via conditional setup that, in the end, powers a relay on or off. By putting 12V on the NO and ground on the NC lines, I ran the common output to the TG-410 and it worked right out of the gate. The Cerbo GX supports standard conditions like SOC-based low/high levels for start/stop, but also quiet hours, emergency low/high levels for during quiet hours, and even time-based runs (i.e. it’s been too long, please run).
After a few days on anchor to tweak the settings, I’ve settled on 40-90% runs during the day, and 20-30% runs for emergency night settings. With these settings, ideally I essentially never have to touch the generator myself, though I’m sure I’ll keep fine-tuning this for a bit.
WS3000 Tuning
A couple weeks after I got the main power setup working, the WS3000 alpha hardware showed up in the mail and I added it to the system.
It’s been a really interesting device to tweak. I’m still working through a bunch of learnings with Wakespeed, and we’re learning as we go. The bidirectionality is a nontrivial problem to handle. You need to detect when voltage falls below a threshold and immediately switch to pulling current from the high side to feed the low side up to a setpoint, but when the voltage rises above the setpoint on the low side, you get to pick when to try pulling current off it to charge the high side. But how quickly do you pull current off? Too quickly and you drop it below the setpoint and then you need to fill back in, and get in a really awkward cycle. Too slowly and you’re letting the alternator “charge” a full battery and wasting potential charging. So there’s a bunch to tweak.
After working through a couple major early kinks, we quickly got off to the races of a working system for the basics, and getting to the finer-grained tweaking. So far we’ve largely been playing with the hysteresis between charge points, and what to put the setpoint at to maximize charging from the low side but also keeping the voltage high enough to actually put current back into the low side battery in case you overrun the 3000 watt converter and pull some capacity out of the low side battery.
A really interesting problem we discovered early on was that the preheaters on the Yanmar diesels in this boat are hungry. Each engine pulls ~200 amps from its start battery for ~5-8 minutes after a cold start. The alternators are only 80 amps each under the best of circumstances, and I mostly measure around 45 amp output at idle, leaving a huge current shortfall for the batteries to fill. The WS3000, of course, tries to fill in for the shortfall, but it can’t quite keep up, so it does draw some current down from the start battery every startup. So we’ve been tweaking the voltage setpoint to make it so that it will charge back up after the preheaters turn off. 13.2V was not enough to get anything appreciable back into the start battery, but 13.6V has been a good compromise so far.
Similarly, when raising anchor, we have double the problem, since we have 200 amps of preheater on the port battery plus the windlass pulling 300+ amps as well, vastly exceeding the WS3000’s capacity. This is causing voltage dips in the whole house setup, causing some devices on the NMEA 2000 setup to freak out whenever the windlass is powered, so I’ll need to address that pretty soon with a buck-boost converter expressly for the NMEA 2000 setup.
Next, at 13.6V, you’re pretty close to the alternator output voltage, so it’s way harder for the WS3000 to figure out how much current it can pull off to send to the 48V batteries. So we’ve found that, at 13.2V, it can pull twice as much current than at 13.6V, so we have some competing interests here in the settings.
Finally, the solar setup on the boat was originally plumbed into the 12V side, but with the WS3000 in there now too, it was getting confused with multiple different devices vastly changing voltage levels and sending current in and out, so I ended up moving the solar up to the 48V side pretty quickly to simplify things for the WS3000.
I’m sure we’ll be tweaking settings for quite a while to really dial in the last effective charging nuances, but the system is already working really well, and I’m sure this will be a great addition to other boats trying to follow in my (and the other few alpha testers’) footsteps. Hopefully this writeup gives other people the confidence to come play in these waters!
Summary/The Future
The final arrangement as it sits today
It’s been a long road, but in a Marie Kondo world, this setup brings me joy. We have the battery capacity to run the A/C all night on anchor, wake up, take a shower with hot water because we just leave the hot water heater on, then turn on a crockpot for dinner that night, run a load of laundry, throw some lunch in the microwave, and spend the day playing video games on a power hungry desktop computer. On an extreme usage day like that, we only need to run the generator for a few hours to top off again in the evening. Working full time in more normal fashion, each of us separately taking taking daily showers, spending all day on our computers on video calls, cooking meals, and watching TV all night, we can easily go two full days on anchor before running the generator to catch up. If we were really being frugal, we could go a week or more in between topoffs. And this is before I even add real solar.
Over the coming months, I expect to keep tweaking things pretty steadily. I still have a lot of optimizing to do to get our power loads down while we’re on anchor — right now, I’m running a ton of electronics all night until I dial in a good anchor alarm setup that gives me confidence. And we tend to leave things plugged in all night because we can just be lazy now and not really think about it. This is really the real measure of success here — Hannah doesn’t even slightly think about power usage, and I only barely think about it, thinking less with each passing day. Living aboard and working full time while boating brings enough challenges, we don’t want to also be dealing with power management all the time.
I was originally planning on diving right into an enormous solar setup — my measurements say I can easily get around 3000 watts of solar onto the roof and still have walking access for maintenance. I’ve wired in a new (Victron, obviously) charge controller sized for it, all plumbed in and configured. But once I saw just how long we can go on the setup without generating, I pumped the brakes and haven’t gotten around to even picking which panel to buy yet, much less getting 8 of them delivered somewhere. The ~800 watts on the roof help quite a bit on good days, so I know that quadrupling the generation should make us essentially never need to generate. So I’ll get around to it. Just not as immediately as I thought I would.
I hope this inspires others to build setups like this on their boats, and I’ll keep updating the blog as I make improvements throughout the year. Feel free to reach out blow with comments/questions, I’d love to hear everyone’s thoughts.
We finally wrapped up most of our projects, and got to see a launch (ish), so we decided it was a good time to set out northwards for our second attempt at the loop.
We had everything stowed away and were ready to set out for New Smyrna, where I hoped to actually get some time at the beach! There was a bit of wind as we were heading out of the dock, and as I untied the last line and hopped aboard, I saw that the other side of our swim platform was currently destroying the piling behind us. I quickly sprinted over to push us off. However, I neglected to fully pull the stern line aboard, and unfortunately as we were backing out of the slip, it fell into the water and promptly got entangled around our prop. Luckily David felt the vibration, right around the time I said something along the lines of “oh no, it’s really bad” and he stopped applying throttle to that propeller. Unfortunately, we discovered that a catamaran does not go straight when it only has one prop working. Nor does it turn in that direction. After a panicked 15 mins of drifting around the marina, we finally managed to get ourselves tied up to the outside of the breakwater near the entrance of the marina. After calling and leaving messages with about 10 divers in the area, we finally got a call back from someone who was available to free the prop later that day. He arrived, suited up, and in about 5 minutes had freed the line. This is totally my fault, and I’ve learned a valuable lesson about line handling in the new boat!
Though delayed, we were able to leave later that afternoon and headed towards New Smyrna. We have decided that we can never return to Cocoa Village Marina, what with all the delays getting there, the constant stream of packages “filling up” (except not really) their mail room, and then the leaving disaster, we think that they must hate us!
We arrived at New Smyrna right before sunset, and since this was our first night on anchor with the new setup, we decided we didn’t want to leave the boat. We also looked at the weather and the next day was set to be pretty strong winds, so we decided to see if we could arrive at our next stop, Palm Coast, a day early, rather than stay in New Smyrna. So, no beach for Hannah :(.
Beautiful sunset at New Smyrna marking the beginning of Loop Attempt #2
Since our plans changed and we now had a Sunday to spend at Palm Coast, I did a little bit of hunting and discovered a local waterfront winery not too far from the marina. It turned out to be an 8.5 mile distance, but we decided to give the Scooters a true run for their range. (If they died on the way home, it wouldn’t be that far to walk or grab an uber). We decided to limit our speed and loaded up the chargers in the hopes that we could plug in at the winery. It was a lovely ride along the water front. Unfortunately the winery didn’t have any outdoor outlets, and wouldn’t let us charge inside (despite it being empty!), so we put them into “limited” mode, which sets the max speed to ~9mph, and puttered our way back. We knew there was a brewery near the marina and since our return trip took so long, we decided to stop for dinner (both down to 1 bar of battery!).
Winery and Brewery in Palm Coast
The next morning, we woke up to a louder-than-usual humming noise coming from upstairs, which turned out to be the air conditioning compressor for the master bedroom stuck on and coming close to freezing itself (down to 39 degrees), so chalk another thing up on the broken list. I’m getting pretty sure that we’re going to replace everything on this boat before we get much further north, at this rate.
After a work day at Palm Coast, we headed out for a morning cruise to St Augustine, which is our boat’s official “home” port. (We have registered this boat in Florida and had to choose a city). This is our third time here, and we know we like the town, so we planned to stay through the weekend, so we could further visit. The first time we were here, it was the first day of the Covid lockdowns, and the second time we stayed only for weekdays and didn’t get to do anything.
We found a craft-distillery a block away from our Marina that’s open for late-night cocktails and has a cute patio and live music, so we were able to go out for drinks one night. After the sun sets, it gets a little colder here, and we’ve both become Floridian snowflakes, pulling out our puffy jackets and hats when it’s in the high fifties! On Friday night, we re-visited a favourite restaurant (Preserved) and had a lovely dinner in their garden (with a heater pointed at my chair!).
Craft cocktails at Odd Bird, a wine flight at Bin69, dinner at Preserved
For the weekend, we booked a walking tour of the city, which was very informative. We returned to the boat and David wanted to do work on a few projects (of course!) that were still remaining. The alternator on our port engine had not been working, so he tried to do a replacement. We had a lot of trouble trying to take apart the old one, to transplant the pulley to the new one, so David jury-rigged the new one up on a single belt for now, in case we were able to leave in time. Unfortunately, after putting the new alternator on, it still wasn’t working, which devolved into an hour of debugging the engine wiring harness to eventually find and repair the true problem.
After all that fun, he also looked further into the source of an oil leak that we have on that engine as well. The one hour of project turned into several hours as the oil leak turned out to be worse than expected, and we realized that Sunday would be easter with potentially even fewer shops open than normal for finding everything we’d need to continue with the projects. Since we’d intended to leave on Sunday and now were sitting with an unusable engine on Saturday night, we called the marina and extended our stay one more night.
The next day, we went on a scooter around town to Home Depot and West Marine, and bought basically every o-ring kit we could find for the oil leak issue and a big impact driver for the alternator project. I made David stop at BBQ for lunch on the way back, which then required rolling us the rest of the way home.
Returning back to the boat, David was able to immediately get the alternator pulley swapped out using his new toy! However, none of the o-rings helped with the leaking issue, unfortunately. The leak was pretty bad at this point, so we didn’t trust going anywhere without losing a ton of oil, so we’re not going anywhere until we can get this fixed. David placed several overnight orders for other parts, and we resolved to call the nearest Yanmar dealership on Monday morning.
On the bright side of things, we’ve been selling older parts one by one that we’ve been replacing with our new projects. Living on a boat, it’s been an adventure getting some of the larger items to the post office. The scooters have been taking it like a champ, though. And the yoga studio (skylounge) is finally emptying out, bit by bit.
Someone in Chile apparently wants to upgrade to a Raymarine E120 AND pay international shipping!
This morning (Monday), we extended our stay in the marina again, and David was able to scooter to the Yanmar dealer, who amazingly had the part in-stock. Unfortunately, the o-ring doesn’t even slightly fit in the groove, so David ended up taking apart the entire area of the engine to get better access, and in doing so sheared the head off of a valve-bolt. So, we aren’t going anywhere right now. We made the cutoff for ordering next day parts by 2 minutes, and with luck, tomorrow afternoon we’ll get the new valve bolt and fix that problem. Later on, David thinks maybe with the better access he made another o ring fit properly, and maybe the oil leak will be fixed, but we can’t run the engine until we get the new fitting, so we won’t know until tomorrow…
In the mean time, we are trying to enjoy our extra few unplanned days in St Augustine, and we hope to be on the move again on Wednesday!
The Endeavour TrawlerCat 48 is a tall boat. It’s around 17 feet from the water to the flat top of the skylounge roof, with anything on top of that obviously making it worse. That flat roof is around the same height as the top of the anchor light was on the Meridian, for comparison. With harsh bridge restrictions on the great loop (19’6″ maximum bridge in Chicago, for example), from the moment we considered buying this new boat, we knew we’d have to get creative with how to put stuff on the roof and still fit under things.
The original factory setup
The boat came with what I’m pretty sure was the original factory mount and electronics setup — a 2008-era Raymarine radar dome, a Glomex analog TV antenna booster, and a non-LED light. It was, at least, on a folding tower, so you could lower it out of the way of bridges. However, the wiring was pretty questionable — they basically just cut a big hole in the roof next to the mount and then ran the wires into the interior from there, rather than running it through the tower itself. I basically decided to eliminate every aspect of the factory setup and start over from scratch.
From the final internet and instrument setup on the old boat, as well as some new toys I knew I’d end up buying, I knew roughly what I wanted to put on the new boat:
Three Poynting 402 LTE/3G antennas
Two Poynting 496 2.4/5Ghz WiFi antennas
Airmar WX220 ultrasonic weathervane
Vesper Cortex GPS (dedicated GPS for the AIS system)
Shakespeare SiriusXM Antenna (could also put it on the roof somewhere else, but I want as much room for Solar as I can manage)
I poked around at a bunch of SeaView options, since they seem to be the only real game in town for larger-scale instrument masts, but really nothing off the shelf fit my bill. However, I noticed a custom build section and said why not give it a shot, figuring it’d be crazy expensive.
Within a day, Jason at SeaView had gotten back to me, and to my surprise, based on my rough description, he actually gave a surprisingly affordable early price estimate that made it worth proceeding. I professionally mocked up a rough idea of what I wanted, based on the other legos they had on their site, and he went to work.
At least 5 minutes of photoshop went into what I sent over to Jason to work with and estimate
A couple days later, some neat looking CAD mockups showed up:
From there, I took some more careful measurements of the back of the roof, since he said he could easily guesstimate how far things would be able to fold, and if we should adjust the design to compensate.
Professionally-annotated/finger-scribbled iphone image with dimensions for Jason
He did some math, determined that it was going to stick up a fair ways, and we iterated a bit more. We lowered the sweep angle of the “wings” such that it’d be able to just clear down to the sill above the door — the best we could possibly do.
At this point, it looked awesome, and we gave the goahead and put down a deposit. 5 weeks of leadtime started then. This was all done from the rental house on Key Largo, well before we moved onto the boat, since we knew it’d have such a long lead time. So we got started ordering all of the various antennas that’d go on top, and went back to sipping margaritas every night.
Fast forward 6 weeks, and about half way through our stay at Cocoa, a pallet shows up (which YRC unceremoniously drops in the street and drives away without calling us):
We unwrapped it and got to work! The first major job was disassembling all of the old stuff and patching any necessary holes from that job. Hannah loves what I did to her yoga space all month. Also, when we went to actually remove the old folding mast, it was on what turned out to be a painted solid fiberglass plate, which must have been 5200’d down to the roof, because it took a pretty good chunk out of the gel coat when it finally pried loose. The sledgehammer was clutch for this and Hannah couldn’t believe how hard I was wailing on the damn thing.
With impending possible rain and the day waning, we decided to not be too ambitious for the day and just go for getting the plate mounted up.
A week prior, I’d ordered a foot square 3/8″ thick aluminum plate to be the backing plate for the new mast, knowing that the roof wasn’t all that thick, was just cored fiberglass, and just had some flimsy wood on the bottom to space off the roof panels for wires to run. So with the mast finally here, I took some rough thickness measurements and brought the top plate over to the hardware store, and ended up buying some 1/2″ diameter countersunk bolts and matching fasteners.
Hannah and I spent a while measuring and cutting the appropriate holes in the aluminum plate, then we roughly lined up where the folding panel would go on the roof, marked the holes, and proceeded to drill half inch holes straight through the roof. After some tweaking, the plate looked like it’d mount up well, so then we took the 2.5″ hole saw and slowly cut a huge hole through the roof right in the center of the plate. Not stressful at all.
At this point, everything looked ready to go, and so we pulled out multiple tubes of 4200 and 5200 and frantically started our work. We coated all of the exposed fiberglass with 5200, filled in all of the wiring and screw holes from all of the things we took off with the old mast, and then lined all of the new area that needed sealing with a tube and a half of 4200. We had no time to take pictures of this part, unfortunately, and we were also covered in 4200. We threw the new plate on top, quickly bolted it down to the aluminum backing plate, just as it was vaguely starting to stiffen up, and stood back to clean up and admire our handywork.
Rain was predicted later in the evening, and we were pretty exhausted, so we called it for the day and went inside to other projects.
The next day, we resumed work. We figured we should do some more final test fits at this point to see where we’d landed. We’d done some really rough “hold the heavy thing up to the wall and see how we feel about it” checks that seemed fine, and, fortunately, they held up under final prototyping.
CAD is neat. Even though I’ve been a software engineer for most of my life, and the process, decomposed, is thoroughly uninteresting at this point, it’s still sometimes amazing when you can give someone some rough napkin calculations over the internet and they can get something calculated and fabricated that lands within millimeters on your handbuilt boat. Everything looked great, so it was time to get down to the dirty work of actually building the mast.
Boy did that turn out to be an unexpected pain in the ass. The outside of the mast looks lovely, but of course the inside has sharp edges and corners and support structure that make running wires through it a chore. It took us nearly two hours, and we both sunburned the crap out of ourselves since we kinda lost track of time in our annoyance, to get everything mounted up and wire-fished through the beast. And when it was all together, we had a nice rats-nest-of-the-gods that we had created for ourselves. However, at this point, it was just an awkward game of muscle-ups to get the assembled mast, now twice the weight, up onto the hinge, and bolt it all up. Of course, we discovered that the antenna arrangement I’d picked meant that, at full droop, the LTE antenna tips JUST touched the ground, so Hannah got to hold it all up while I ran the cables into the roof, since it couldn’t rest there. Measure once, cut twice, or something.
It looked great! Just one problem.
Hannah was now able to go read a book while I spent hours running and cleaning up wiring, and testing the results.
This whole time, I’d been very nervous about the hinging process itself, since the size and location of things meant that the cord moved almost a foot through the tube when the mast went up and down. With no room in the ceiling, it was going to to be a challenge to make it so that we could raise/lower this thing several times a day in Florida and then every so often past that, without eventually snagging a wire on something in the ceiling and making for a very expensive and time-consuming problem. I decided to try out using braided plastic sheathing over the section of wire that would slide in and out of the roof hole, and spaced off the roof panel by a little over an inch, to give a little bit of play for the cables to live in. Some early testing looked promising, so, at the end of the day, we put the roof panel back up and had a drink.
It looks a tiny bit awkward if you’re really looking for it, but it’s pretty hard to notice otherwise. I’ll probably tweak it over time to try to make it a little more flat across the roof, but I’m incredibly pleased with how well it all came out in the end.
We finished off the project by ordering a rubber stop for the mast to touch down against and keep the antennas from hitting the floor while everything is lowered, and it worked out perfectly.
Hannah’s already had to raise and lower it for a bunch of the bridges coming up through Florida, and it’s worked like a charm. So, cross our fingers, maybe this project is basically all done, at least until the next gadget catches my eye…
One of these faucets is about to be made obsolete…
I’m going to start breaking completed larger projects out from the travel blog posts so people can properly ignore the posts they don’t care about. 🙂
The moment we got our first boat, I got a bunch of advice from people about keeping bottled water for drinking, boiling water, putting a little under-sink filter in, and a variety of other things. Boat tank water is unsafe, don’t drink it! That seemed real crappy to me, so I found the SAFH2OUV unit online and ended up plumbing it in right after the water pump, so every tap and showerhead on the boat served filtered and uv-cleansed water. It worked great as long as we had the boat. Good-tasting water even when the marina has scary hoses, and don’t need anything more than emergency water supplies on hand in case of catastrophic water system failure away from a marina. Later on, on the loop, the water pump, a variable-flow unit, failed and we ended up getting a fixed-flow unit and accumulator, which was a huge improvement in livability over the v-flo unit.
On the new boat, I wanted the same ending experience as we had on the old one. This boat had a fixed-flow pump but no accumulator, so all taps and showerheads had constant pounding effects. It also just had a little questionable-quality filtered tap for drinking water at the kitchen sink, as the only “drinkable water” on the boat. So, I set about duplicating and improving on the old boat’s setup — I wanted to do approximately the same thing, but knew that the boat had more water pressure and volume than the last boat, so I wanted something with better flow and bigger filters than the last setup. The SAFH2OUV setup said it flowed 3GPM, but that was pretty optimistic based on our experience. The new boat’s water pump was a 6GPM unit and the water pipes were larger than the last boat’s, so I figured we should better-utilize it.
Look at all that room just asking for a filter, in the starboard engine bay next to the fresh water tank!
After a bunch of research, I contacted Purest Filters, who were close by to us in Stuart, gave them measurements of the area I could put filters in, and we agreed on a quite large 3-filter filter block and independent UV setup that I’d plumb together. We decided to do a sediment filter and then two carbon filters, so we can replace the second carbon filter with an iron filter or something based on awkward water in marinas we find along the way. I also ordered a Jabsco 1 gallon accumulator, the same unit I had on the last boat. It’s a good compromise between consistent water pressure/not running the water pump that often and physical space occupied.
Nalgene bottle at the top for size reference. They were … really really big.
A few weeks later, a couple enormous boxes show up, and I start trying to mount it, to quickly discover that it doesn’t fit. I get out the tape measure and find that it’s many inches larger in every dimension than what was advertised. Some annoyed emails and phone calls later, he ends up switching us down to a quite-a-bit-smaller unit that lists as supporting 6GPM, still with common filters for later replacements. We pack up the two enormous boxes and ship everything except the UV lamp back to him.
A couple weeks later, a much smaller box shows up. I measure everything up and find a reasonable pattern for installing things, and then go online to buy fittings, only to find that most of the Watts fittings for 1/2″ CTS are backordered everywhere for some reason. I put in some orders a week out and put the box in the corner of the skylounge, just where Hannah likes me keeping large boxes.
Finally all the fittings arrived and I started installing things, but neglected to read an important nuance of the UV installation and ended up not putting a spring inside the quartz vial before putting the lamp inside. As such, the lamp busted through the bottom of the quartz vial. Whoops. Ordered a new one of those on Amazon to the next marina. Box back upstairs.
The new quartz vial arrives, and the next boat over also has someone named David on it, and they grab the box from the package room, open it up, and remove the quartz vial from the protective sheath to look at it in confusion. Touching it with your hands gets oils on it that block UV, so once we got it back from them we had to rig up a skewer-based cleaning system and wait a couple days for it to dry out. Box back upstairs.
This evening, finally I was able to mount everything up, and, somehow, only got leaking from the a few NPT fittings that apparently required teflon tape. A few minutes of disassembly, taping, and reassembly later, and the whole system amazingly held pressure! Cleaned/secured everything with zip ties, and finally the eternal project is over, and we can stop exclusively using this annoying tiny spigot in the kitchen for our drinking water.
About a year ago, we posted a story about our first attempt to watch a rocket launch (Titusville and New Smyrna: Poor Social Distancing and Rockets). This involved taking the boat out from the Titusville marina, anchoring, waiting, and hearing “Abort” right after 0 was reached. Unfortunately, we left Titusville to head north the next day, so we did not end up seeing that mission when it actually launched a few days later.
We may not have mentioned this, but we had another near miss as we were working our way south late last year. As we were getting closer to Titusville, we were keeping an eye on the whether or not there would be a launch. Unfortunately, when we were still over 50 miles away, we discovered that there was indeed one scheduled, but we would be unable to get south to see it since it was on a Friday night. We were bummed since we just missed it by a day as we’d be heading to Titusville on Saturday! Since we didn’t have any specific plans on Saturday, we had a lazy morning and started our journey. As we were under way, about 30 miles from Titusville, we hear something on Channel 16 from the Coast Guard about a launch. A little Googling and we discovered that the Friday night launch had been aborted and the new window was around noon on Saturday!! We did actually see the streak in the sky as the rocket launched right in front of us, but we felt a bit stupid since we would have been able to see it from up close if we had realized it had been rescheduled and gotten up earlier to make it to the viewing spot in time!
Now, heading back through the Space Coast on our way north, one of the reasons we chose Cocoa Village for our extended work-project stay was in the hopes that during our time here, we would be able to see a launch up close. The opportunity presented itself when a scheduled launch coincided when a friend of mine who works for Blue Origin would be in the area for a work trip. The launch was scheduled for 9pm and she had a rental car, so we drove to a spot very near the launch site, where we could see (through binoculars) the smoke around the rocket as it was being filled/prepared for launch. We laid out a picnic blanket and tuned in to the audio coverage of the launch. We hear the countdown, but this time we hear the “Abort” call with several minutes still to spare on the countdown. Disappointment!!
It was a beautiful night with a huge full moon
The launch was rescheduled for the next day, so we made plans to do the same, since Sara was still here that day. Unfortunately, during the day, the launch was delayed again and Sara headed back home to Seattle. The launch was delayed for several more days, and then finally happened at 3:30am, which we didn’t realize, so we missed it completely.
Then, David and I got a bit neglectful of checking the page (turns out I was looking at the wrong page), and we ended up missing an 8pm launch last week!
It seemed our luck was running out as this is our last week here, before we head north again. In the mean time, David had found a twitter feed that he could subscribe to for alerts about launches. Last night at 2:30am, just as he was about to go to bed, he got a notice that there would be a launch at 4:30am. He set his alarm and we woke up in time to sit on the bow and watch! We’re about 10ish miles away from the launch site here, so we didn’t have an up close view, but it was still pretty incredible, and a few minutes after the launch, we could hear the rumble. Since it was night, it was very peaceful, and the sound seemed to fill the bay. What a beautiful experience!!
What the salon has looked like for most of the last month…
We’ve been more than a little slow about a new post. I kept intending to make a post with some wrapped up projects, but it’s hilarious how many projects we’ve been progressing on in parallel, and just starting to wrap a bunch of them up this weekend. I’ve basically been either working, eating, sleeping, or projecting every waking hour for the last month, with a very few exceptions to go have some fun out and about with Hannah. I’m definitely excited to almost be through the meat of the list and soon being able to take a night off without feeling like I’m going to get screwed on shipping new parts.
I’ve been digging into projects, but Hannah’s been getting some decent pole time in between the seemingly endless windstorms
We bit off a huge list of stuff to get through while in Cocoa, knowing that this was going to be our only shot to get long-lead-time items shipped for basically another year, short of maybe shoving more crap into poor John and Joan’s garage while we work our way up the coast. With one week to go until our departure, I’m happy to say that we’ve gotten through most stuff, and, more importantly, everything ordered ended up arriving in time!
All of the ground tackle (anchoring equipment) that came with the boat was undersized. Fine for calm weekends in the Bahamas, but on a boat of this size, riding out a substantial storm scared us. We ended up swapping out the anchor chain from 5/16″ to 3/8″ G43, which required also swapping out the windlass chainring. The anchor itself was also undersized, so we swapped out for a much bigger unit. We loved the Rocna we got on the last boat, but my research indicated that the Mantus was at least as good as the Rocna for everything, with some better holding characteristics in a few bottom conditions, so I ended up grabbing their 105 lb anchor. It comes in a flatpack box and requires assembling, which feels a little weird, but if it saves a couple hundred bucks on freight shipping, I’ll take it. After assembling everything and test deploying, we found out that the 3/8″ chain hilariously doesn’t quite smoothly run through our anchor lock, so we ended up having to upgrade that too. Finally, we decided to try these Imtra colored link centers for marking how much chain we’d put out instead of spray painting. We’ll let you know how they work out this spring.
The dinghy did end up coming back a few days after our last post, but it kicked off a whole bunch of work/rework. They had no idea what to do with the electronics I’d sent them and left everything in a half-finished state, so I had to take a long day and rework a bunch of the wiring, installing the NMEA 2000 stuff and other electronics. It’s possible that we got what we paid for, trying out the v1 version of a new dinghy company. Then our mounts on the swim step were very misaligned to the dinghy, which kicked off a long iteration cycle to re-drill a bunch of holes to get it sitting nicely in place. Then we have no idea how anyone ever “secured” a dinghy to this platform, since there’s only two tiny eyelets in very weird places, so we custom ordered some beefy SS ratchet straps and installed four beefy eyelets to keep our precious dinghy secure under the high seas we know we’ll encounter in the next several years.
Lots of the various panels on the boat were questionably wired up with modifications since it was created, and I’ve been fixing them one by one. The boat had two different stereos for three zones, with super wacky wiring, so I just consolidated everything to a single stereo that managed all three zones. Then we figured out that half the speakers on the boat were blown or also miswired. I had to diagnose and fix the wiring for all of the lights on the back of the boat. We had to contact the maker of our watermaker to figure out how to properly connect it to a NMEA 2000 network since it was wired up backwards and I couldn’t tell whether it was intentional or not. I added a bunch more lights to the office since it was set up as a bedroom before, which required a remarkable amount of tearing apart of things. The boat came with whale pumps for the showers, which required you manually managing a button mid shower for when you got tired of water being up to your ankles, so we quickly tired of it and switched out for shower boxes with float switches. Now our showers are delightfully not gross mini-baths.
The toilets came with an idiot light for when the holding tank was full, but no gauge, so I had to come up with a way to put external gauges on the tanks that I could view over the network, and ended up installing a little Maretron DSM410 NMEA 2000 monitoring screen. We installed a grill, which the boat never had before. New (non-broken) window covers finally came in for the bedroom (the previous owners ordered them in December), and we installed them today, so we can finally have proper blackout in the morning. We got the boat pumped out last week and were told that one side didn’t want to clear, so I jumped down into the hold and popped the vent tube off, and suddenly it pumped out. So then we got to spend a long afternoon removing the vent system and debugging — ended up hogging out the clogged vents while everything we own smelled like poop for the day. Lots and lots of little awkward and time-consuming projects that mostly required a bunch of research.
The biggest, and still ongoing, project has been the power system conversion. The boat had mostly original factory stuff, which was a very basic inverter and fairly limited house capacity (four 4D AGMs), with some other stuff really poorly hacked in over the years. I decided that the current system was basically throwaway for our purposes and to go absolutely bananas. I started by ordering a ridiculous amount of LiFePO4 batteries (30 kWh), which had a 6 week lead time from China. More absurdly, I decided that I wanted to try moving to a 48V house system, due to all of the ways it makes wiring simpler, increased charging speeds, increased conversion efficiency to AC, etc.
Once it’s all finished, I’m going to be writing an enormous post about it and all of its trials and tribulations, but for now, we’re up and running on a 48V house system, with 100% of our AC loads going through two Victron Quattro inverters. We’re alpha testing a new bidirectional DC-DC converter/charger from Wakespeed to power the 12V loads (the vast majority of the boat), so that will be an ongoing exercise. I can happily run multiple air conditioners on the boat overnight on battery power, which is both pretty sweet, and also wildly absurd. But mostly, without being ridiculous, we can both work on computers for days straight, even with no solar, before having to run the generator.
After forgetting about needing to do it for much of the month, we finally found a local vinyl fabricator who could make the transparent logos we needed, and they installed our first round of decals. We’re finally legal! (since we registered as Highwind, running around as Salty Paws was … questionable.)
Since I still had the St. Patty’s Day suit on the boat, I had to bust it out for zoom calls all day on Wednesday, and then we went out and got dinner and dessert in Cocoa for the evening
The last major project of the month has been getting a new radar tower for the boat. We needed a good spot to put all of the internet and wifi extending equipment, as well as a pile of other misc instruments, all of which need to be quickly removable to clear low bridges. After researching options, I talked to Seaview in January, and they actually had a really great custom fabrication wing. A few rounds of iteration later, we designed a hinged system that can hold everything we currently need, with a little room for expansion down the line, with ~5 weeks of lead time for the custom build.
This week, it showed up, packaged incredibly well, on a pallet that took a lot of sledgehammering to disassemble! Of course, like all of our other freight shipments, YRC literally dropped it on the street in front of the marina and drove away, so, you know, screw those guys. Prepping for the mast install, I’d been ordering parts for a while — metal plates, bolts, all of the electronics to go on the mast, etc. Hannah’s been carefully navigating a giant pile of boxes upstairs for weeks, and will be unbelievably excited for the pile to finally go away instead of invading her yoga space.
Today’s primary job was disassembling the old, smaller, hinged mast, and un-running all of the wires to the old Glomex TV antenna and Raymarine radar and GPS system. The old system used wires run straight through the roof instead of through the mast, so there were a lot of holes to dig out and later fill up with 4200. The mast itself was attached to a weird extended plate that turned out to be made out of fiberglass, and was very very securely glued to the roof, so removing it ended up taking a bunch of gel coat off with it. Oops. At least I finally ended up getting to use my new oscillating multitool, and damn is that a great toy.
After spending basically the whole day on it, we got the old system completely off, filled up the old holes with filler and sealed it all up with 4200 to dry overnight, measured up and drilled holes in all the appropriate layers and plates, and finally bolted up the new hinge base. There’s now a nice 2″ hole clear from inside the skylounge up into the hinged mast setup, and it’s bolted down with 1/2″ bolts with a foot square aluminum backing plate. And there’s a tube and a half of 4200 slowly drying around everything. I gotta say it was a weird feeling digging straight through the ceiling into the upstairs room with a 2″ hole saw. Tomorrow, if all goes well, we’ll get all of the electronics up on the new mast and wired into the dash and the router setup.
We have a bunch more smaller projects to finish up this week, but we’ve scheduled our departure from Cocoa for next Saturday, the 27th. So hopefully we’ll be heading north, and with any luck, the boat still drives. After how much crap I’ve changed this month, you never know.
We moved across the ICW to the new Ft Pierce Marina (Causeway Cove) and settled in for the week of the work on the bow/anchor area. Other than working, some more unpacking, and receiving many packages, not much of note happened, other than it being the worst week of rain we’d seen in perhaps the last year…which of course made it difficult for the project (fiberglass work on the bow) to take place. We of course experienced a few days of delay, which meant that the folks at Cocoa Village Marina were getting a little annoyed at us at having filled up their mail room already, despite us not being there on our scheduled arrival date.
Hipster breakfast – according to David
The work was finally completed early Sunday afternoon and we were able to cast off and head north. We have planned to spend the next month in one place – Cocoa Village – in order to receive all the packages we need for completing the primary boat projects, and also waiting out the winter in the warmer southern weather before we attempt to Loop again.
Celebratory margaritas for our arrival at Cocoa – finally! (and a break in the rain)
So far, we have been at Cocoa for over a week now, and are going through the project checklist. David finished his office area with a temporary desk to which he has mounted his enormous monitor and installed new ceiling lights in the room. The new Garmin unit has been installed in the dash upstairs. I mounted our burgee poles on the bow. We have a temporary internet solution mounted (waiting for the new mast to arrive into which we’ll install the antennas). I installed some slide out drawers in the kitchen for accessing our alcohol and have completed various other internal organization projects. David replaced the blown speakers in the flybridge, installed the new radio unit, rewired all speakers to attach to the new unit and we installed a new sound cable from the TV to the radio unit so we can use the boat sound system for the TV (that was quite a difficult wire run and required most of the starboard stern corner wall and ceiling panels to be removed!!). We figured out a solution for storing the bikes. Phew!
Various projects
Rebecca Short original watercolours hanging in my office and the kitchen!Completed office
We also had a bit of a disastrous first dingy delivery – they were not anticipating us needing a water delivery and the nearest boat launch ramp was a mile away. It was raining and pretty windy, and one of their guys – with no jacket, or life jacket – had to drive the dingy over to the marina. He was not happy! David was on non-interruptible calls, and unfortunately he and I could not figure out how to get the boat onto mounts in the platform properly, despite me standing on the submerged platform, peering under the boat!. We tied it off to the end of the swimstep for David and I to figure out later, but as he was handing everything off to me, we noticed that the bilge pump was pumping water into the storage space under the seat…not good! After a few panicked phone calls to his Dad (family business), they decided that he needed to drive the boat back to the ramp and they would take it back to the shop for repairs. I loaned him some lines and a life-jacket and he went on his way! Over the weekend they were able to get everything fixed up and David handled a smooth delivery yesterday, so now we have a dingy!
On Saturday, after a long day of projects, we decided to head into town to the “Hofbrauhaus” (not its actual name) at the recommendation of some other Loopers. They had a large outdoor seating area and very loud club music was playing when we arrived. Shortly, a performer came out on to the stage and began playing polka music while a couple of people danced. He was actually pretty entertaining, even though the music was so loud we could barely hear each other talking and the food was amazing. We will probably go back there :).
We continue to receive a steady stream of packages and the boat is filled with tools and boxes. We hope to get quite a few projects done this weekend, so perhaps soon we’ll have a live-able space :).
We spent the last week in Key Largo in the house surrounded by boxes full of our things, but it was a nice relaxing time. The sun came out for long enough that we w even found a moment for a dip in the pool – our first and last of the stay at the house.
On Wednesday we rented a uhaul and spent the evening loading everything up. David and I woke up early the next morning to drive up to Stuart, where the new boat had been moored for the month.
The dock hands at the marina were extremely nice and assisted us with their golf carts in unloading all the boxes and gathering them in the new boat for unpacking, making the whole frantic-morning-move fairly smooth, in the end. Later that day, Mum and Dad joined us among the boxes. I had taken the day off to deal with unpacking, but David had important meetings in the afternoon that he could not miss, so he set up shop upstairs while Mum and Dad and I unpacked most of the boxes downstairs. Since I had done most of the box packing, this worked out well – everything was jumbled together with kitchen, bedroom, and random boat things in each box!
We were able to get quite a bit sorted and organized, and made enough room to enjoy some takeout on the boat for dinner in the evening – our first meal aboard!
On Friday, both David and I worked while Mum and Dad hung out, ran a few errands for us and did a bit more unpacking – what way for them to end their trip! They headed out on Saturday morning, leaving us to spend the weekend getting further unpacked and settled in.
It wasn’t long before David had started dismantling the walls and ceiling of the skylounge for installing the first phase of internet on the boat! Once the project was complete, we settled in for the evening and I found my new reading spot and watched a gorgeous sunset.
On the survey, it was discovered that the bowsprit of the boat, around the anchor and windlass had significant leaking/dampness and was in need of repair to replace the sodden plywood core with a stronger material and re-fiberglass everything. We had made an arrangement with the previous owners for this to be fixed, but unfortunately the contractors kept delaying and it was not able to be repaired before we received the keys. We had been put in contact with the contractors and organized to take Highwind II (hereafter referred to as Highwind…) to their shipyard the next week. Since they would not allow us to remain on the boat, we also had to secure a nearby AirBnB. We were watching the weather closely as it was extremely windy at the beginning of the week and we didn’t want our first voyage to be in adverse conditions, especially considering that the slip in Stuart was extremely tricky to get out of in the best of conditions. By the middle of the week, the wind had calmed, so we headed out. It was smooth waters for the 5 mile trip and we pulled into the new slip with no problems (after 3 attempts – it had only an inch of room on either side – Highwind is fatty!).
Thursday morning, they started investigations on the bow and soon discovered that the job extended much further than they originally estimated. As such, they actually did not have anyone available to do the repairs, since they’d put us in a tiny time slot, but he put us in contact with one of their 3rd party contractors to do an assessment. We had an uneventful night in the AirBnB, which included wandering out into the freezing evening (55 degrees) for some dessert.
The next day, we found out from these new contractors that the work would take 7 days, which was longer than we had planned – we had been told 3-5 days and had been planning to head to Cocoa Village where we intend to stay for a month completing the first phase of boat projects. This was much longer than we wanted to stay in a place where we would not be allowed to sleep aboard. We decided to head to Ft Pierce in the next morning as there was a chance this new contractor would be able to find us a place near there where we’d be able to keep the boat, sleep on it, and have the work done. If that didn’t pan out, then we’d keep heading north to Cocoa and make arrangements with some more advance warning with a shipyard further north.
We arrived at Ft Pierce and David made a beautiful docking. David had the day off, so he got started on the bedroom to office conversion project while I worked. It was a lovely day, so in the evening we headed over to Pierced Cidery (we’d visited before) where we enjoyed another sampler of all their flavours and some live music.
On Saturday, we heard from the new contractors that they had found us a place just on the other side of the ICW and we’ll be allowed to stay on the boat, so we’ll head over there on Monday and hope that the work doesn’t take longer than 7 days!!
After months of taking it easy, remote phsyical therapy, doctors visits from Boston to Miami, in-person PT in Islamadora, I was finally cleared to get back on the pole. I pulled it out once at the house in Key Largo, but then we had a few busy weeks of moving, so yesterday I was finally able to get it out again. I’m taking things slow, but it’s very exciting to hopefully get back in a regular routine of training, yoga, etc.
We’ve been remiss in writing a new blog post. We’ll get on that. In the meantime, I wanted to share one of the bigger projects we’re already undertaking on the new boat.
The old working situation. Worked great, when only one of us was on a call at a time.
One of the primary criteria for a new boat (and motivating factors to, in fact, change boats) was to have separate/isolated spaces for us to be on video calls at the same time that are also climate-controlled/weather-protected. These days, we are often both on video calls 5+ hours a day each, which was presenting a stressful reality working next to each other on the last boat.
The Endeavour has a third small bedroom that has two bunks in an L shape and some storage. Our plan when we decided to buy the boat was to turn this into an office. We had bought a nice little desk for Hannah to use near the kitchen, and she immediately started working from there. I spent the first week on the boat working from the upstairs table on a laptop, which worked somewhat fine, but I’m also pretty loud, especially on video calls, so even upstairs, Hannah was getting complaints sounding like she was working with the TV on. Oops.
State of the bedroom as demolition just got started.
With a company holiday on Friday, it seemed like a good opportunity to start tearing apart the room and see what kinda challenge we were looking at here to make this the space we want it to be. It also started as an incredibly claustrophobic space with the bunks in there, so we were a little nervous about whether it’d open up enough to be a really comfortable place to spend 10+ hours a day. So while Hannah was on meetings all day, I started taking things apart.
Immediately, I ran into some … interesting design choices. The bed was a single solid piece of cored fiberglass with white veneer, that ran from under the window all the way to the hallway, between the washer/dryer cabinet and the storage cabinets above it. I freaked out a bit because it looked like something that could be structural/integral. It was only 48″ off the ground, which would have been extremely limiting to work around to build a desk under it. After taking apart the drawers and backing of the closet, I found basically all of the vertical pieces also fiberglassed into the floor/back wall, which also appeared that it could be structural in some way.
Fortunately, after digging apart more things, these concerns were satisfied, one by one. The bed turned out to be basically “hung” from the walls, with fiberglass rolls draping down from the walls and connecting to the top of the bed sheet. So no torsion could be reinforced by it, as it’s basically hanging (even though the resin makes it solid). Presumably this is the strongest way to let kids jump up and down on a bed. Similarly, the vertical panels ended up just being glassed in as kinda a lazy attachment mechanism — you could tear the extra surface layer off with your bare hands without much work. Think of it like taping things to the floor or back wall, with fiberglass. So, eventually, the basic structure yielded.
After the first problem yielded, it was on to the next one. The dryer vent ran along the wall on the underside of the bed, covered up by various trim pieces and carpeting in the back of the closet. Now it’s hanging out for all to see. I explored a bunch of options for what to do with this, but it looks like the real answer is going to be to change the whole routing and run it up along the ceiling, with a new dryer vent on the outside of the boat instead. That’s going to take a custom fiberglass repair person, so for now we have to just throw it back together, taking up as little space as possible. With that in mind, for now, we decided to keep 5 inches of the bed against the wall to be the support for the dryer hose, but take out everything else that we could.
After converting an inordinate quantity of fiberglass into dust with a jigsaw, we managed to get roughly the first cut we were looking for. Finally the space felt open and like it’d really work well, especially if we could get rid of the vent stuff someday. A nice open 56″ wide box to start thinking about putting a desk into. Finally, with all the cutting complete for now, I built some new support brackets for the vent covers, cut things down as small as I could, and tried to reassemble everything I could back into something resembling a finished space.
It’s definitely a little ghetto for now, but it’s good enough to pick up a cheap desk to work with for a while. I can spend time testing out the desk height and general space while find someone to move the vent hose, and then finish cutting the other pieces out and get someone to build a proper custom desk setup into the wall. My woodworking skills are nowhere near good enough to make an even vaguely professional setup in this space, so I’m not even going to try.
But at least we have a usable space now! And it looks very likely that we can keep the single bed and still have a great desk setup. More to come!


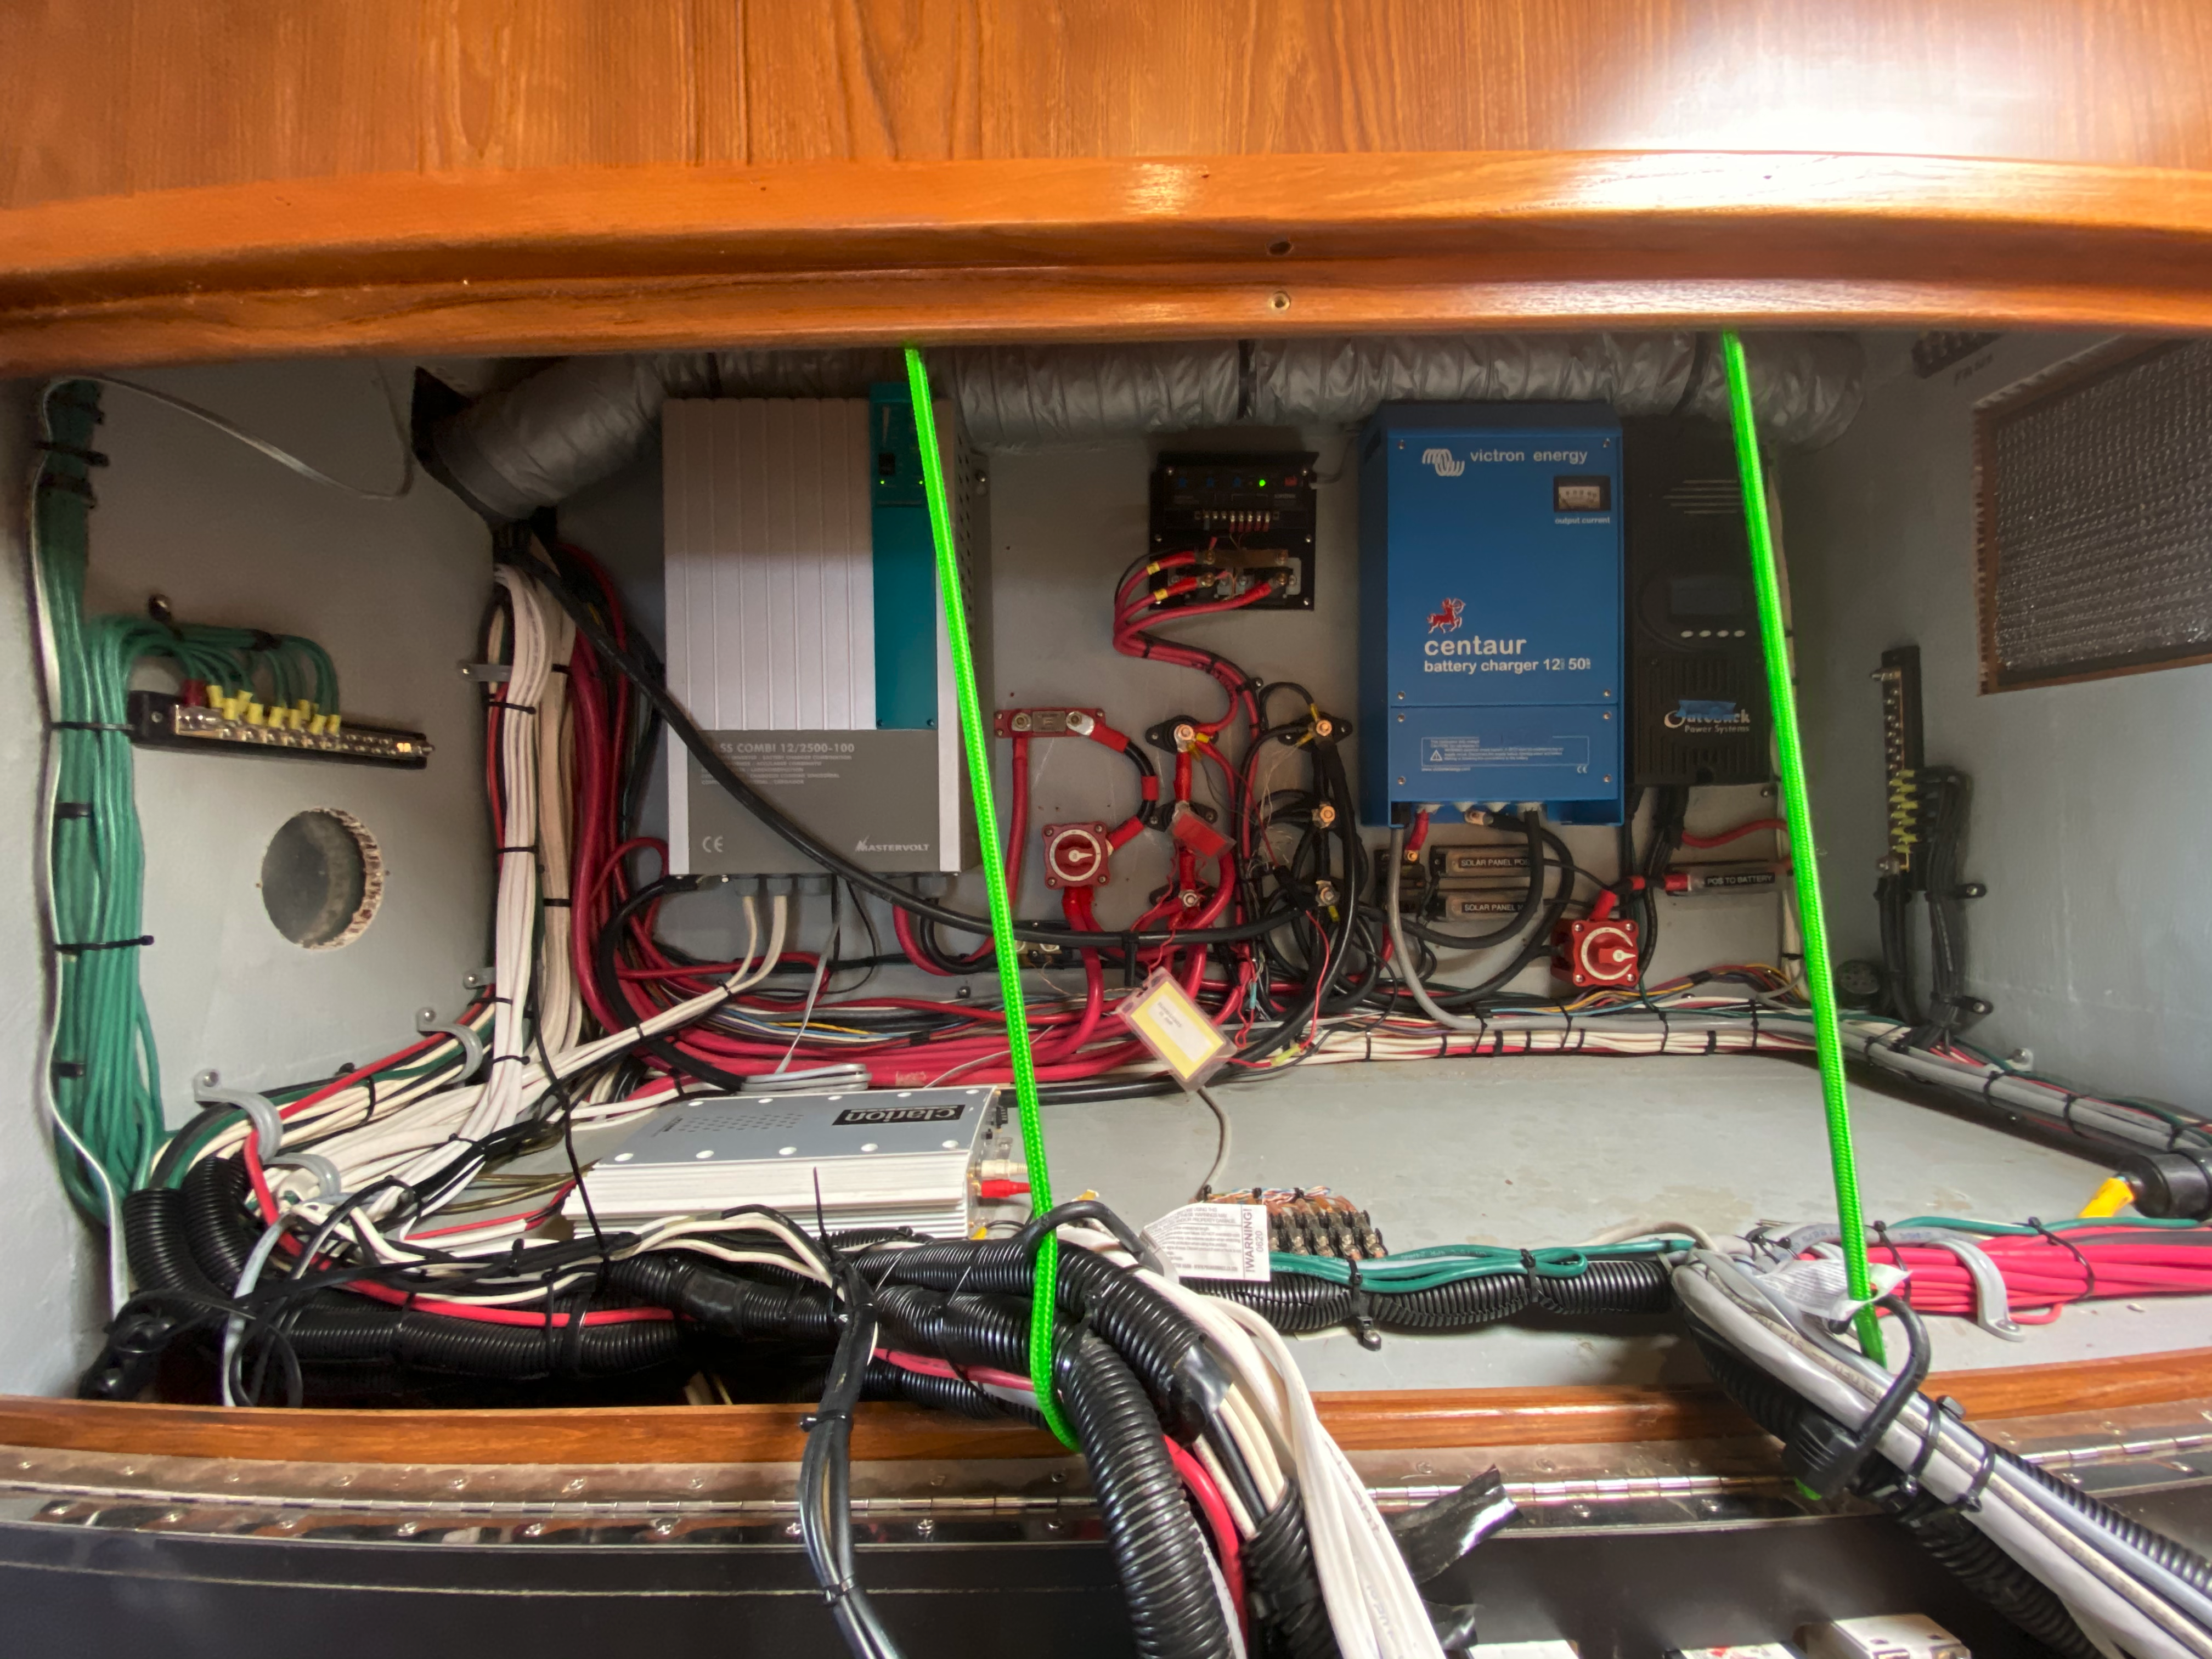
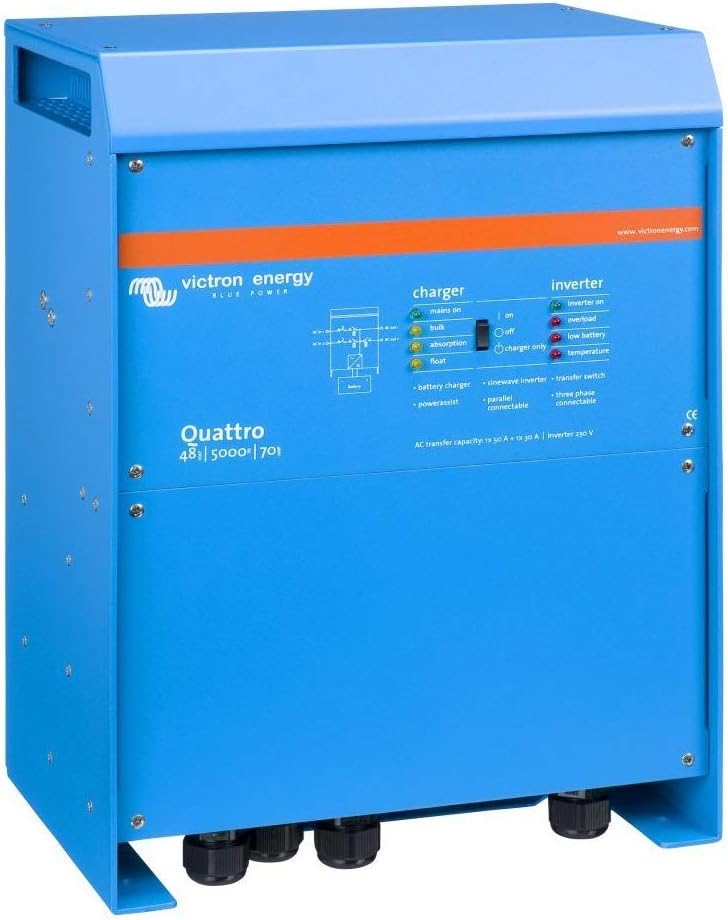

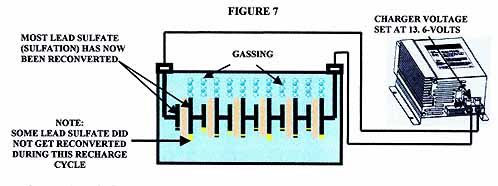


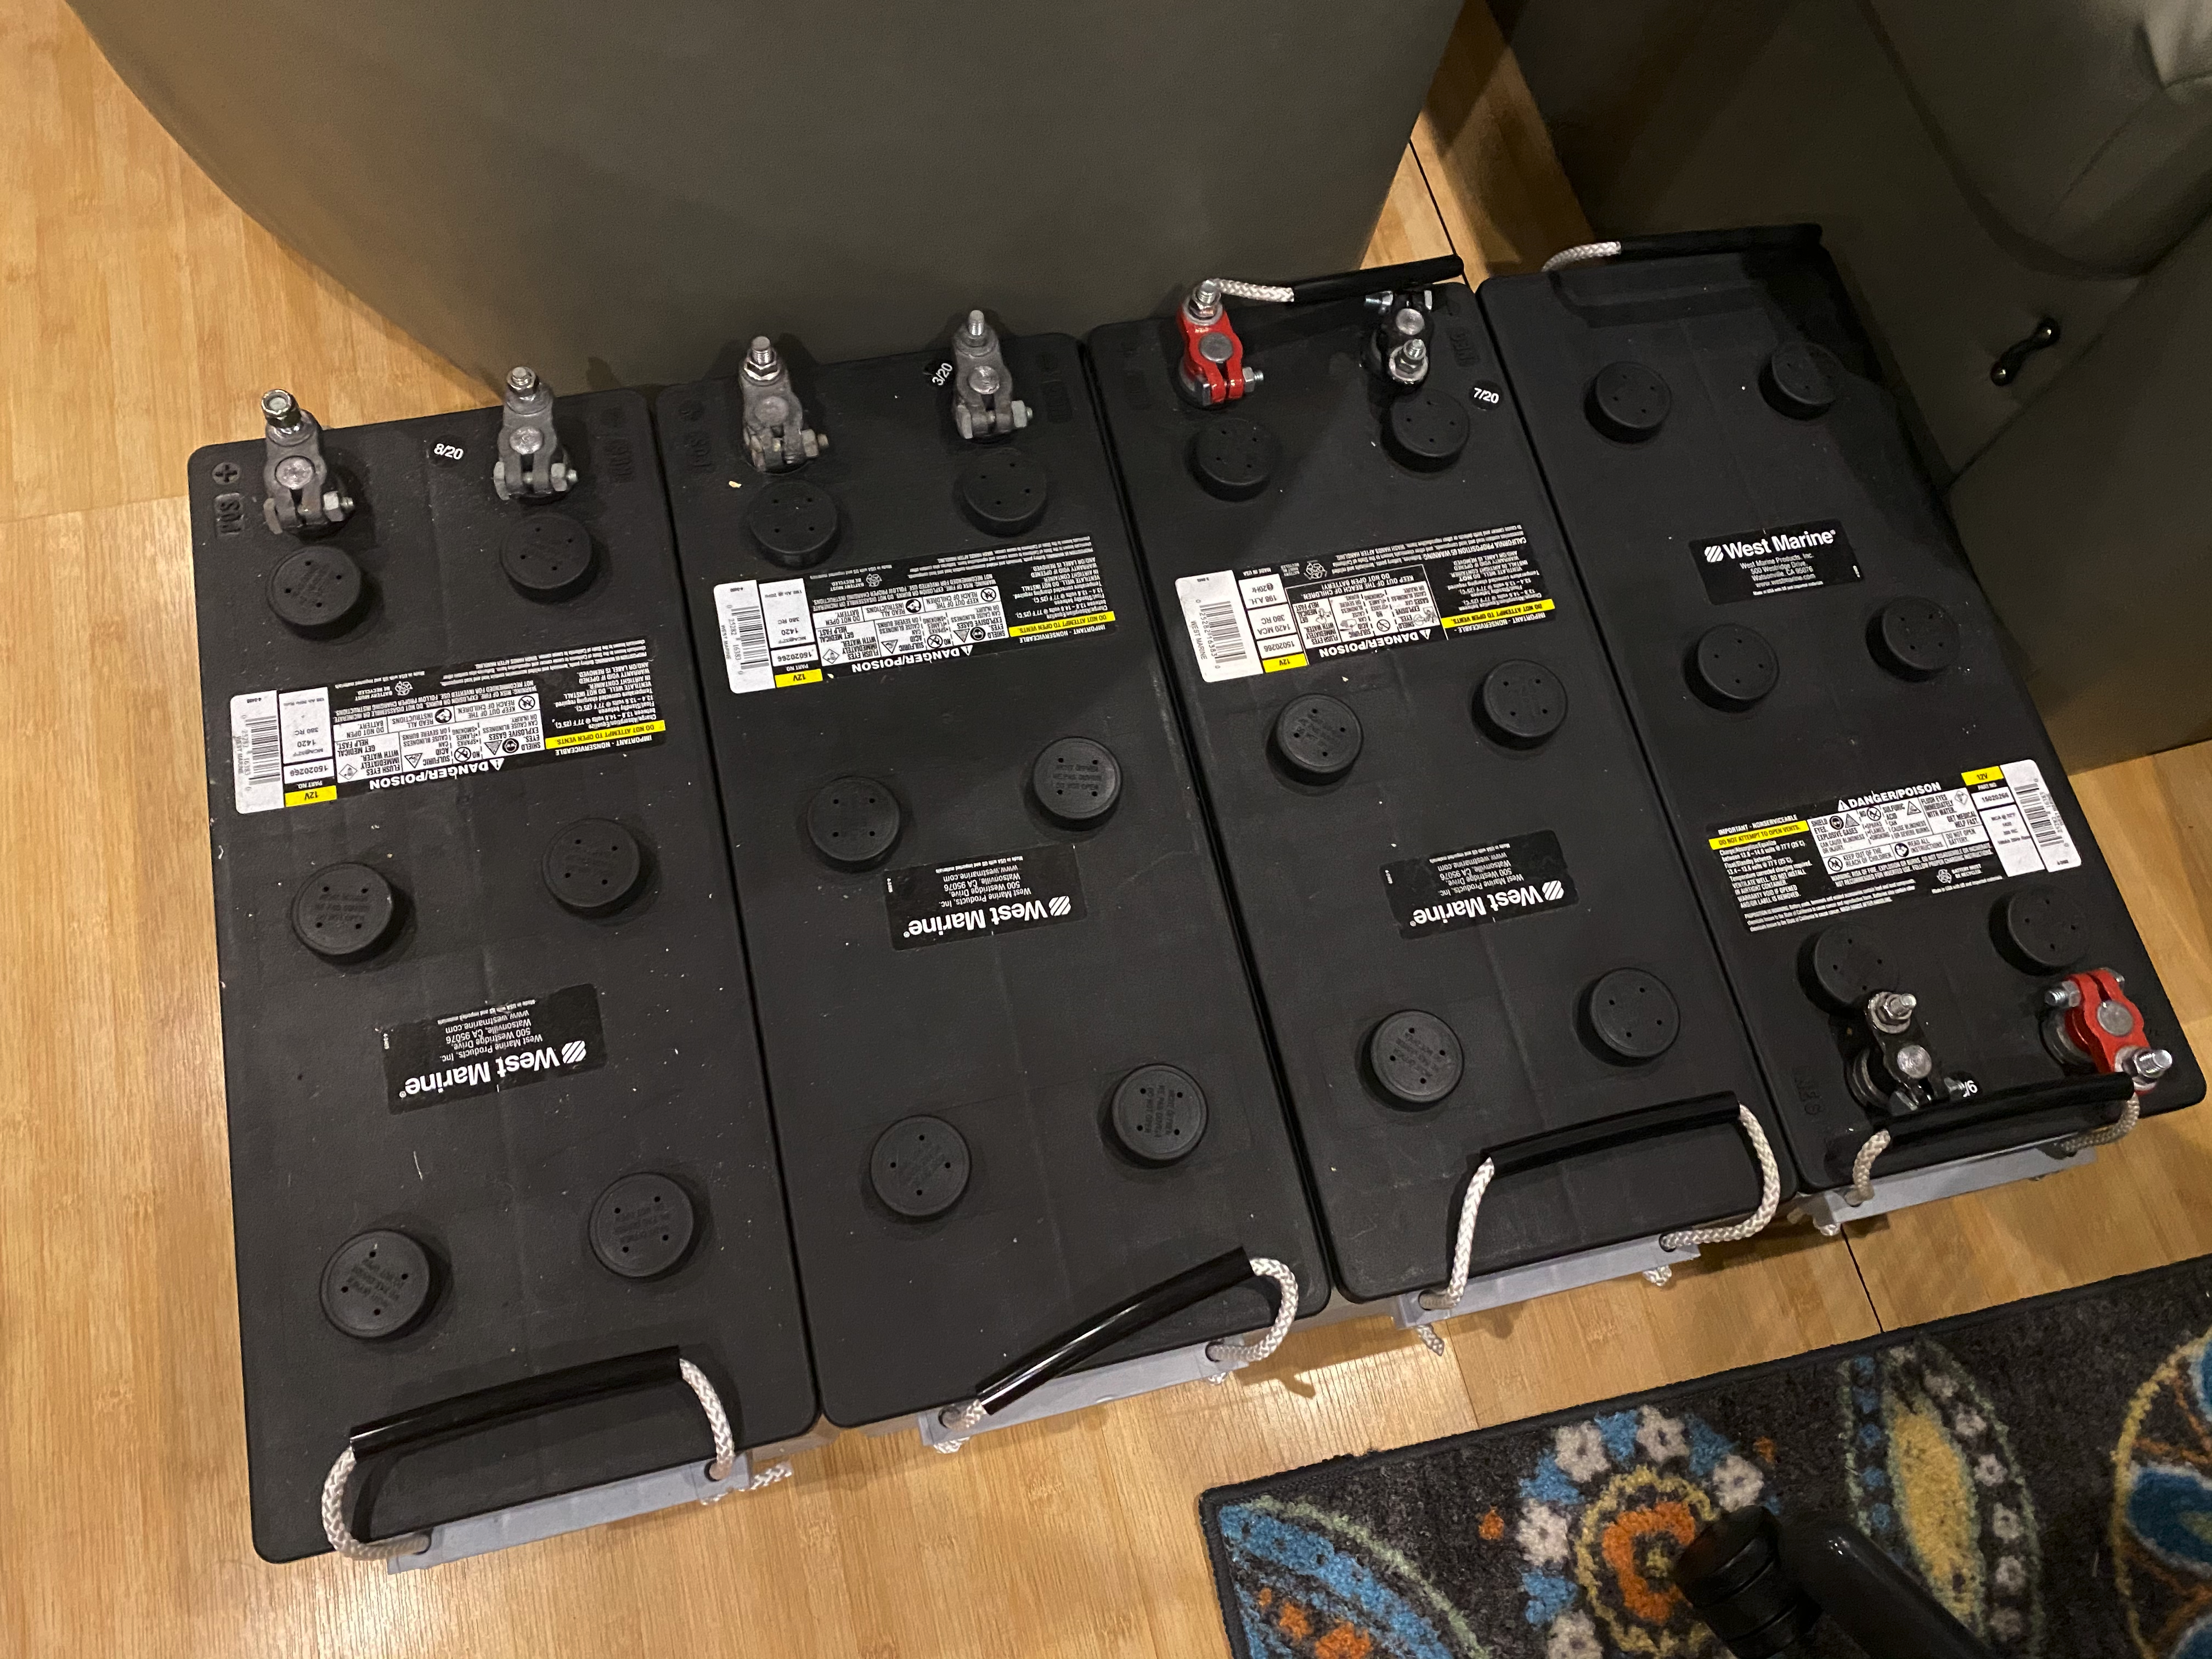


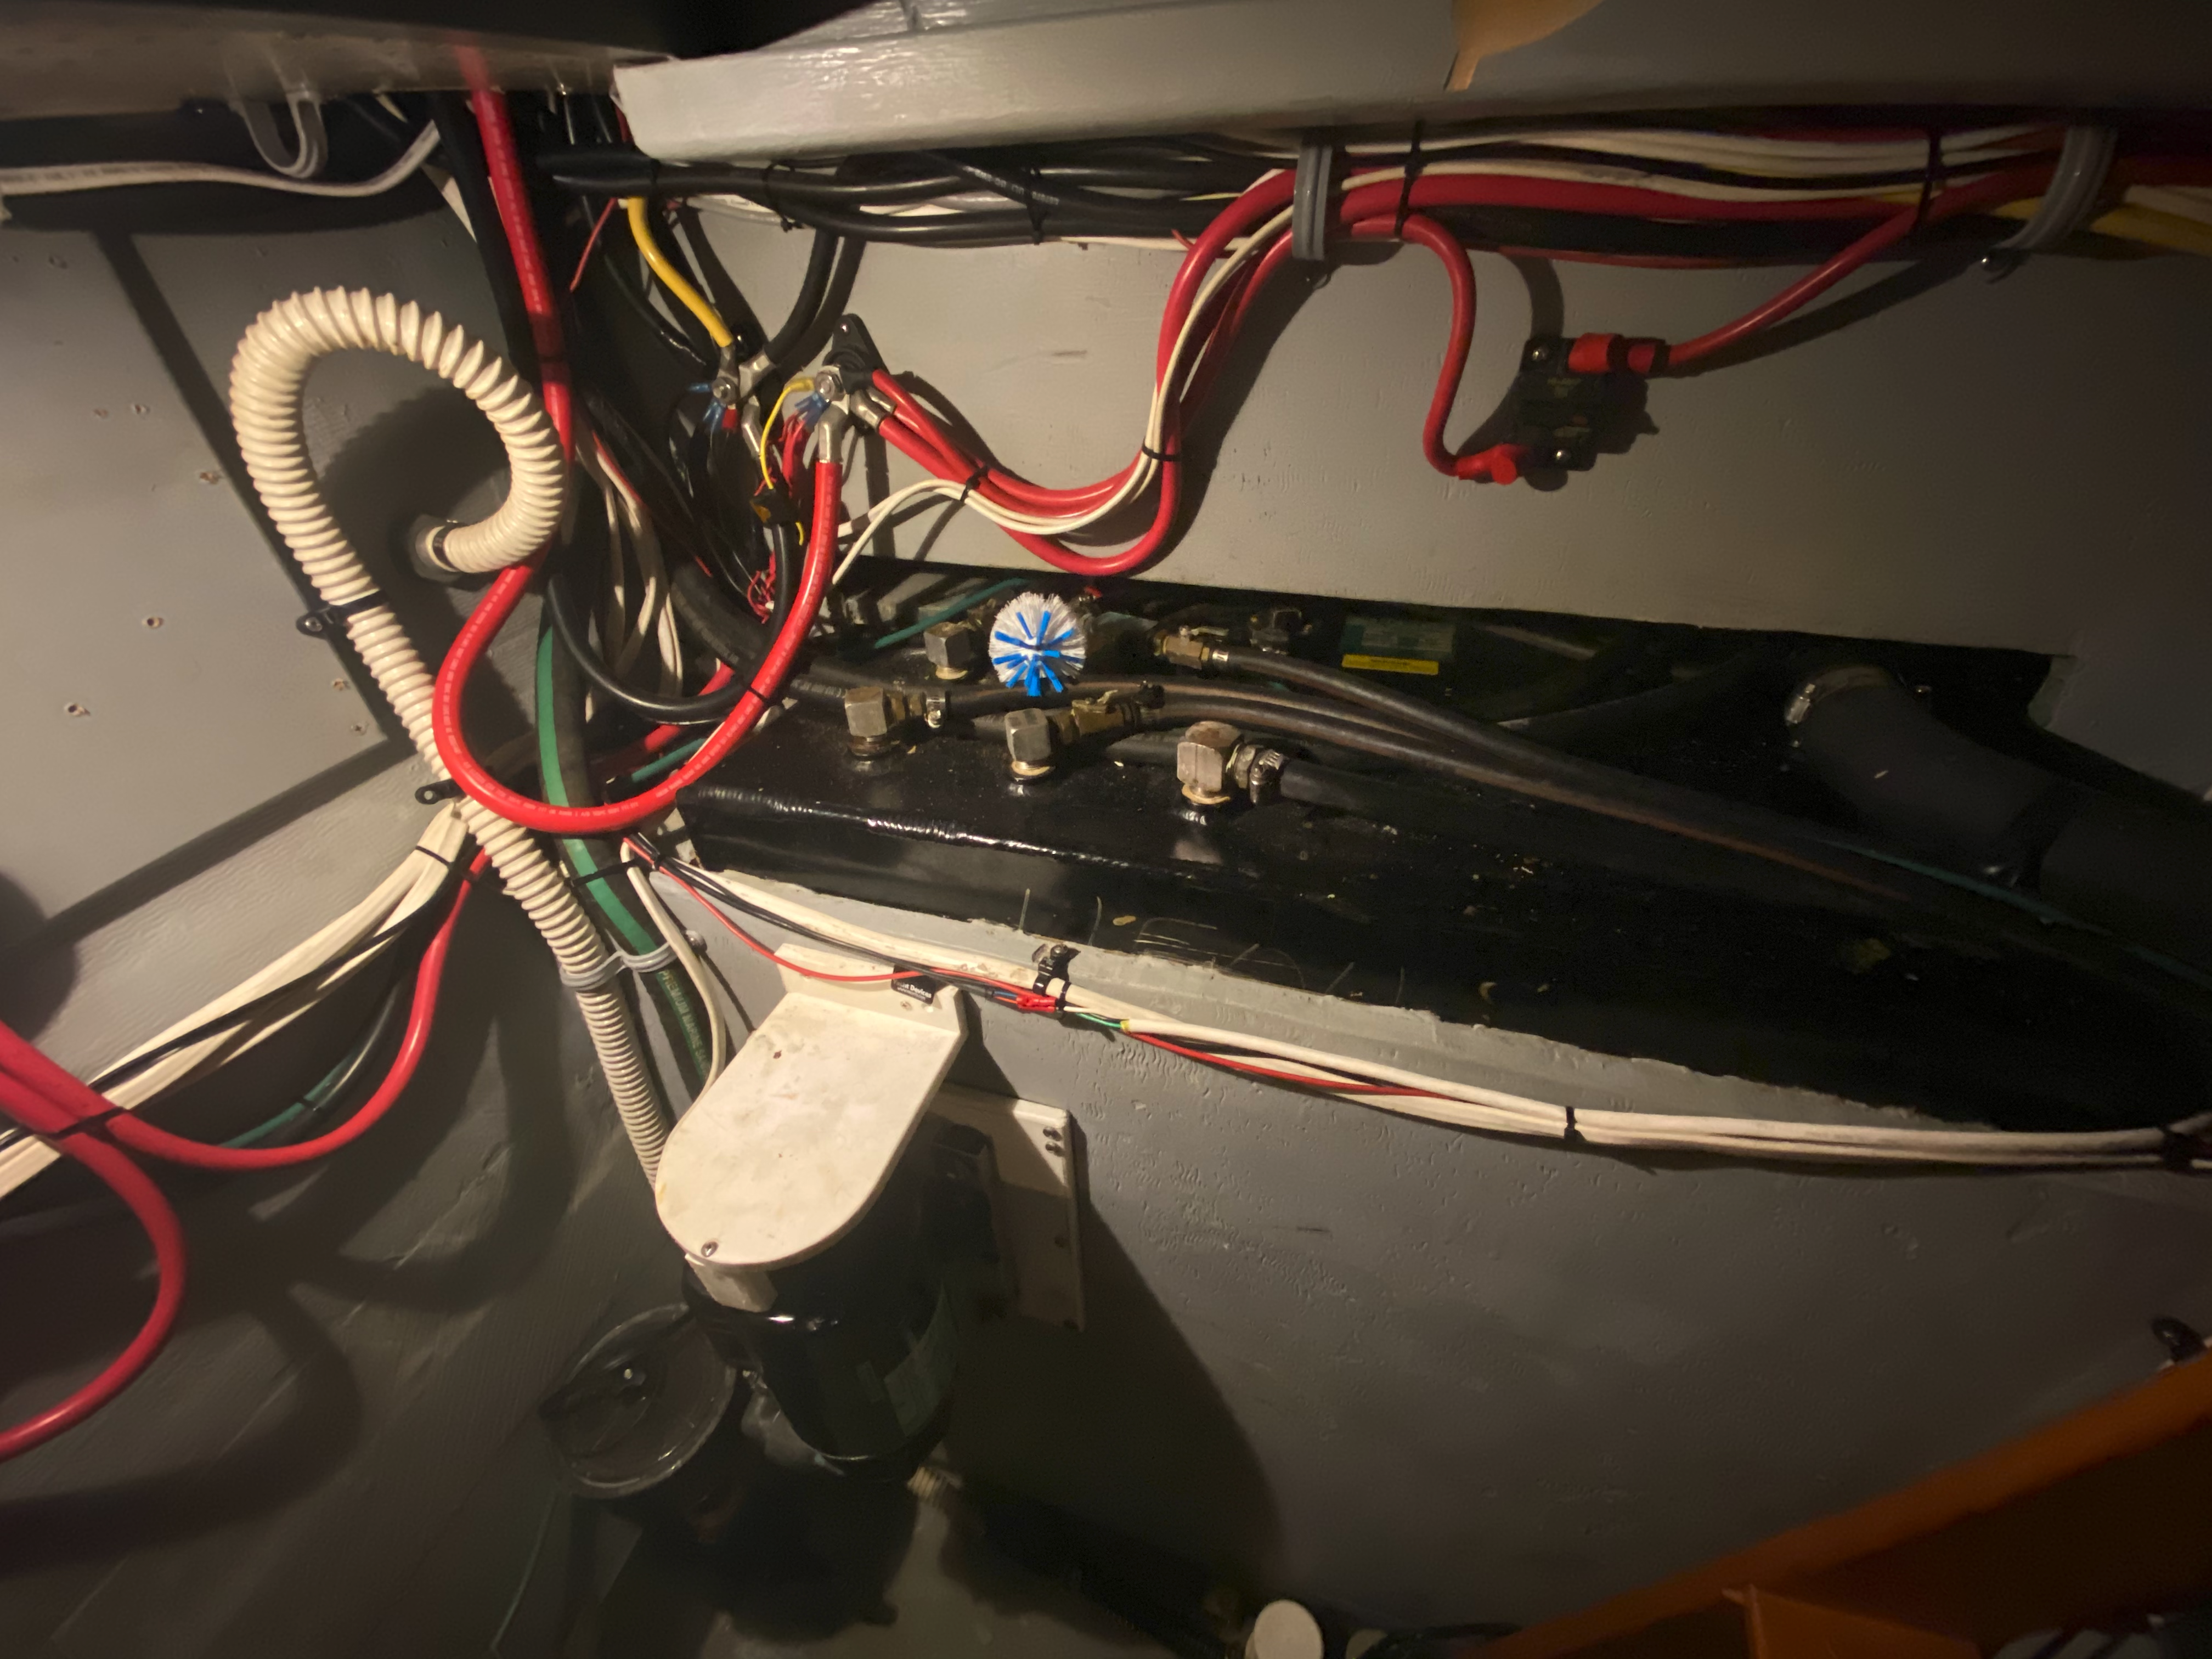
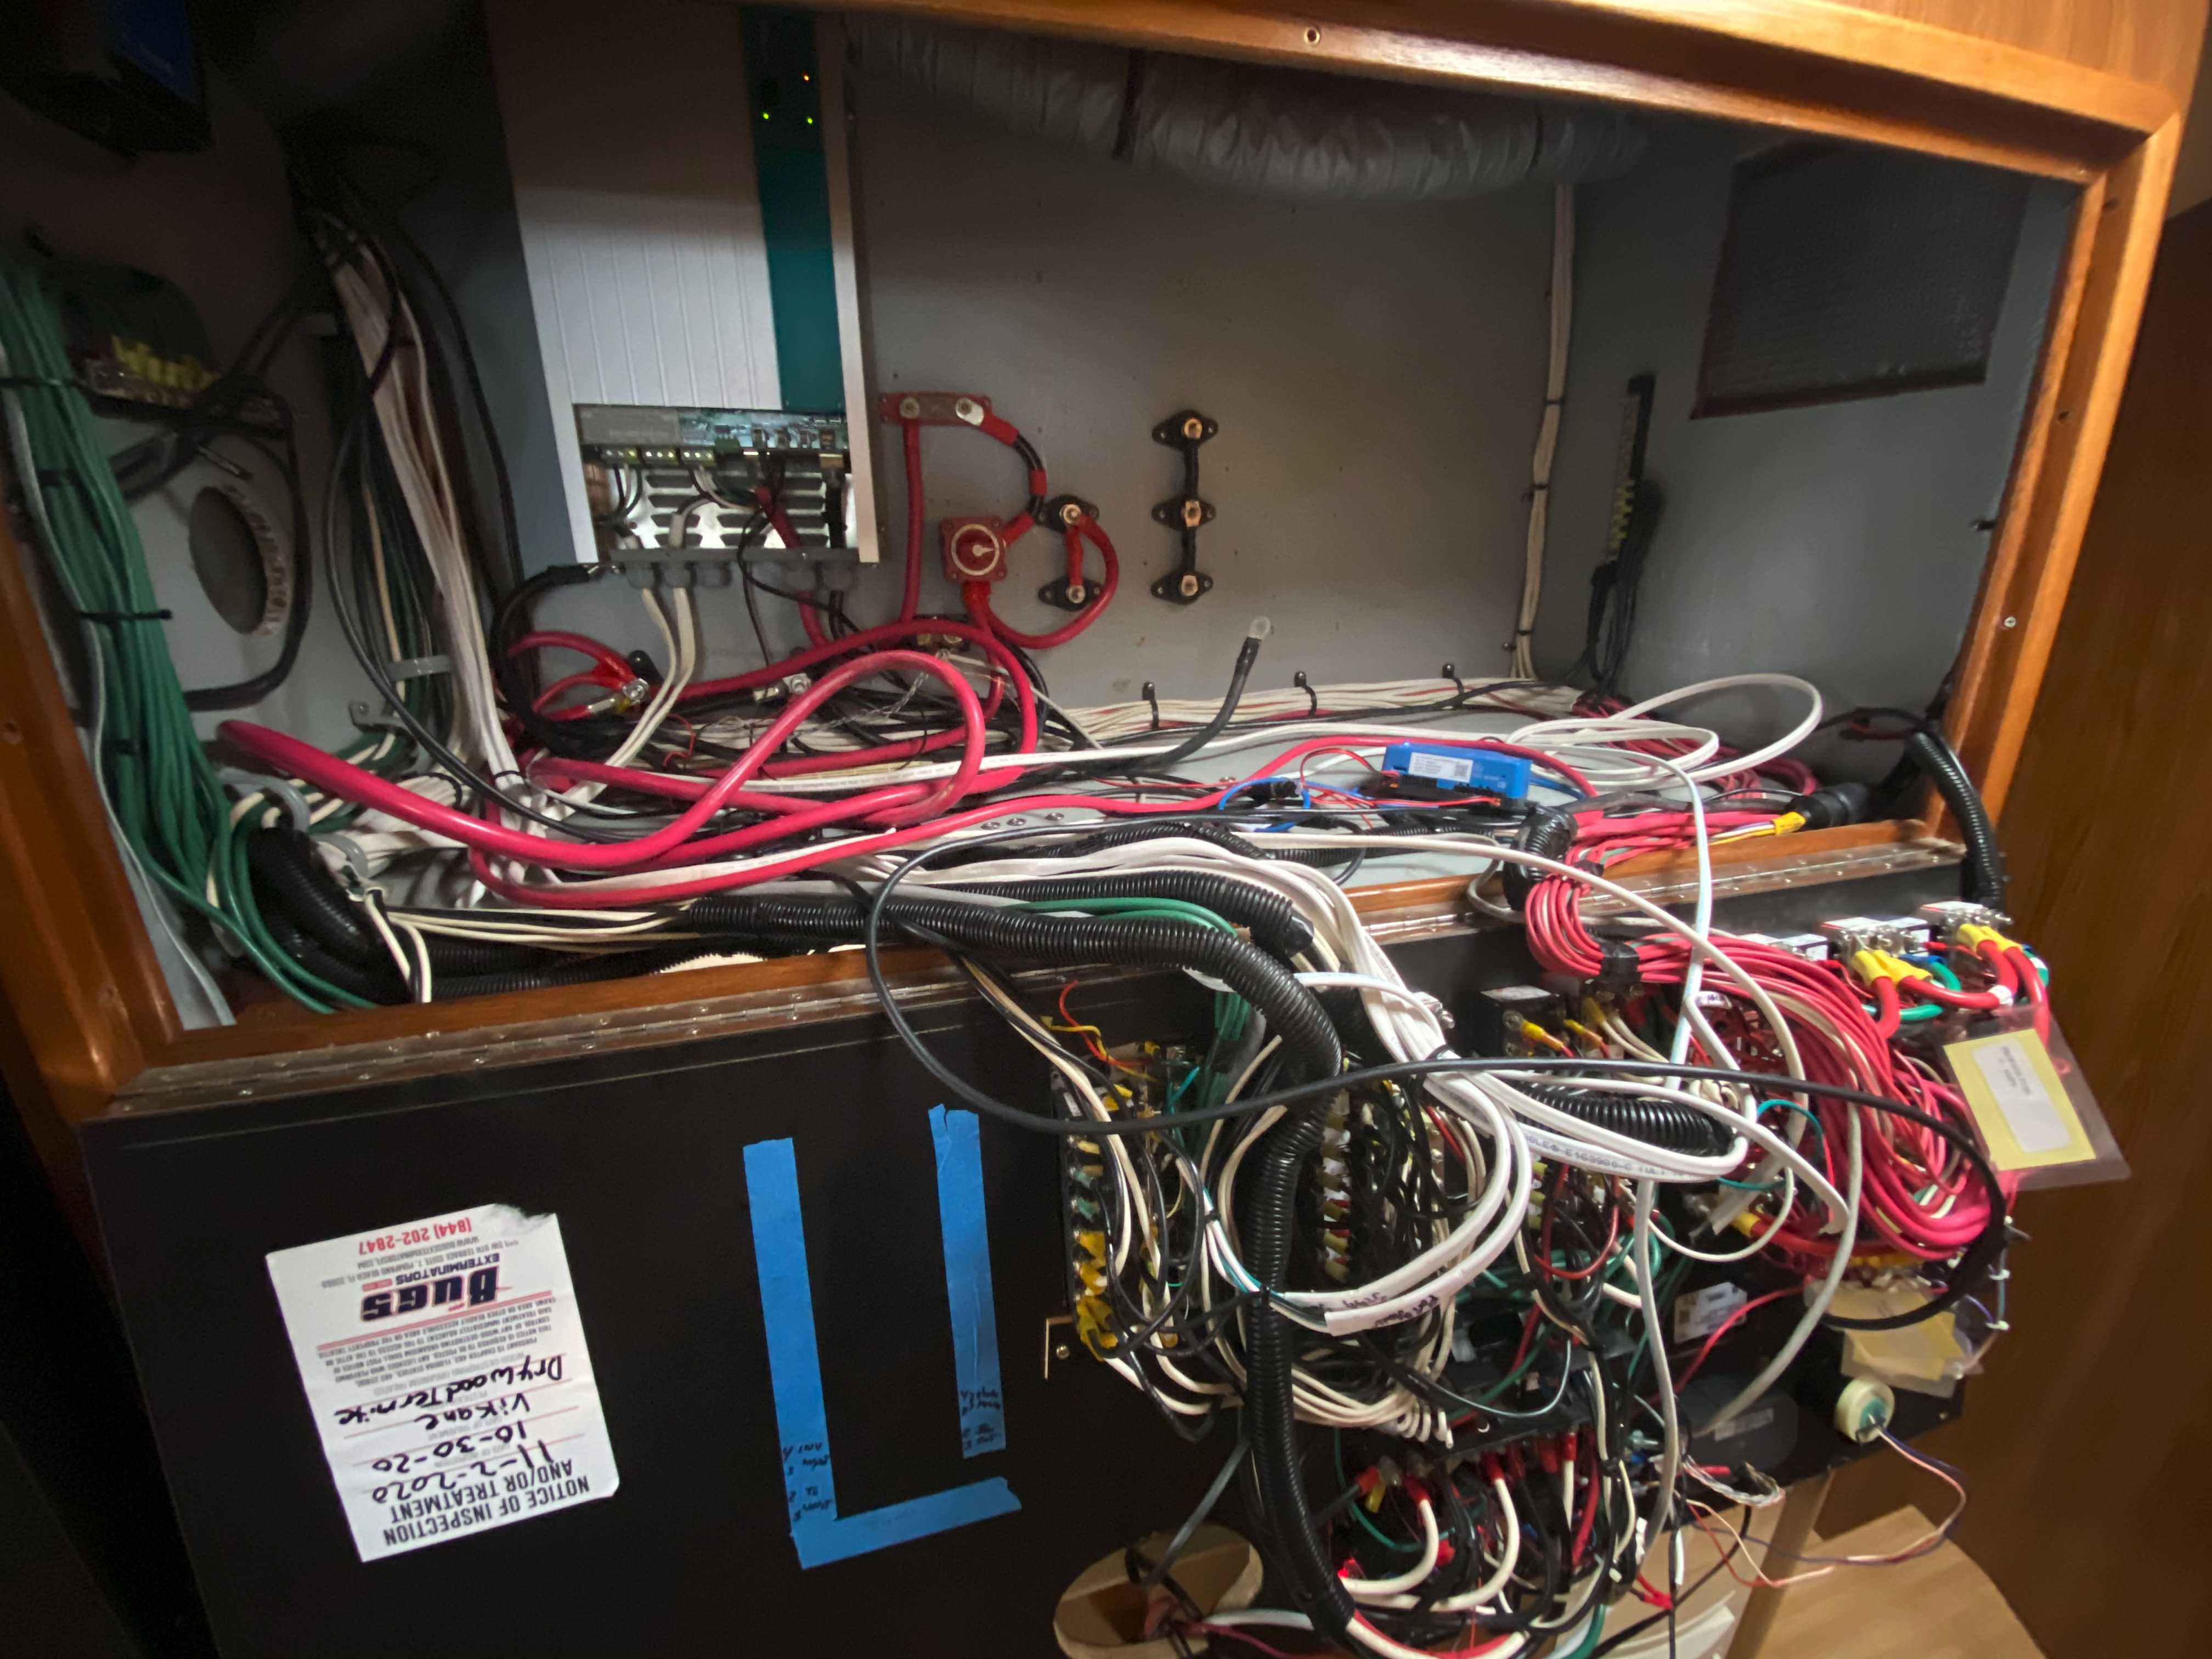
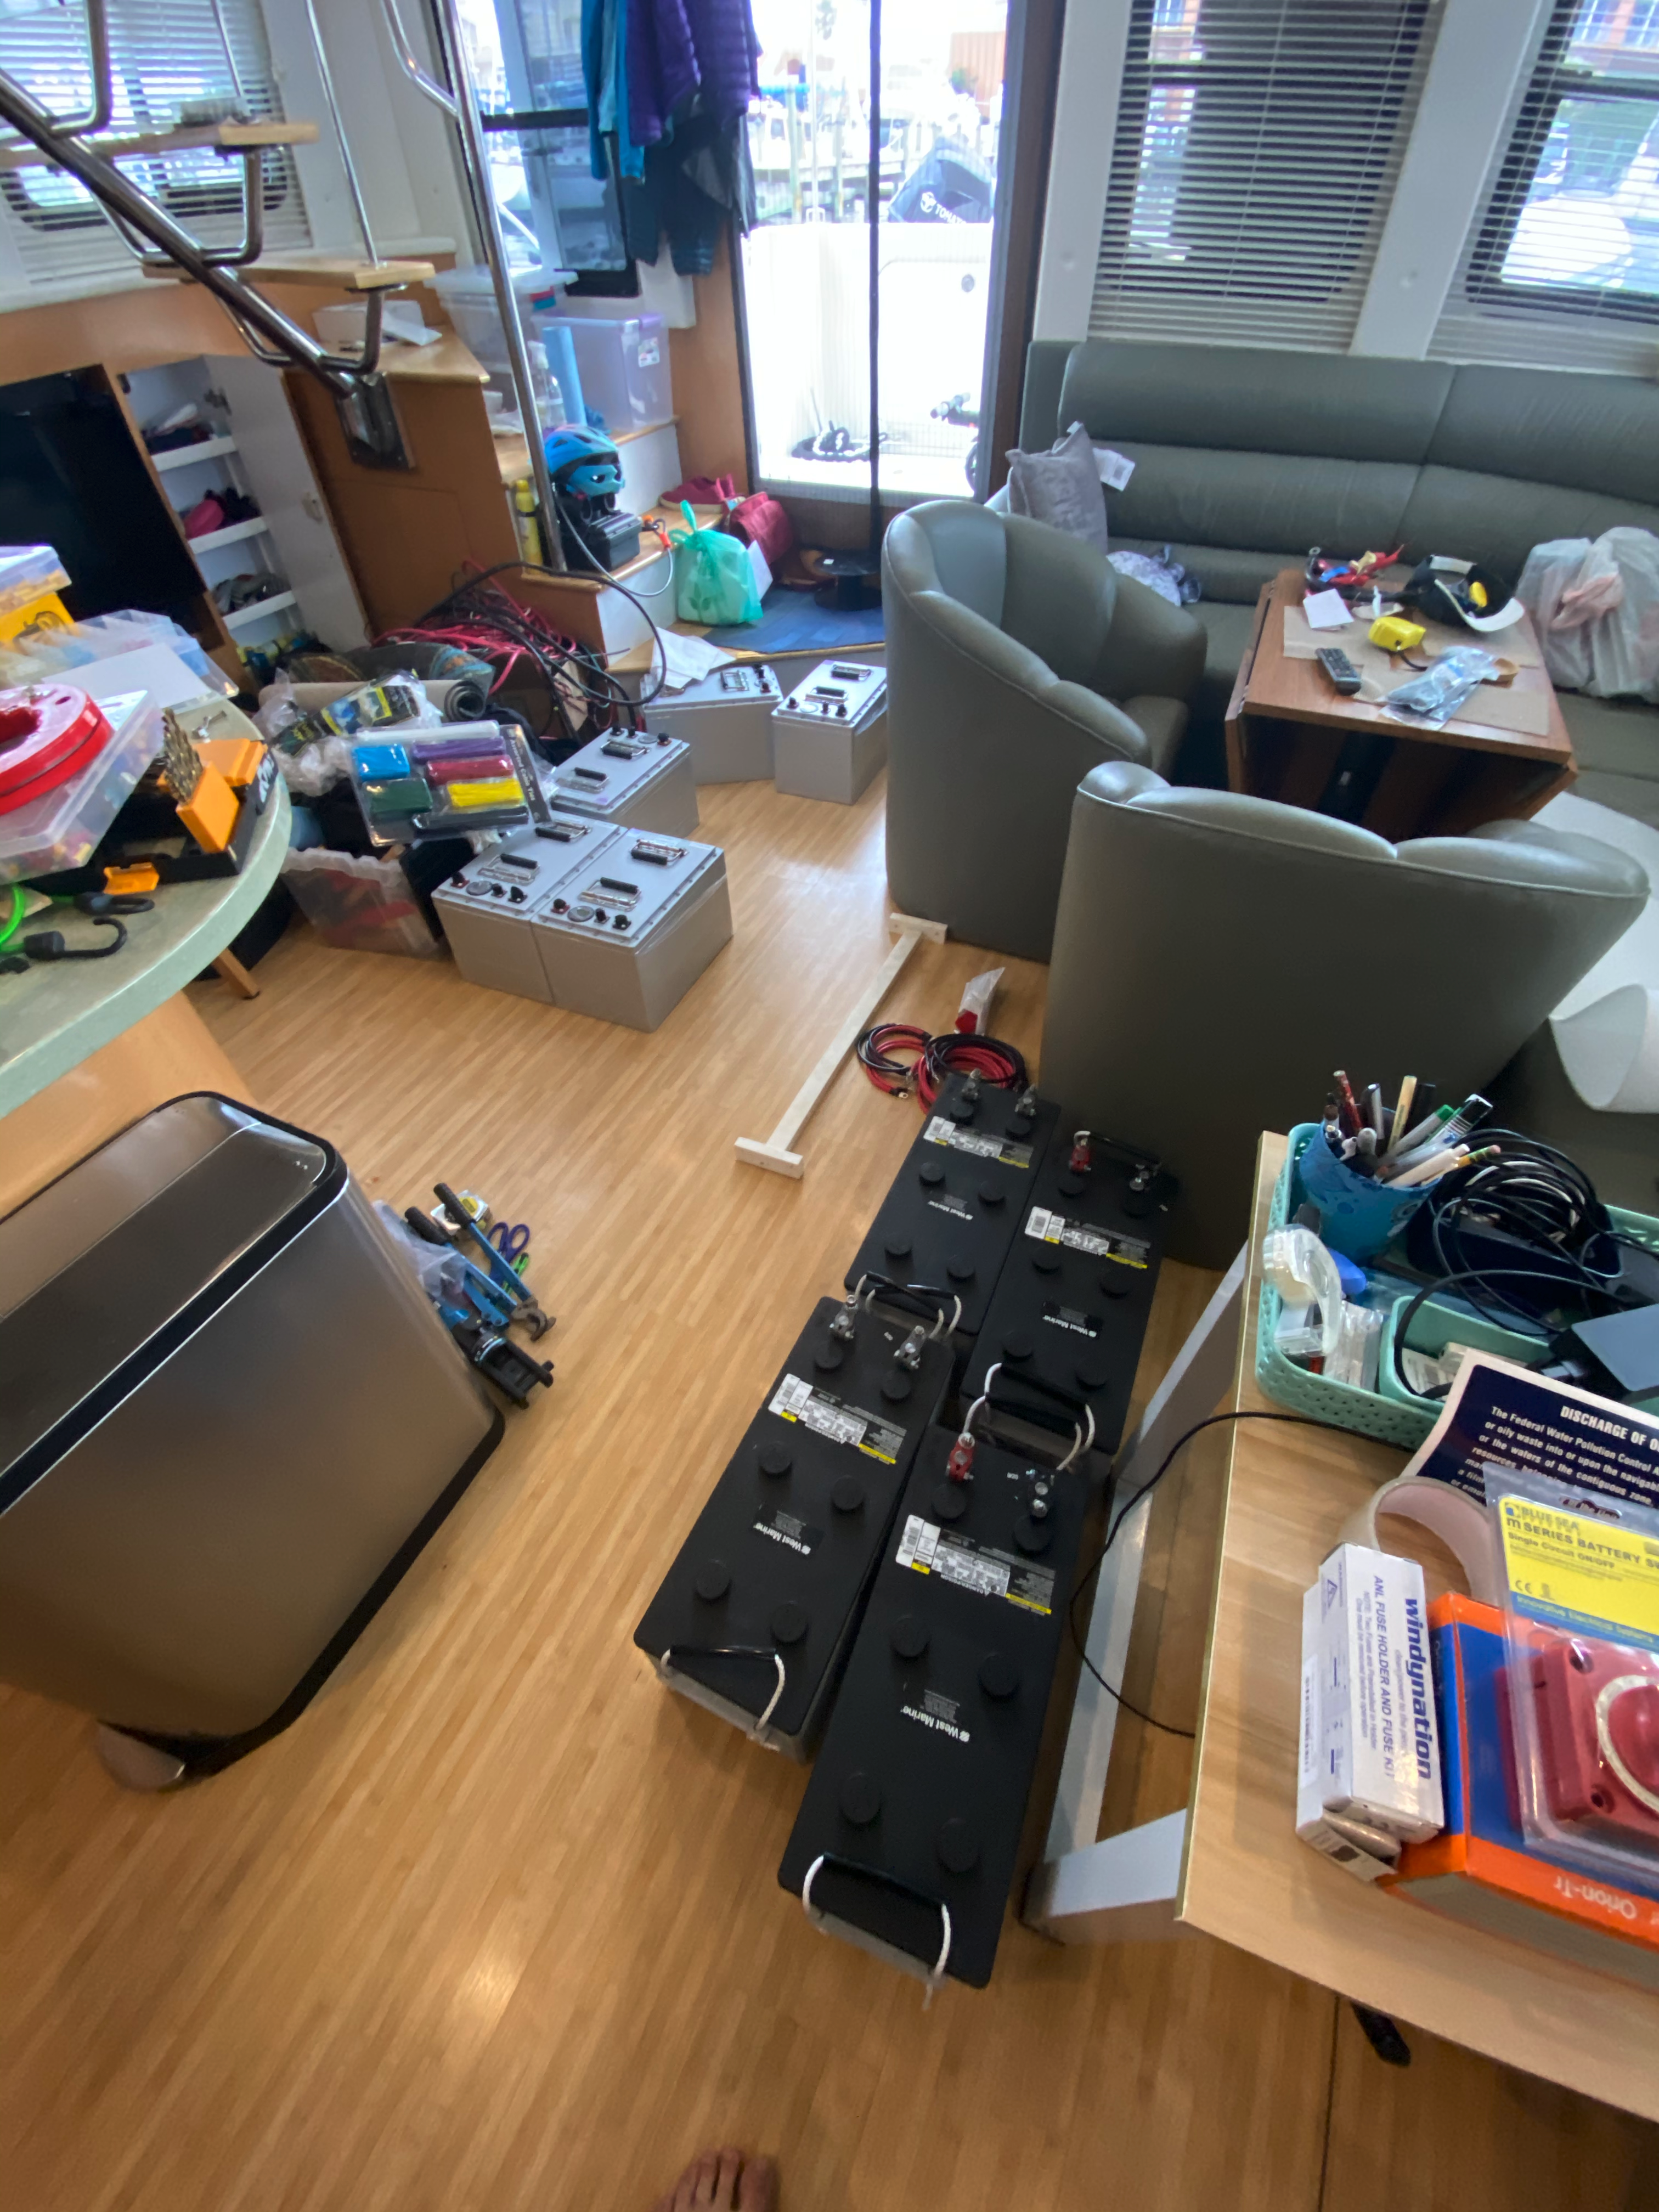
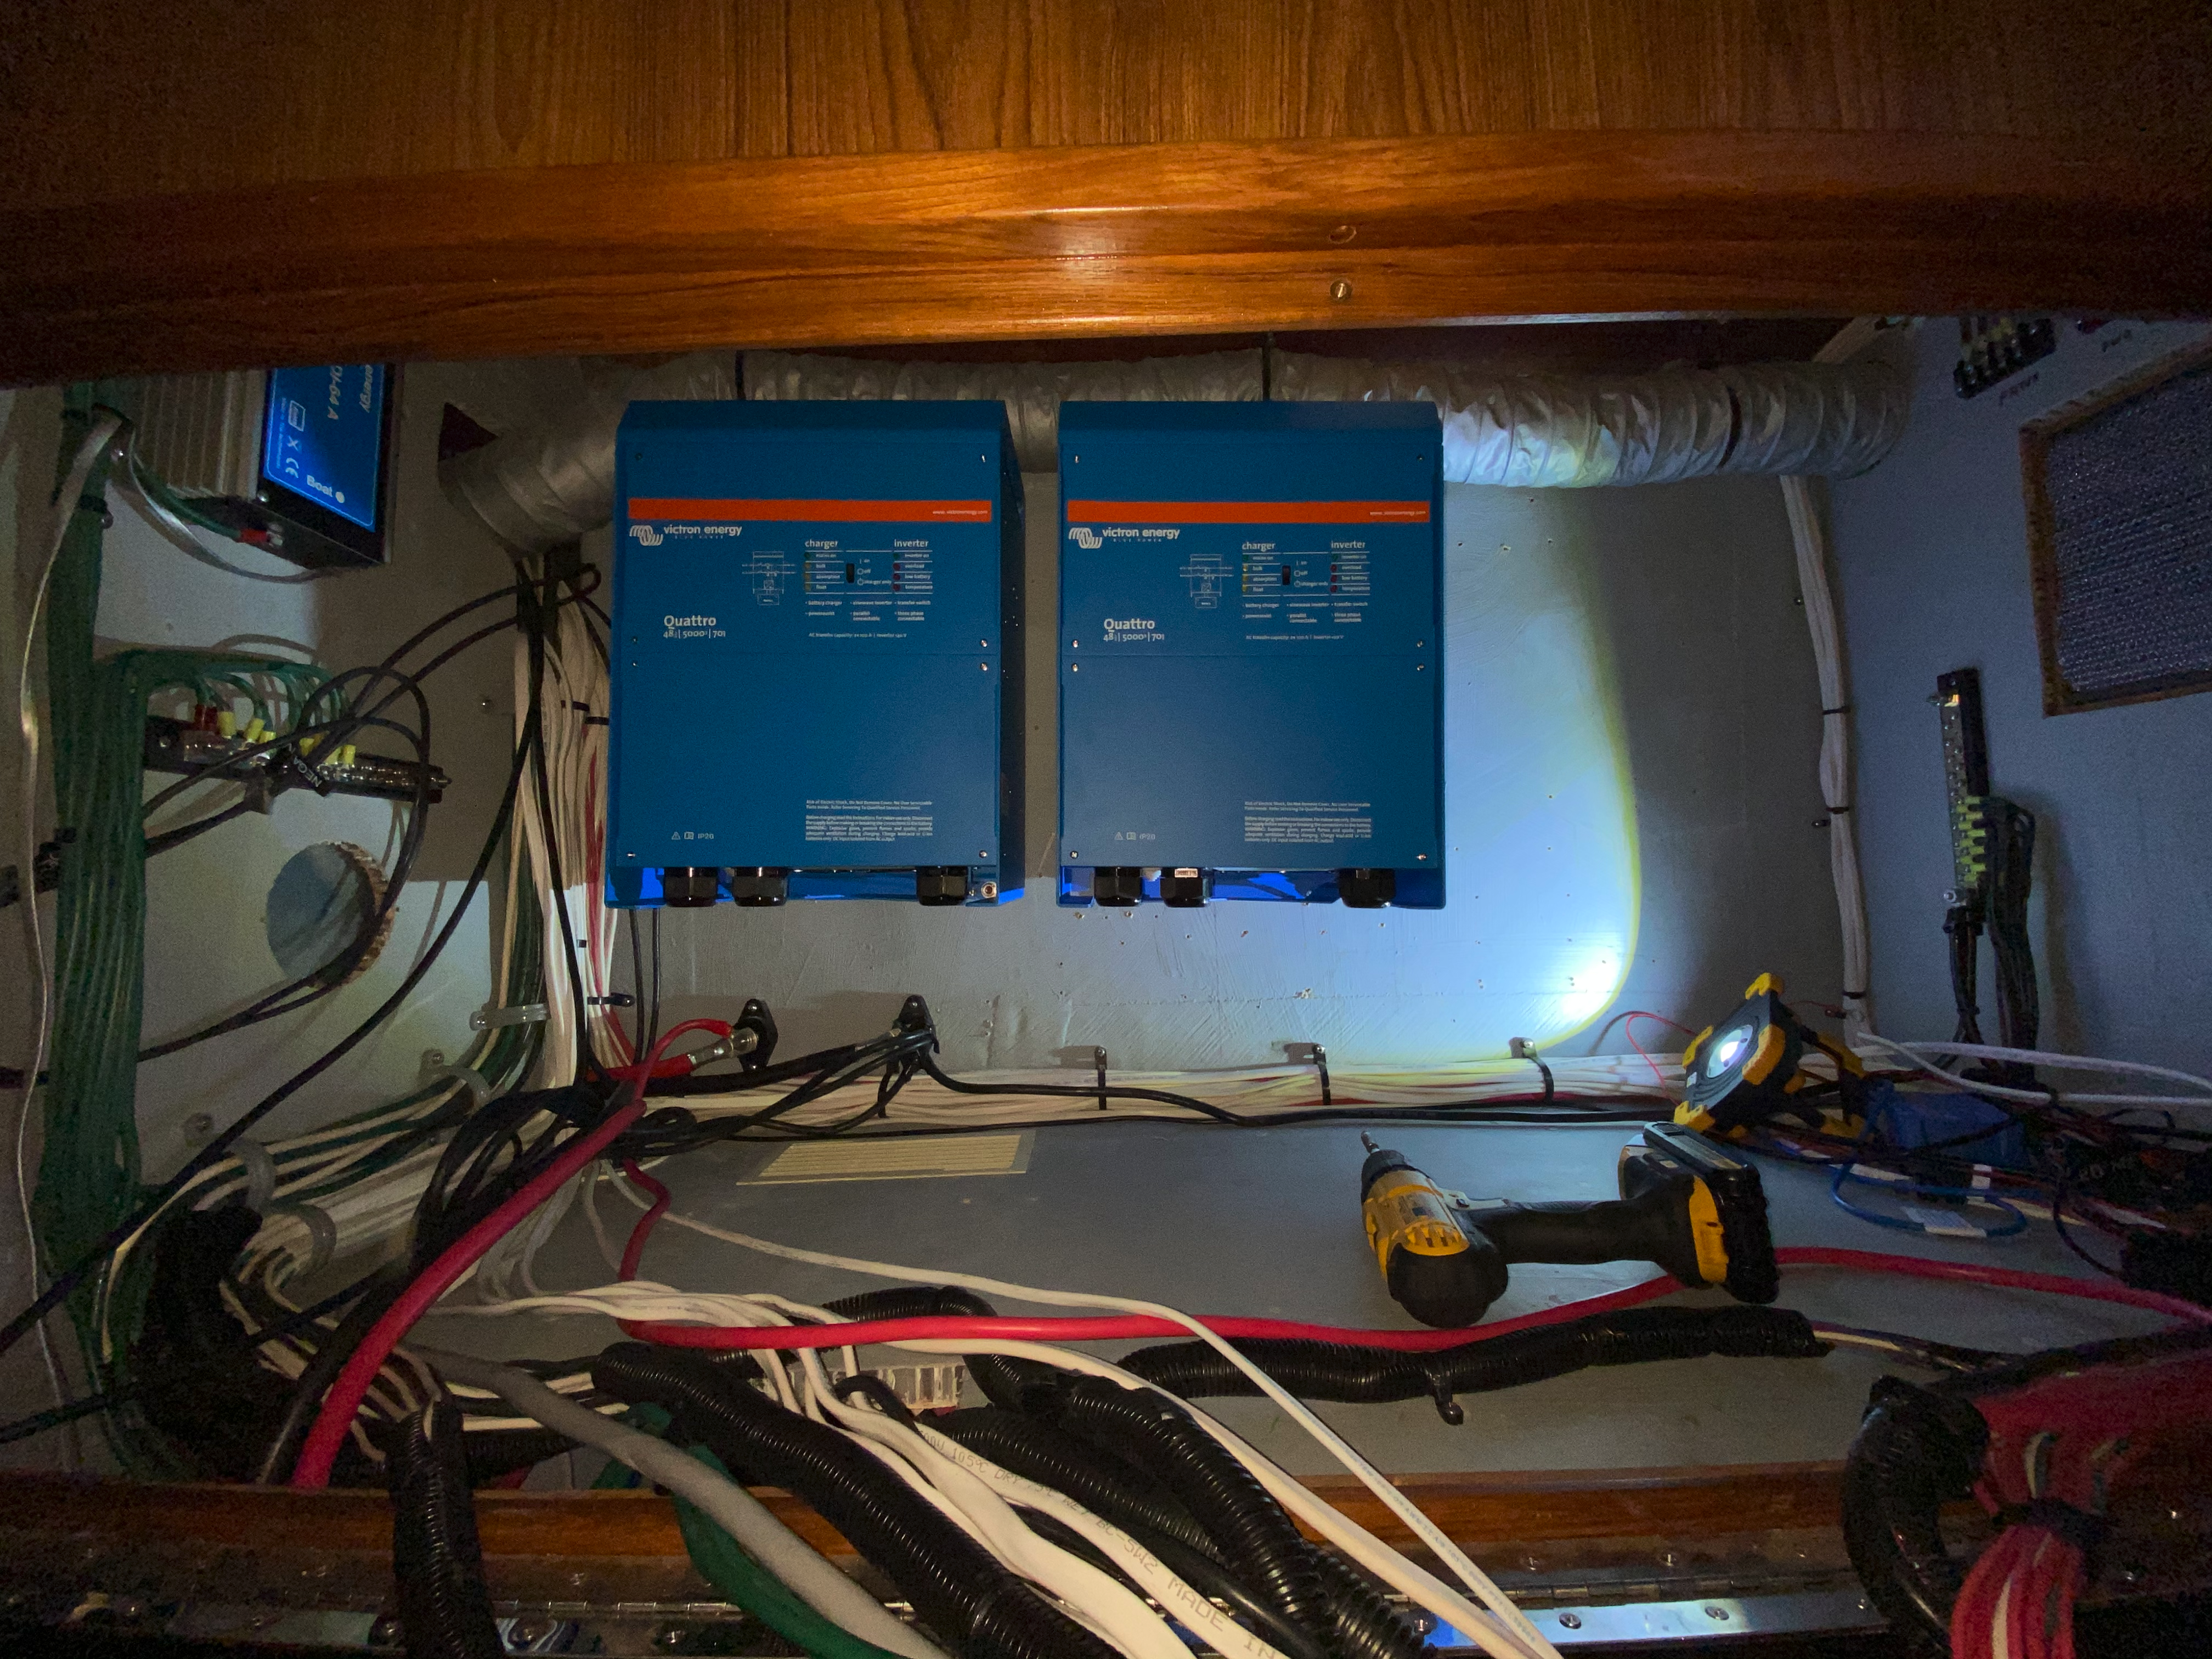
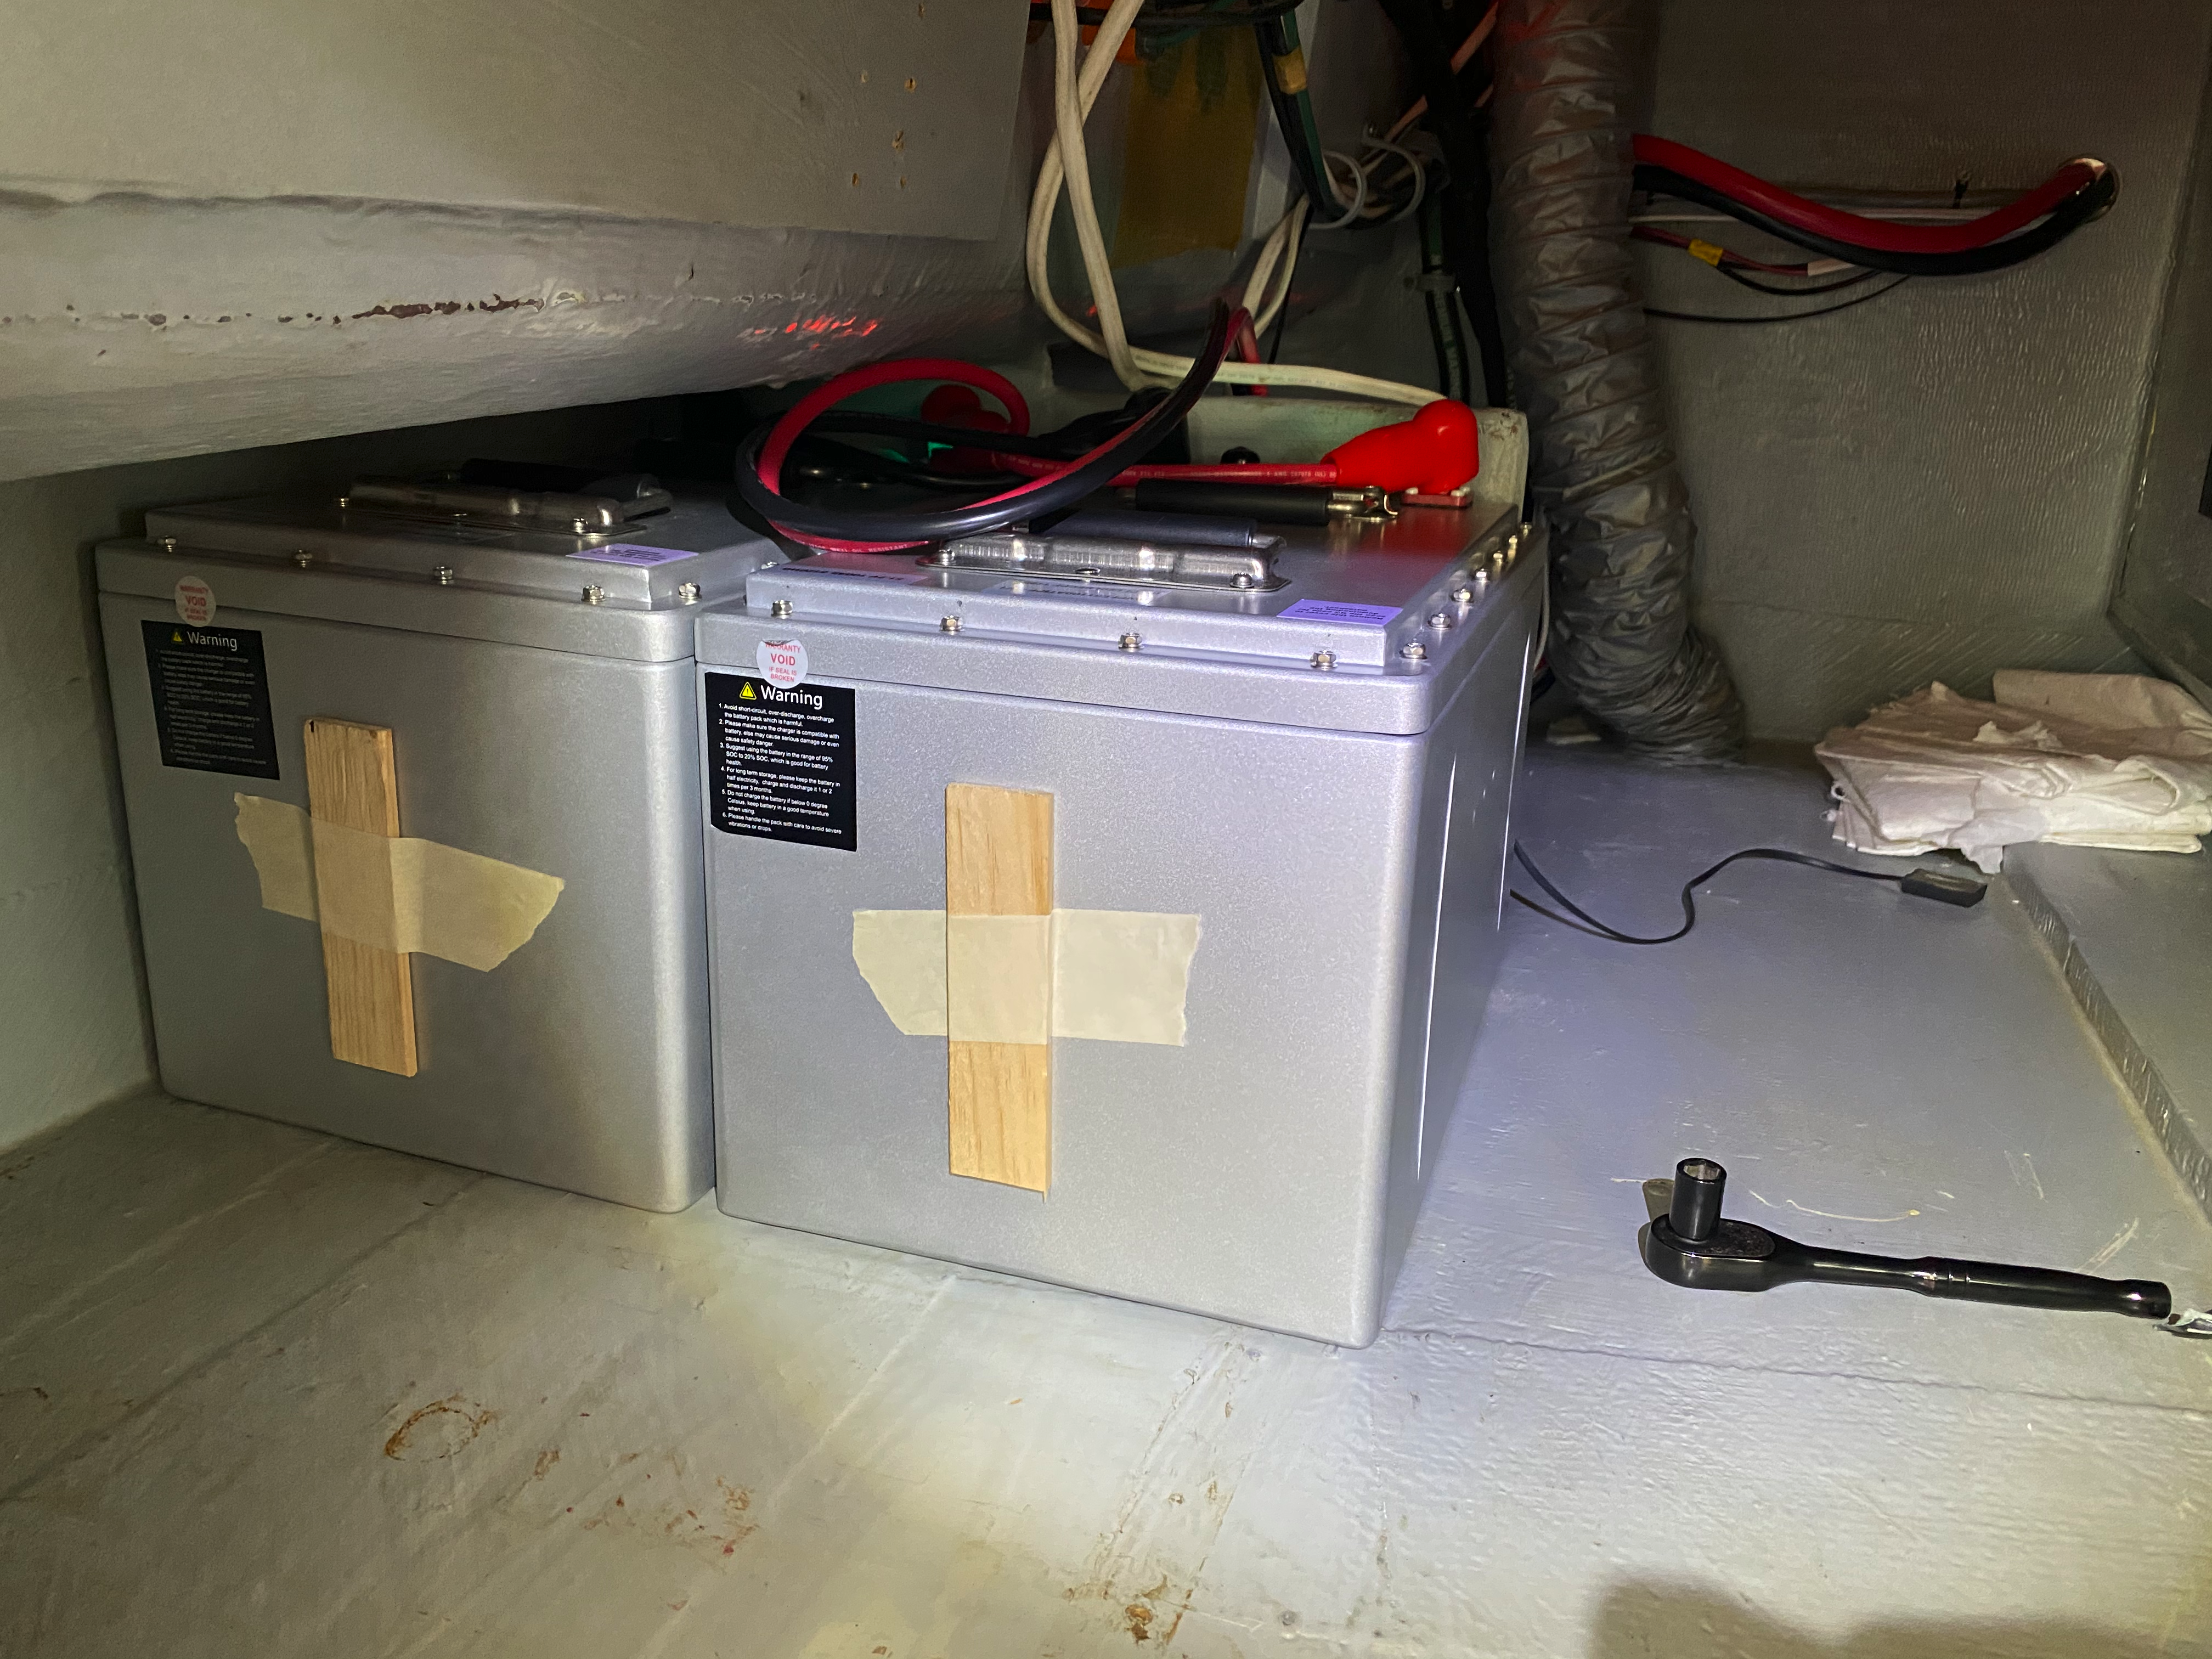


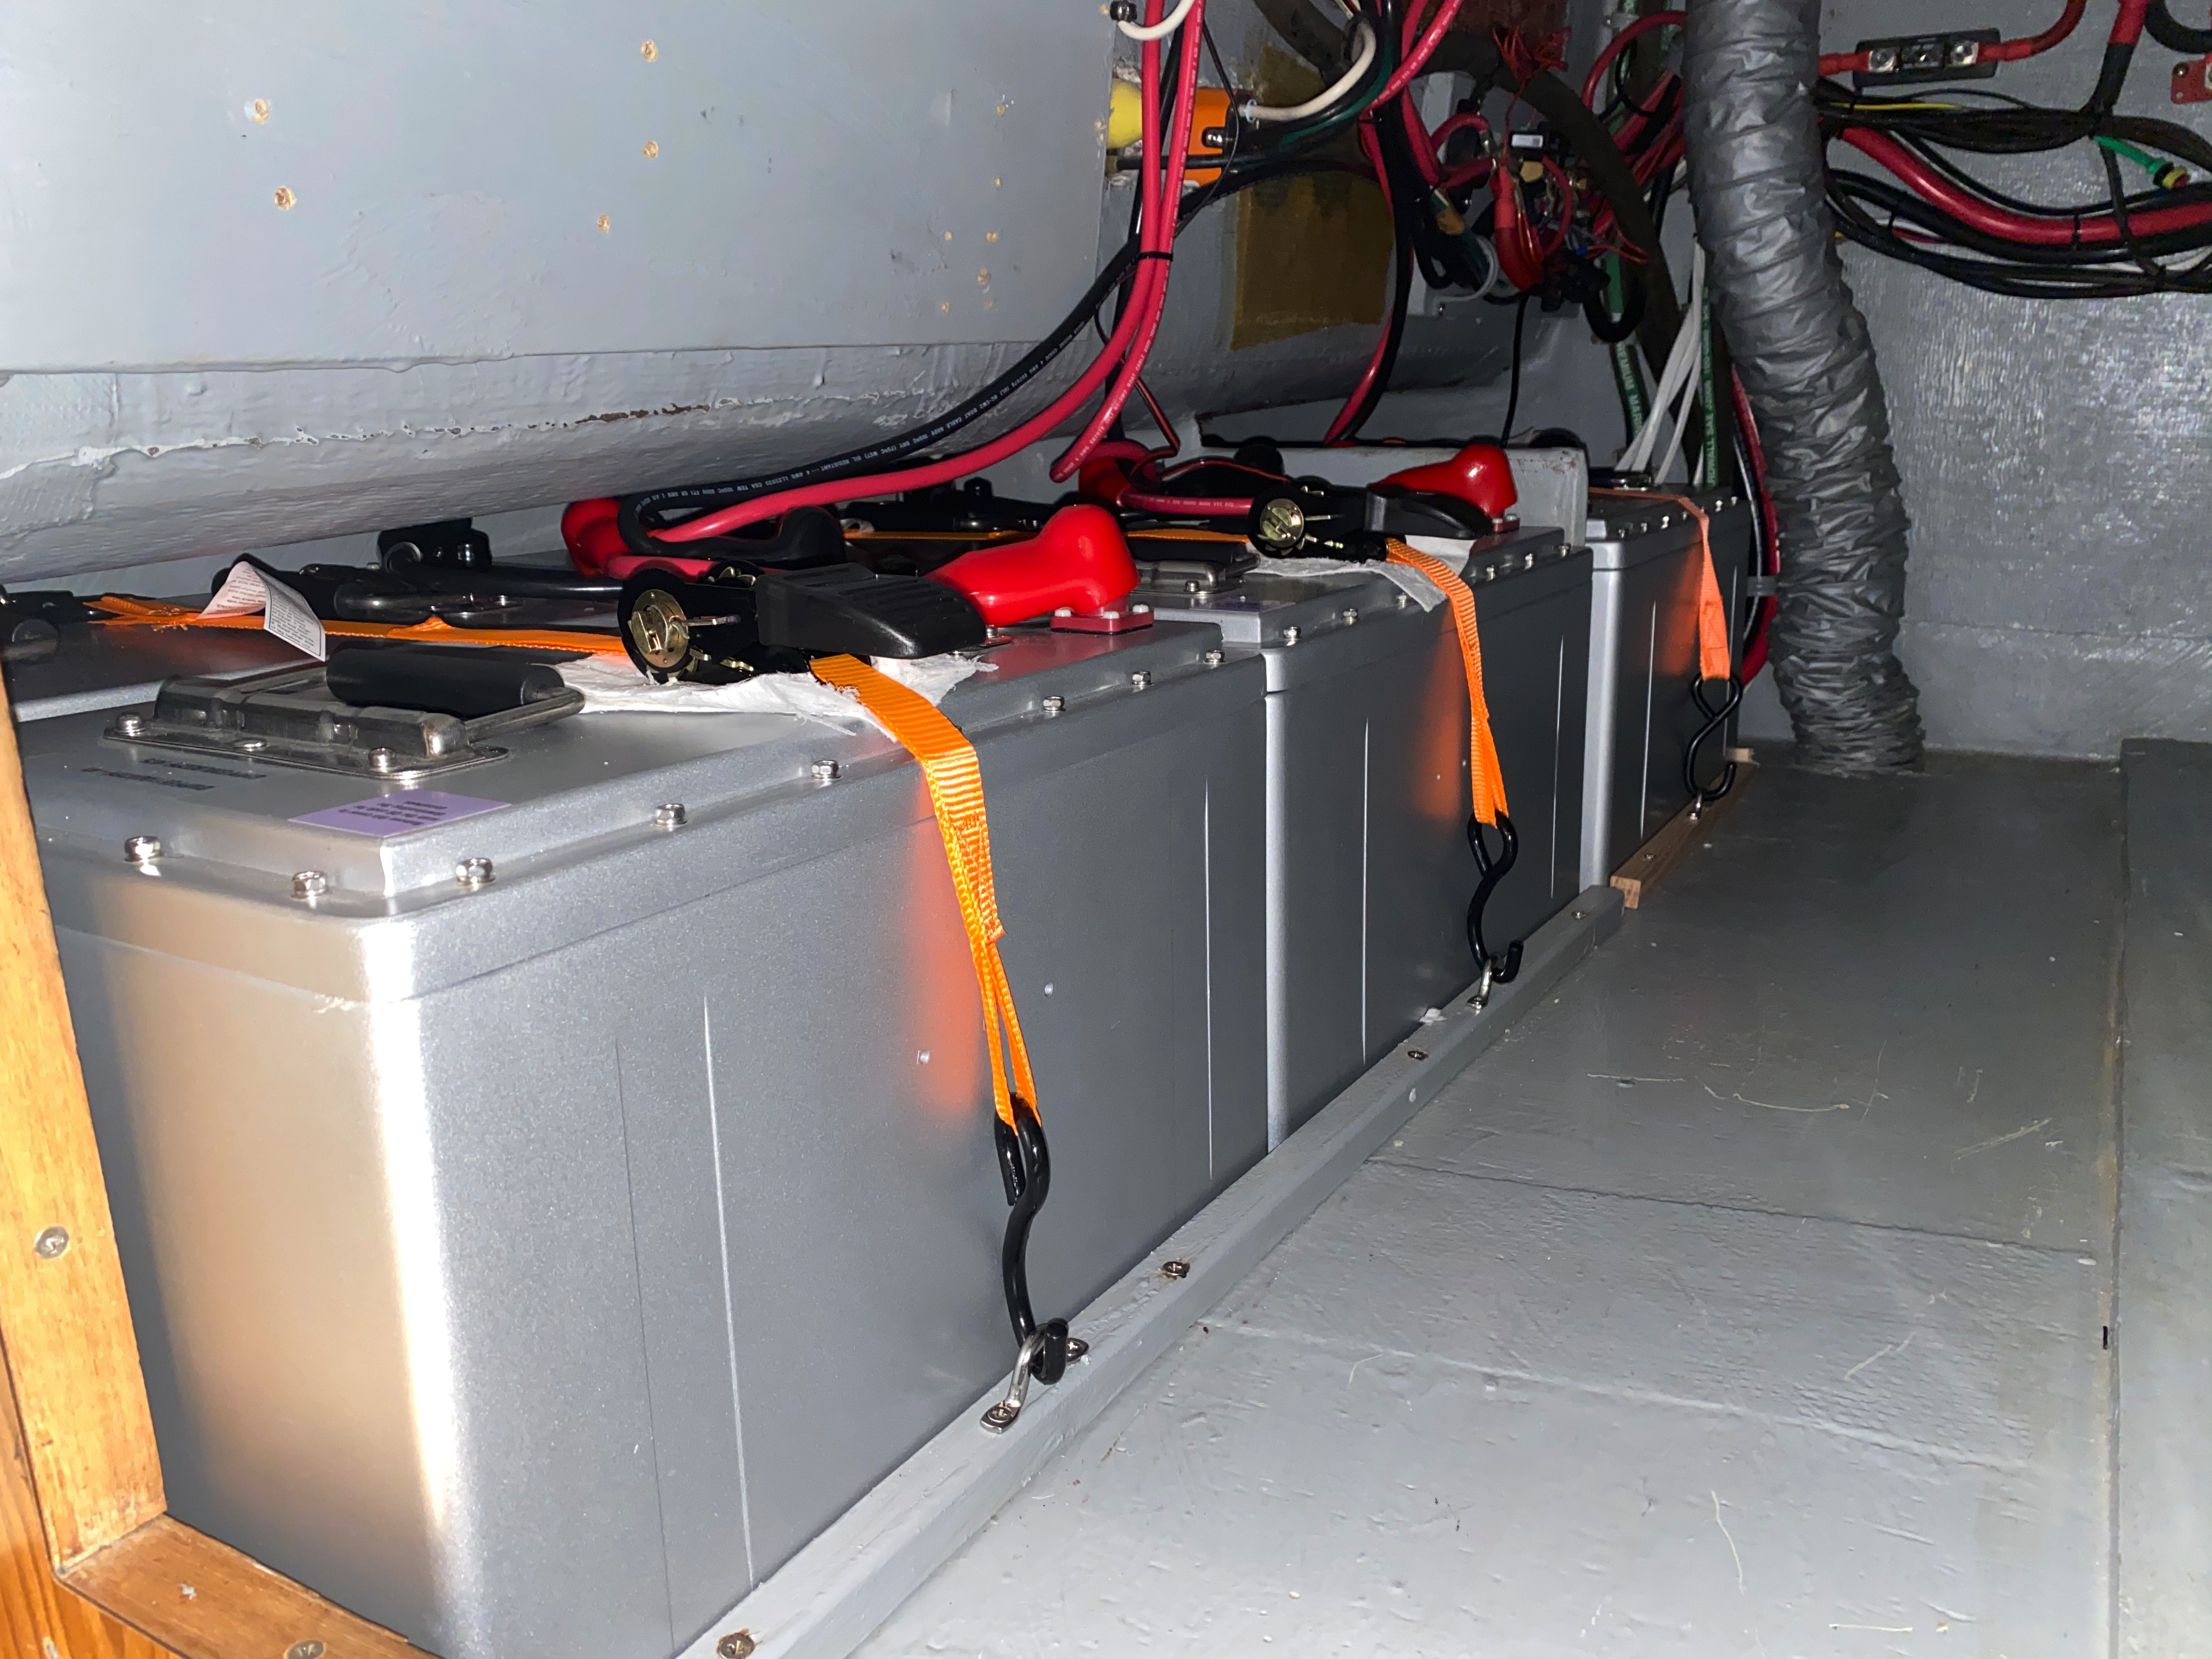
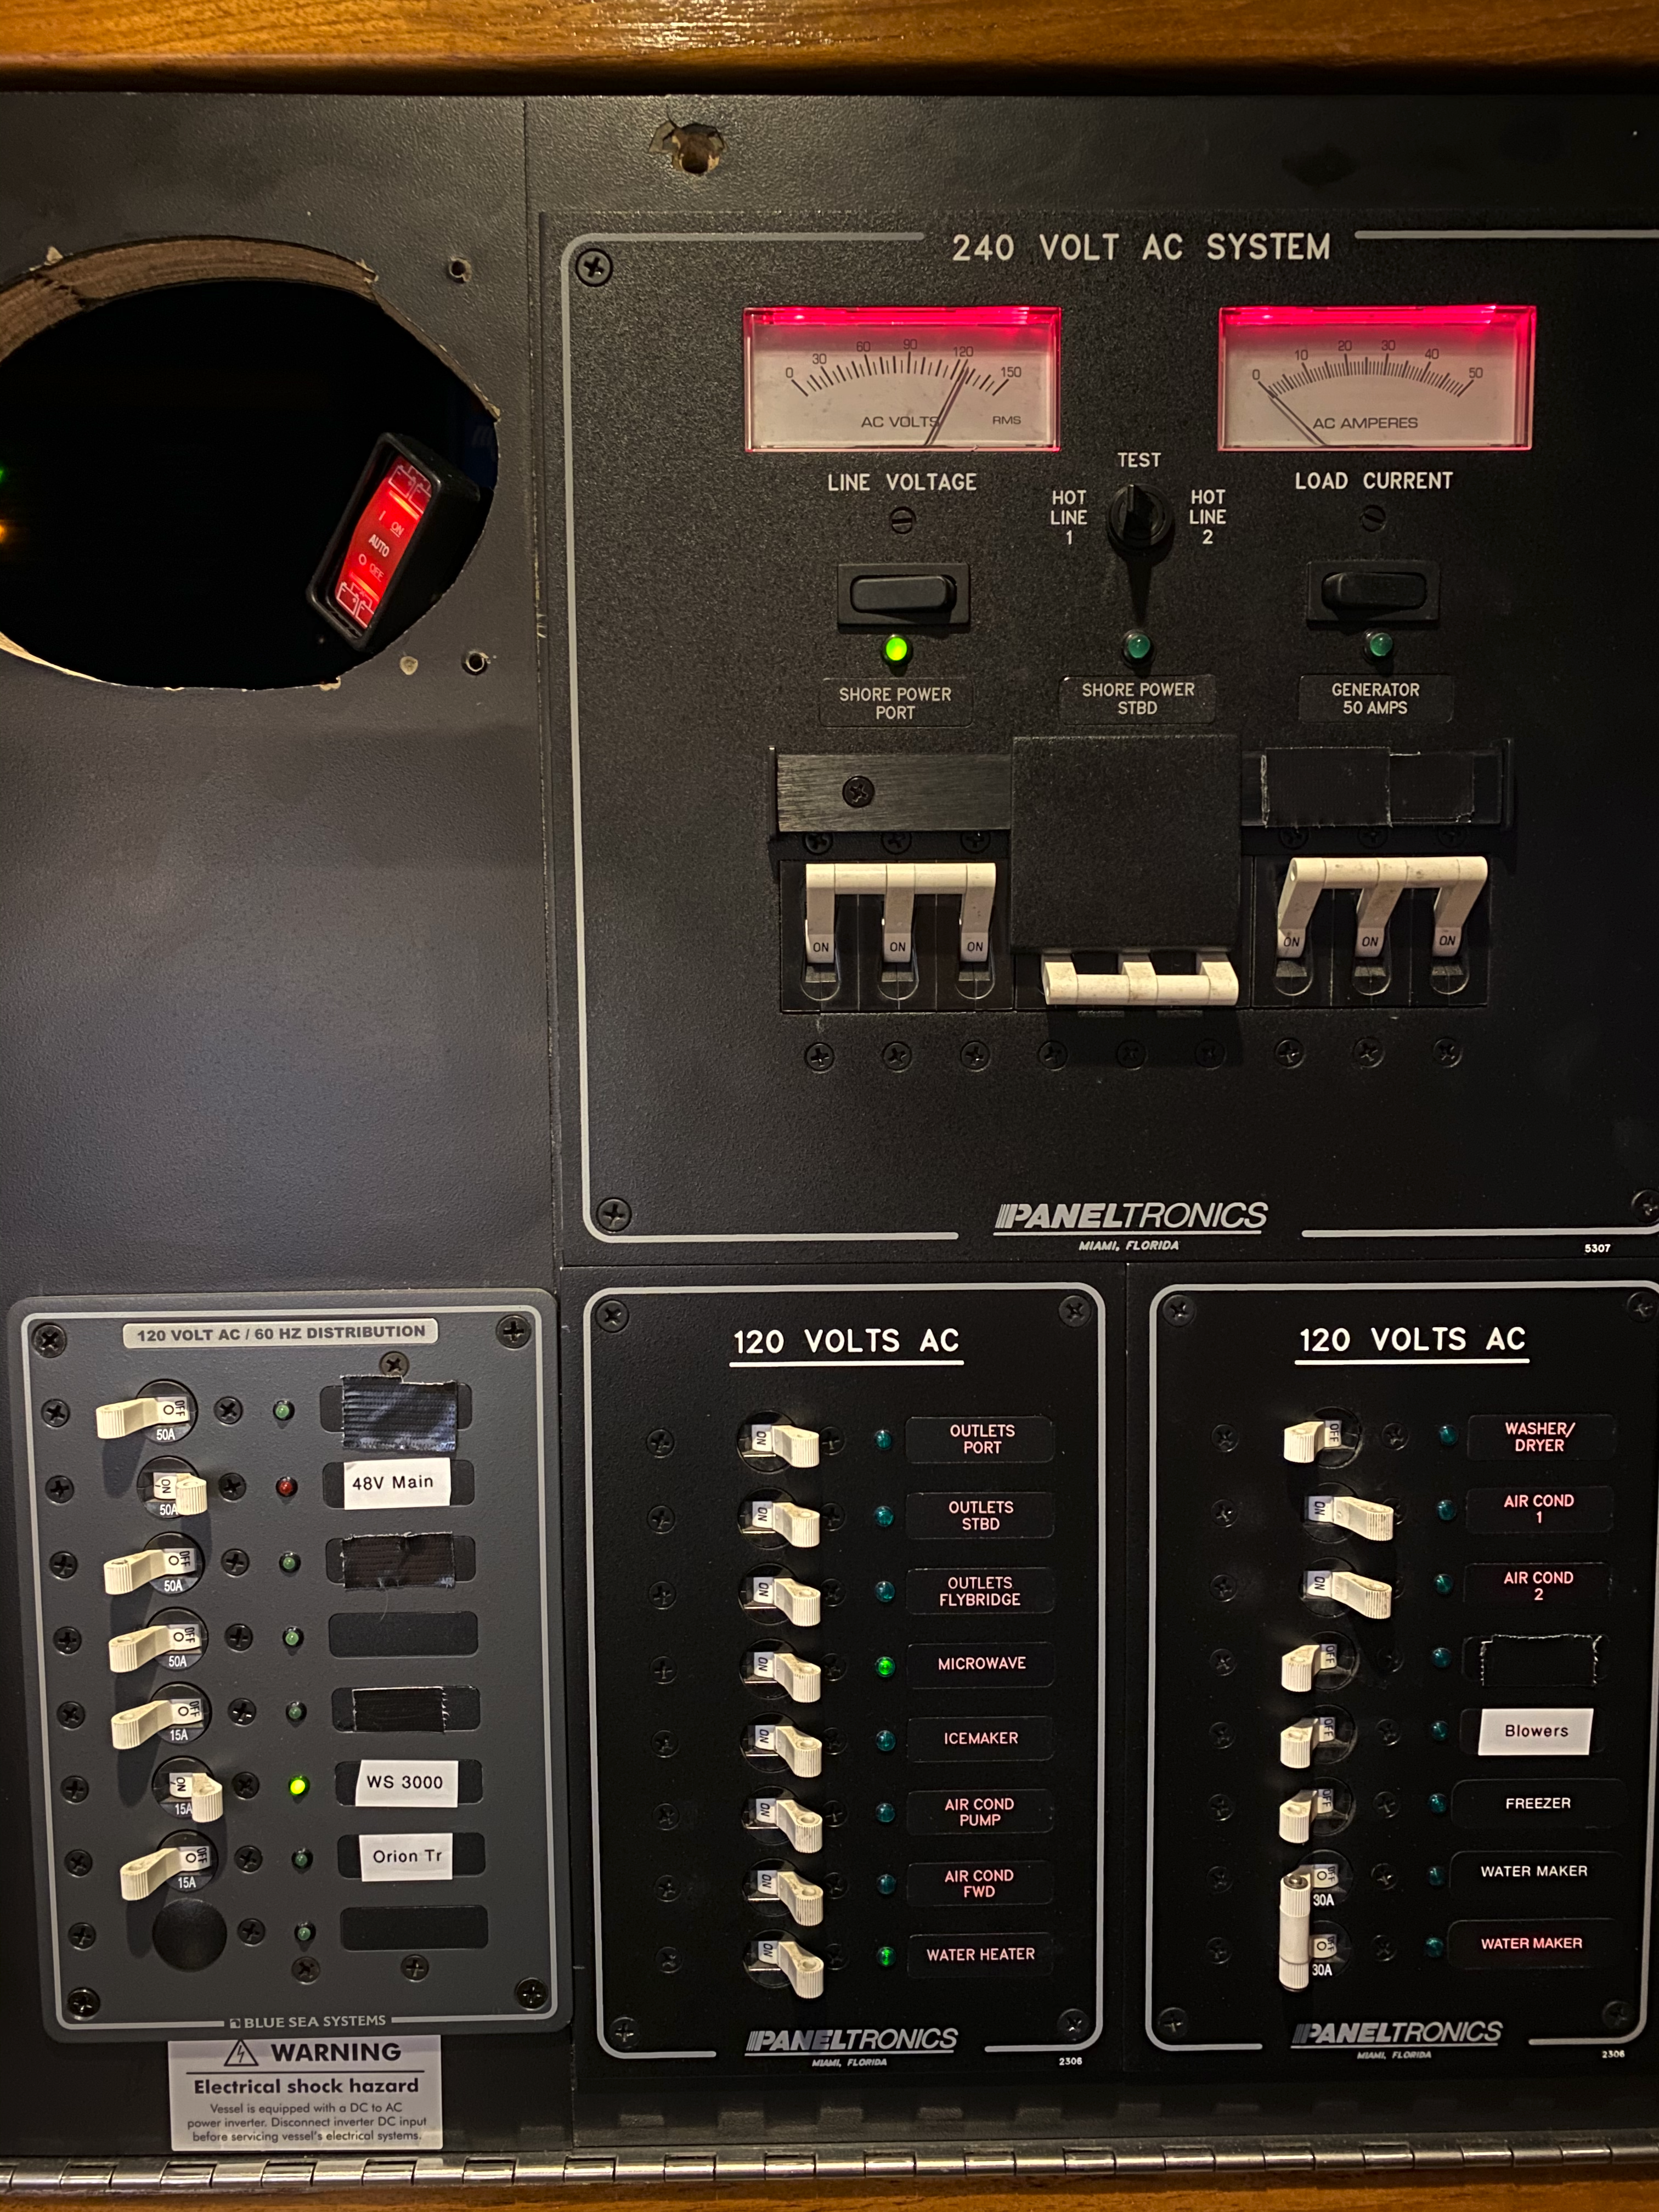
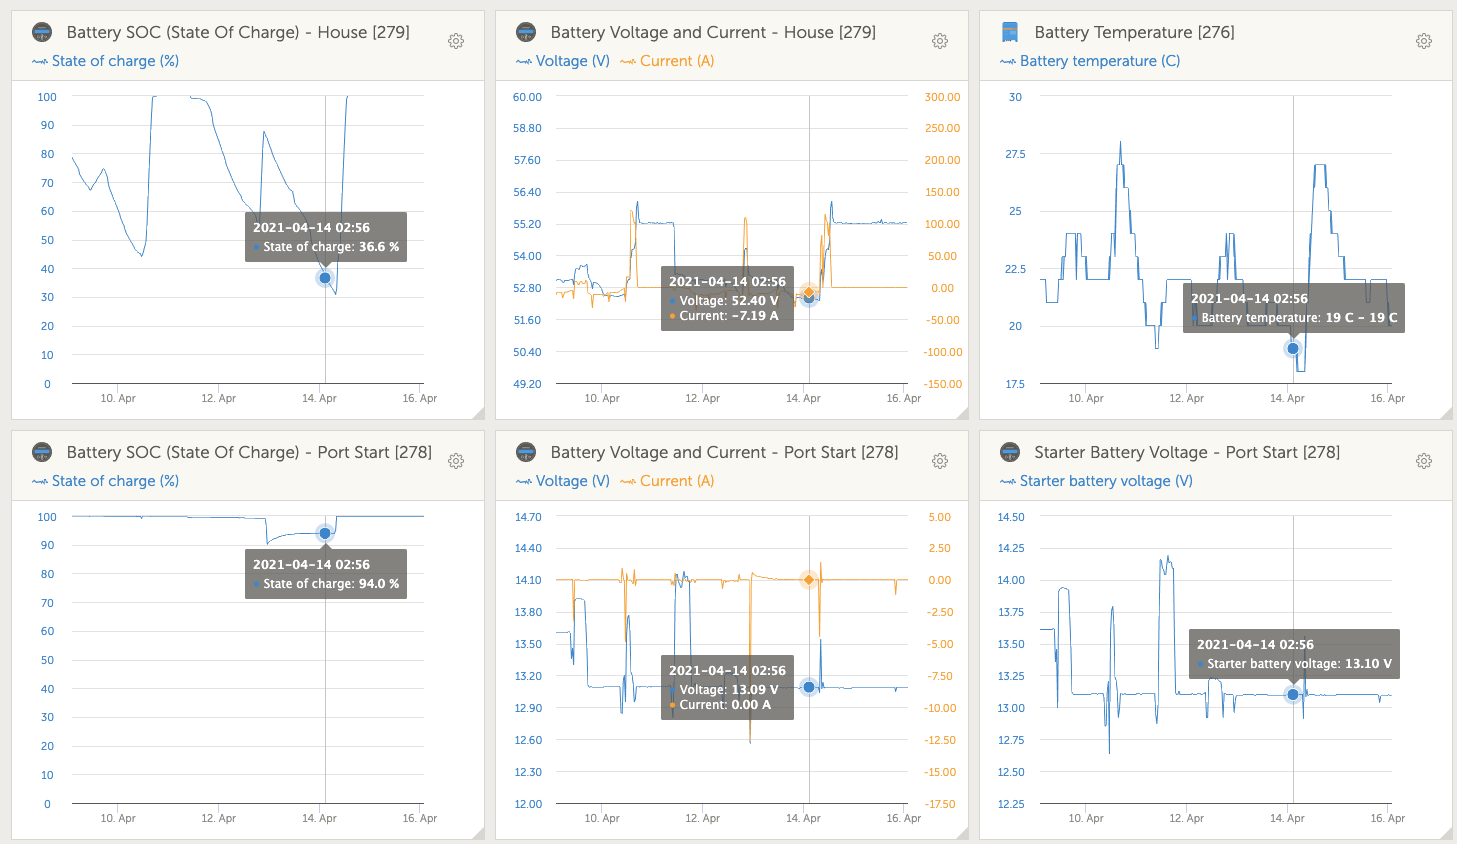
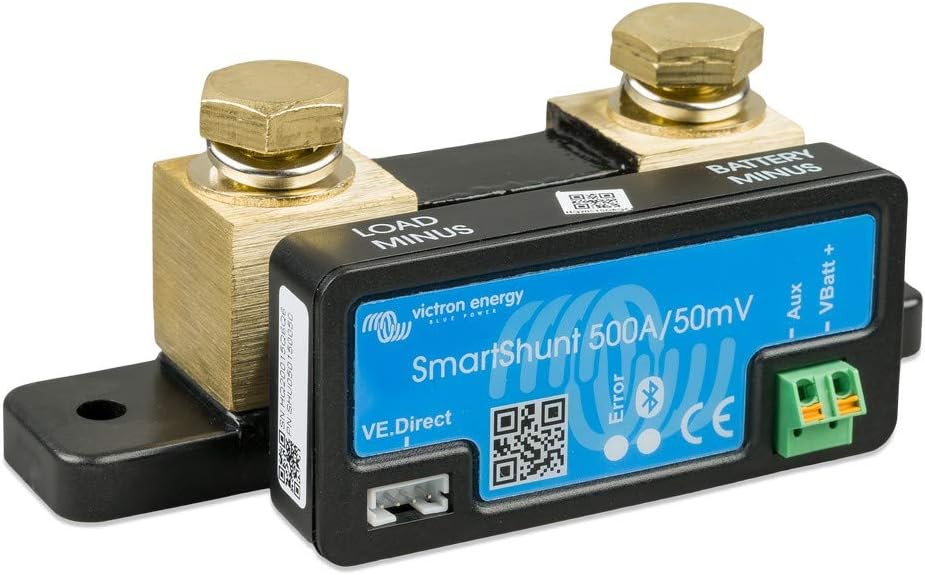


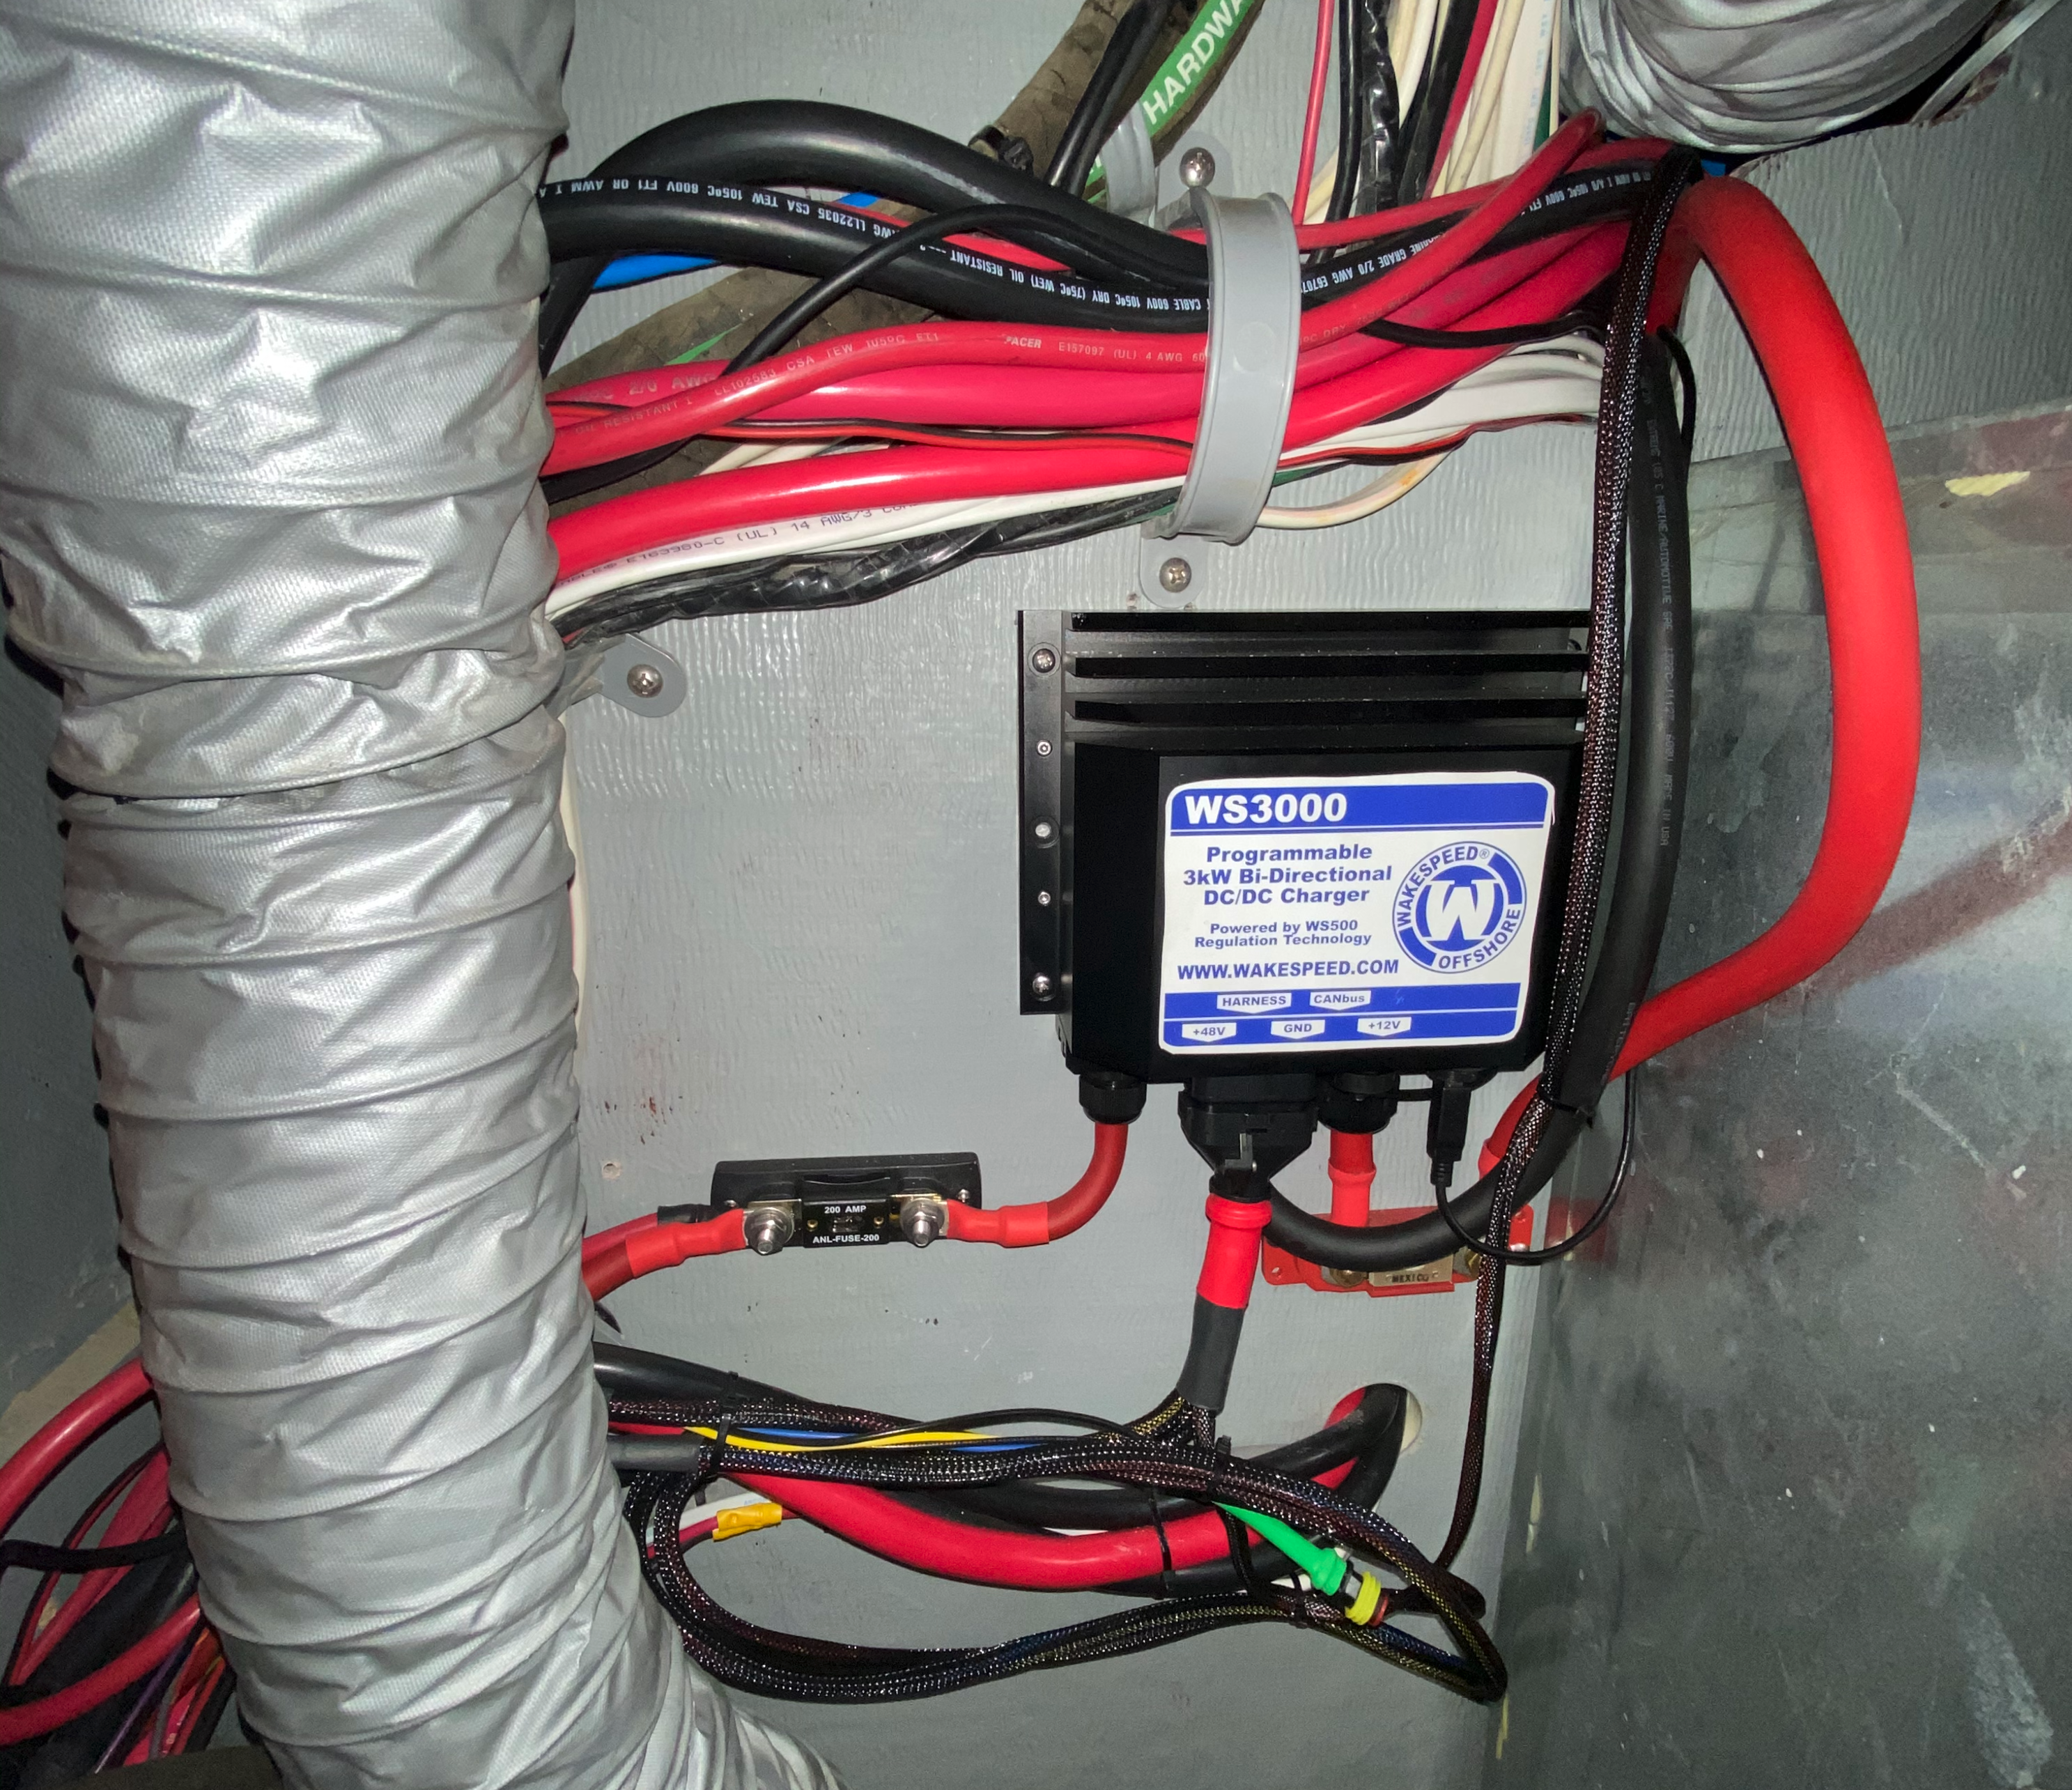
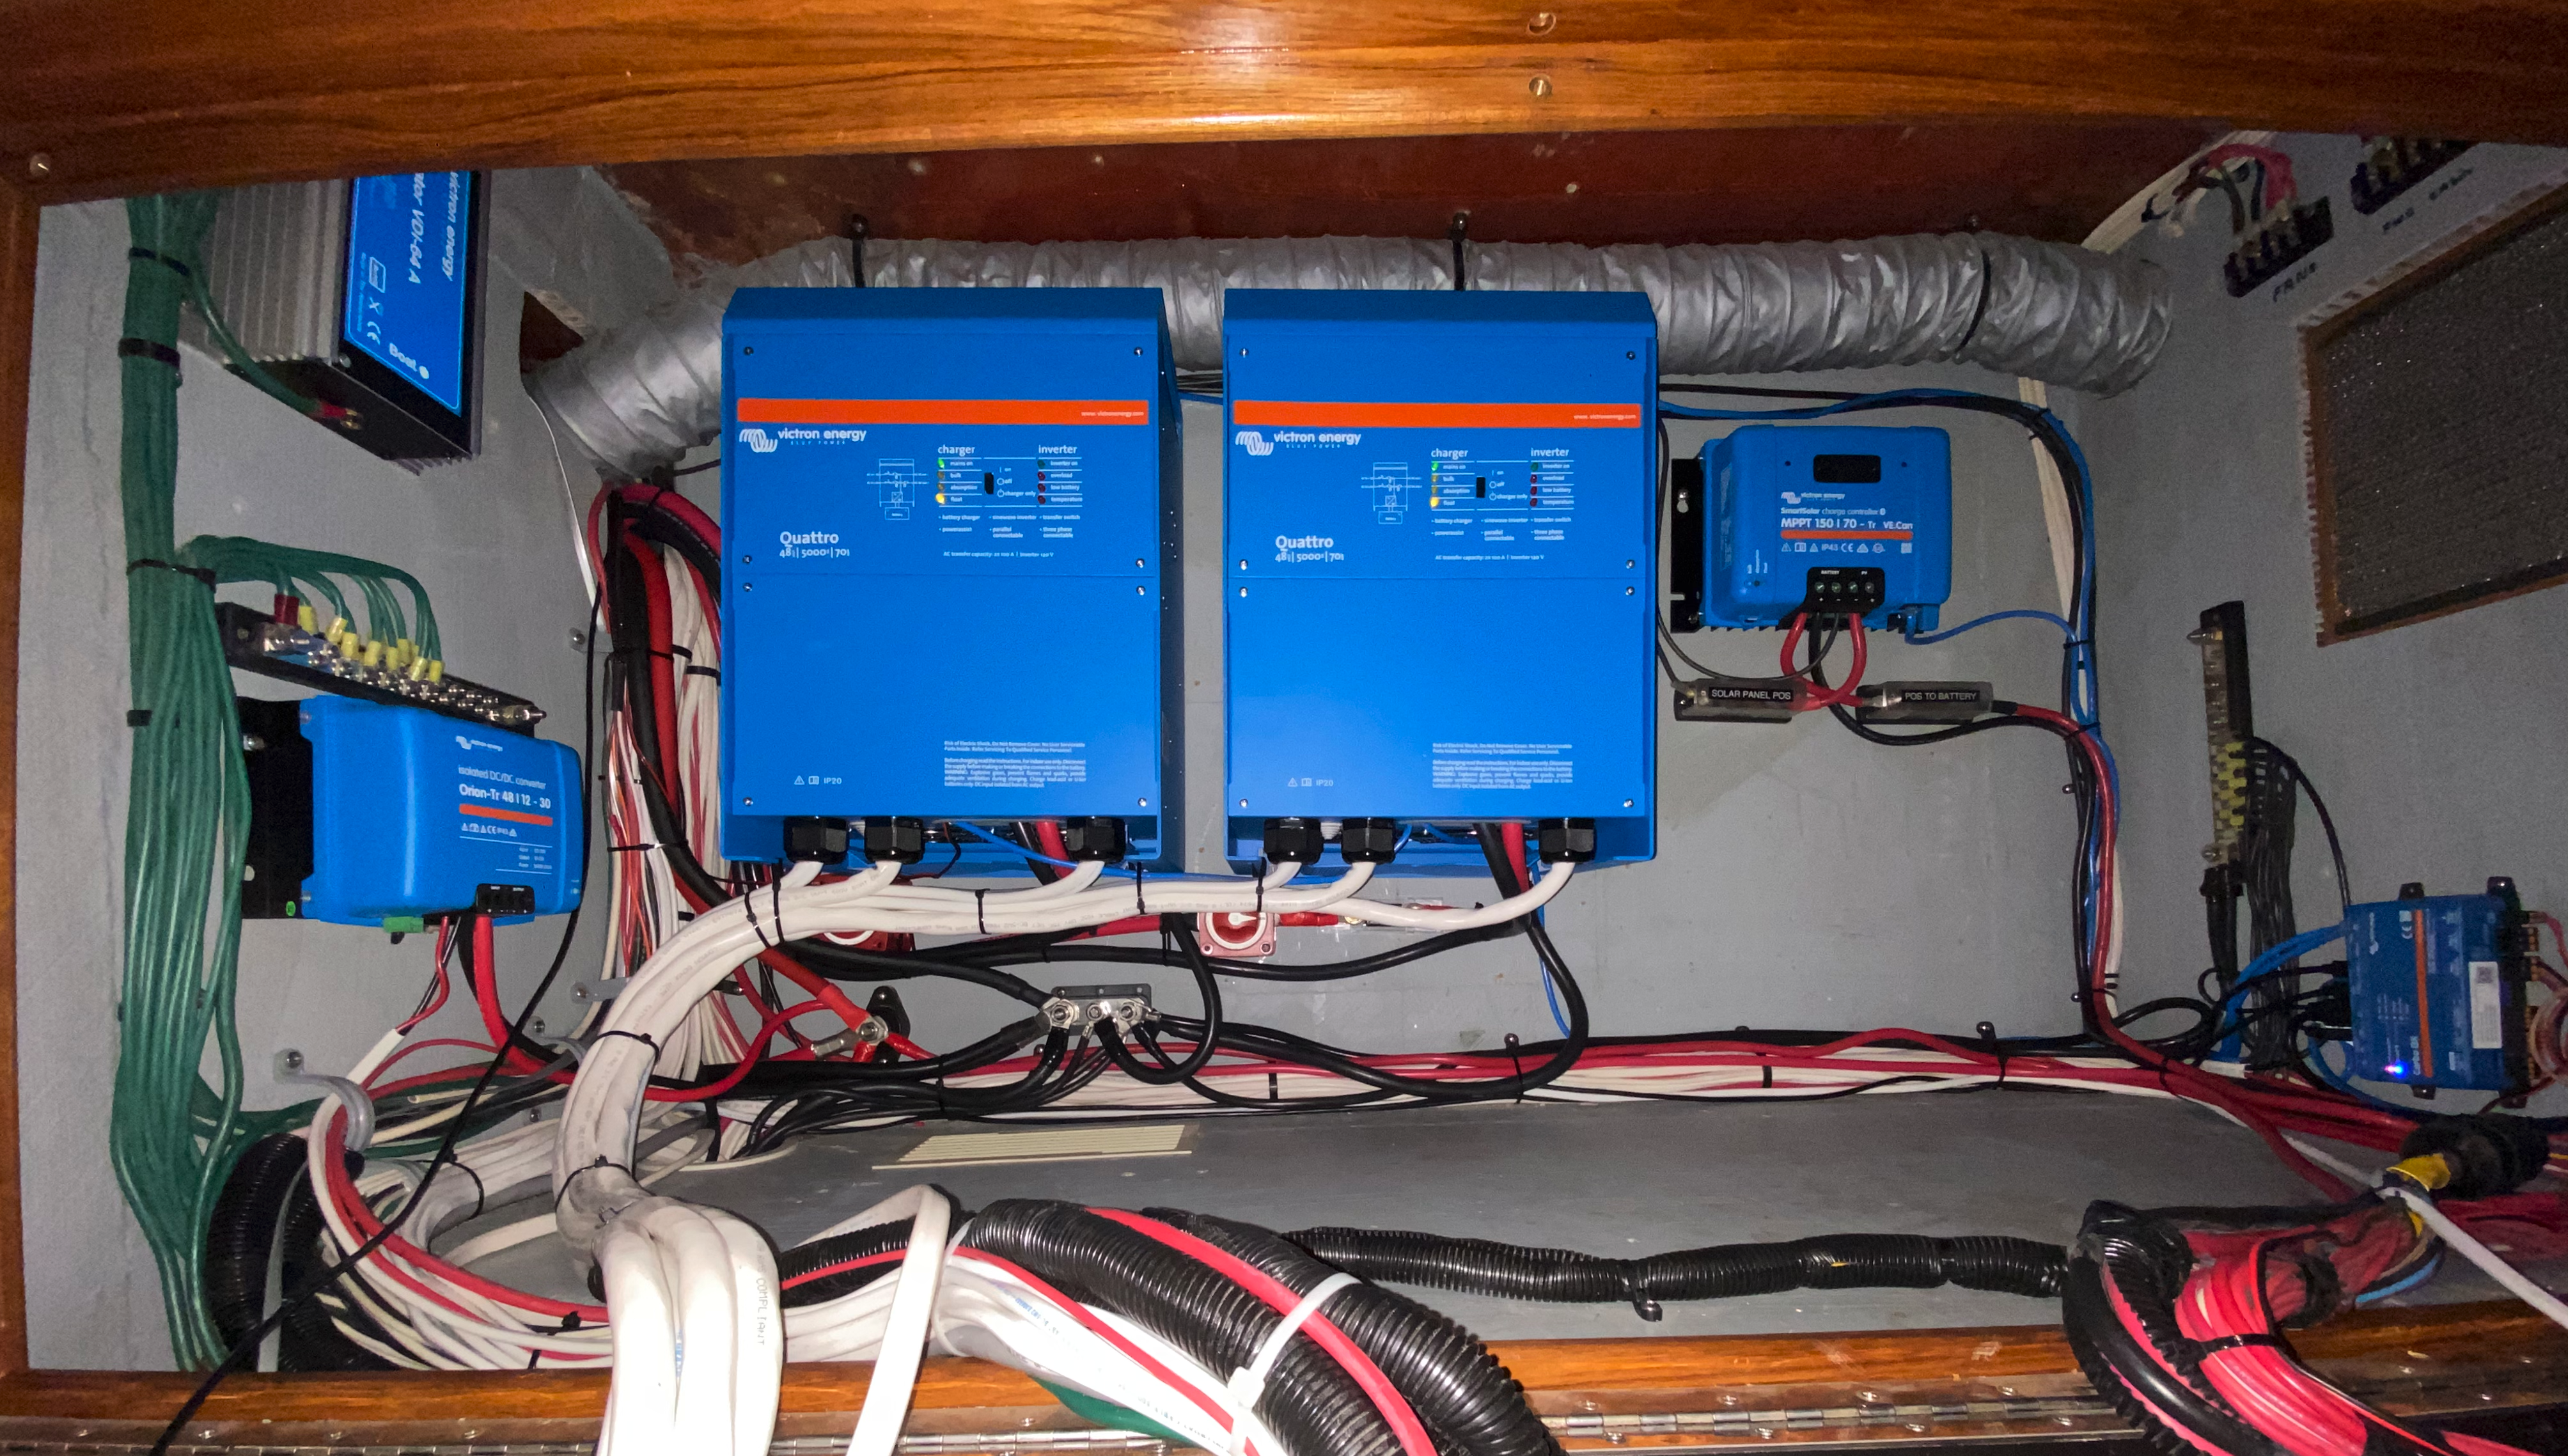

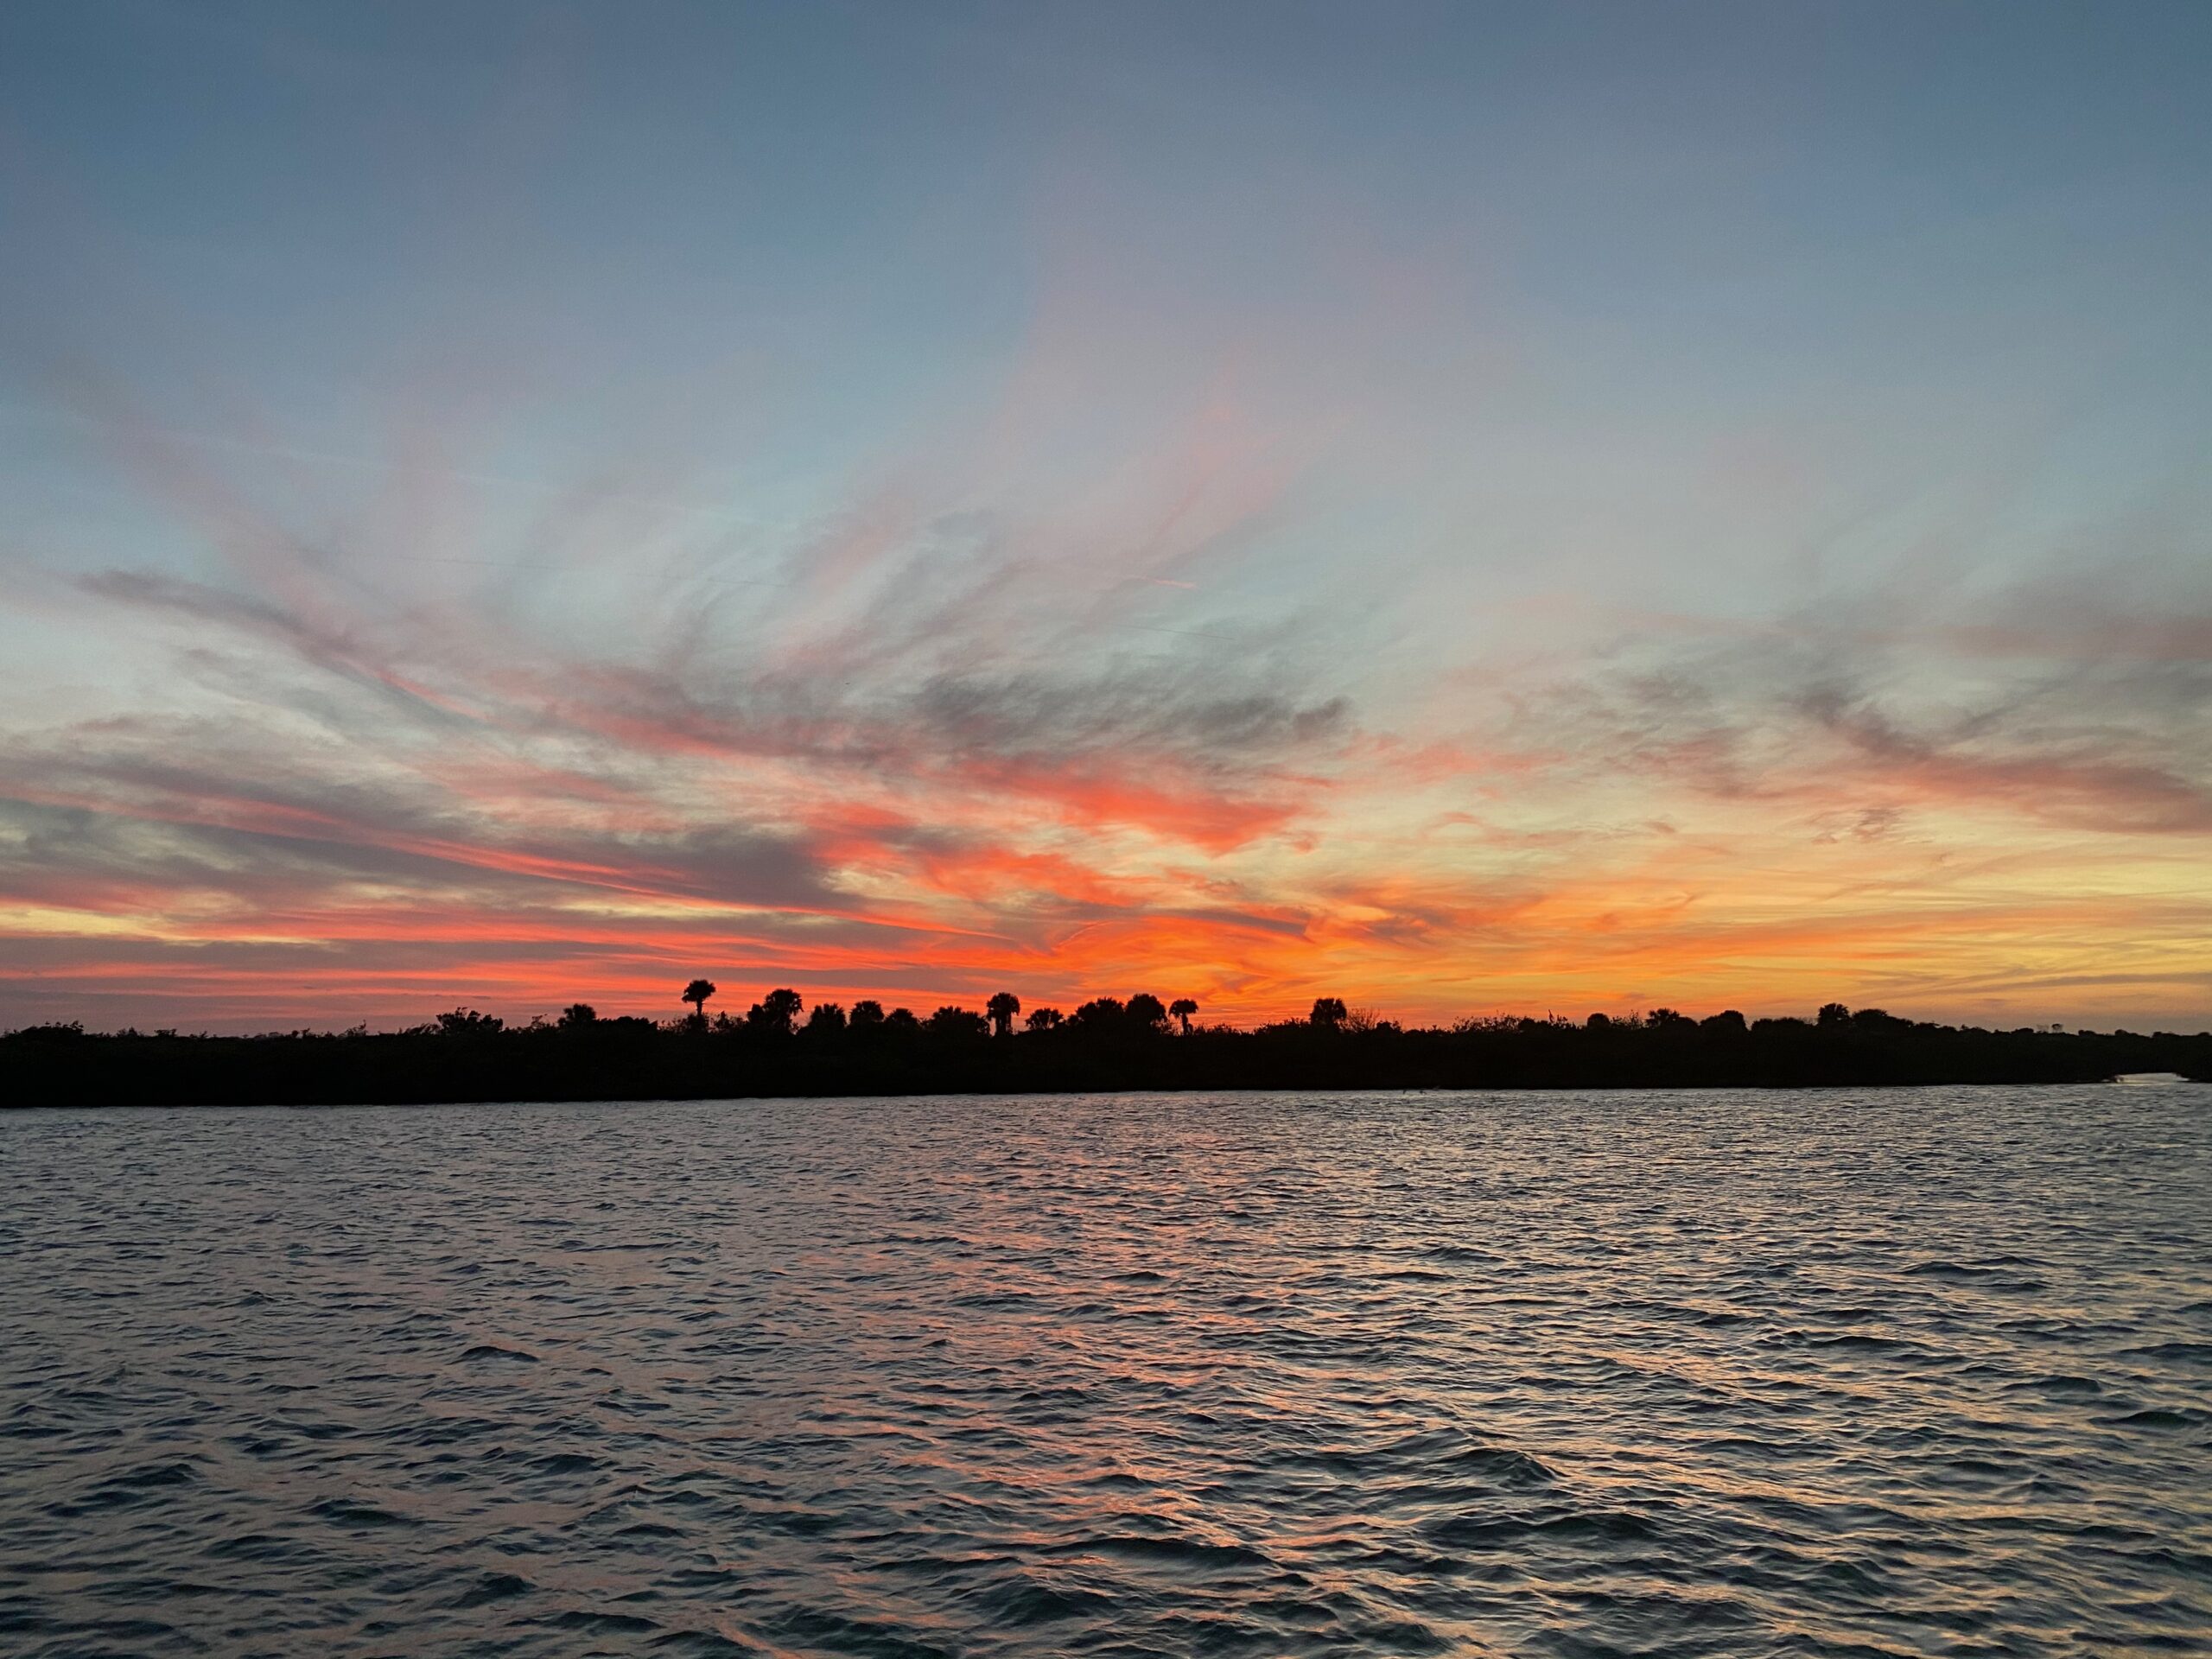
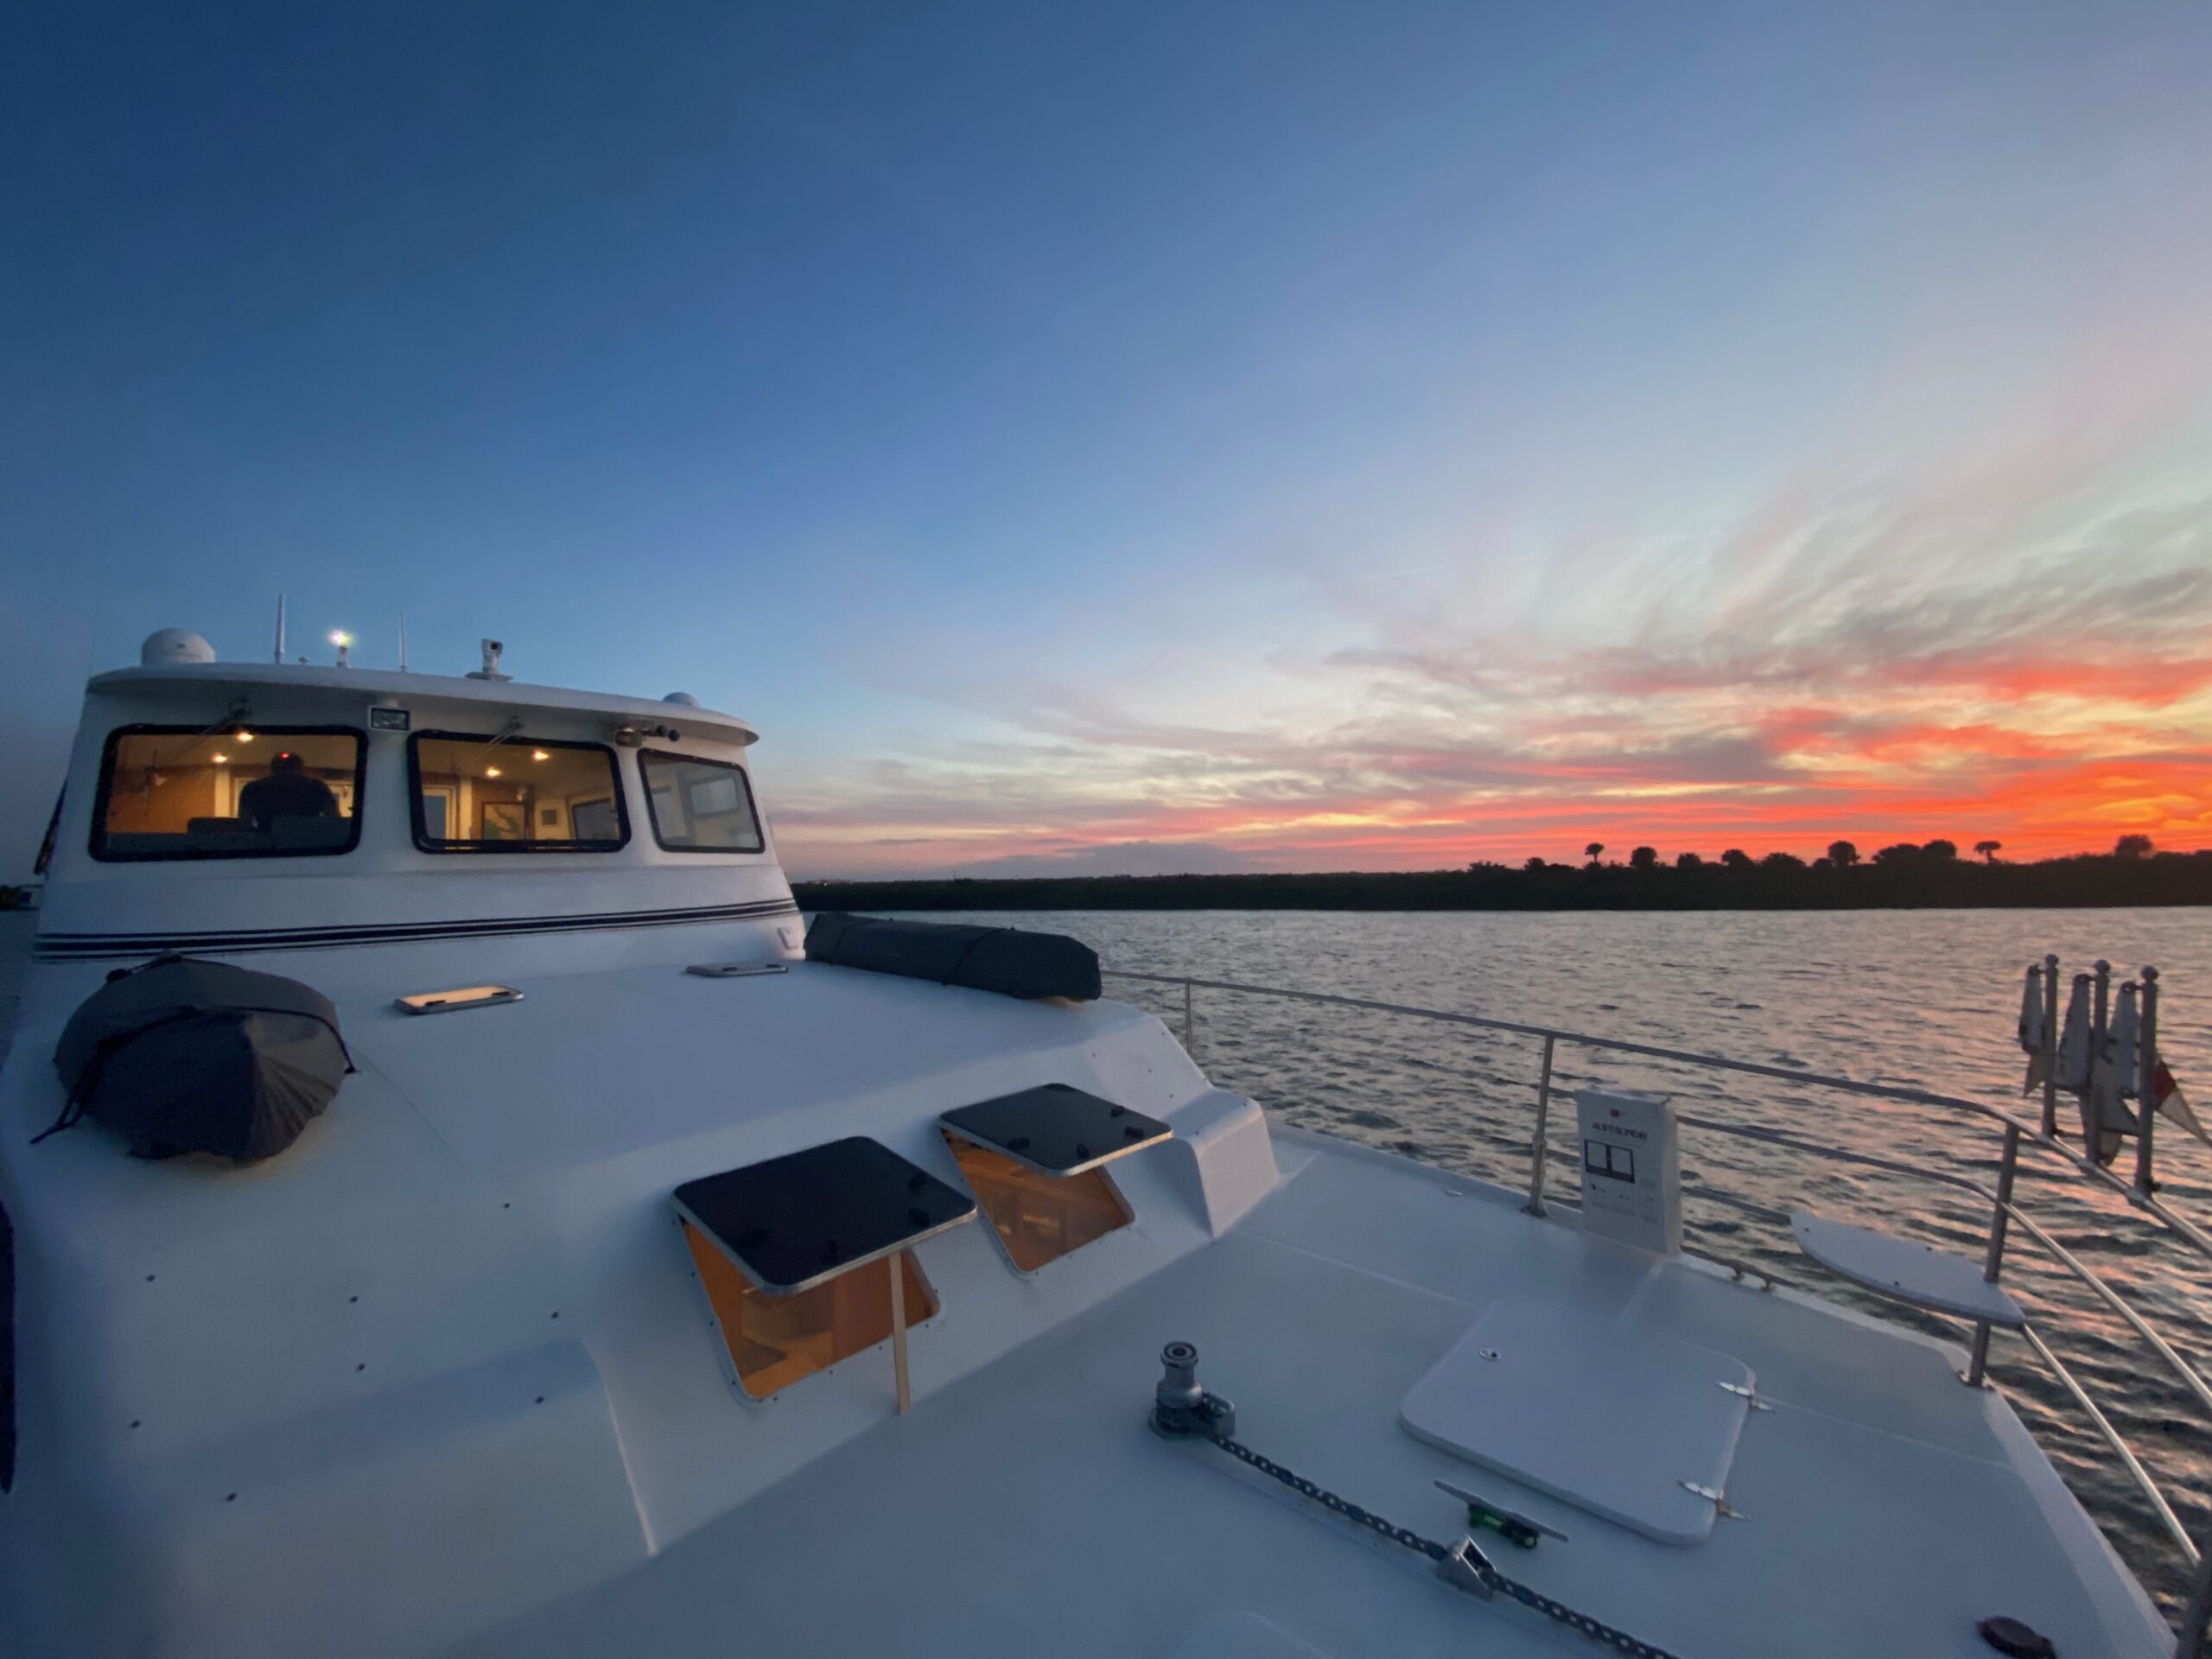
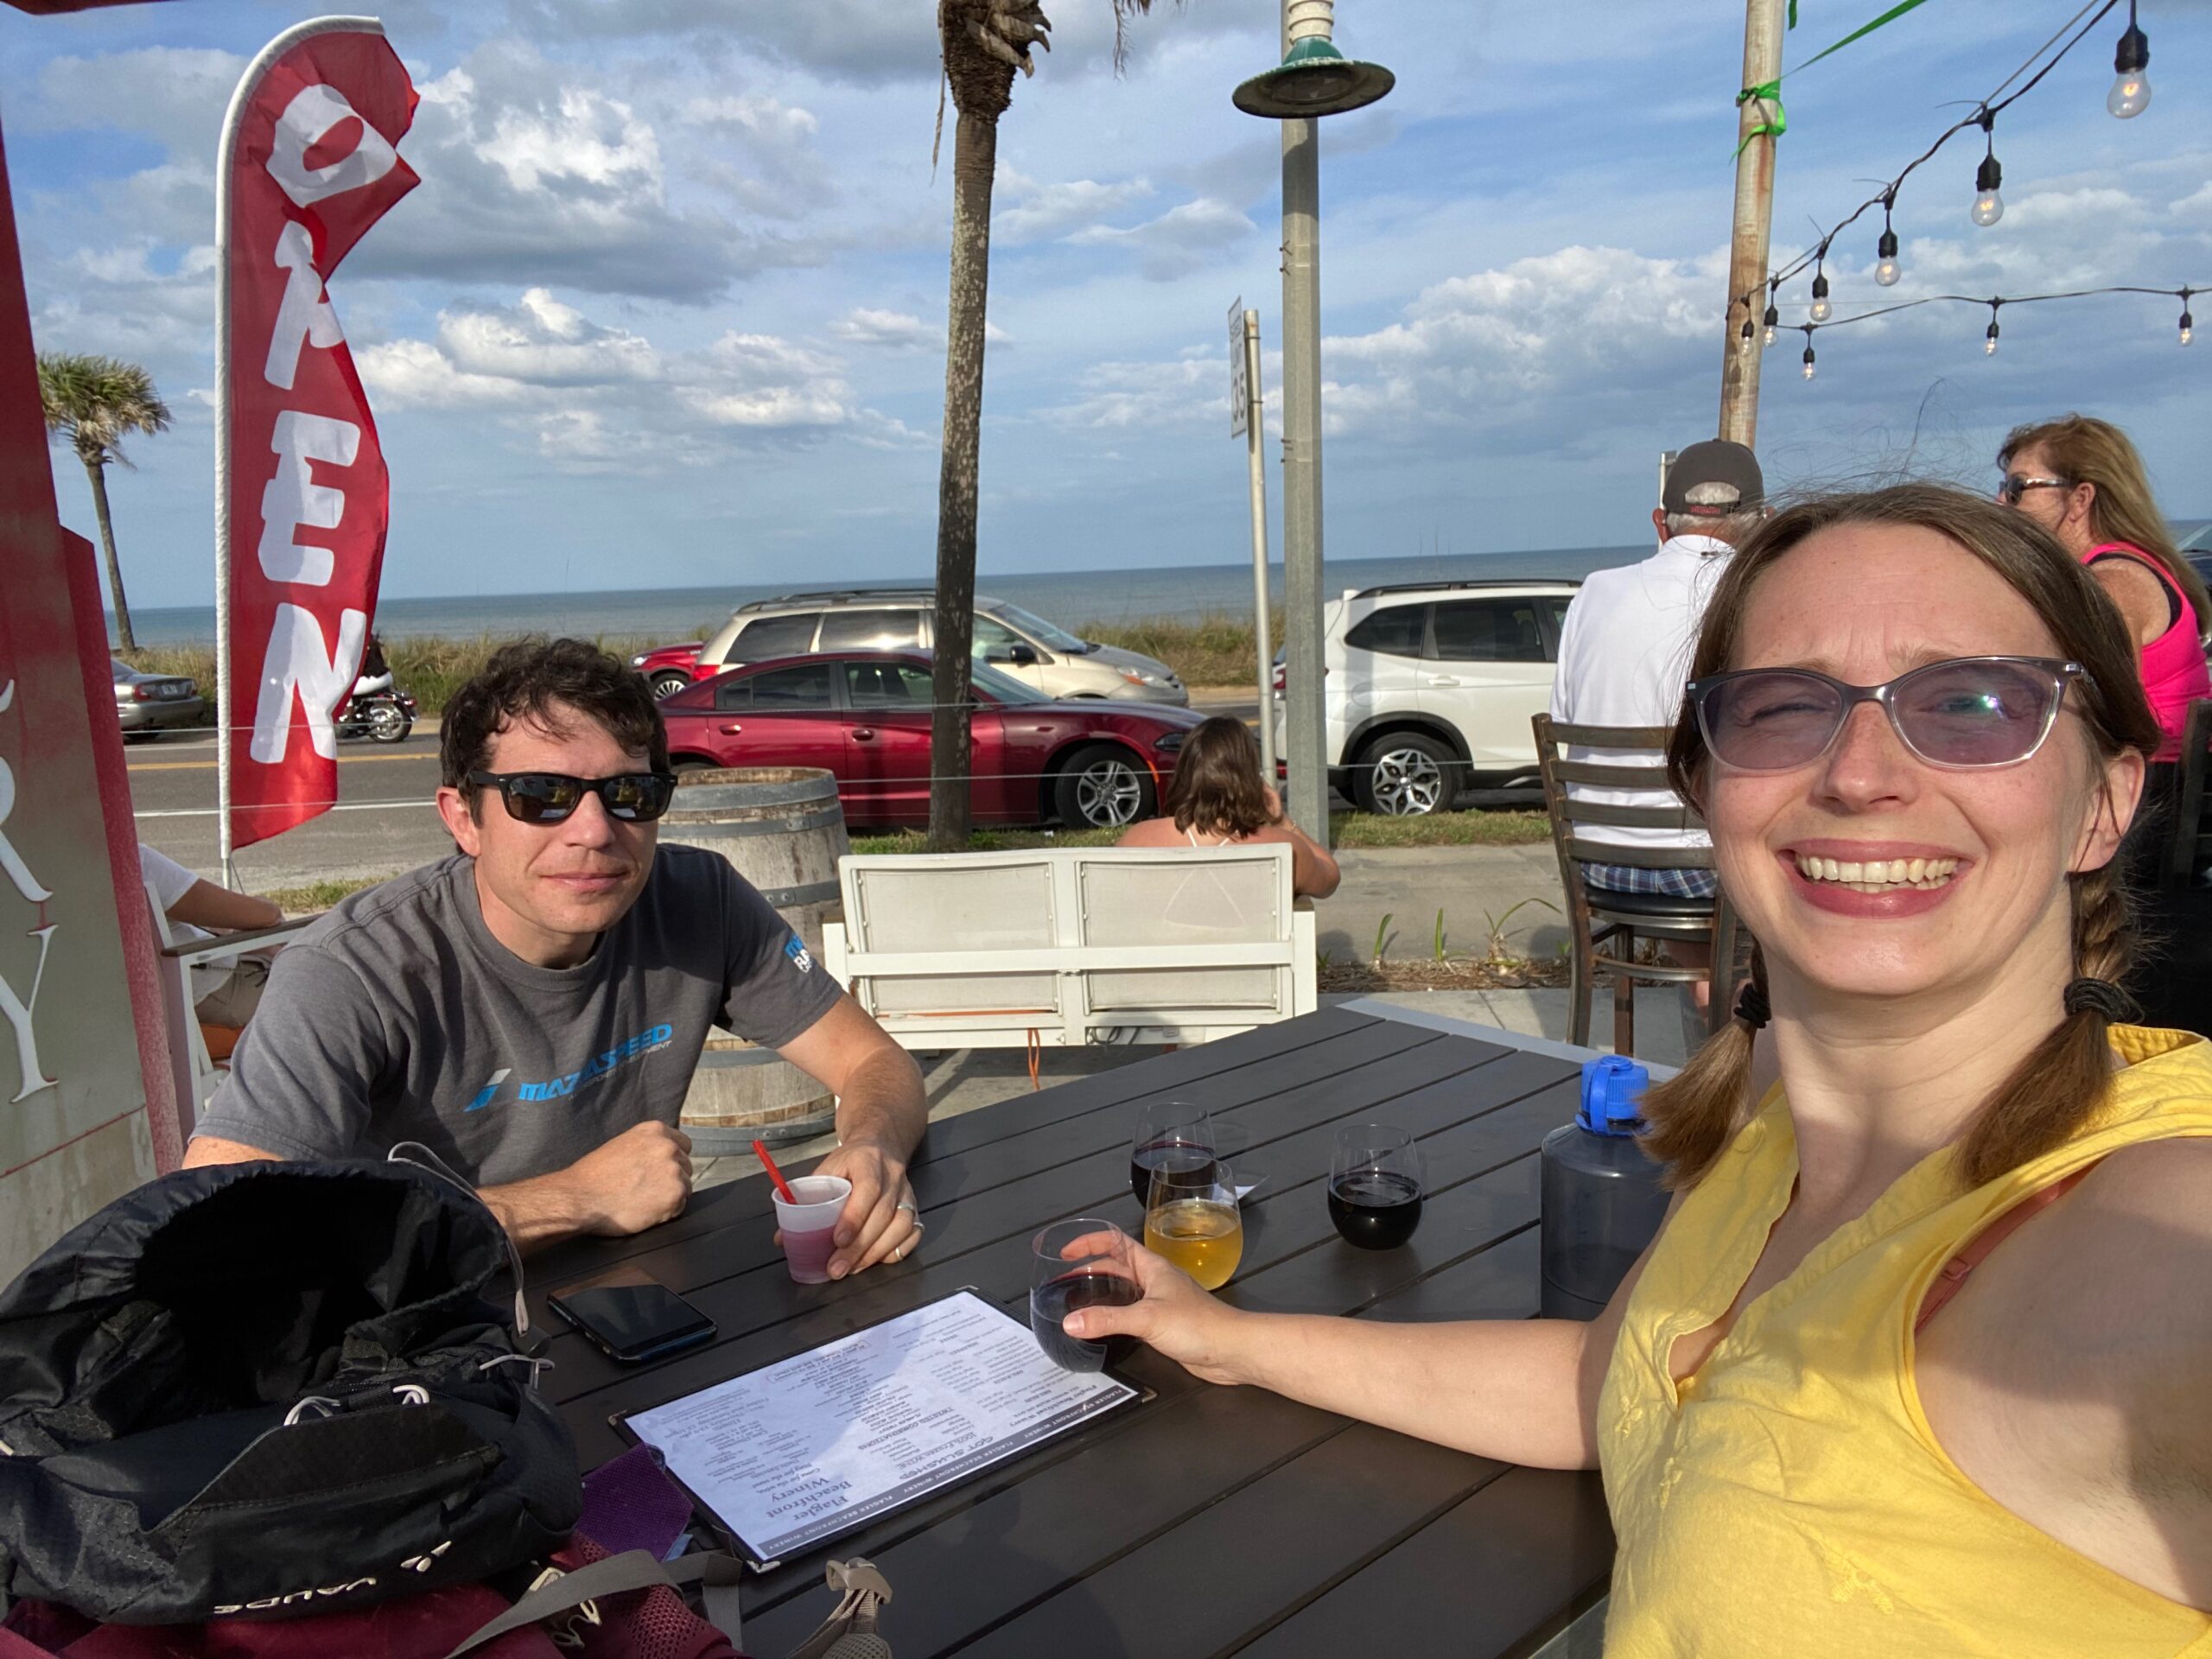
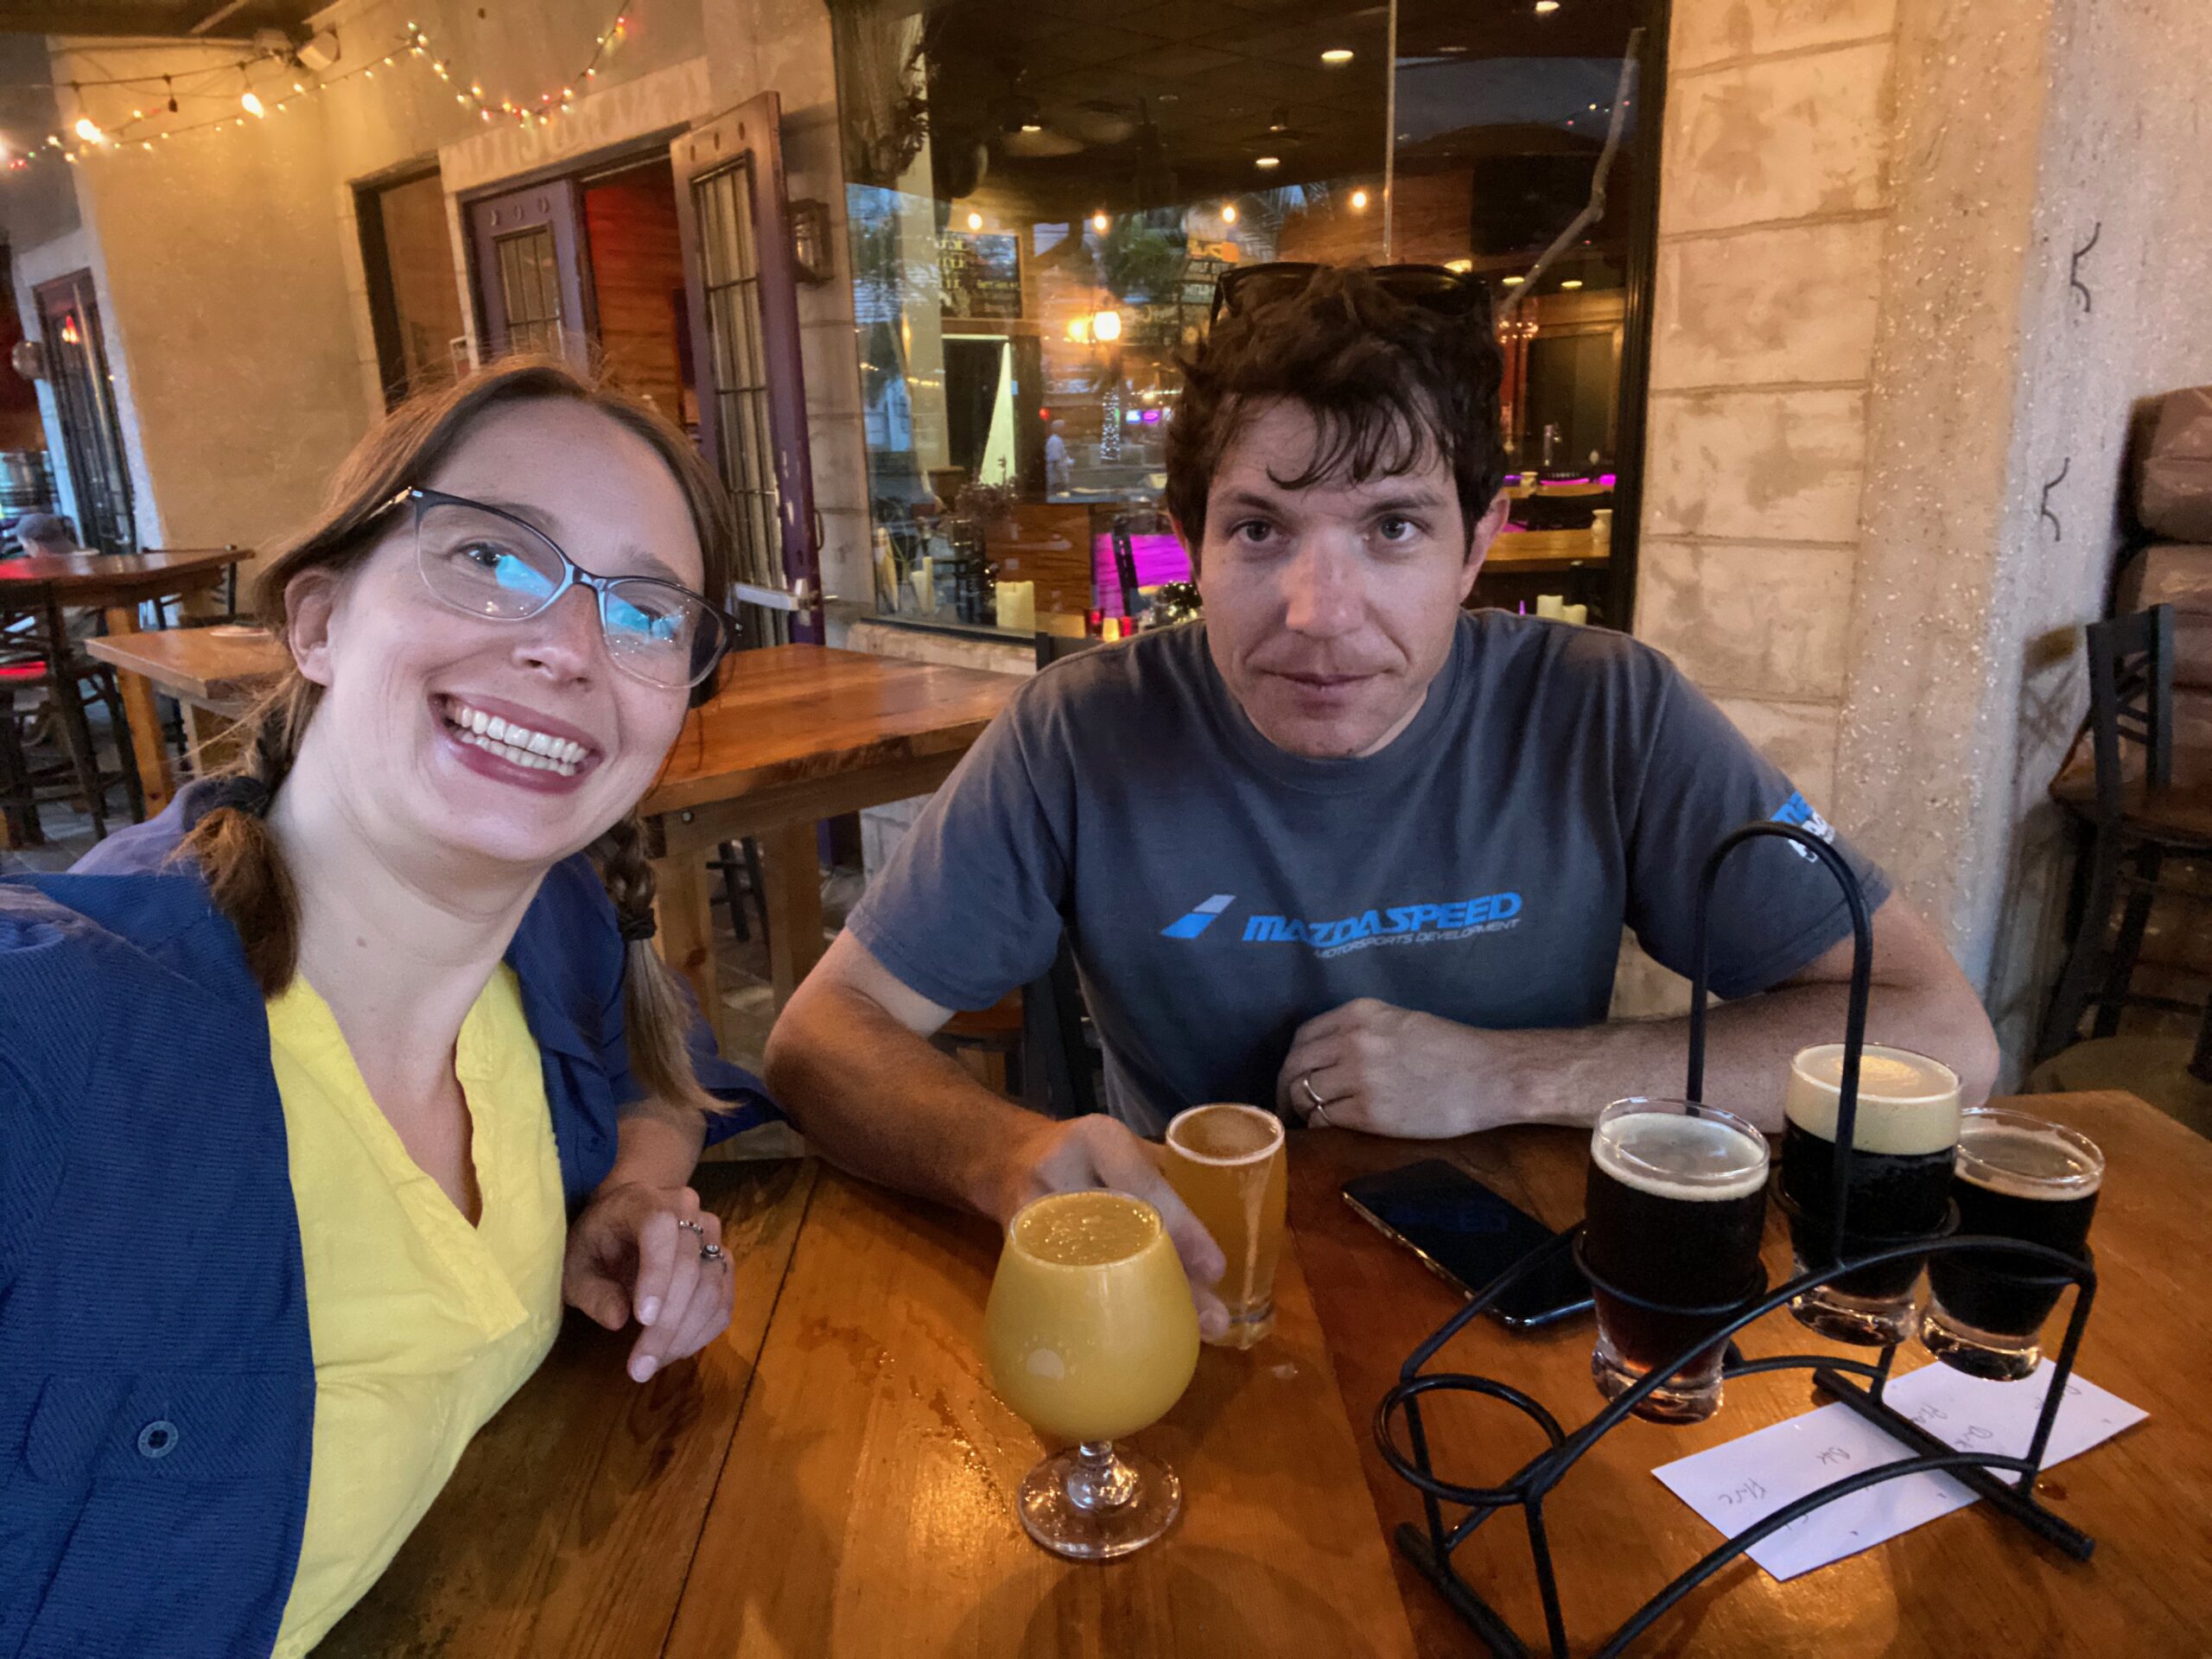
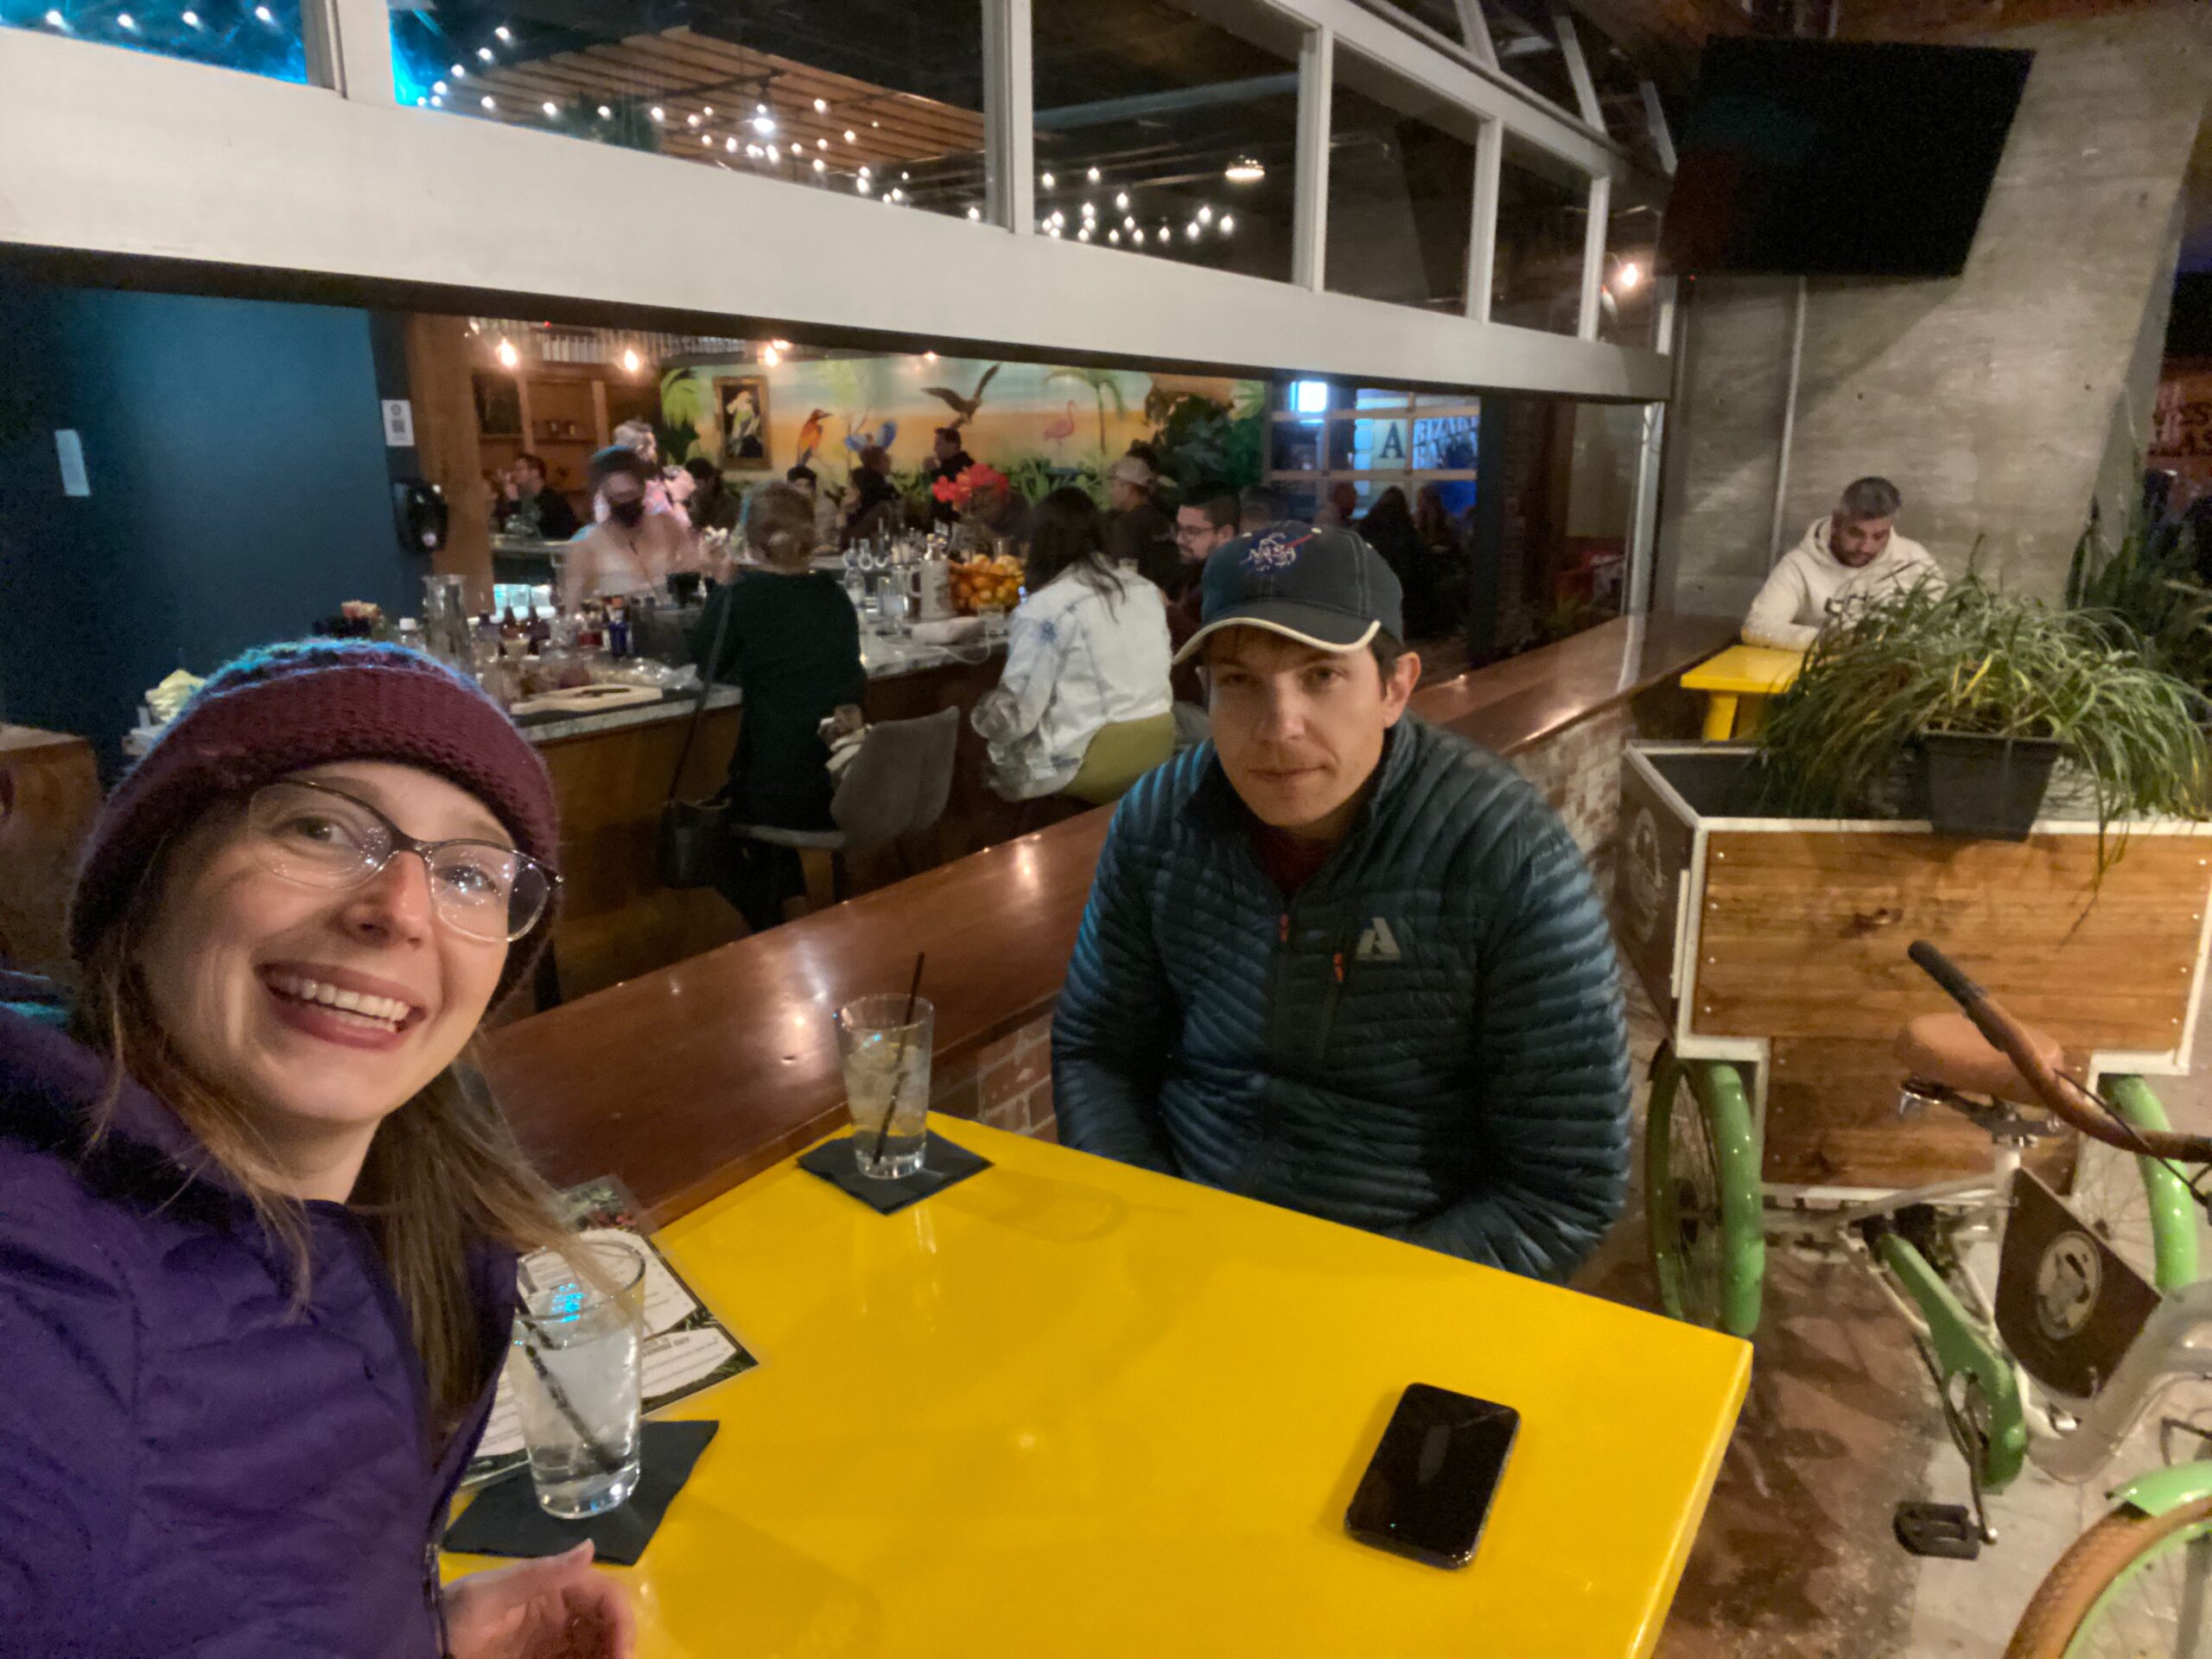

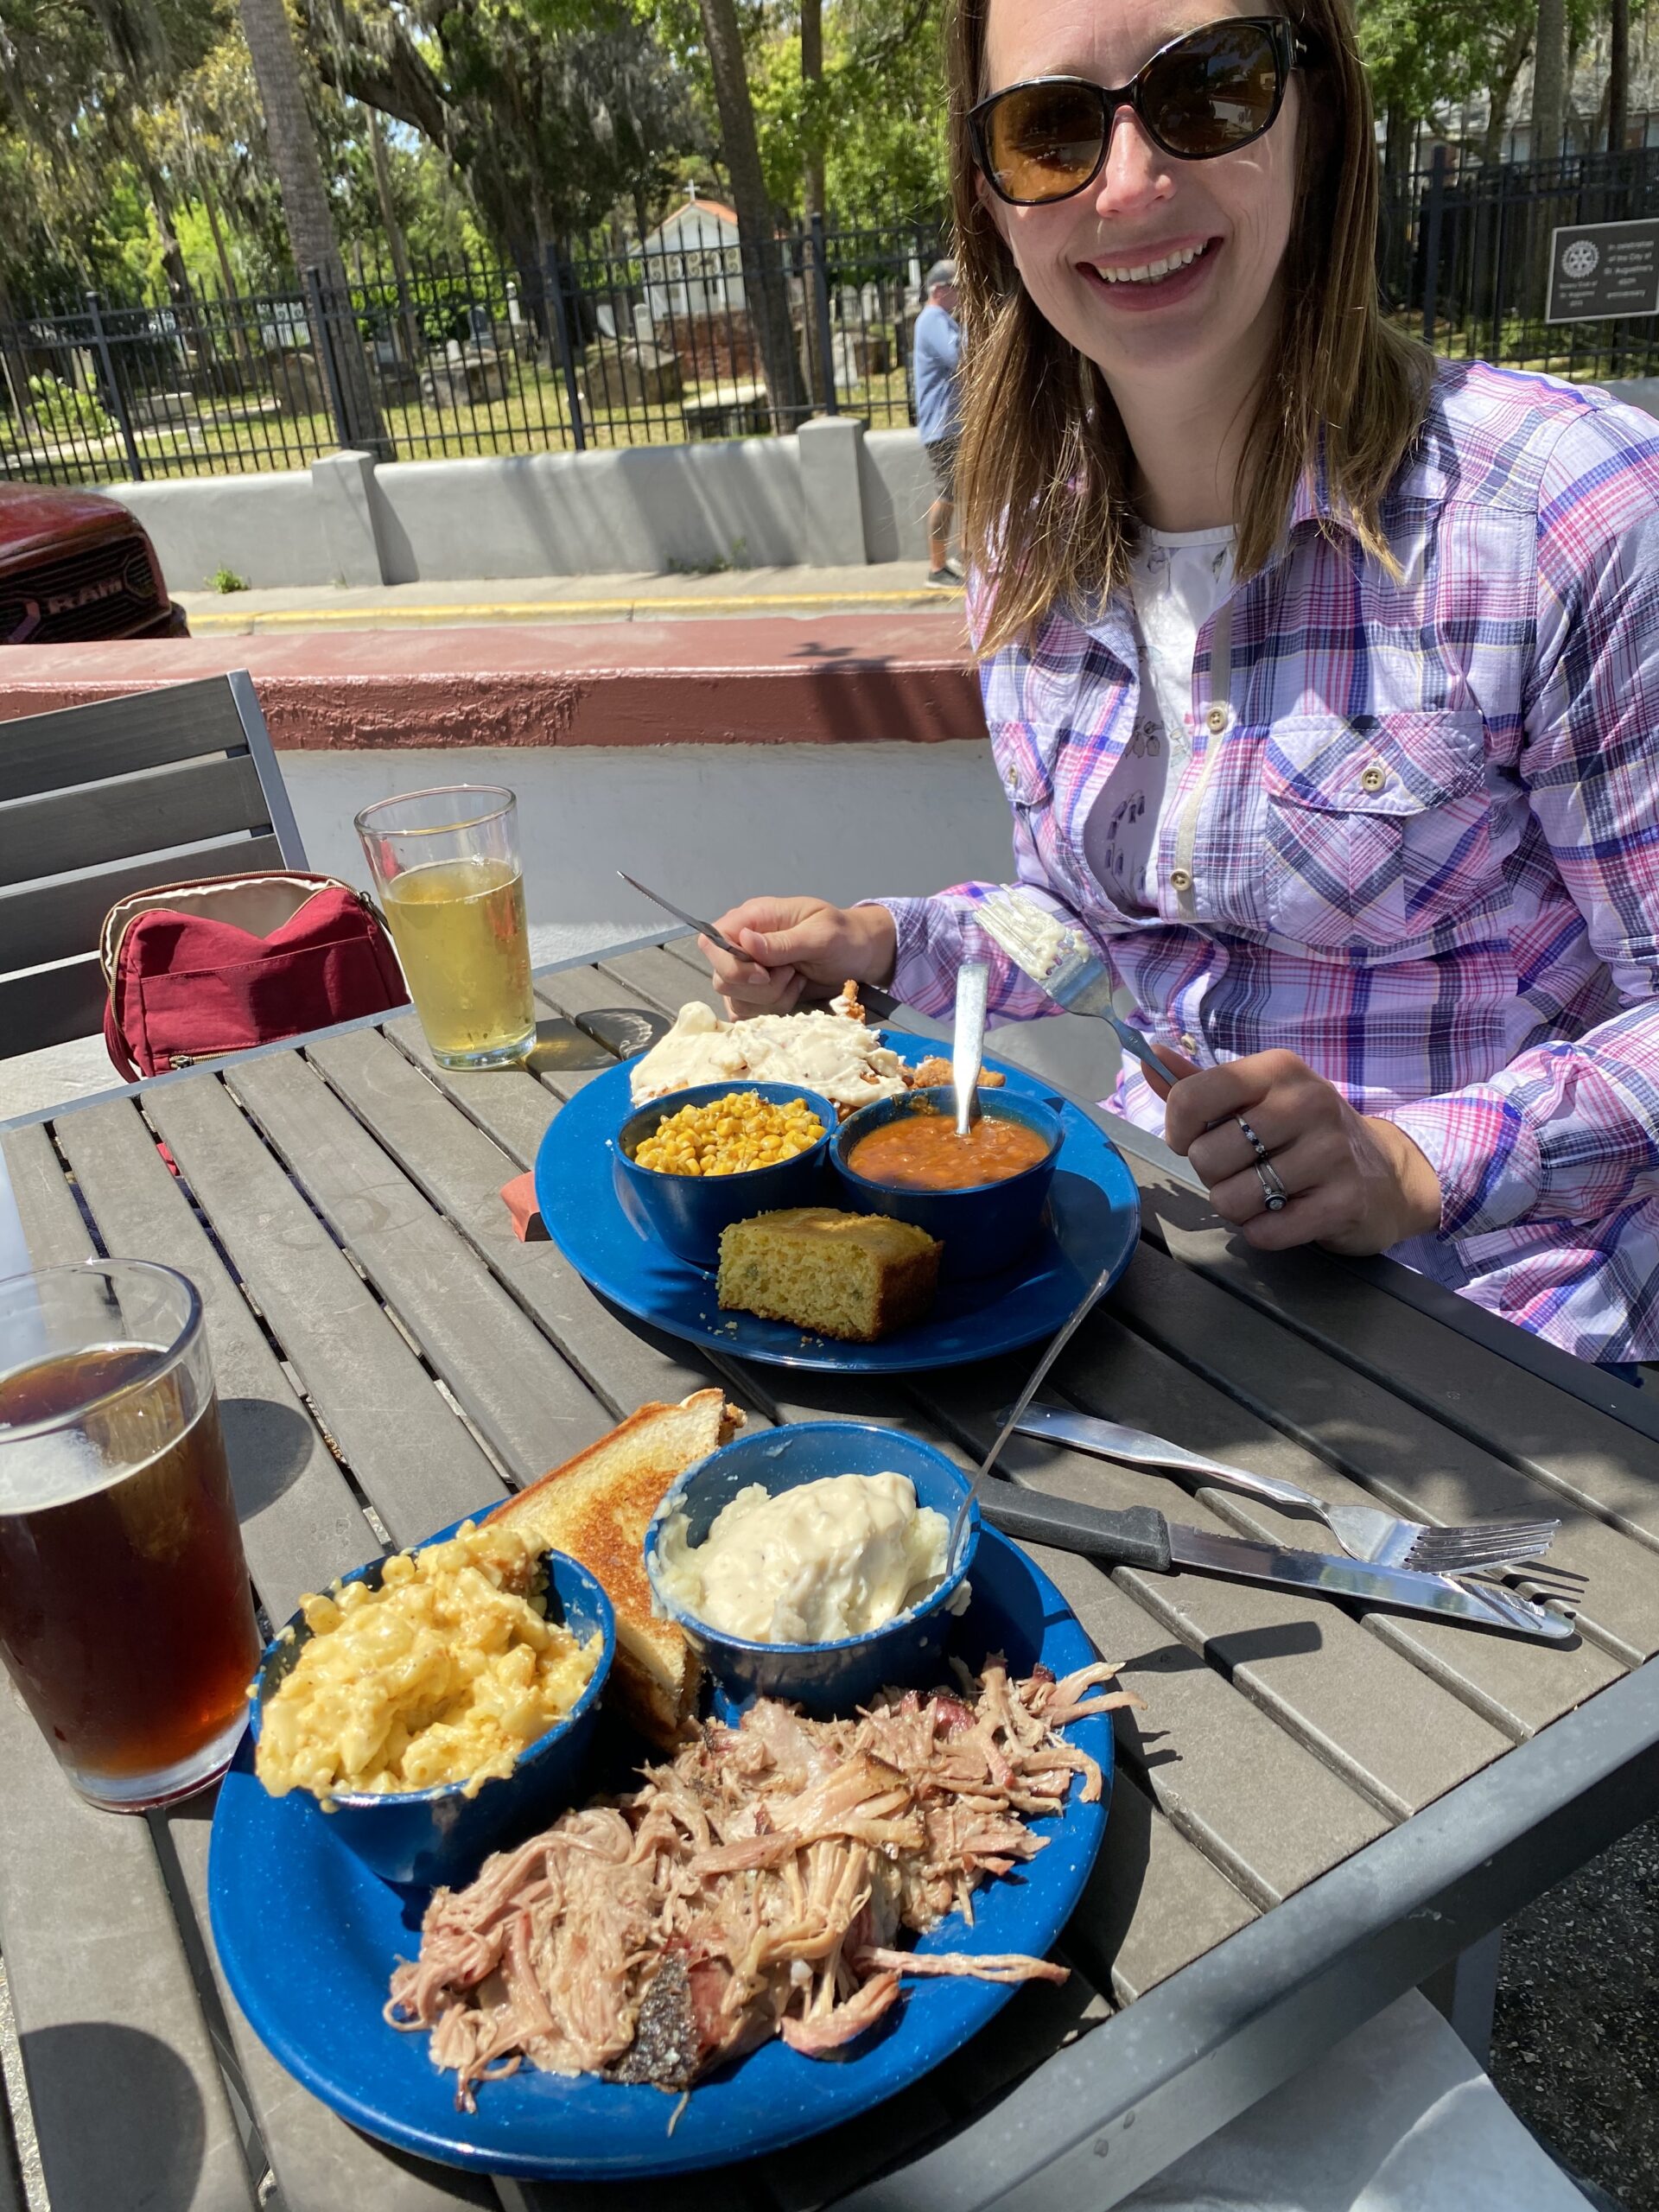


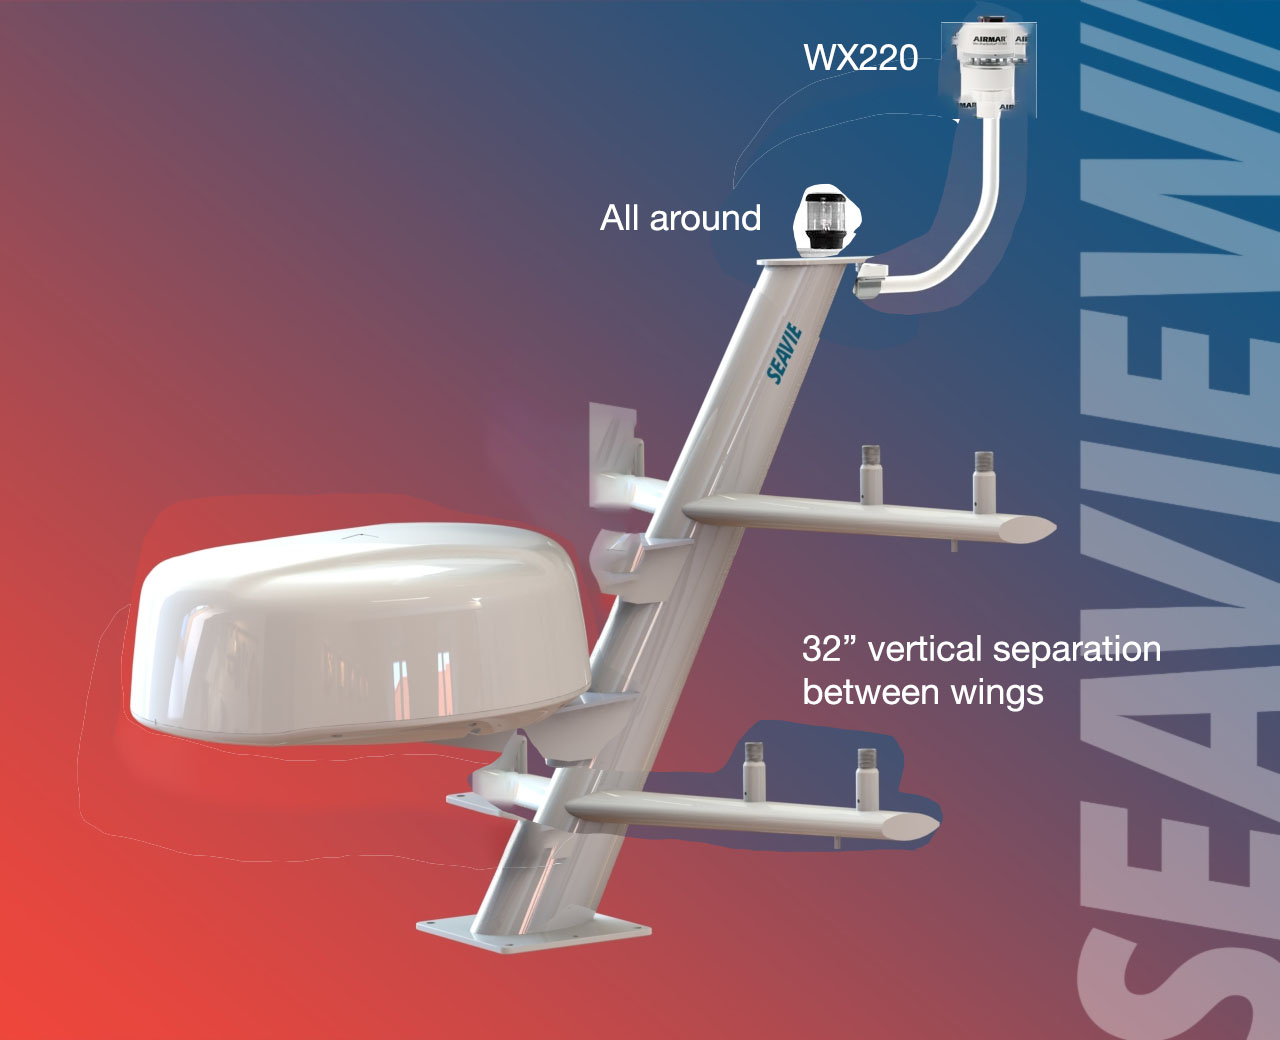


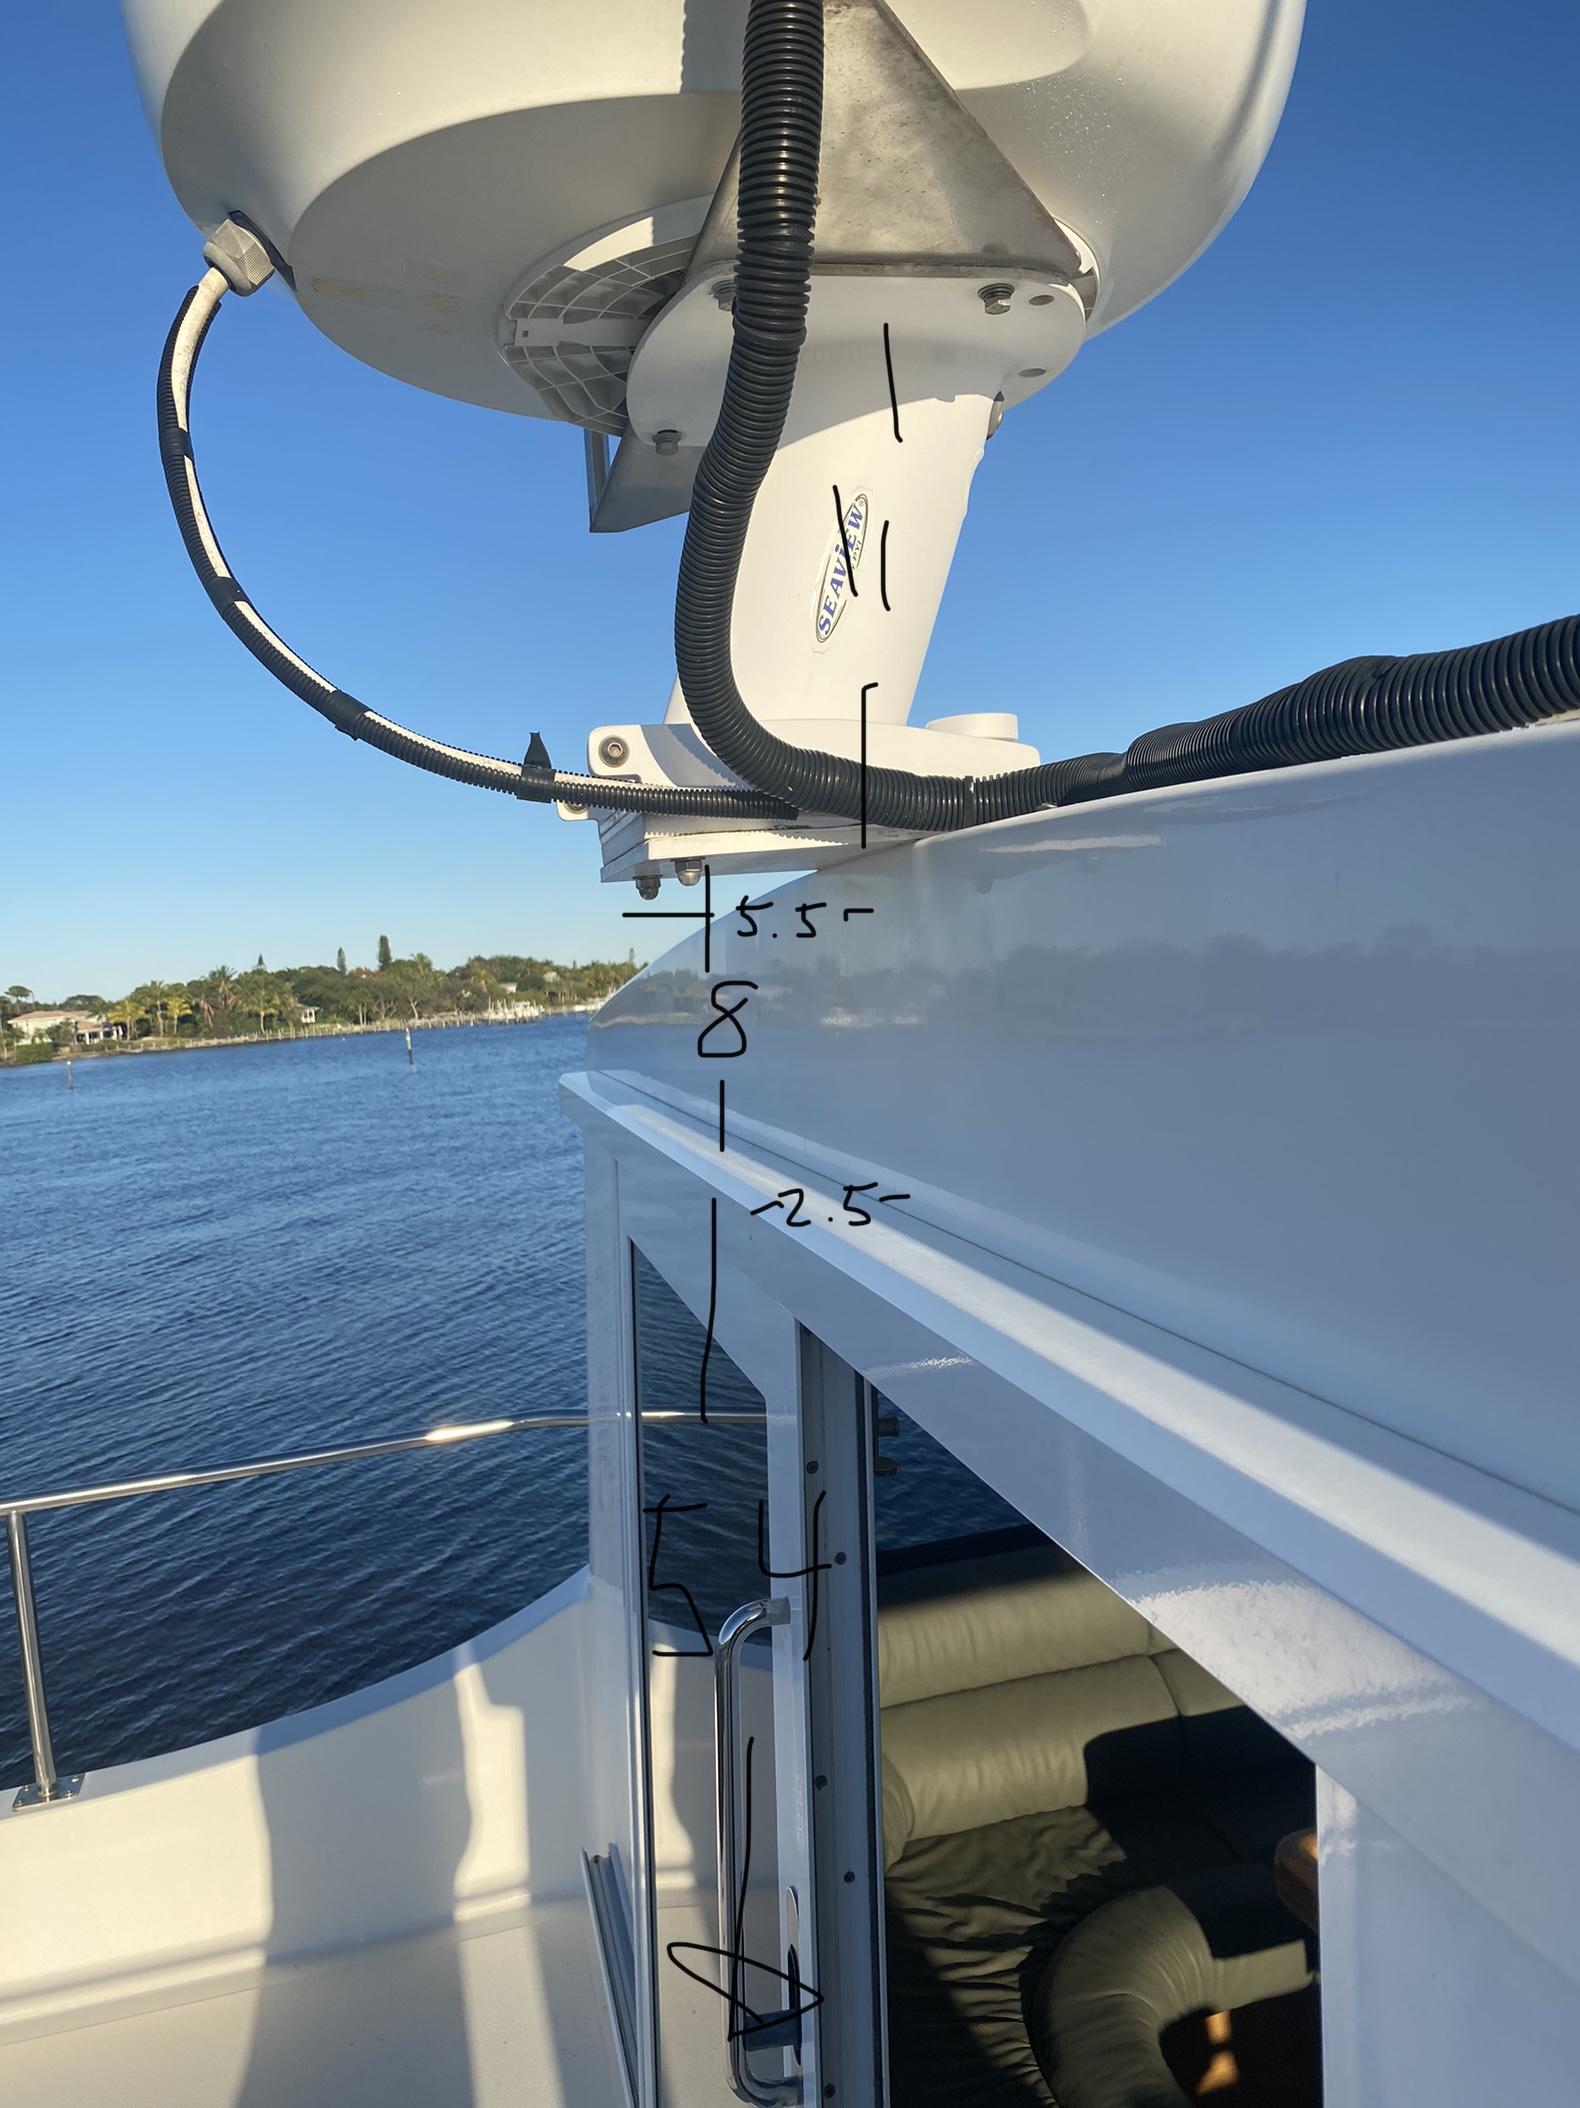
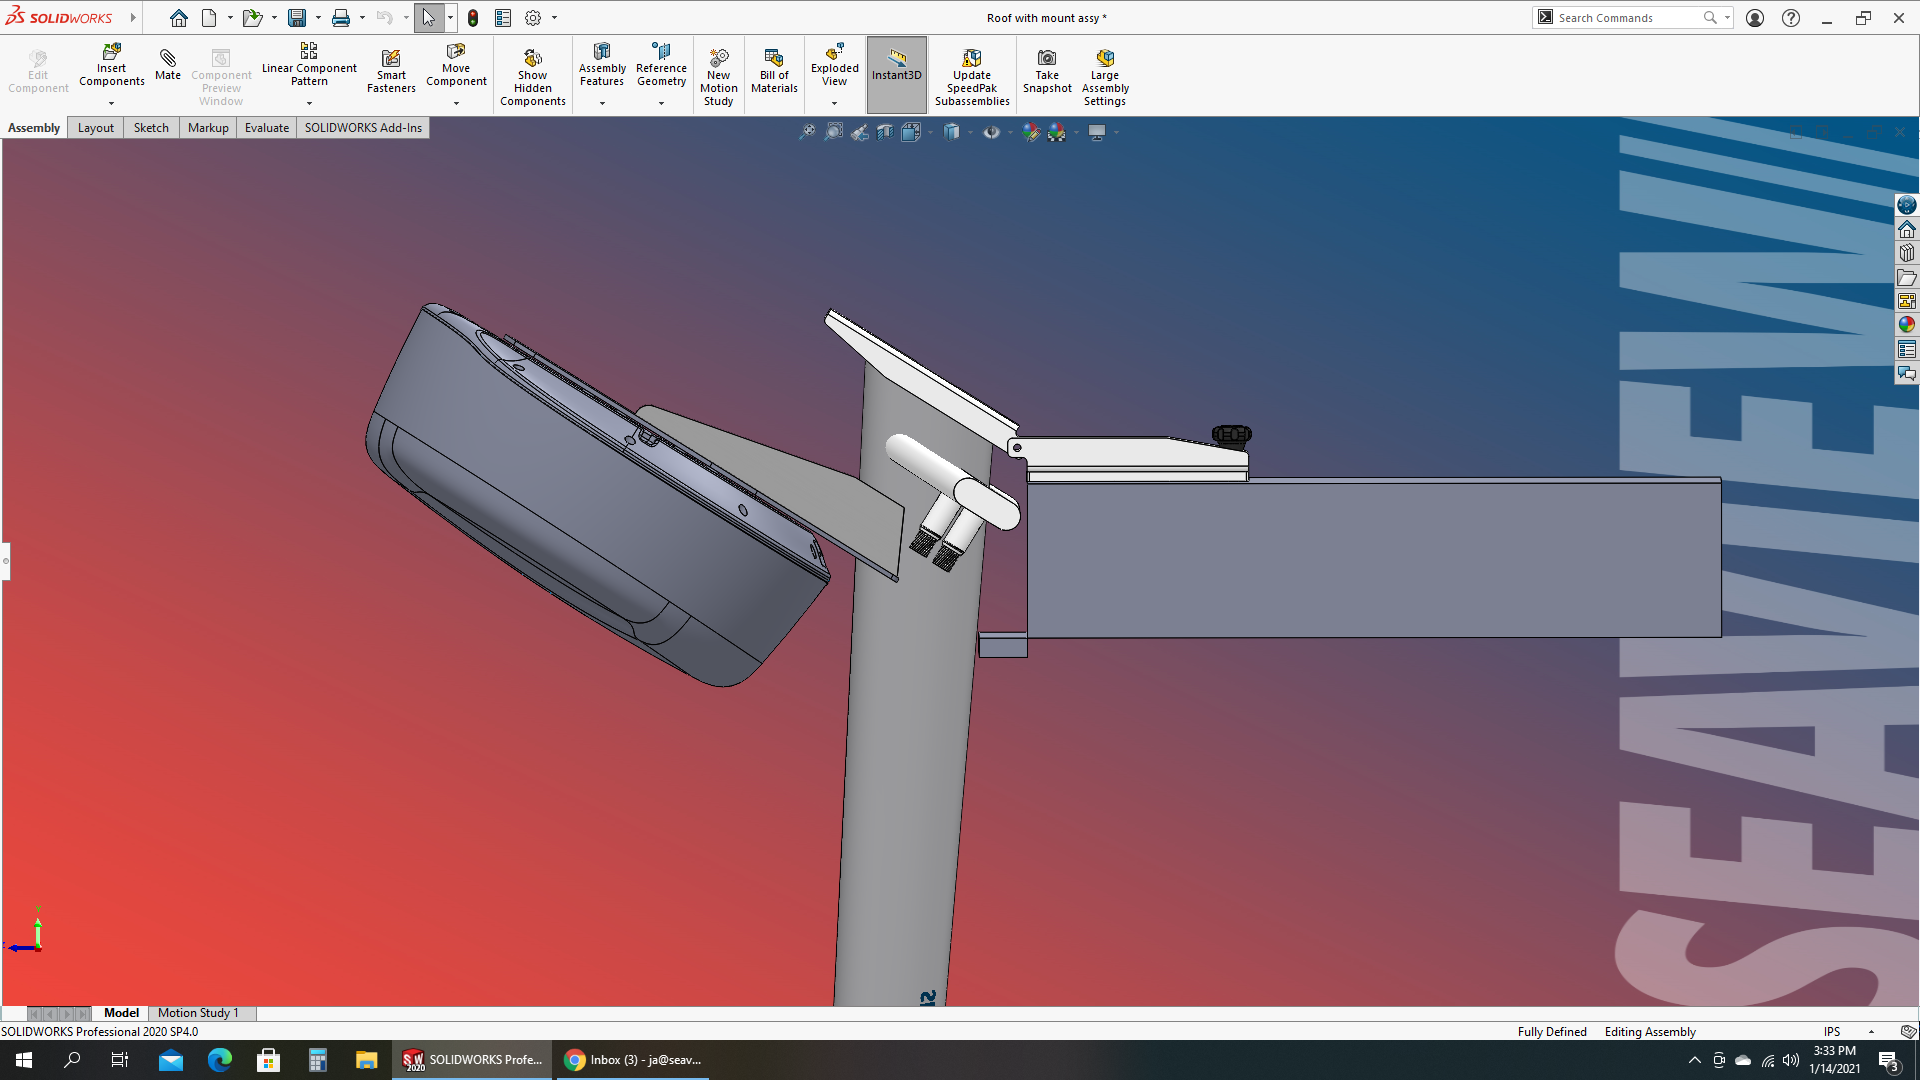


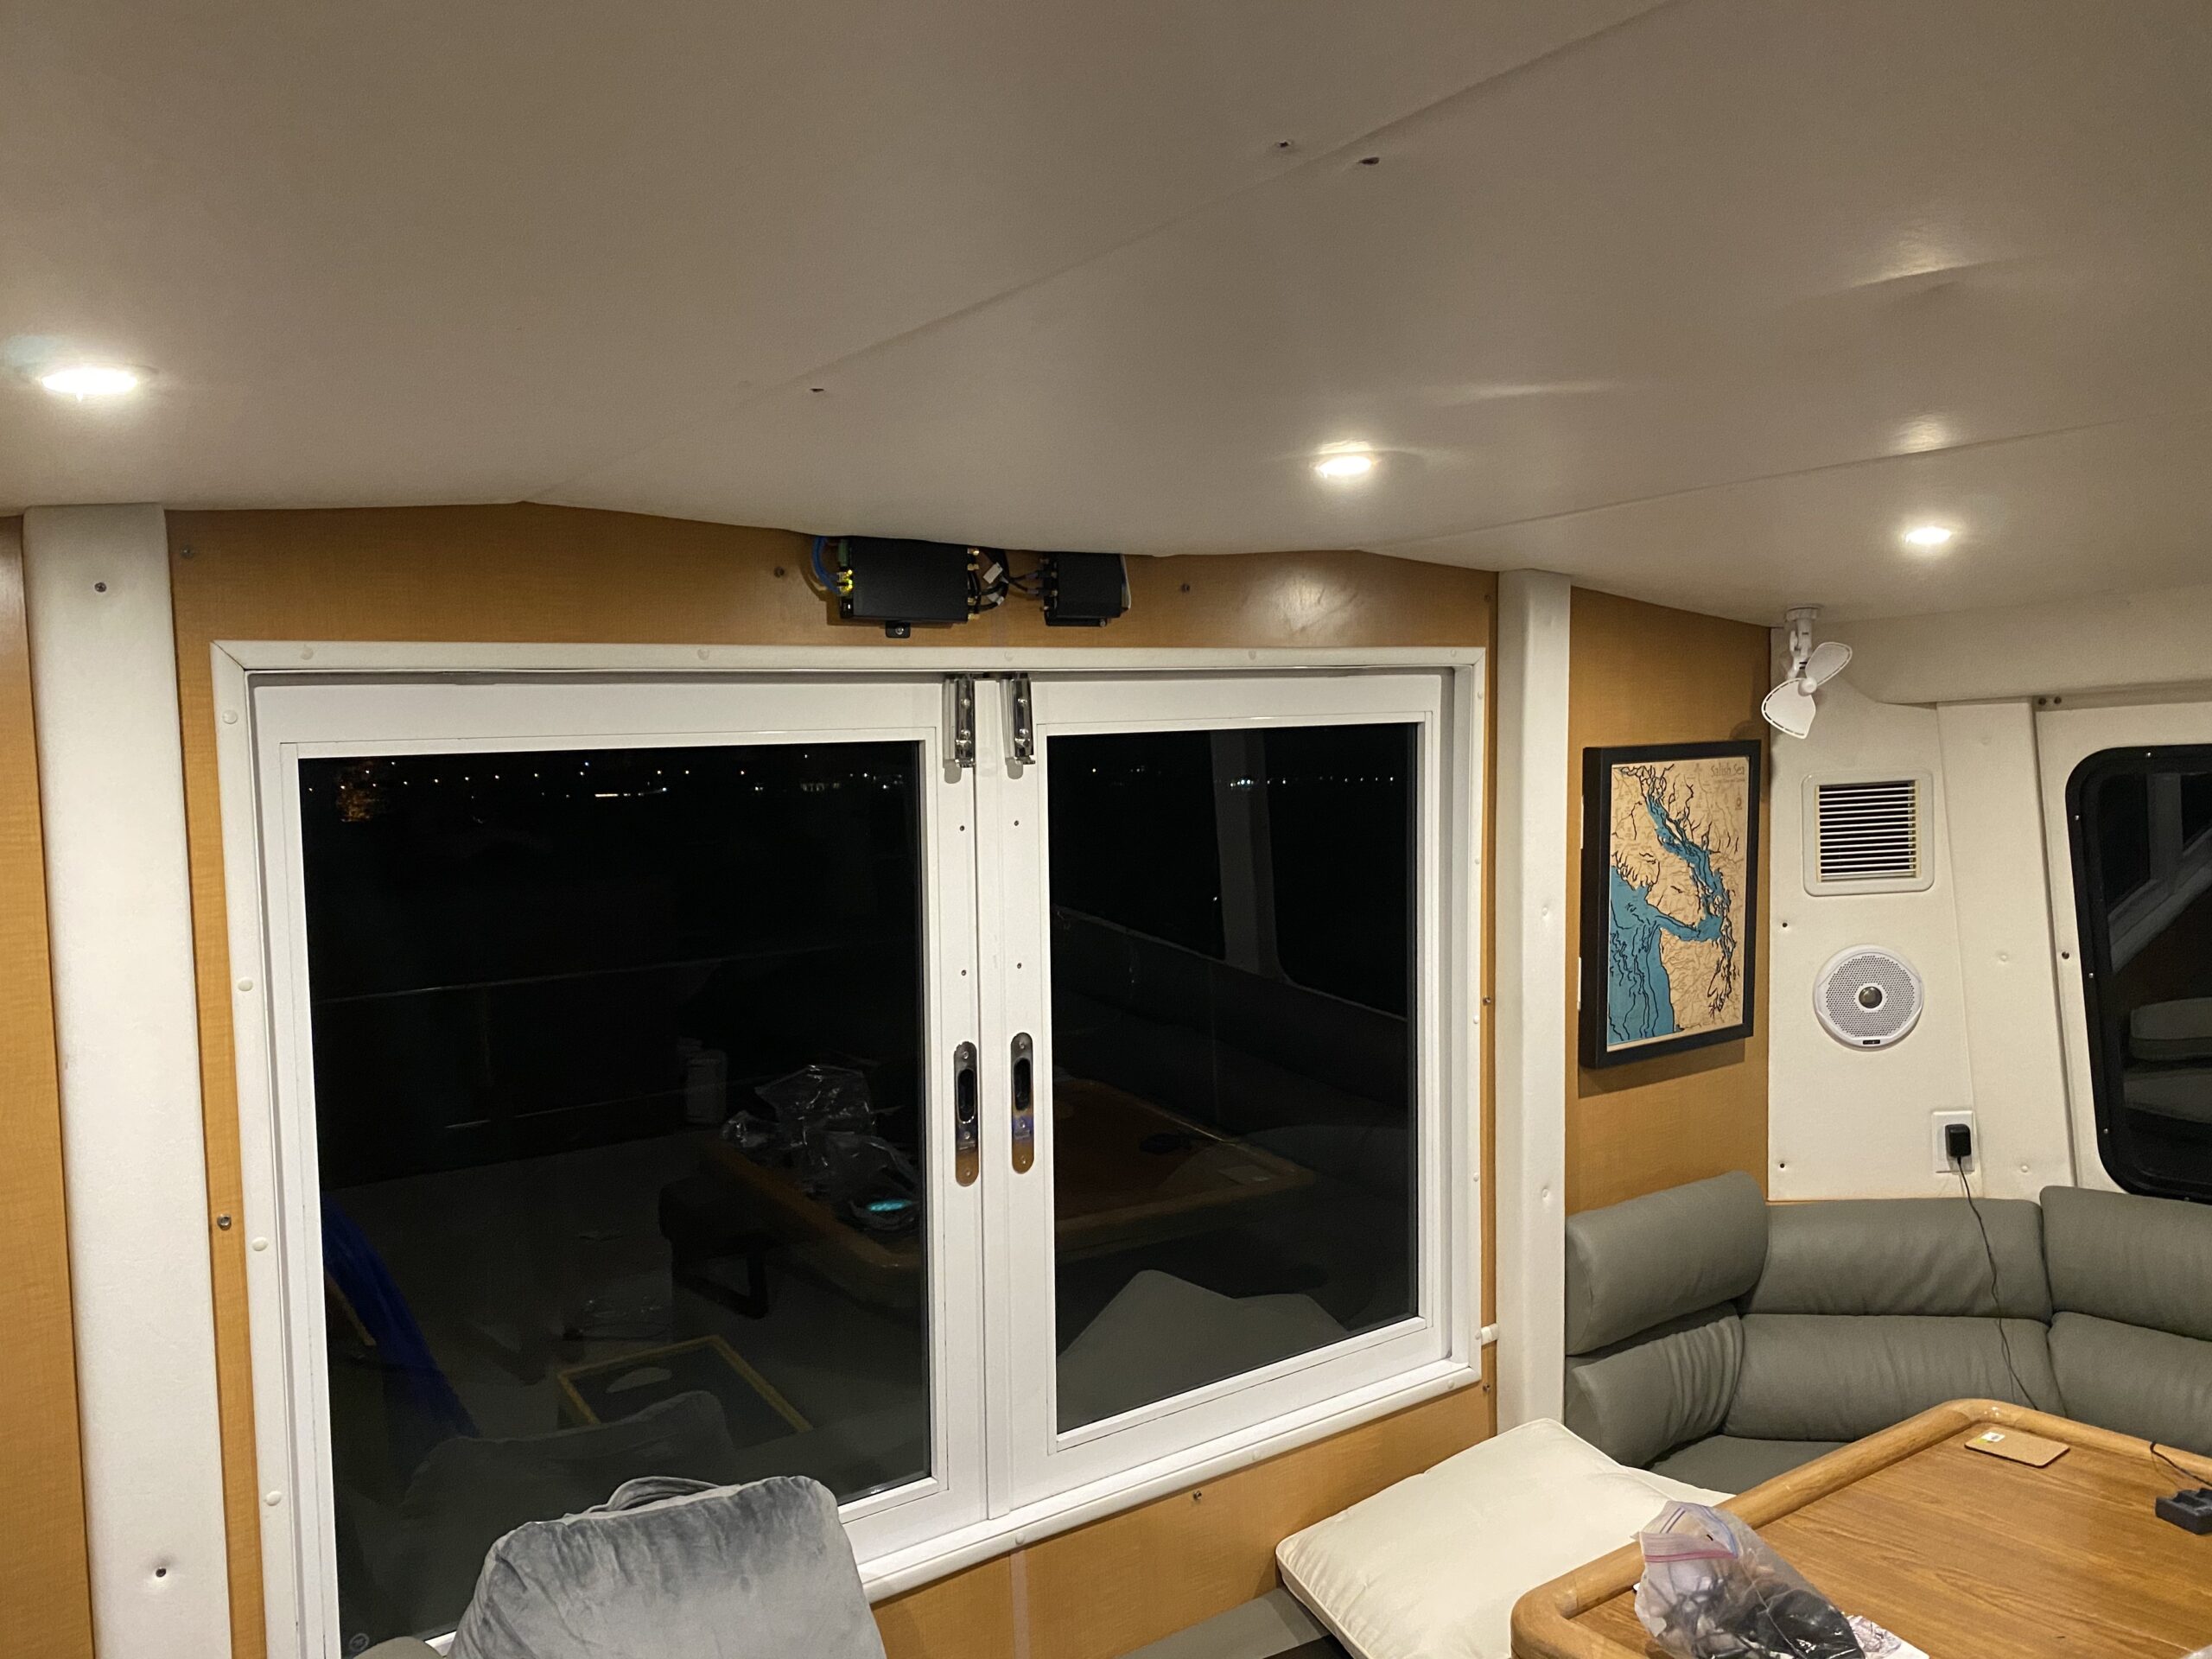
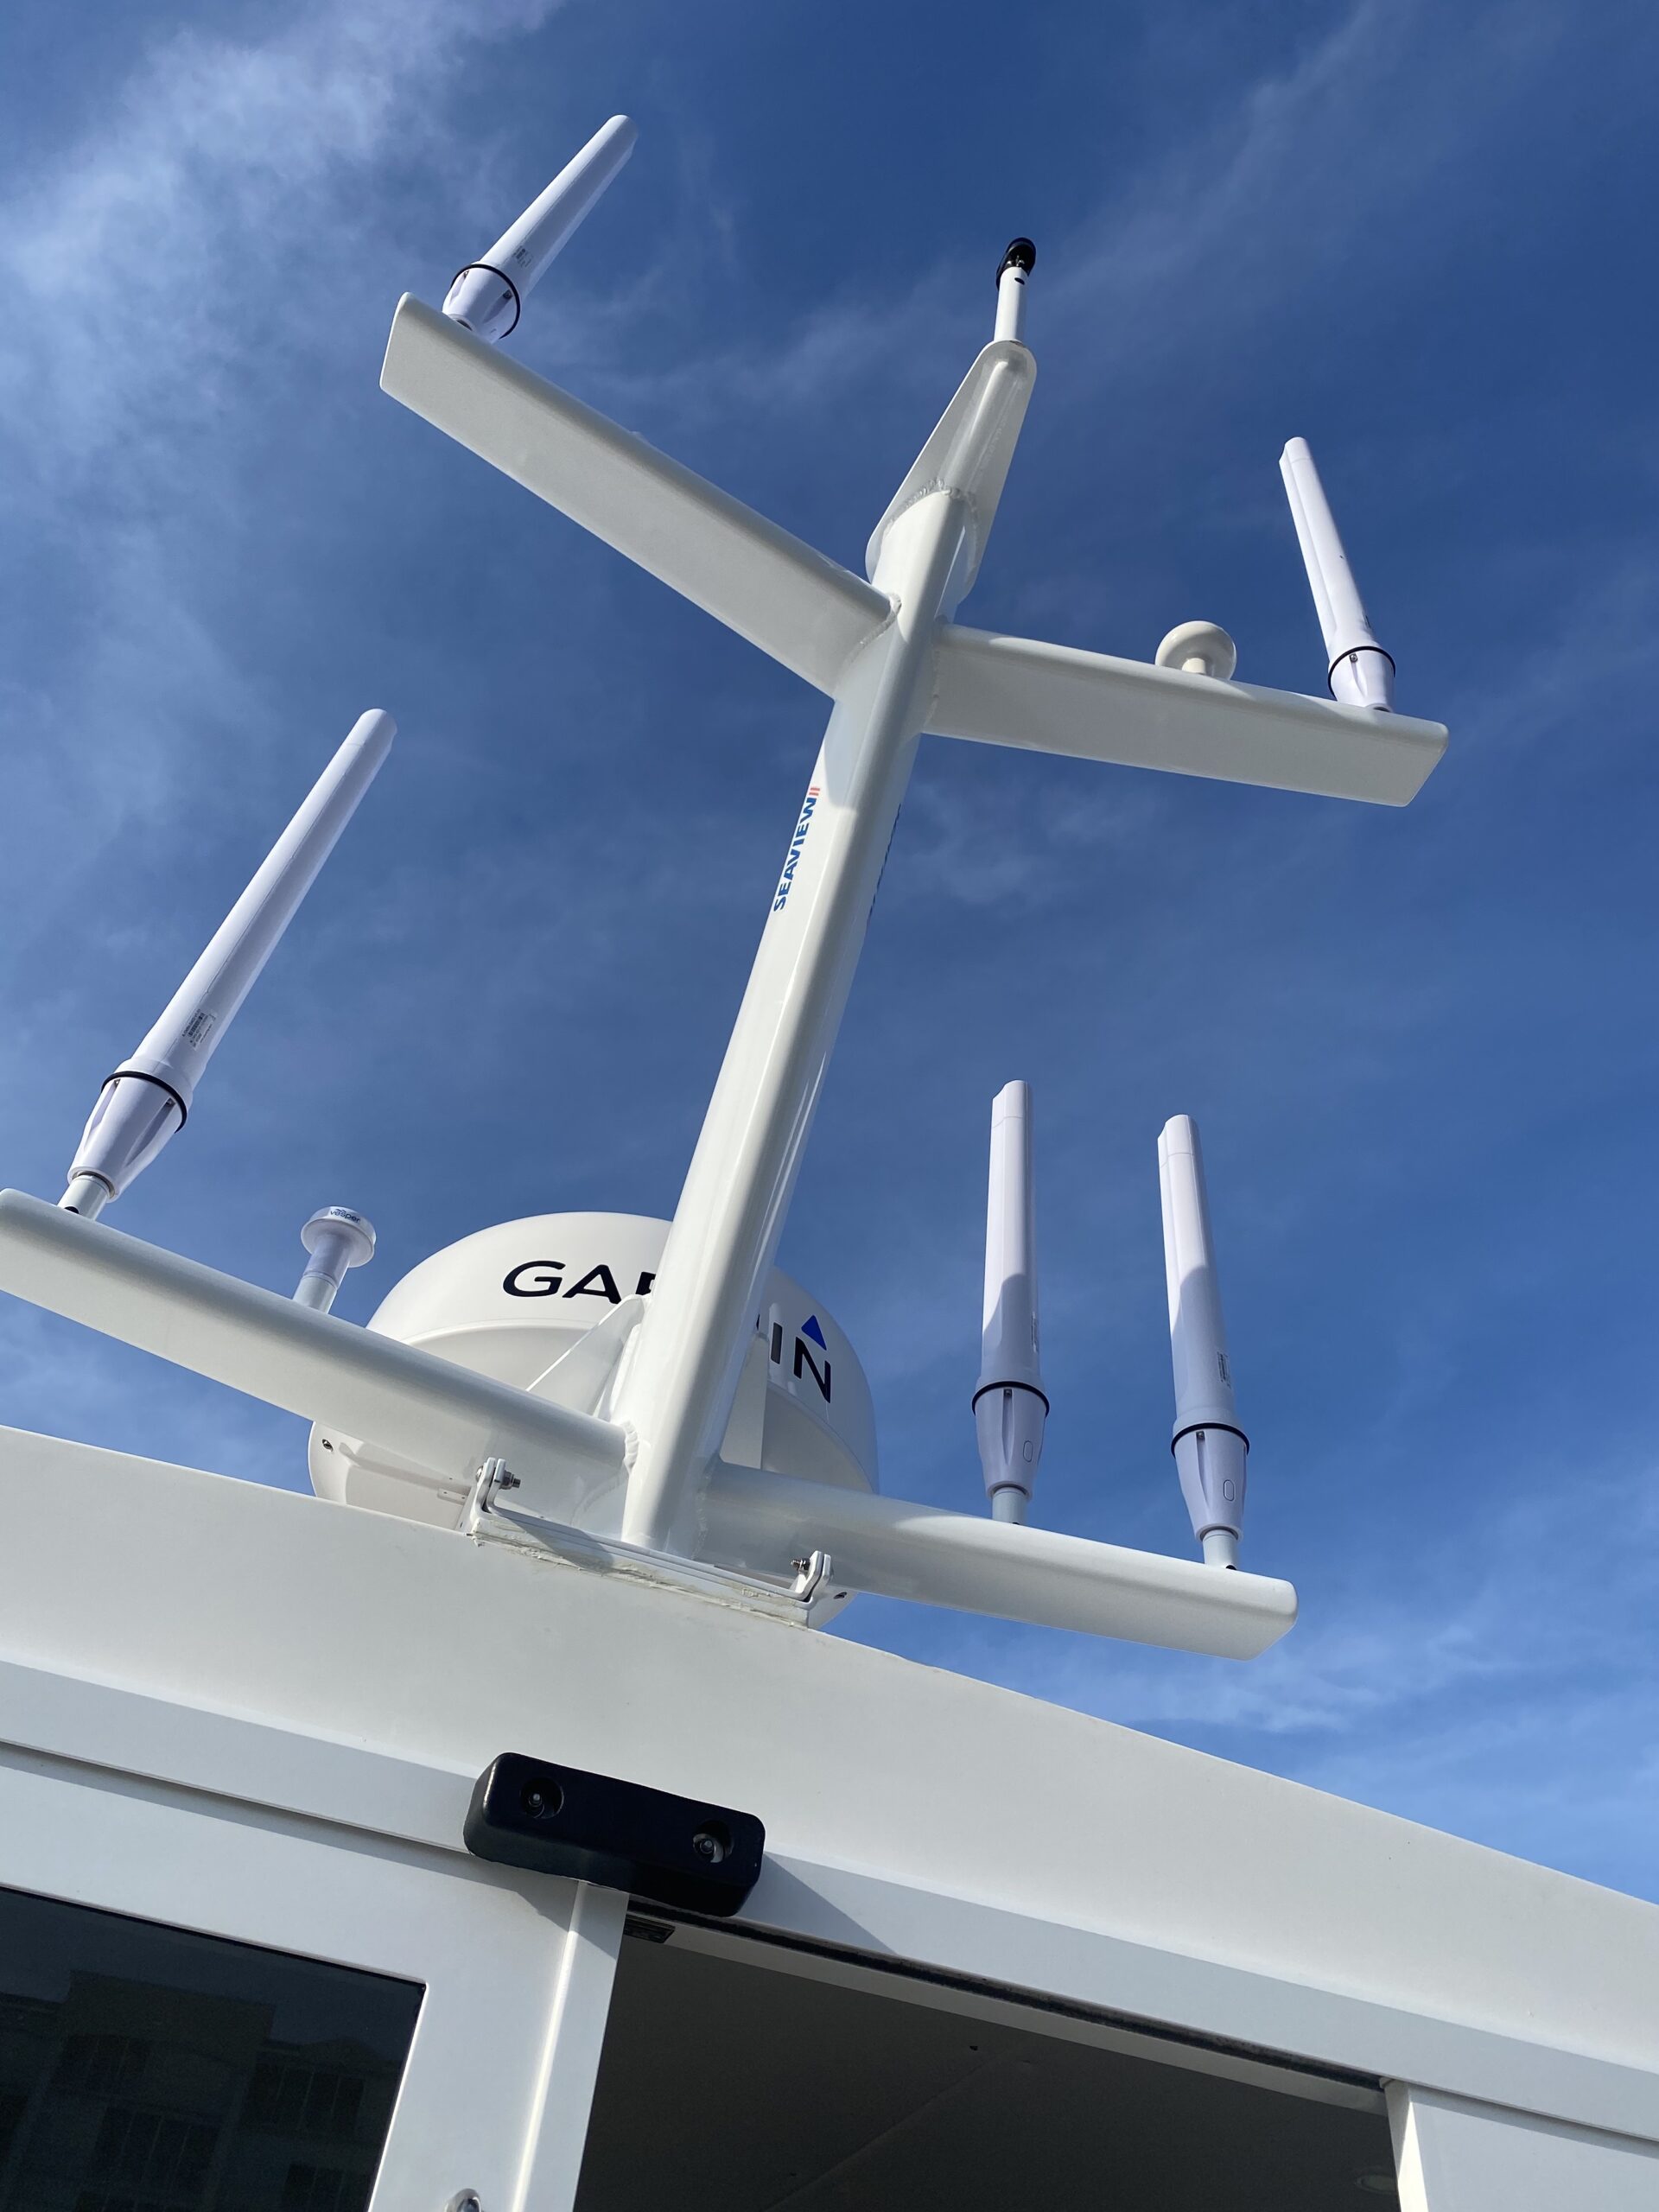
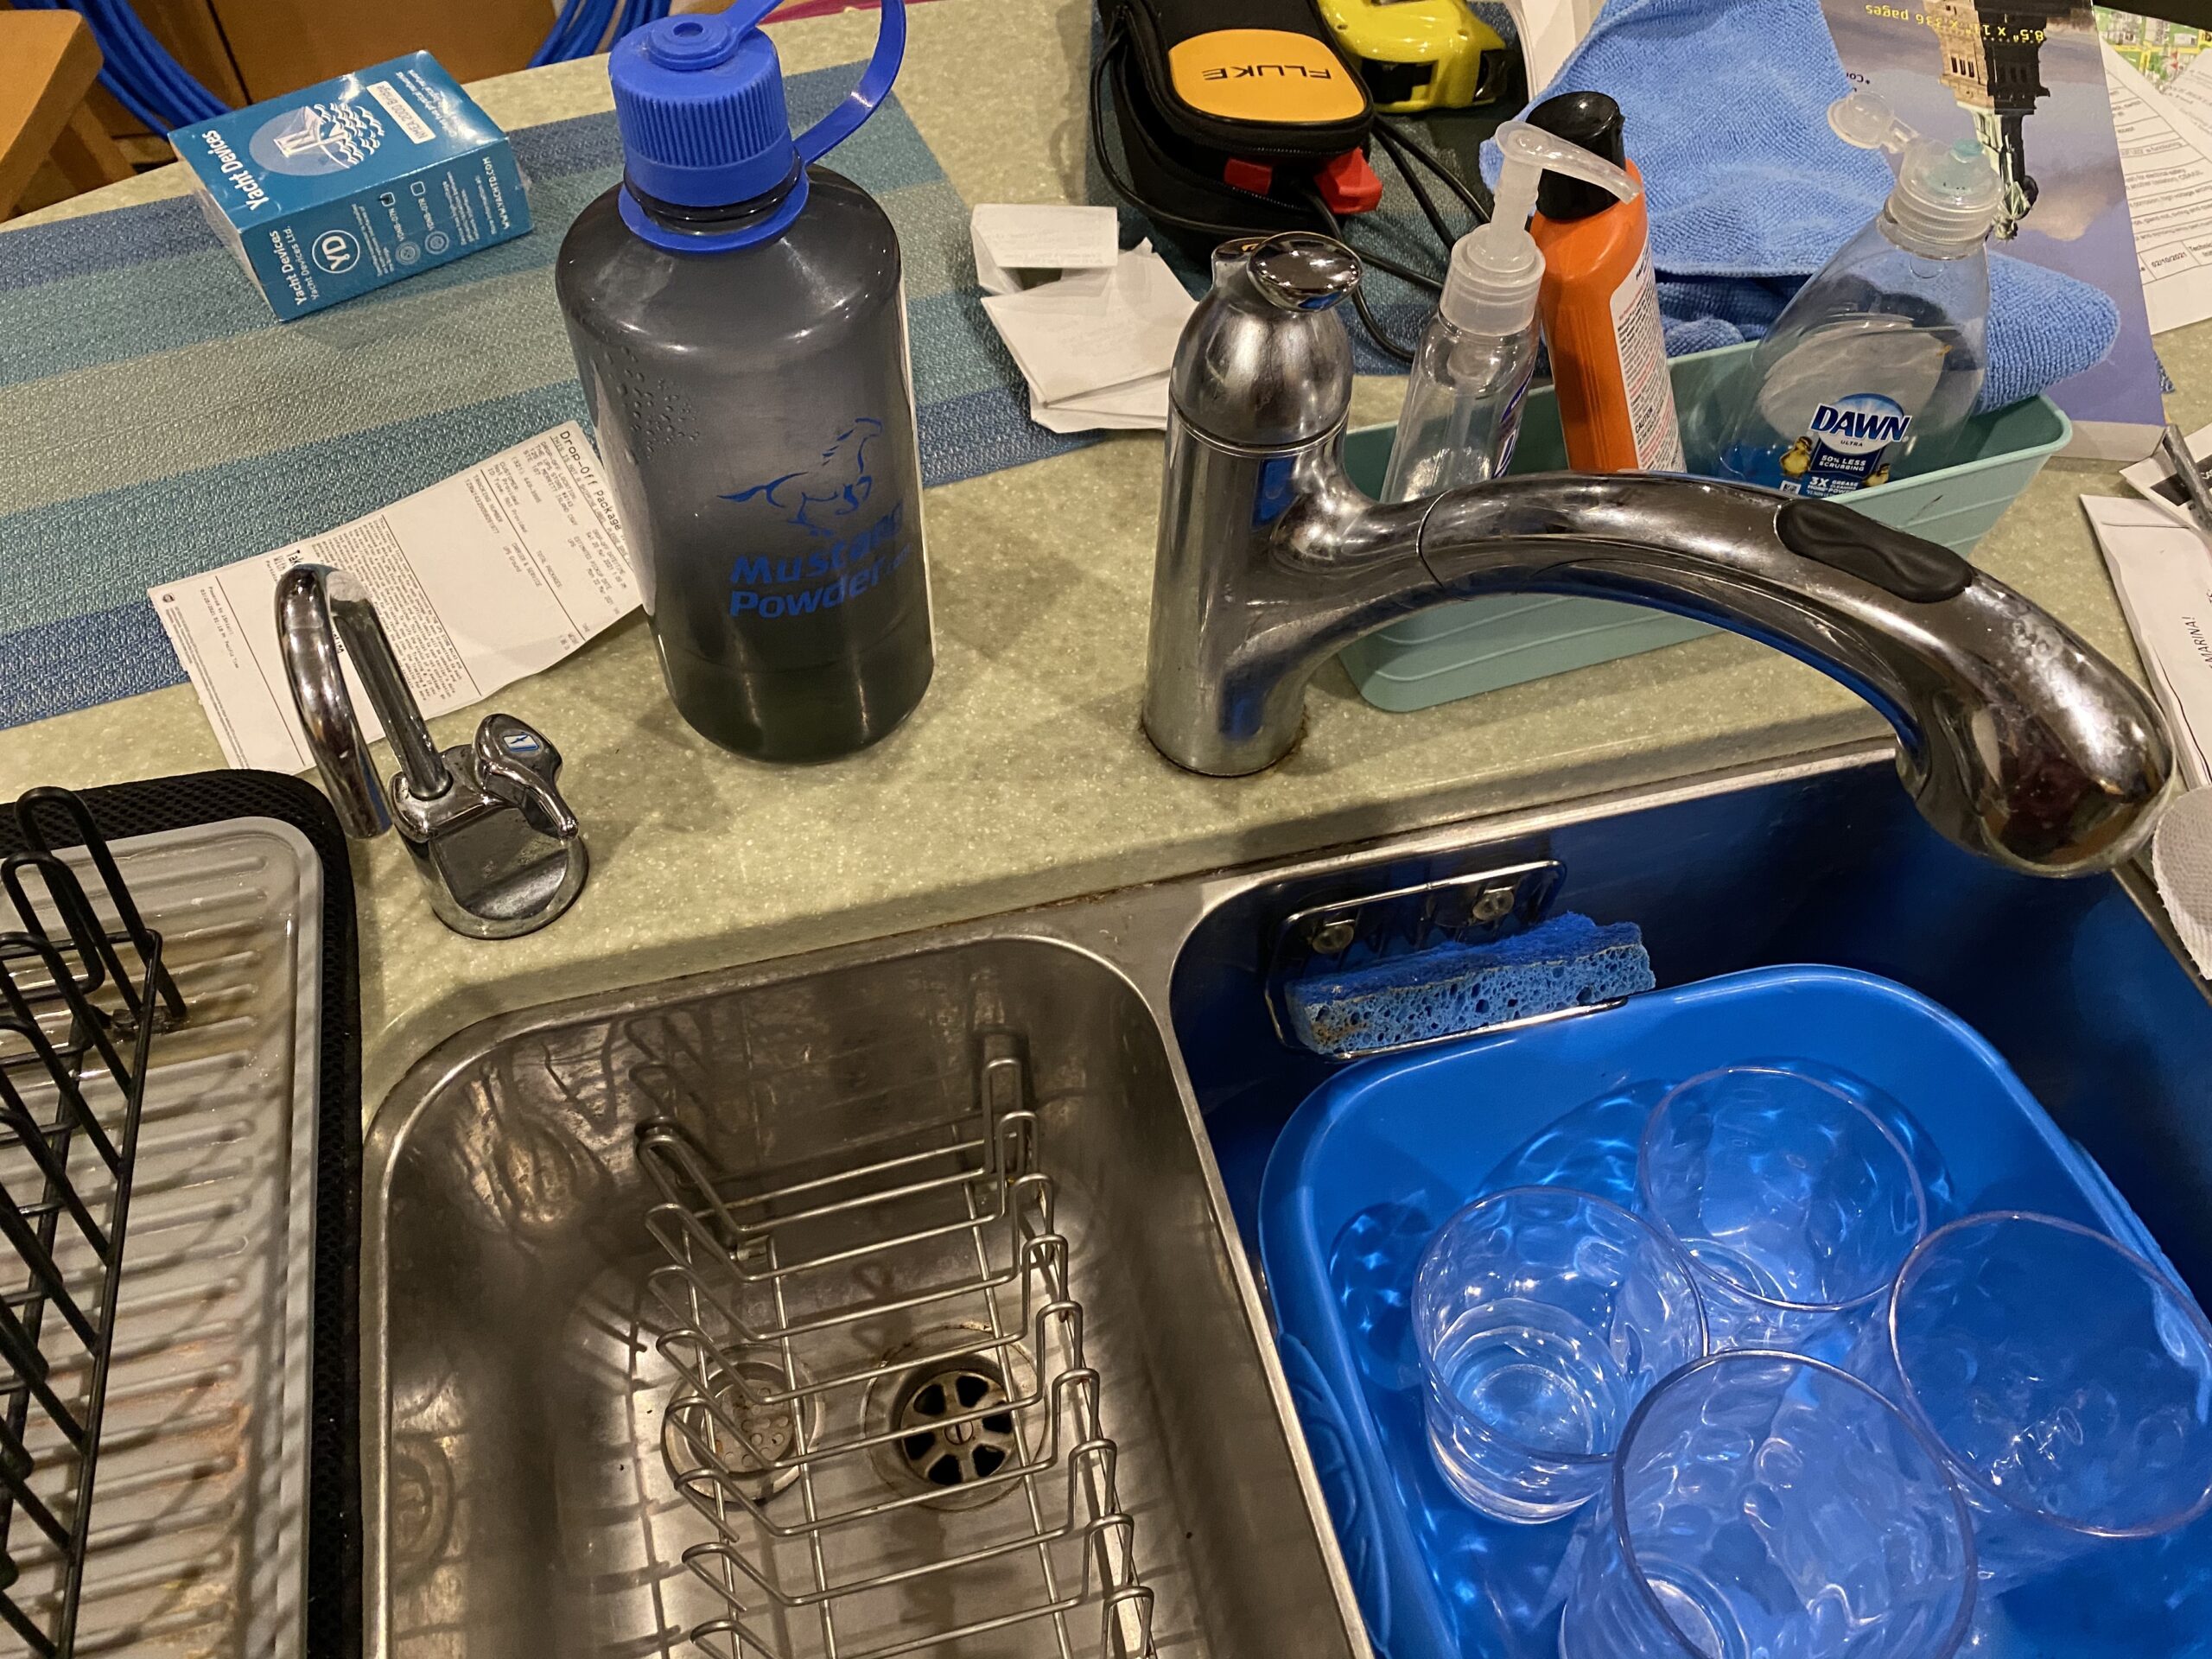

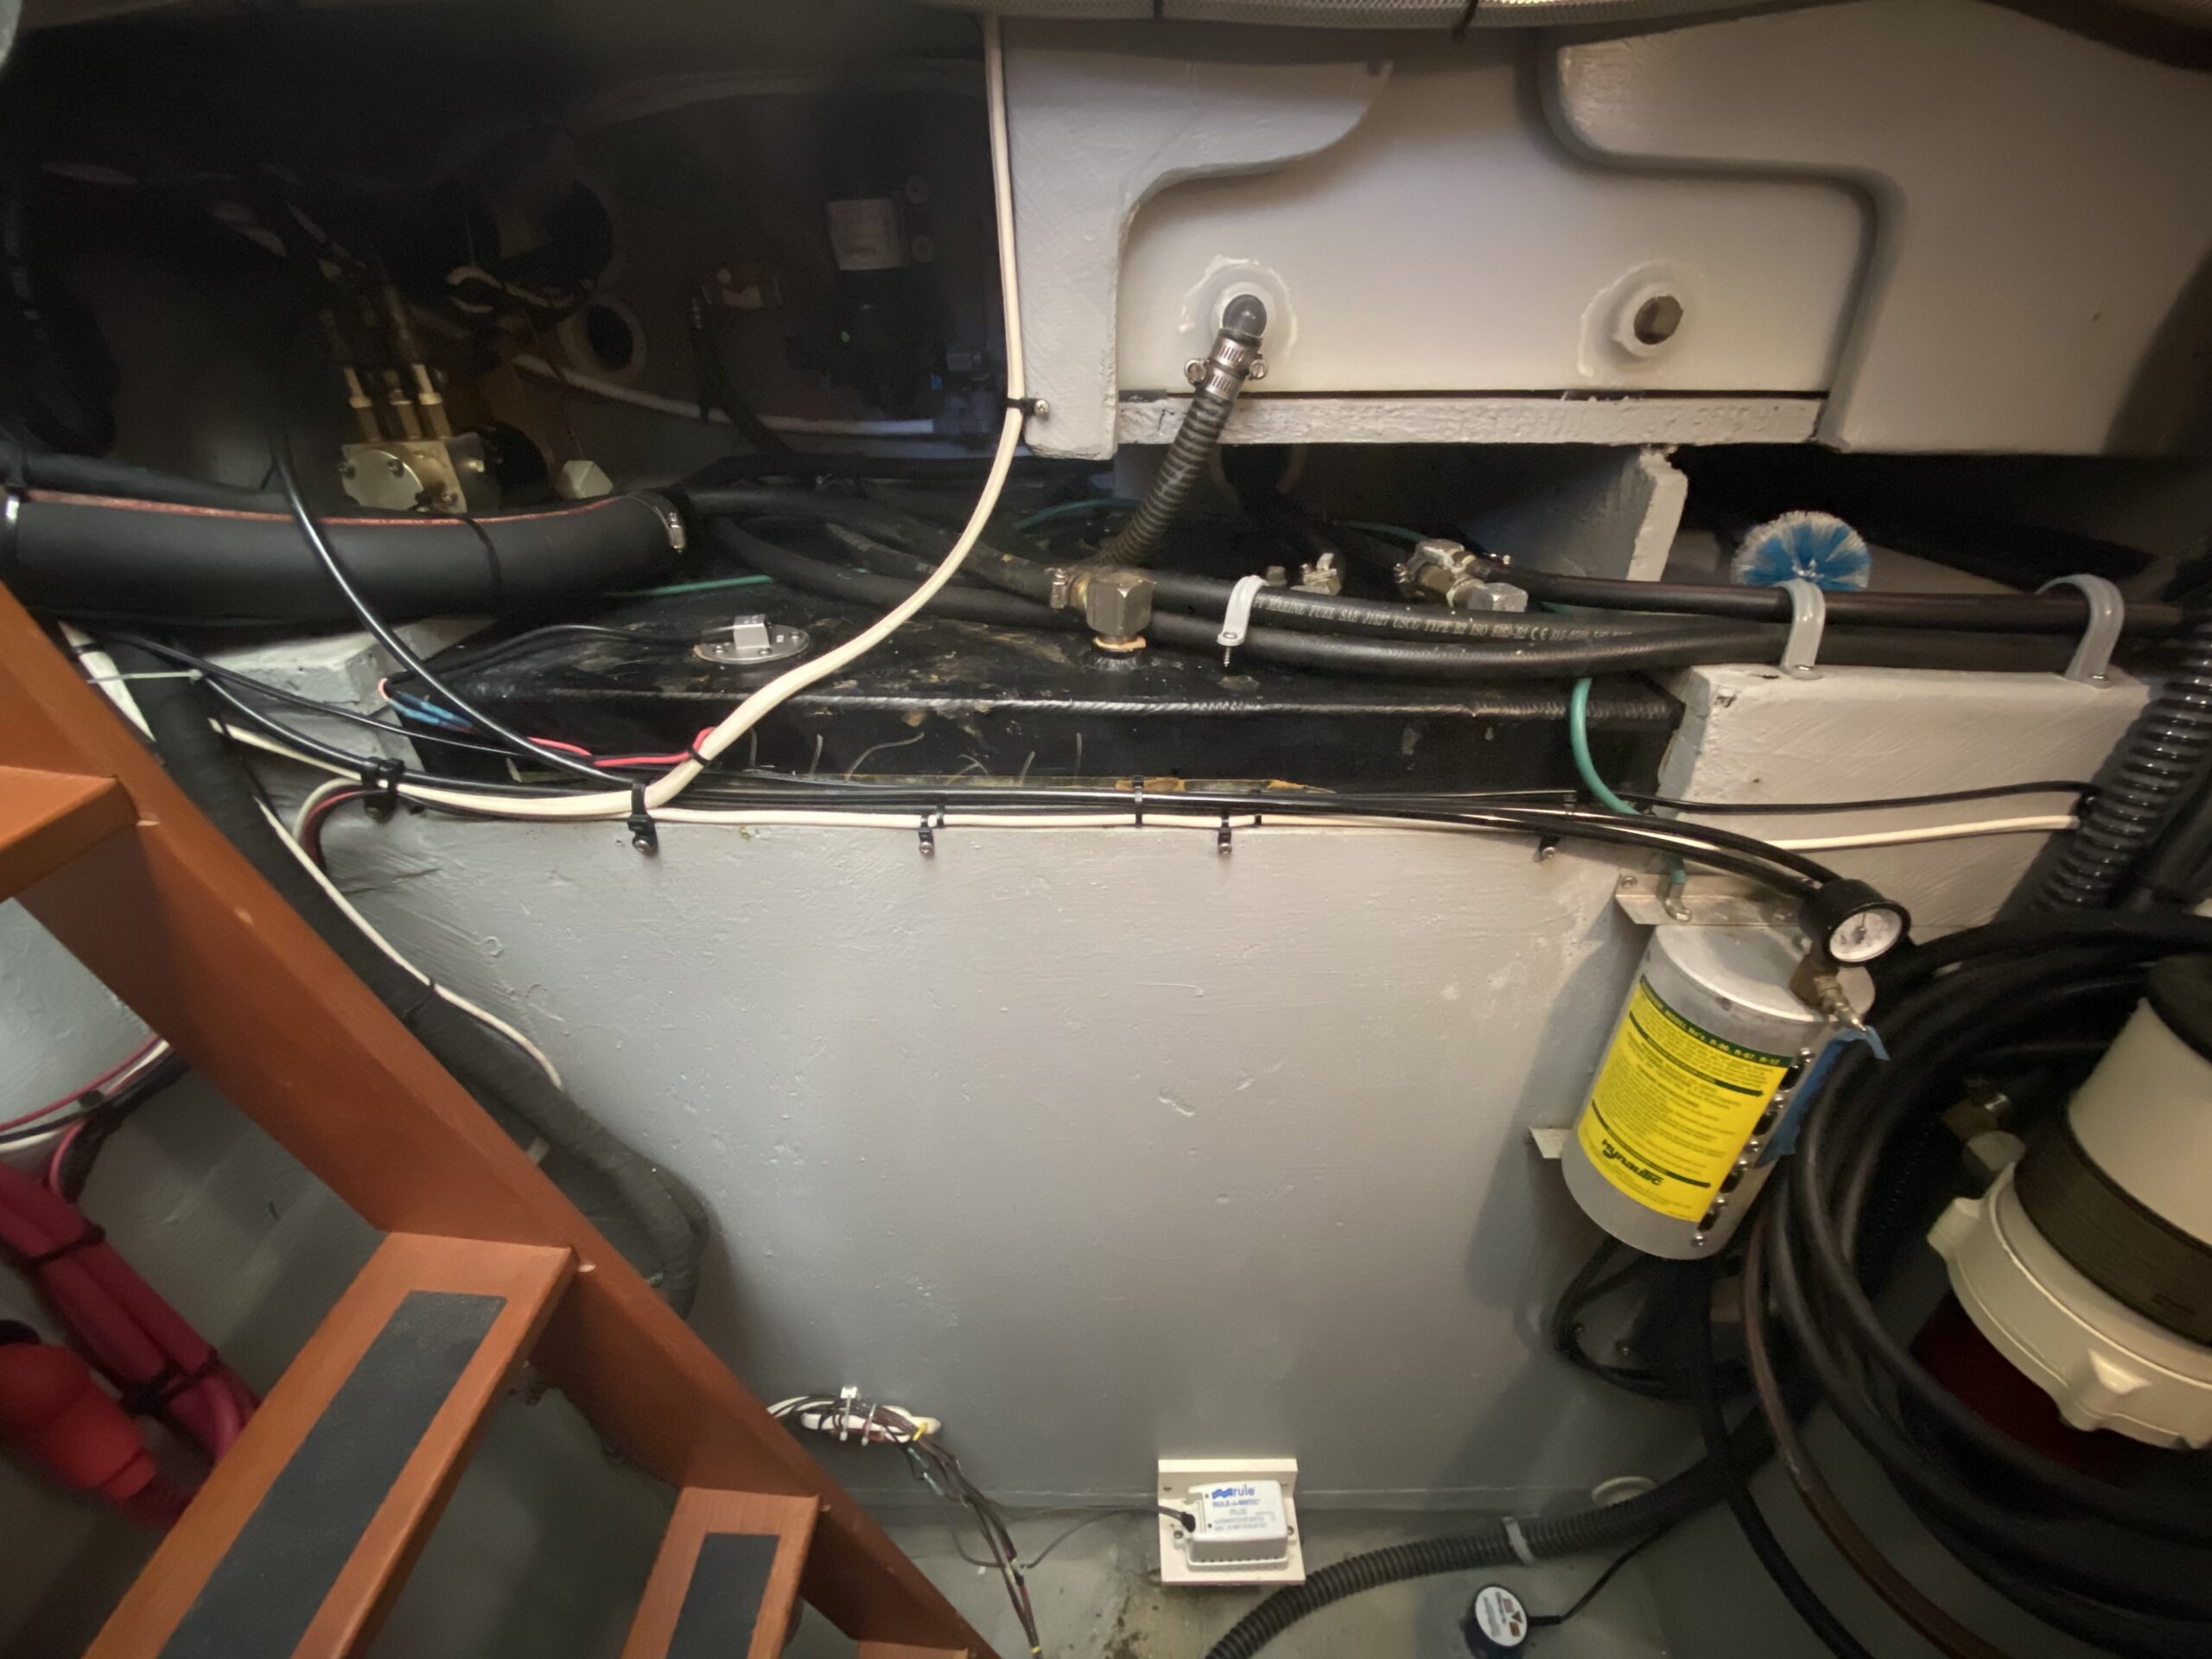
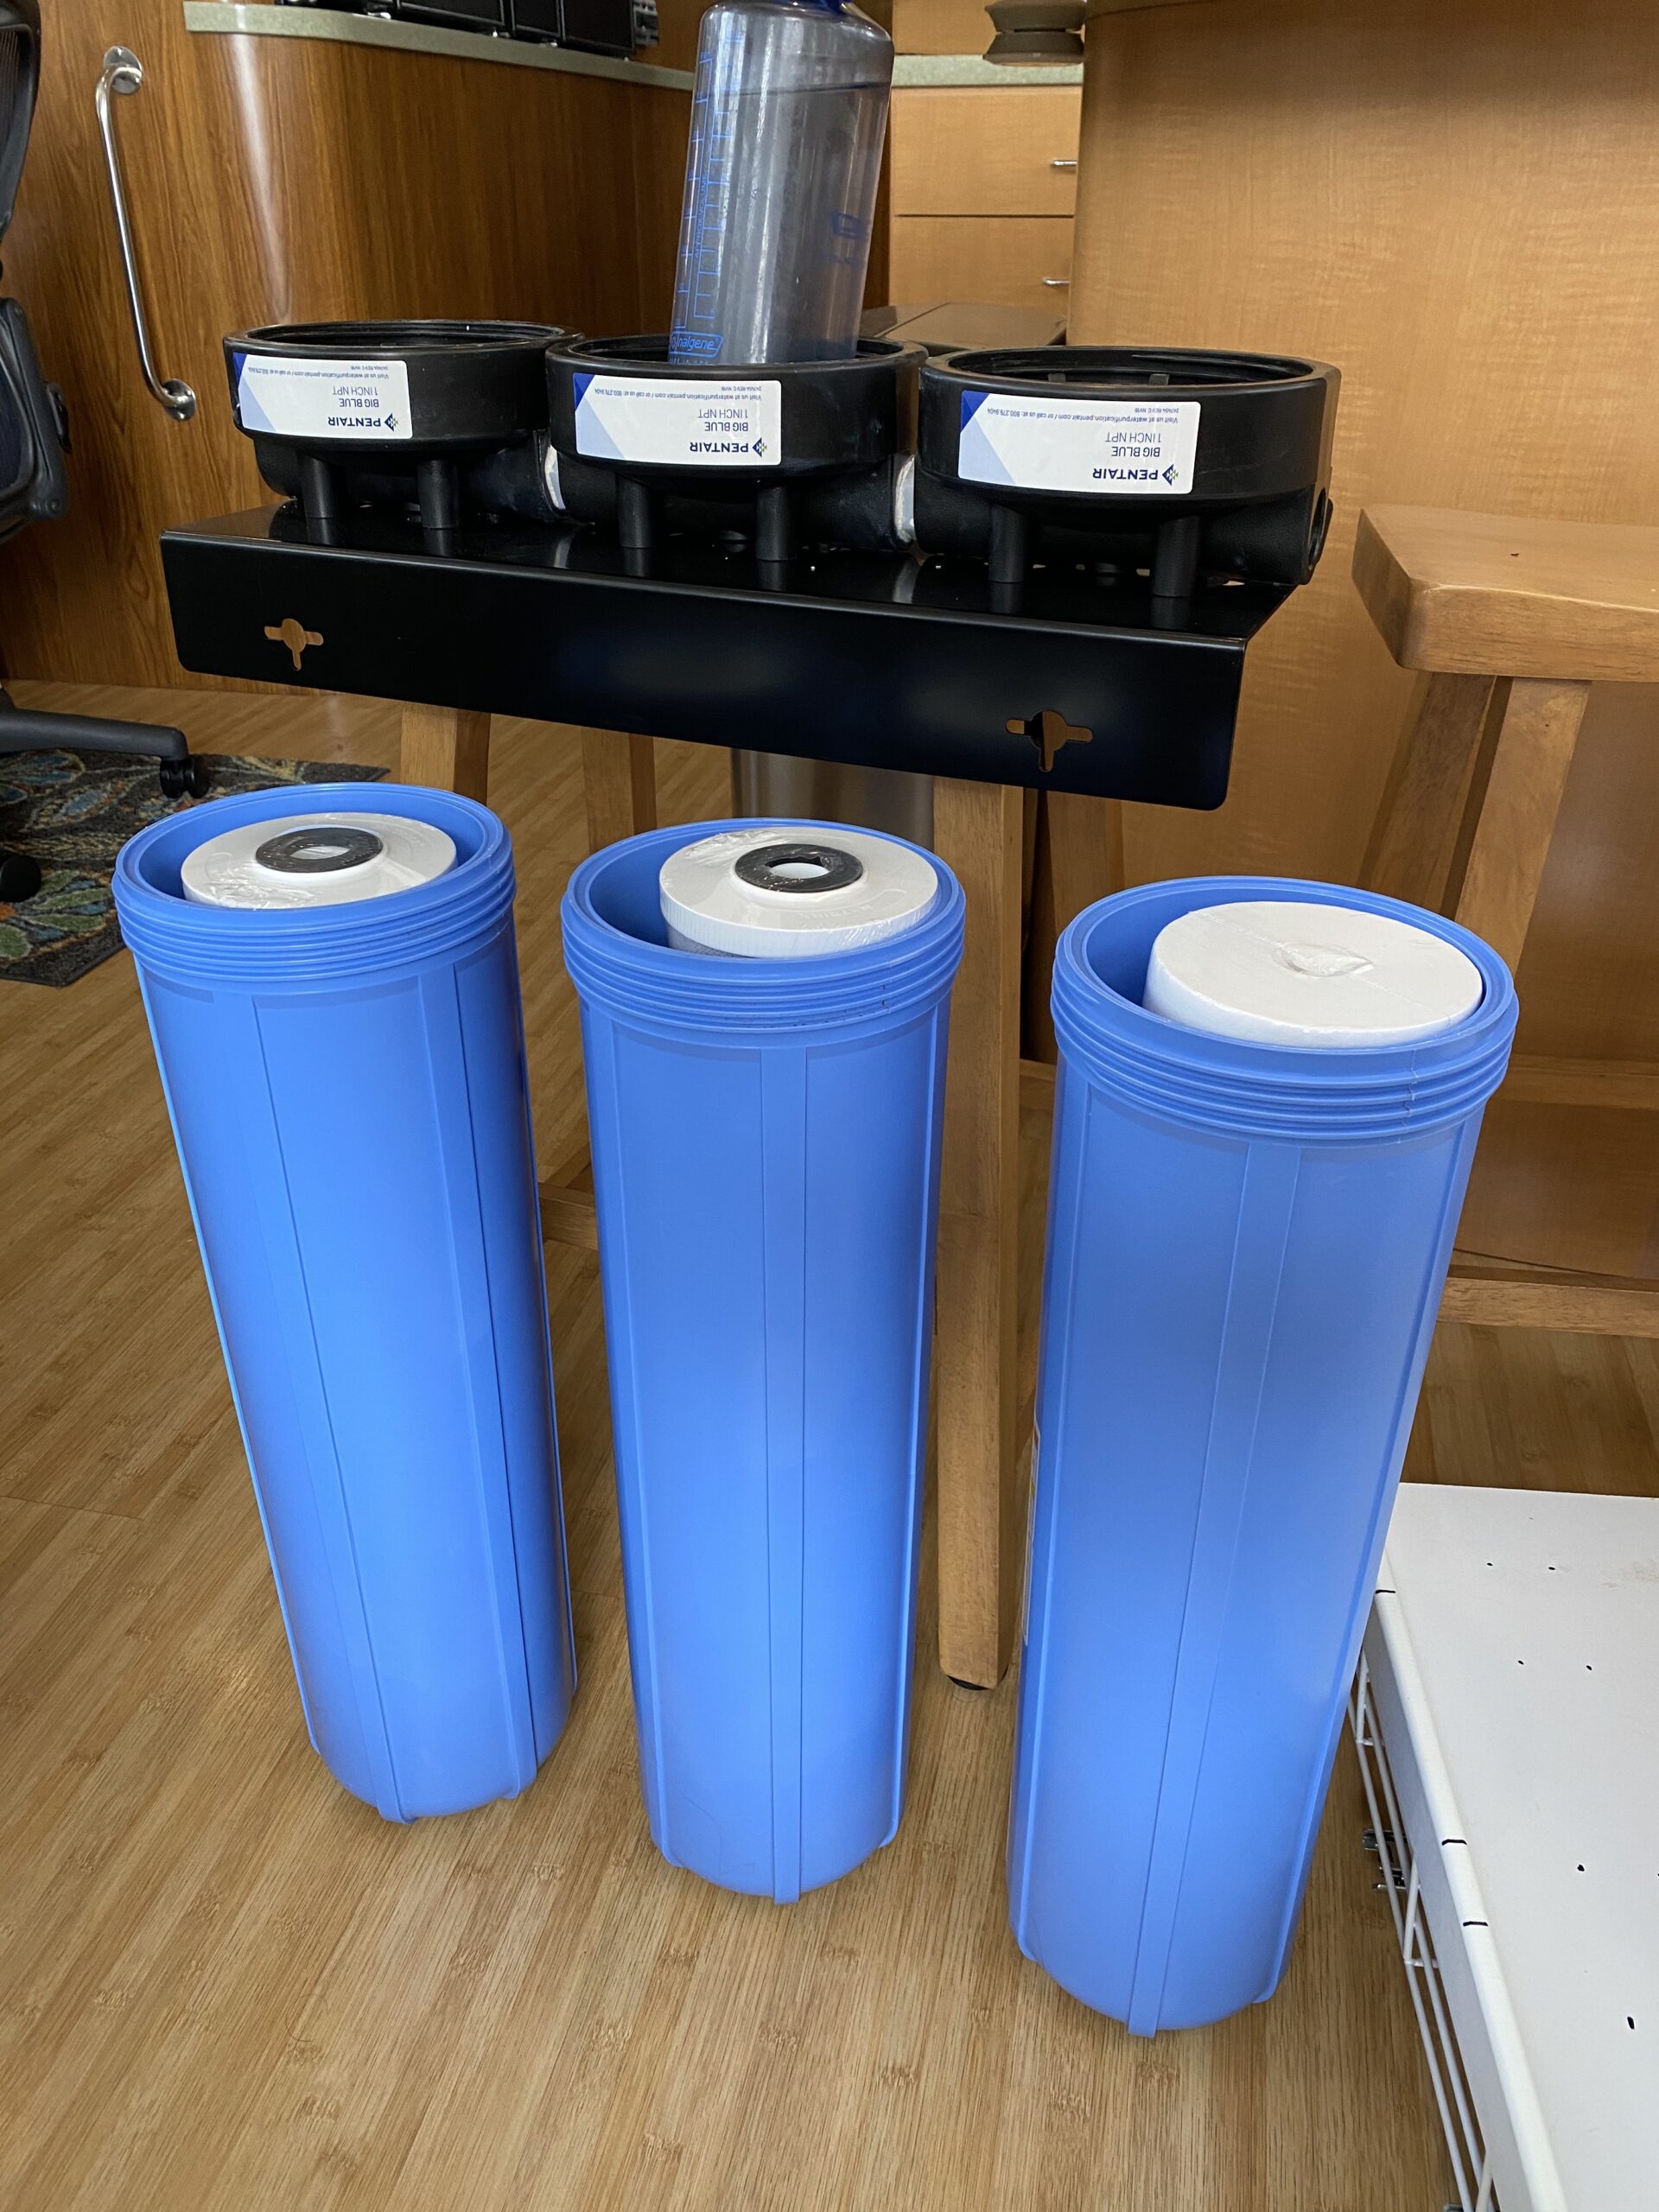


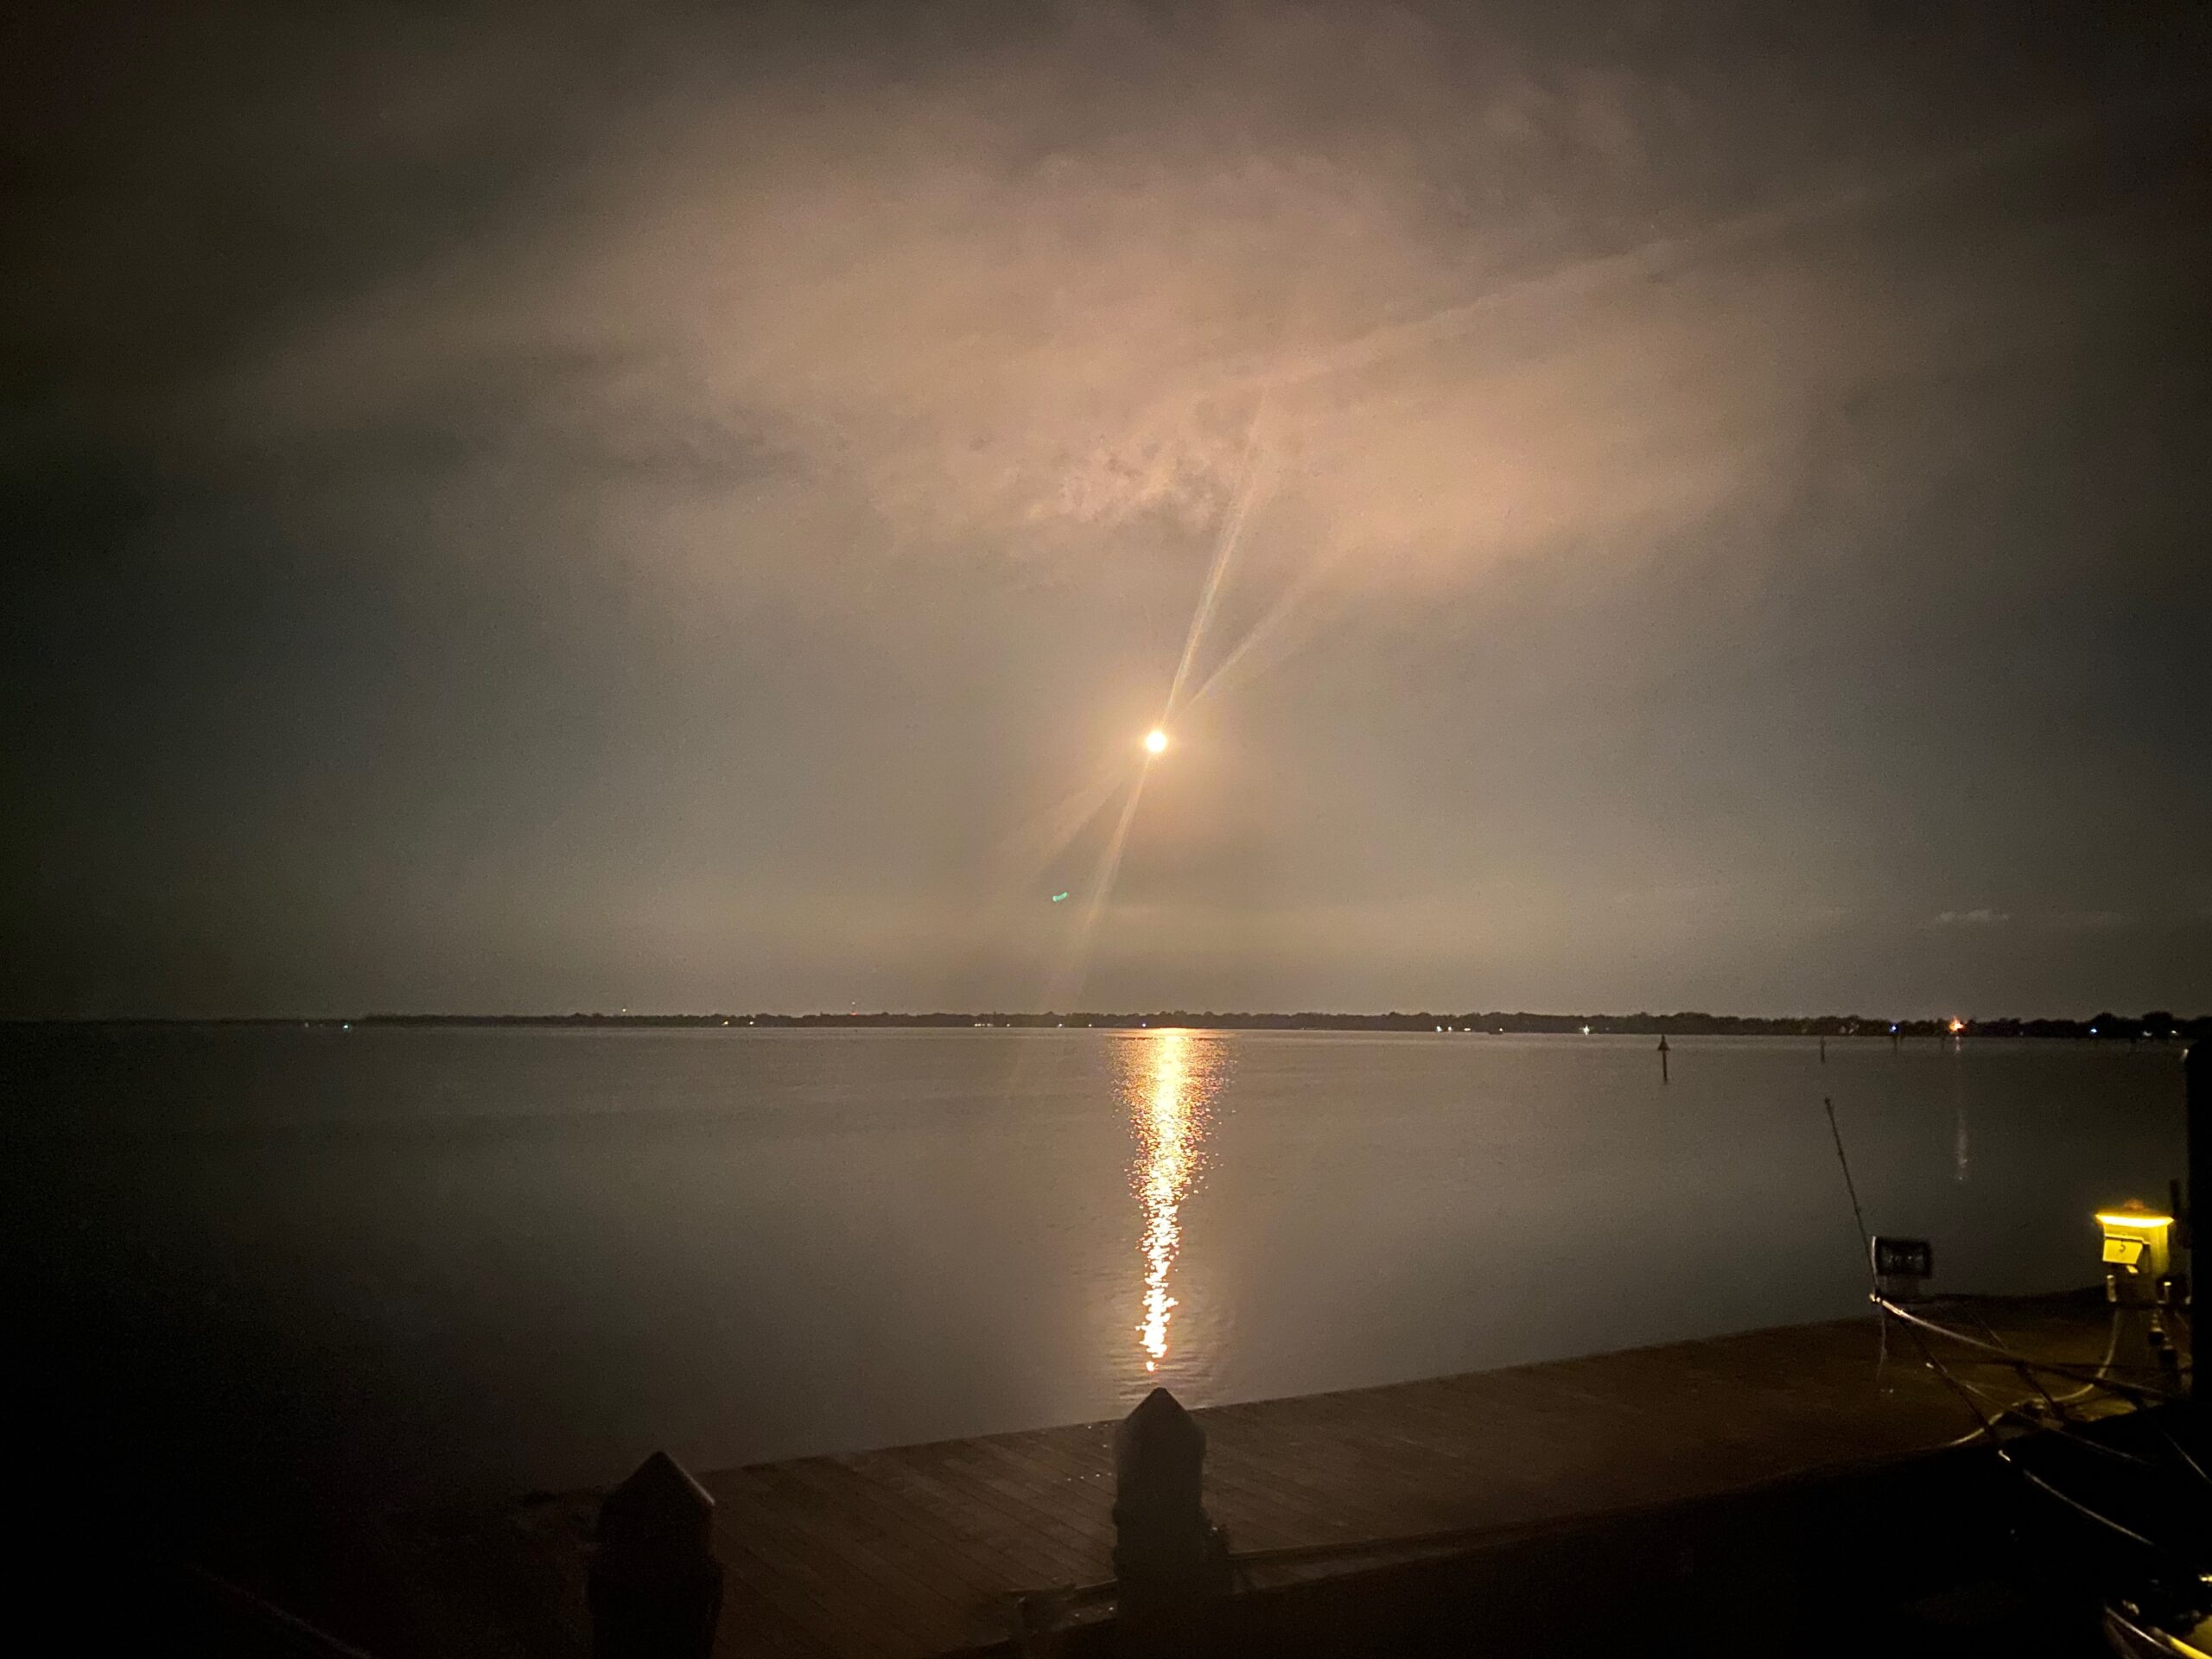


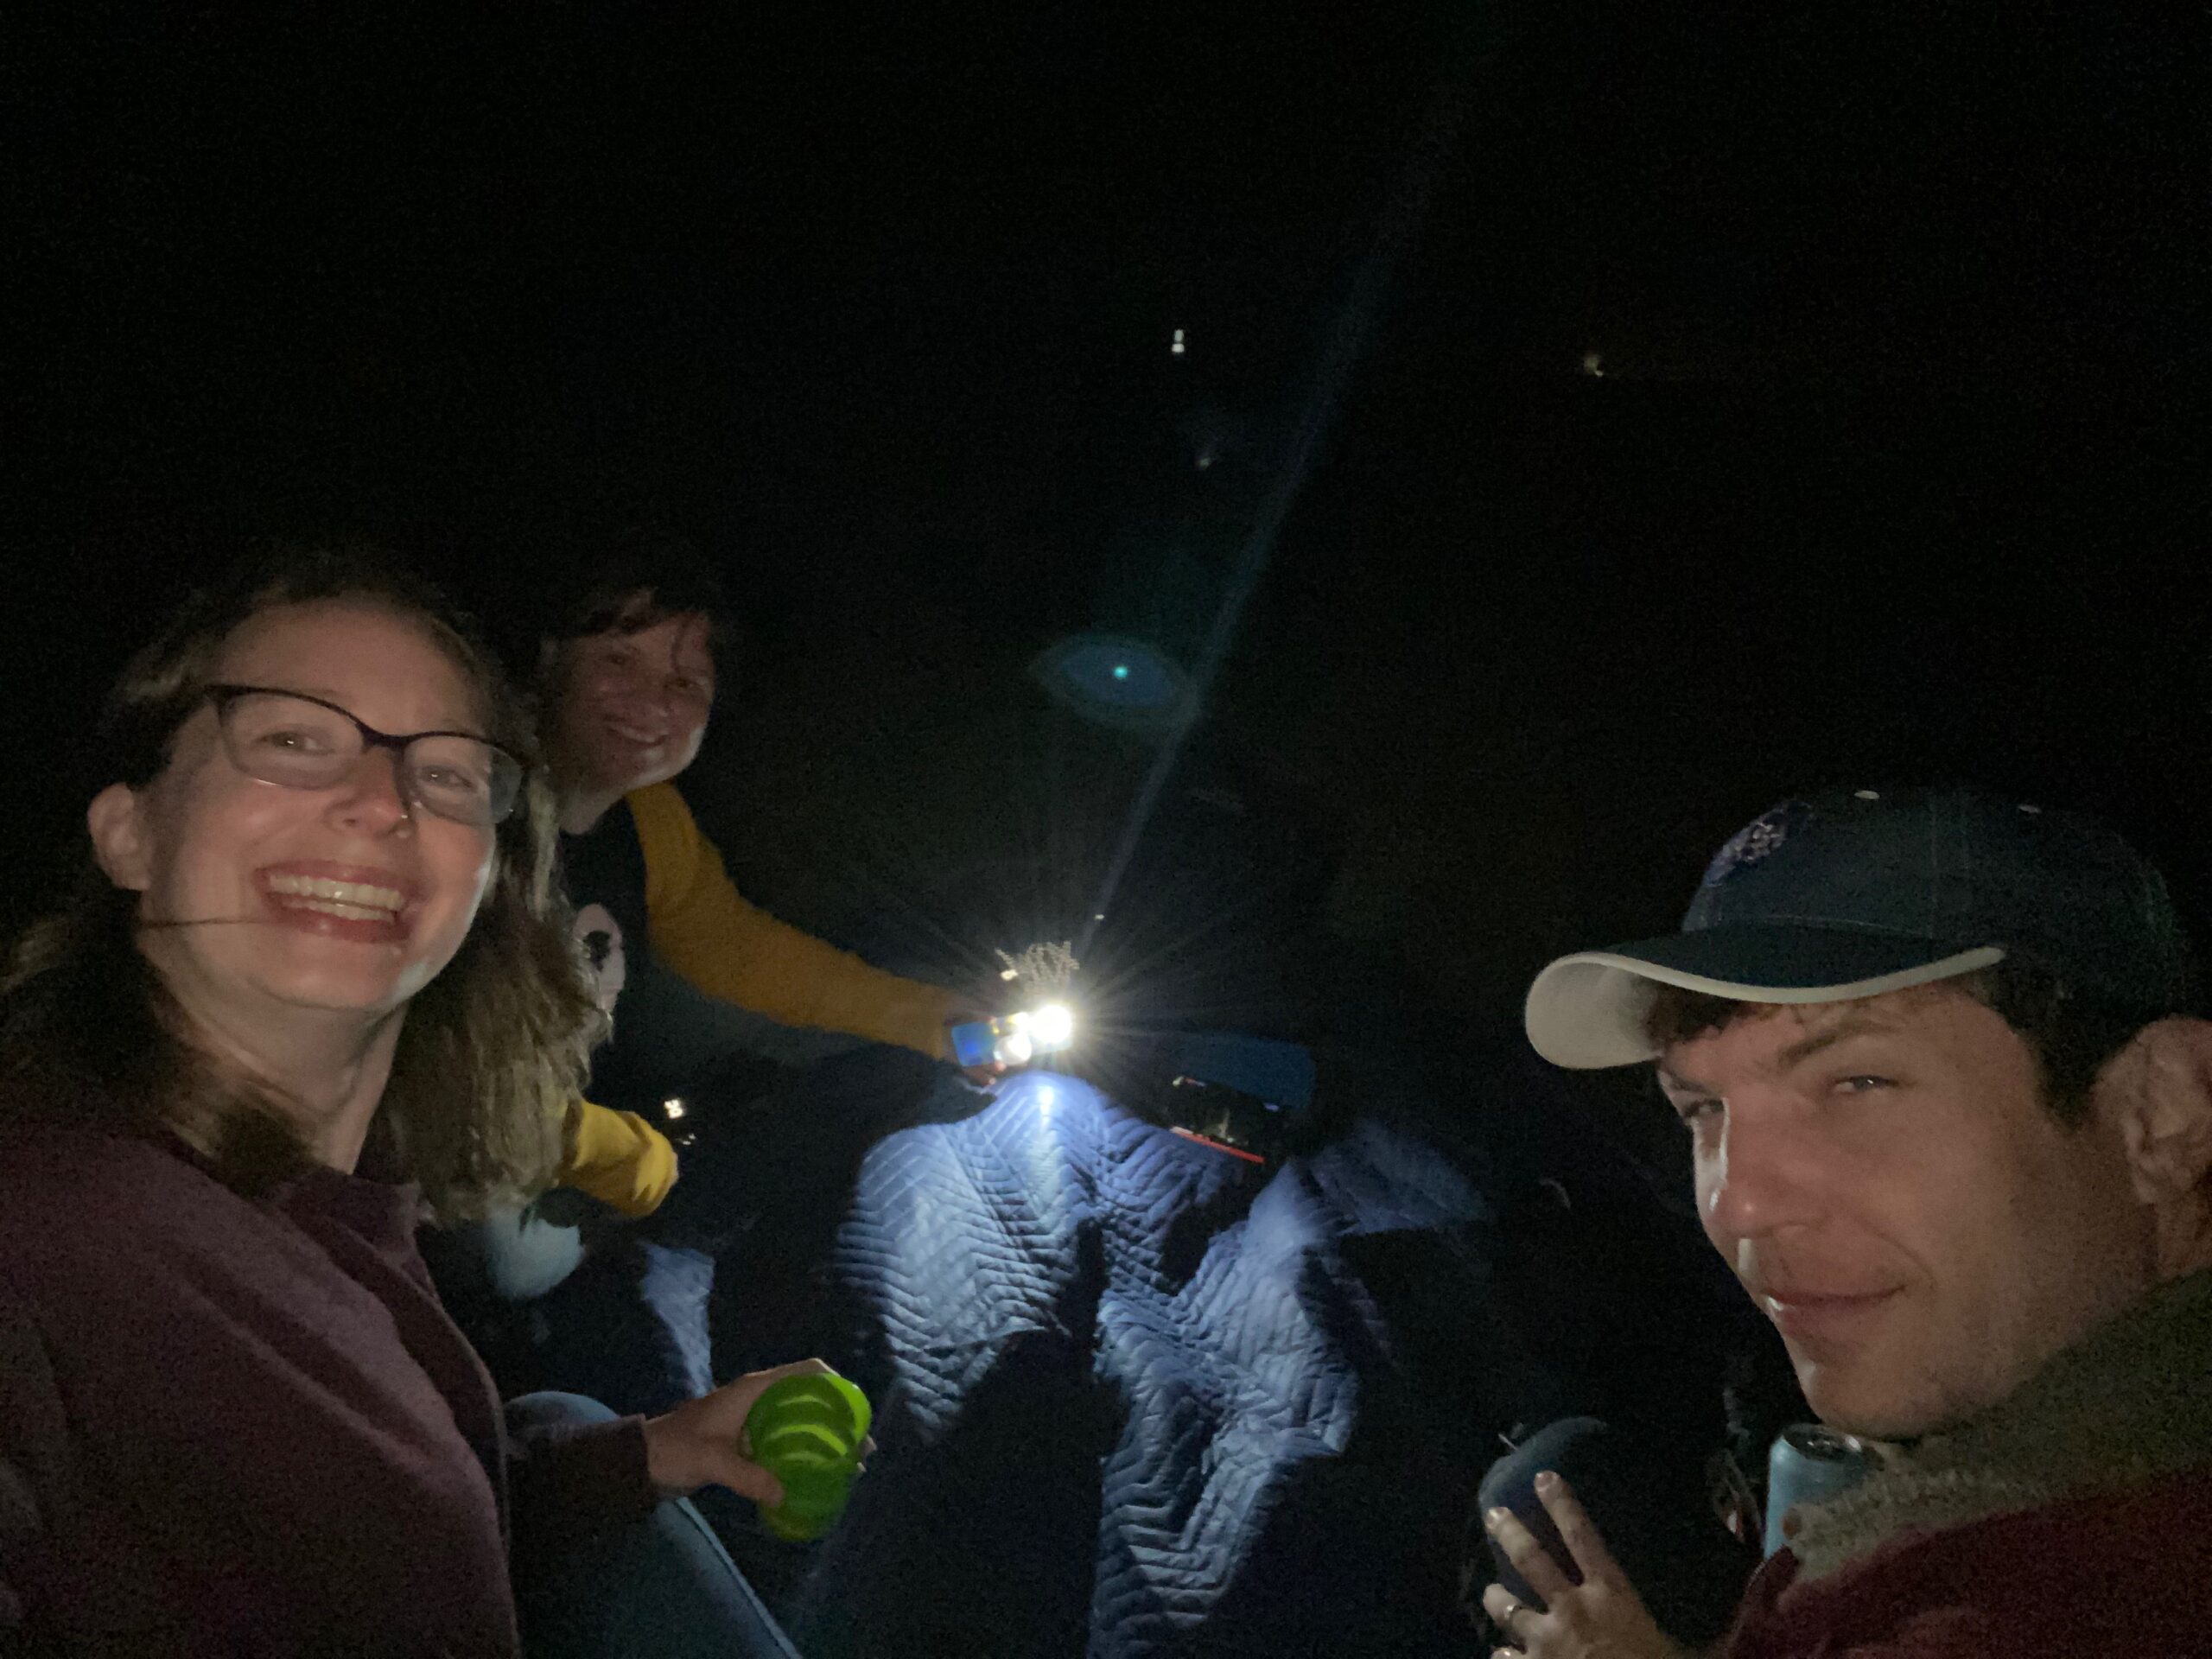

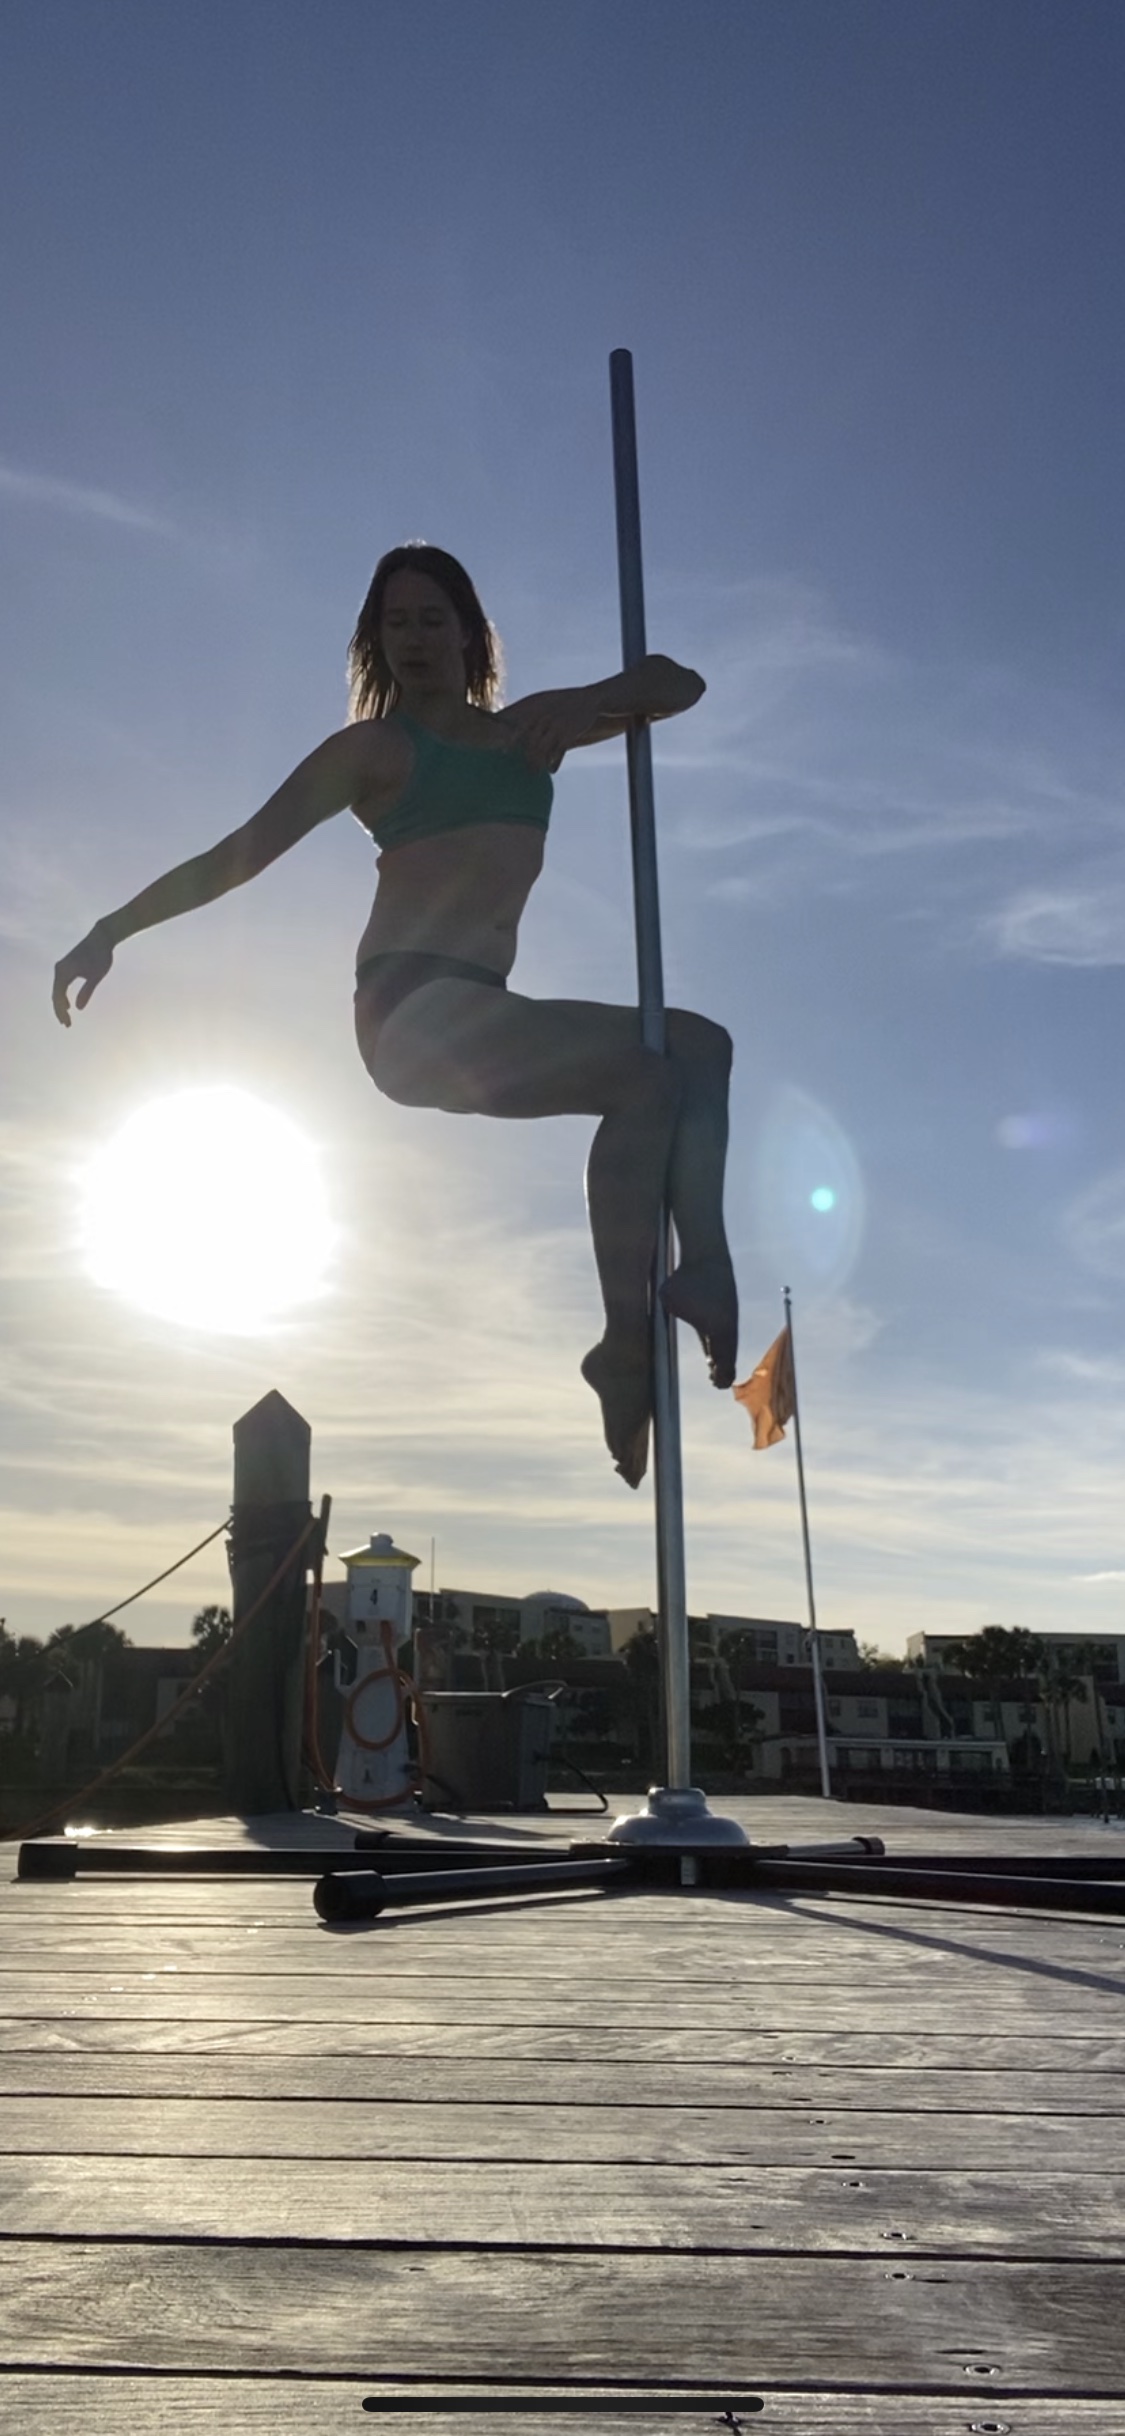


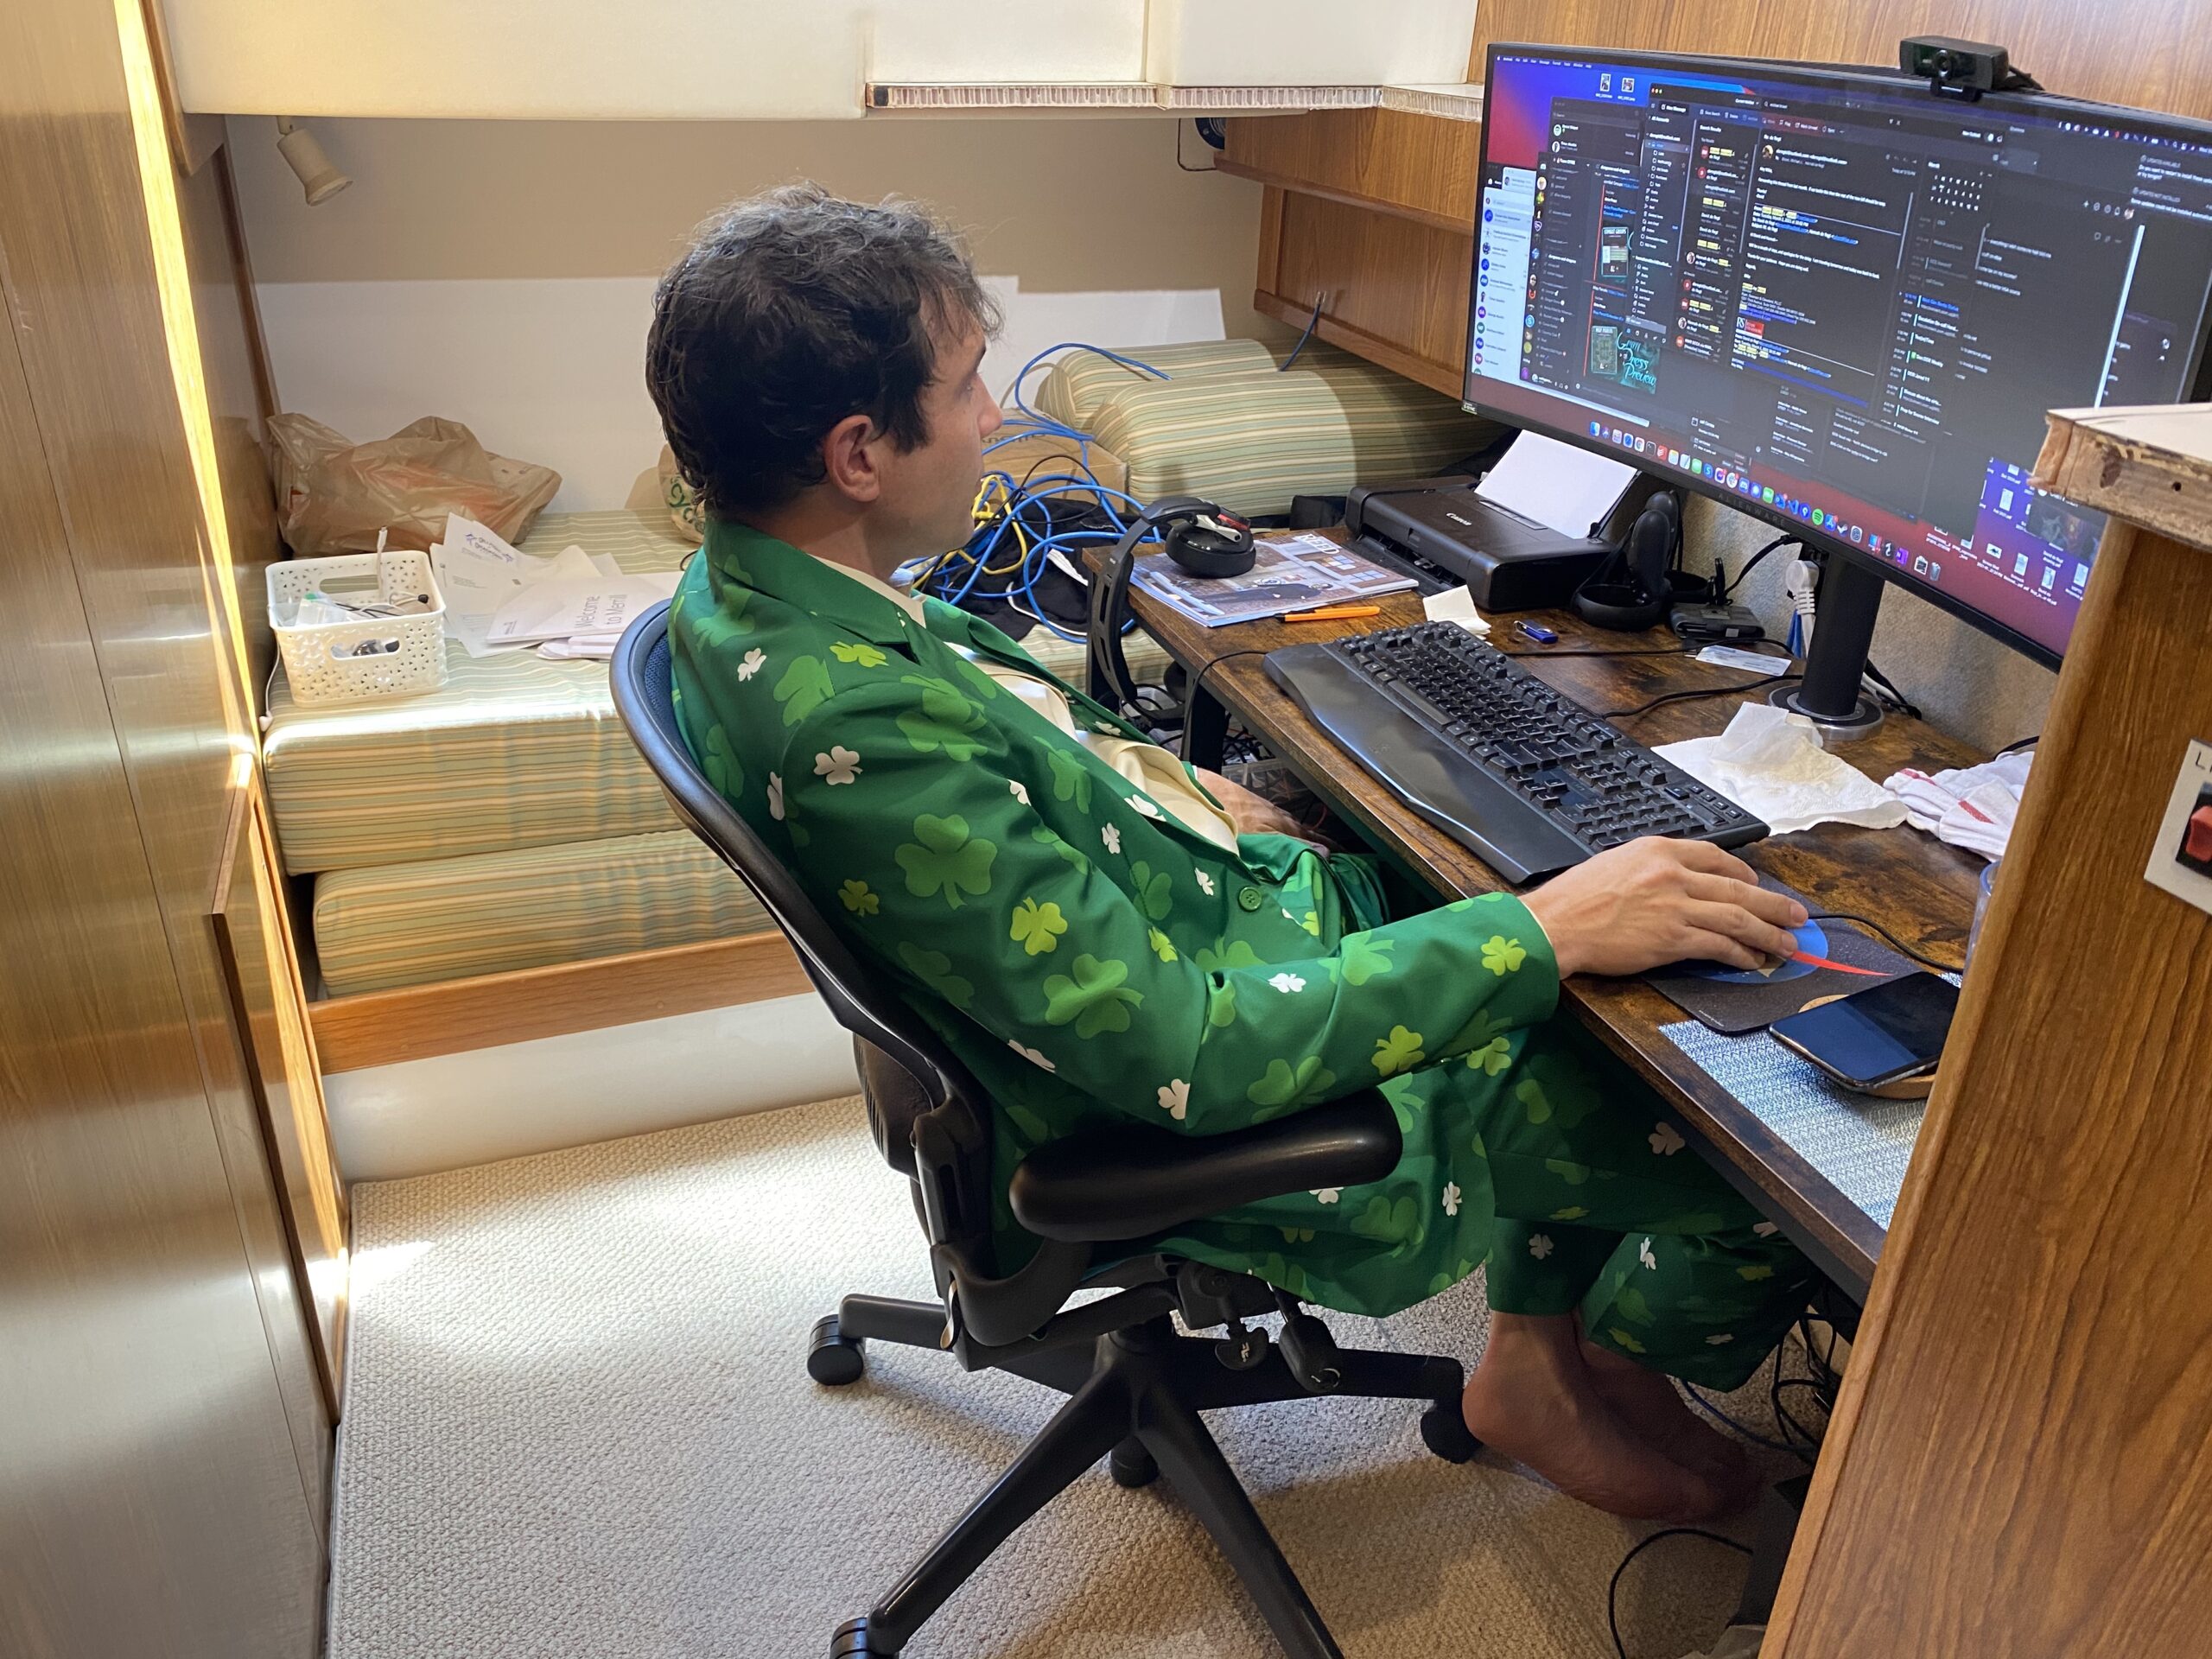


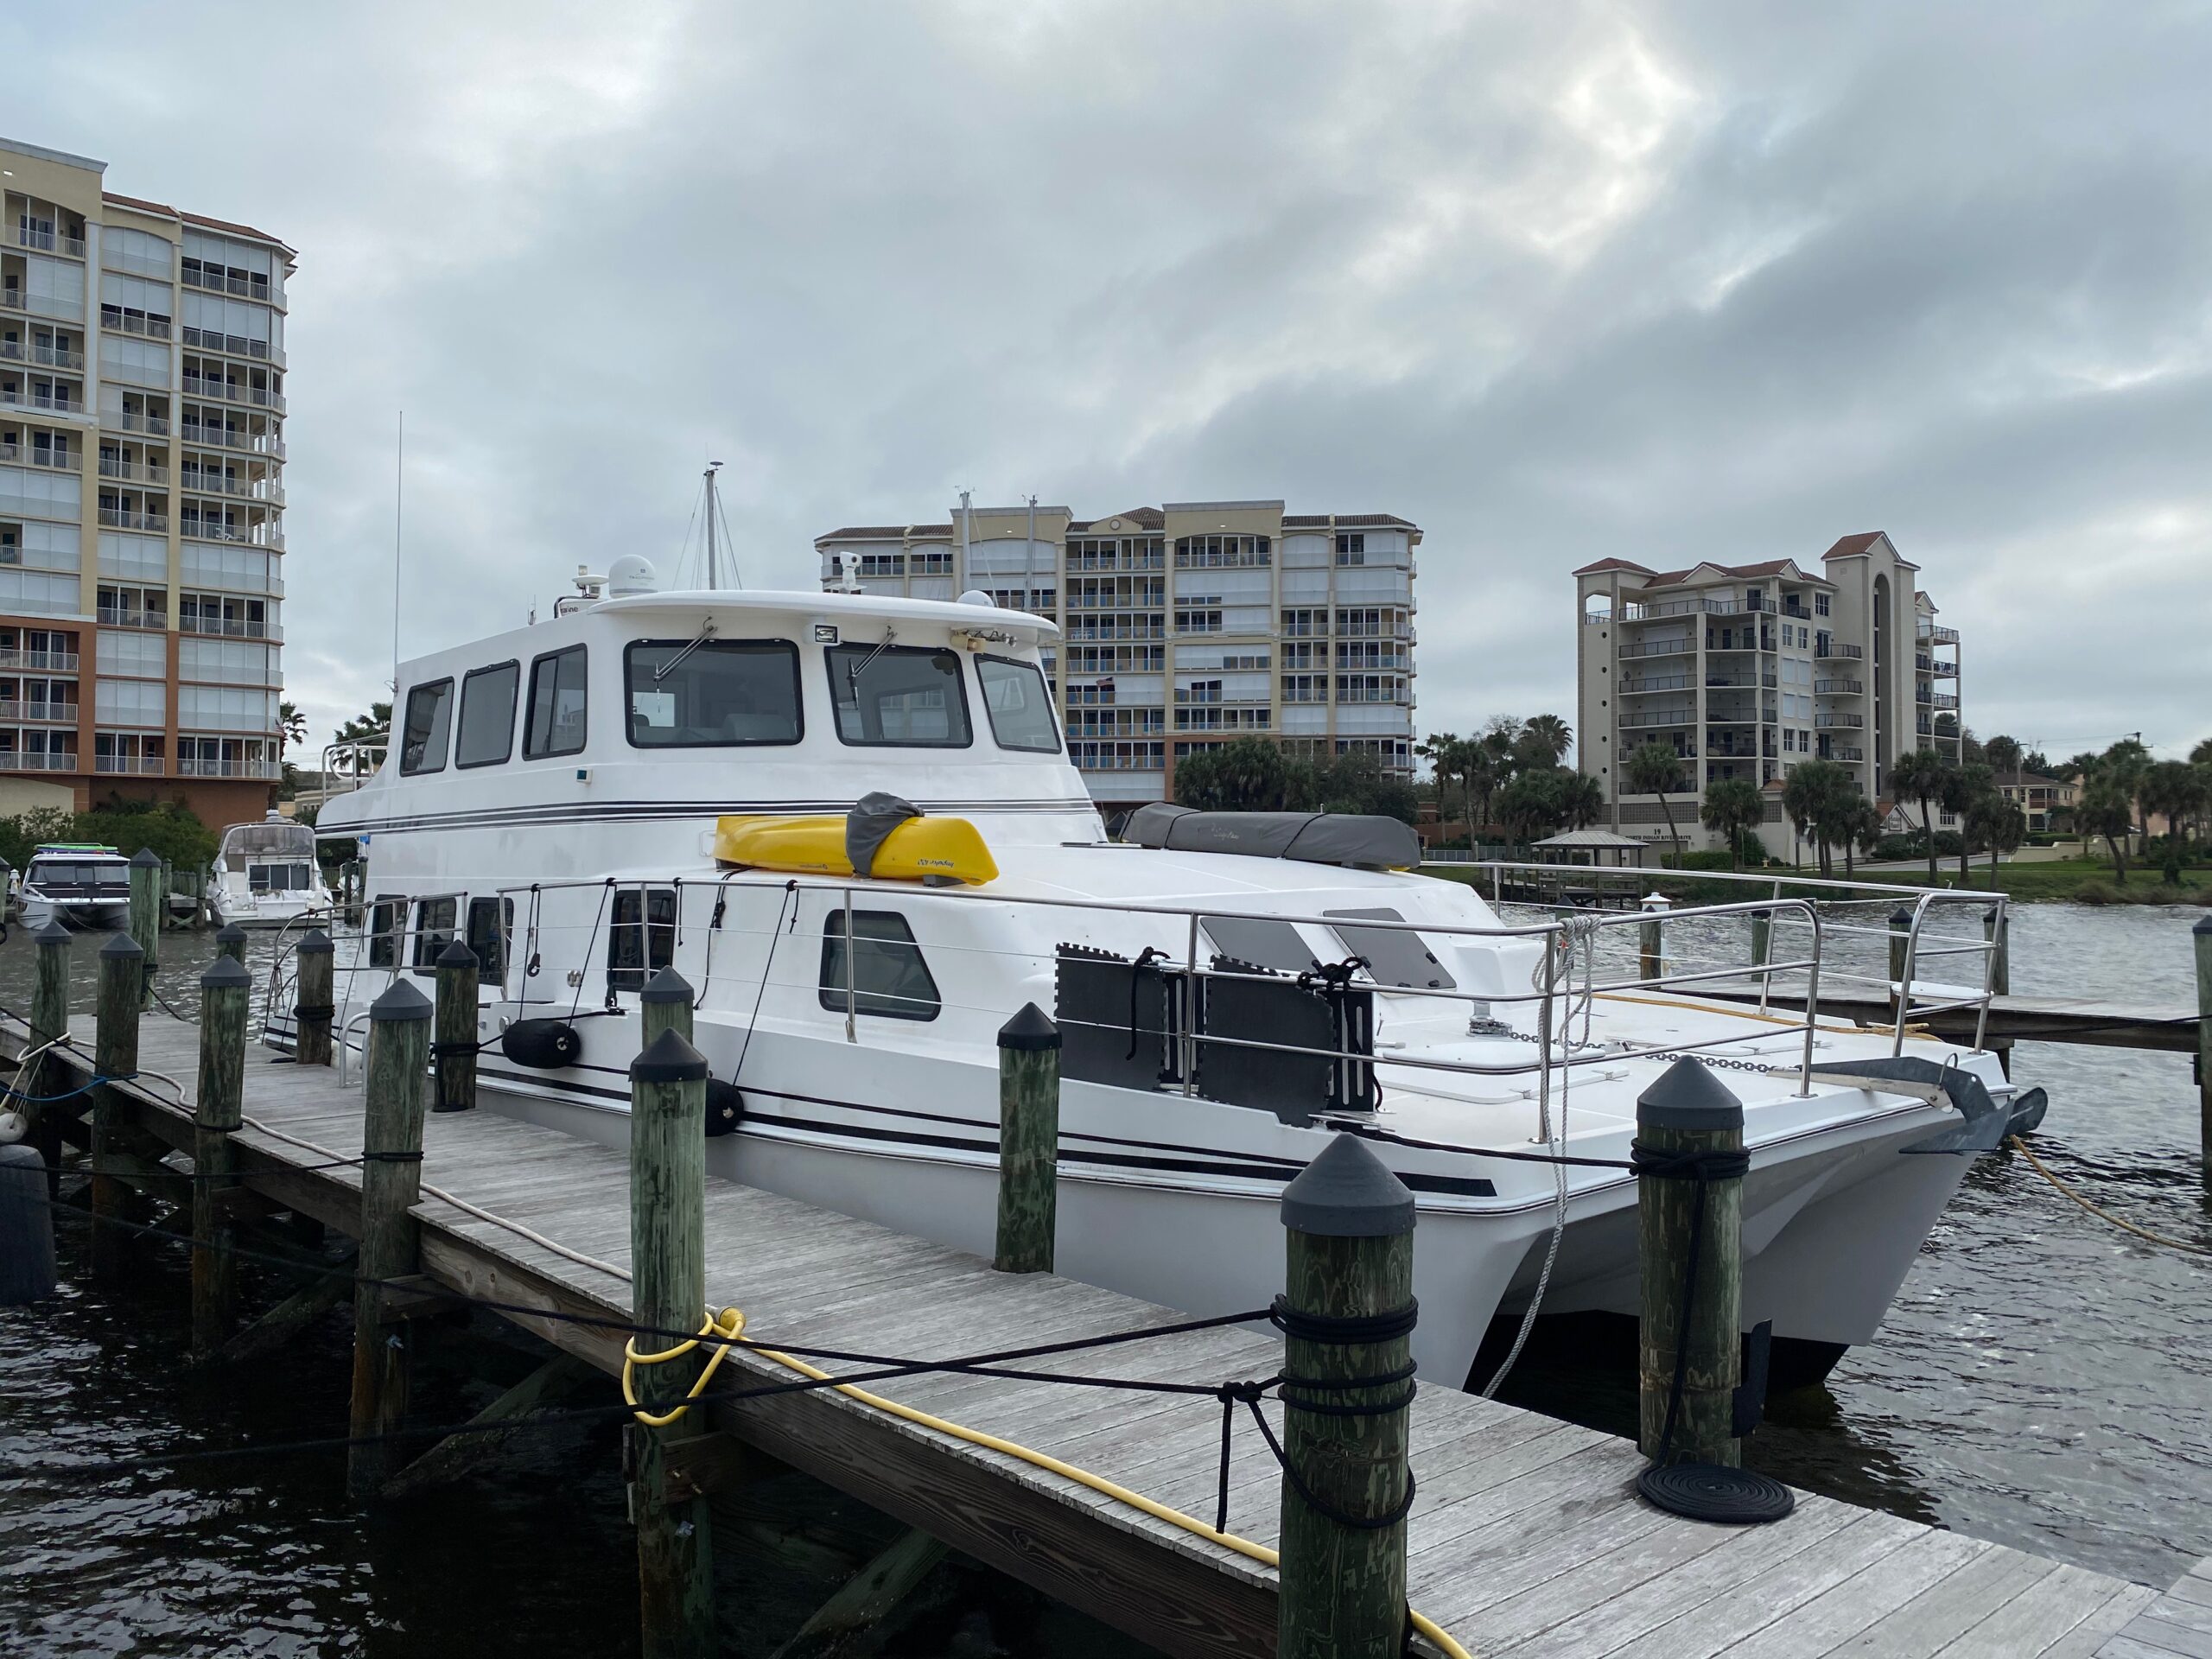


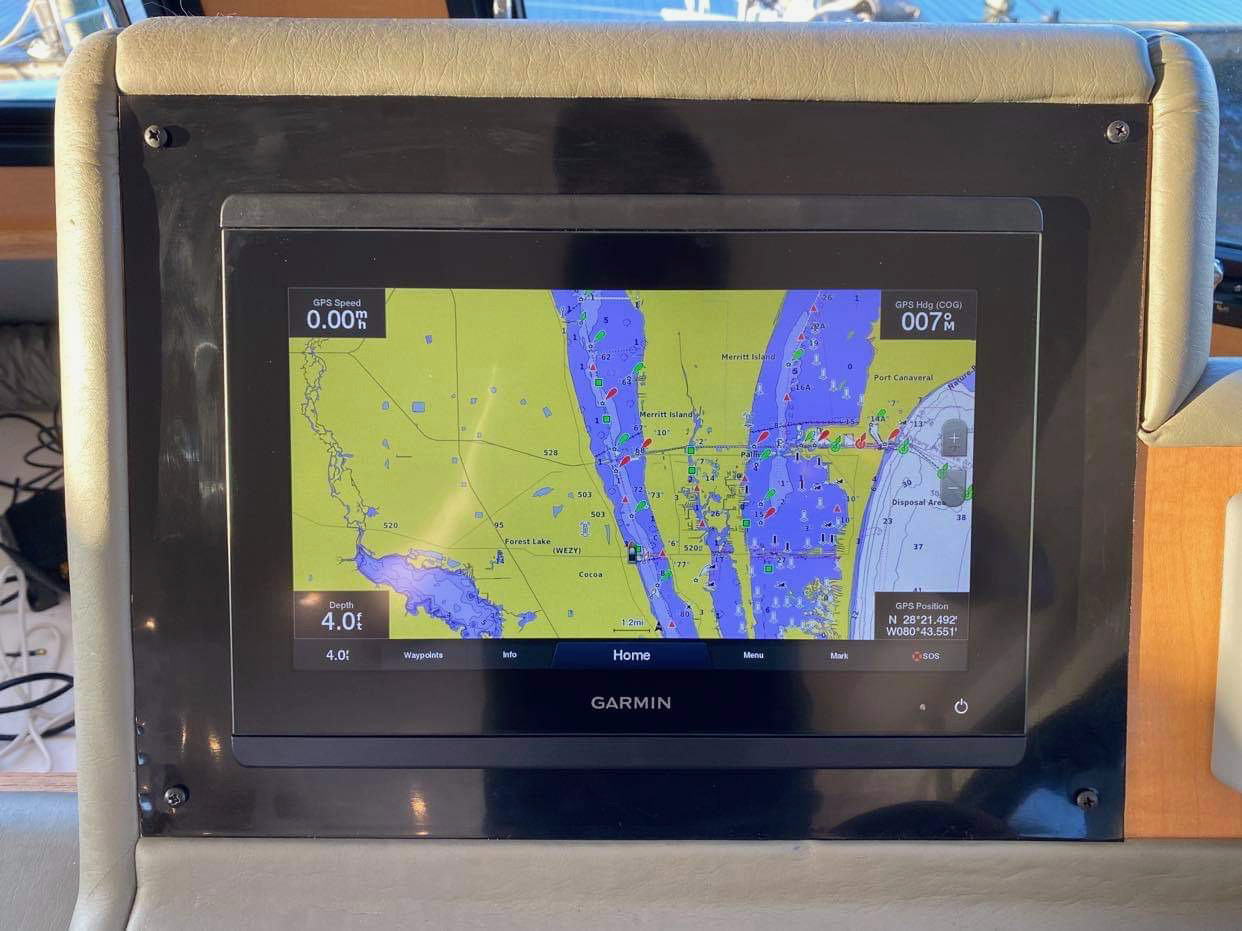
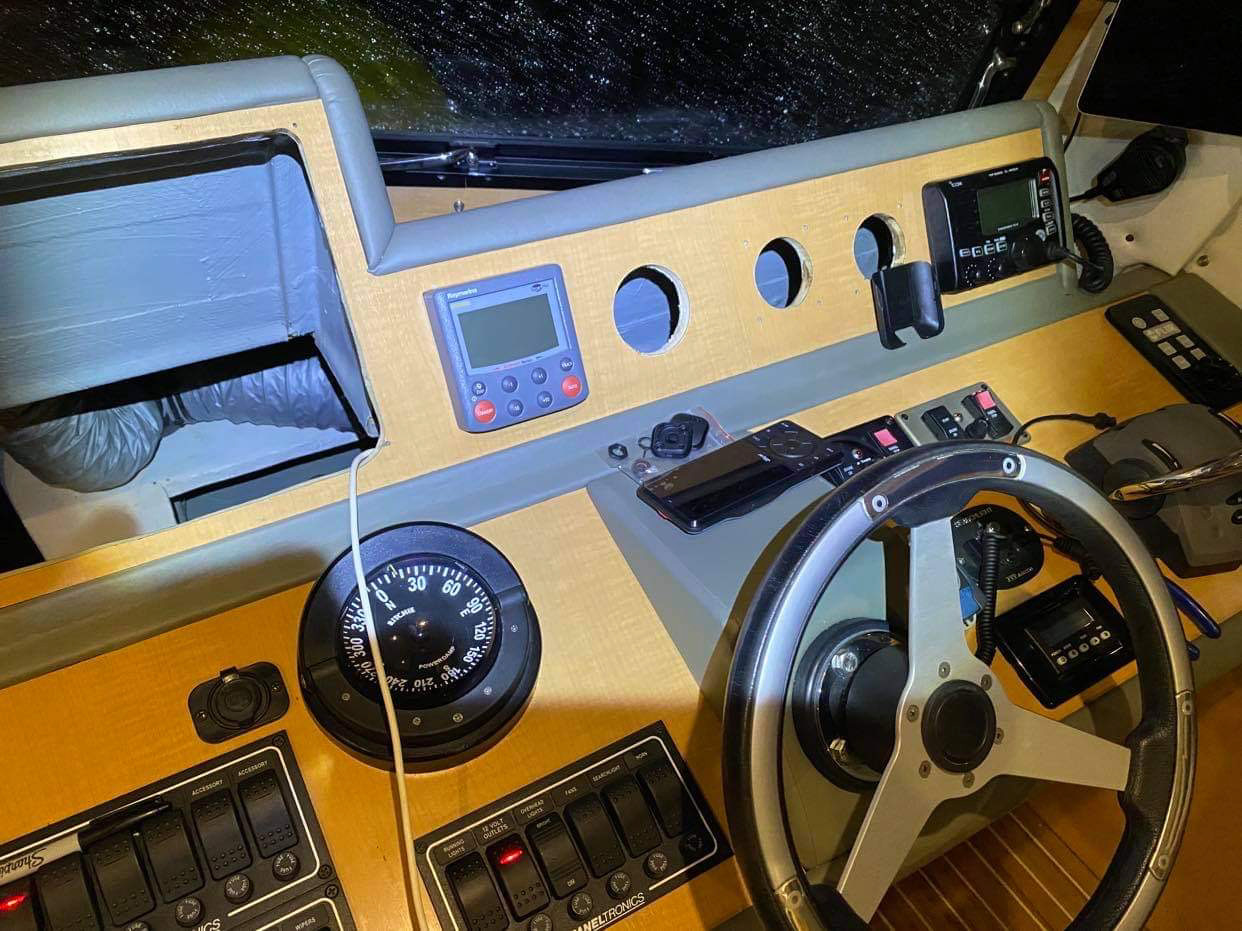


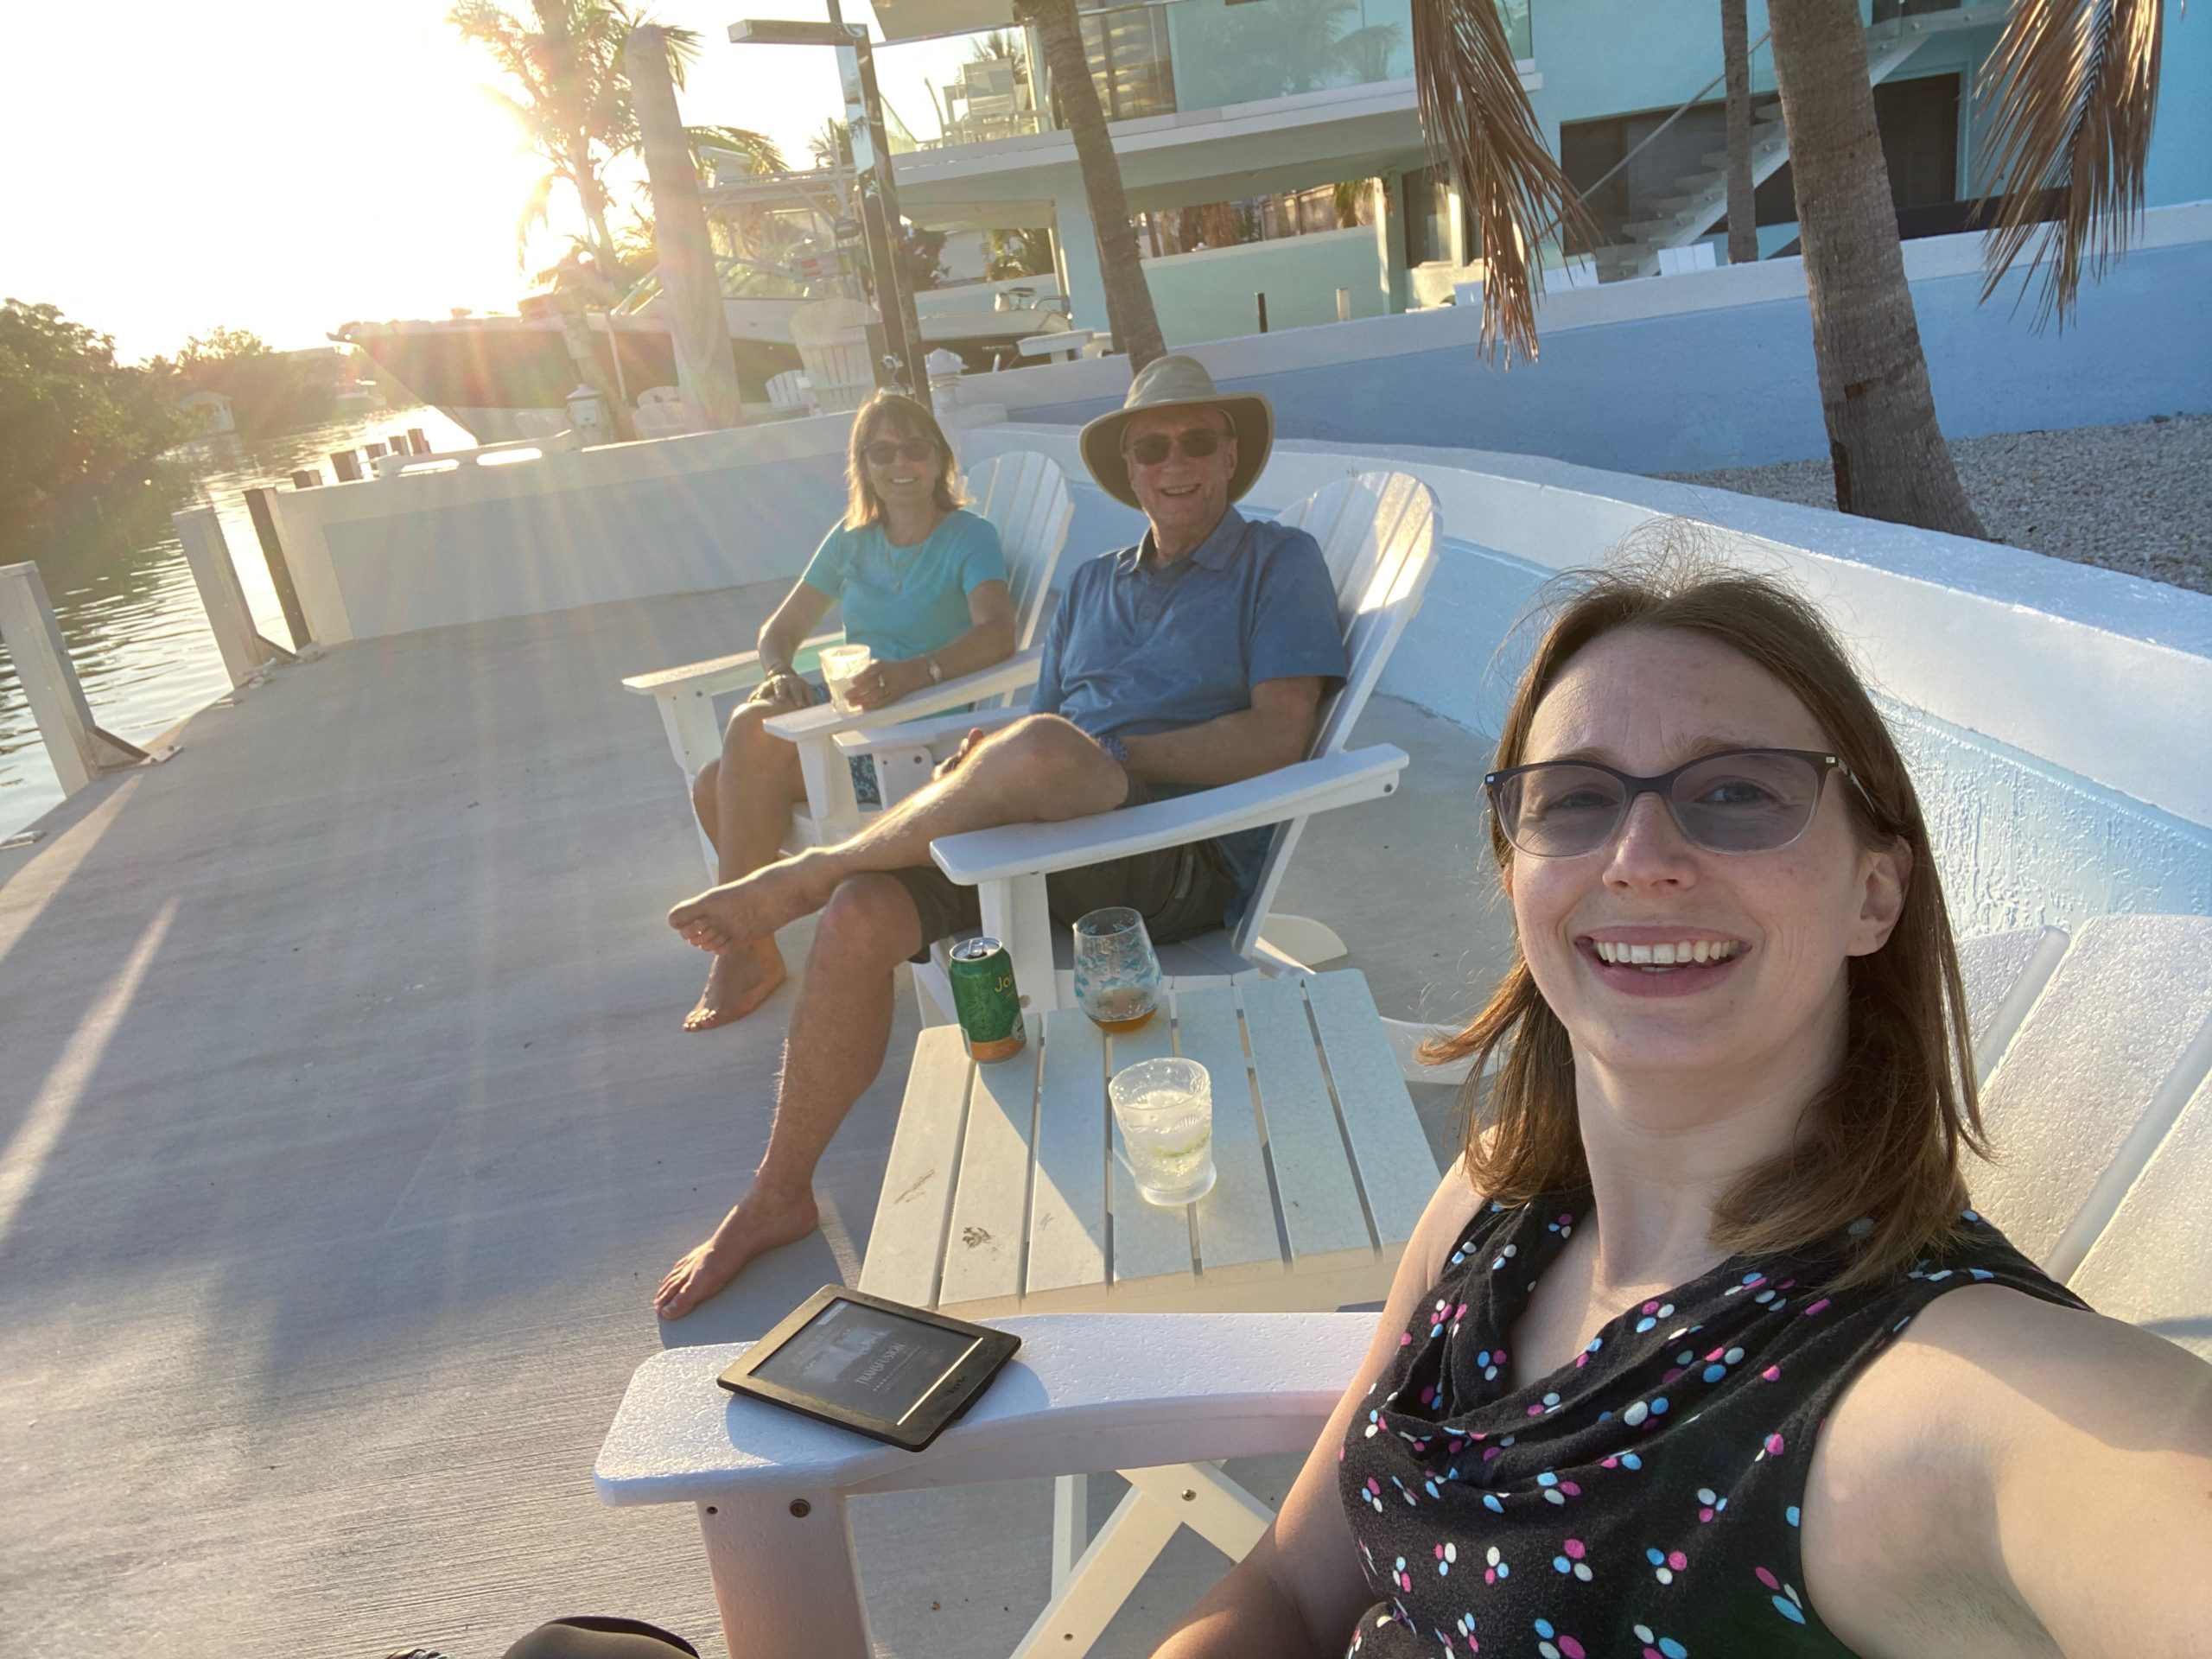
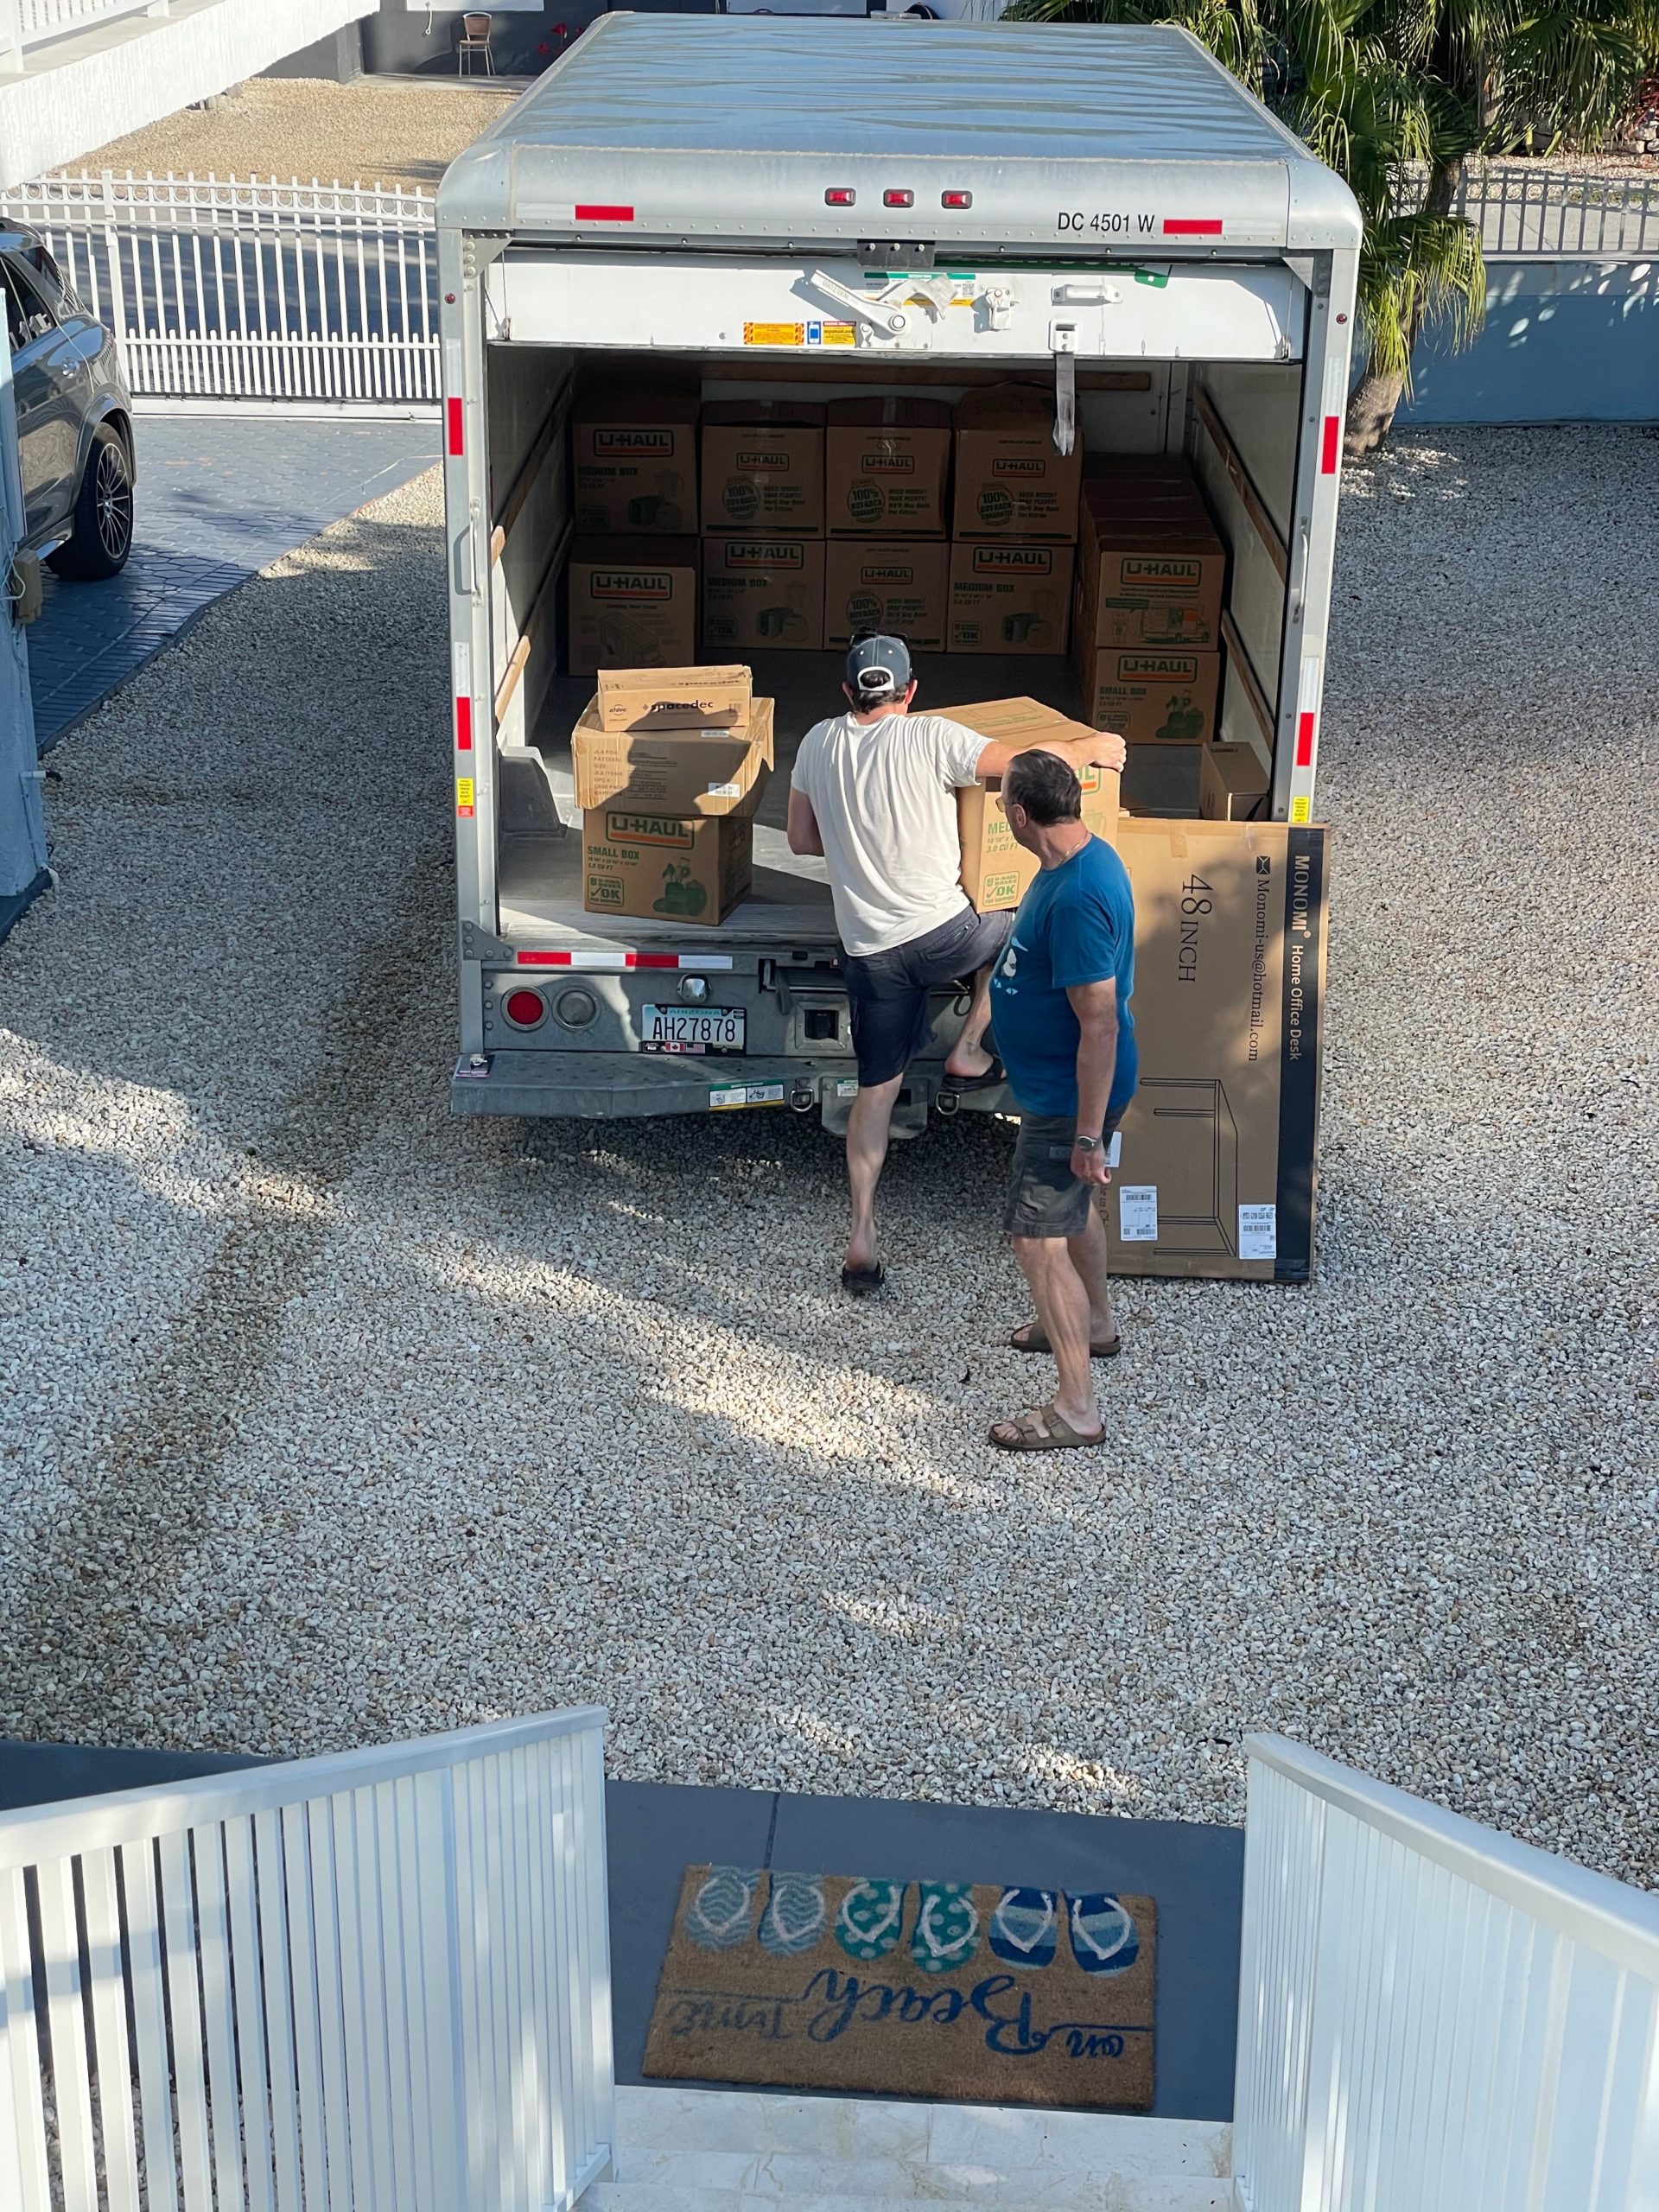
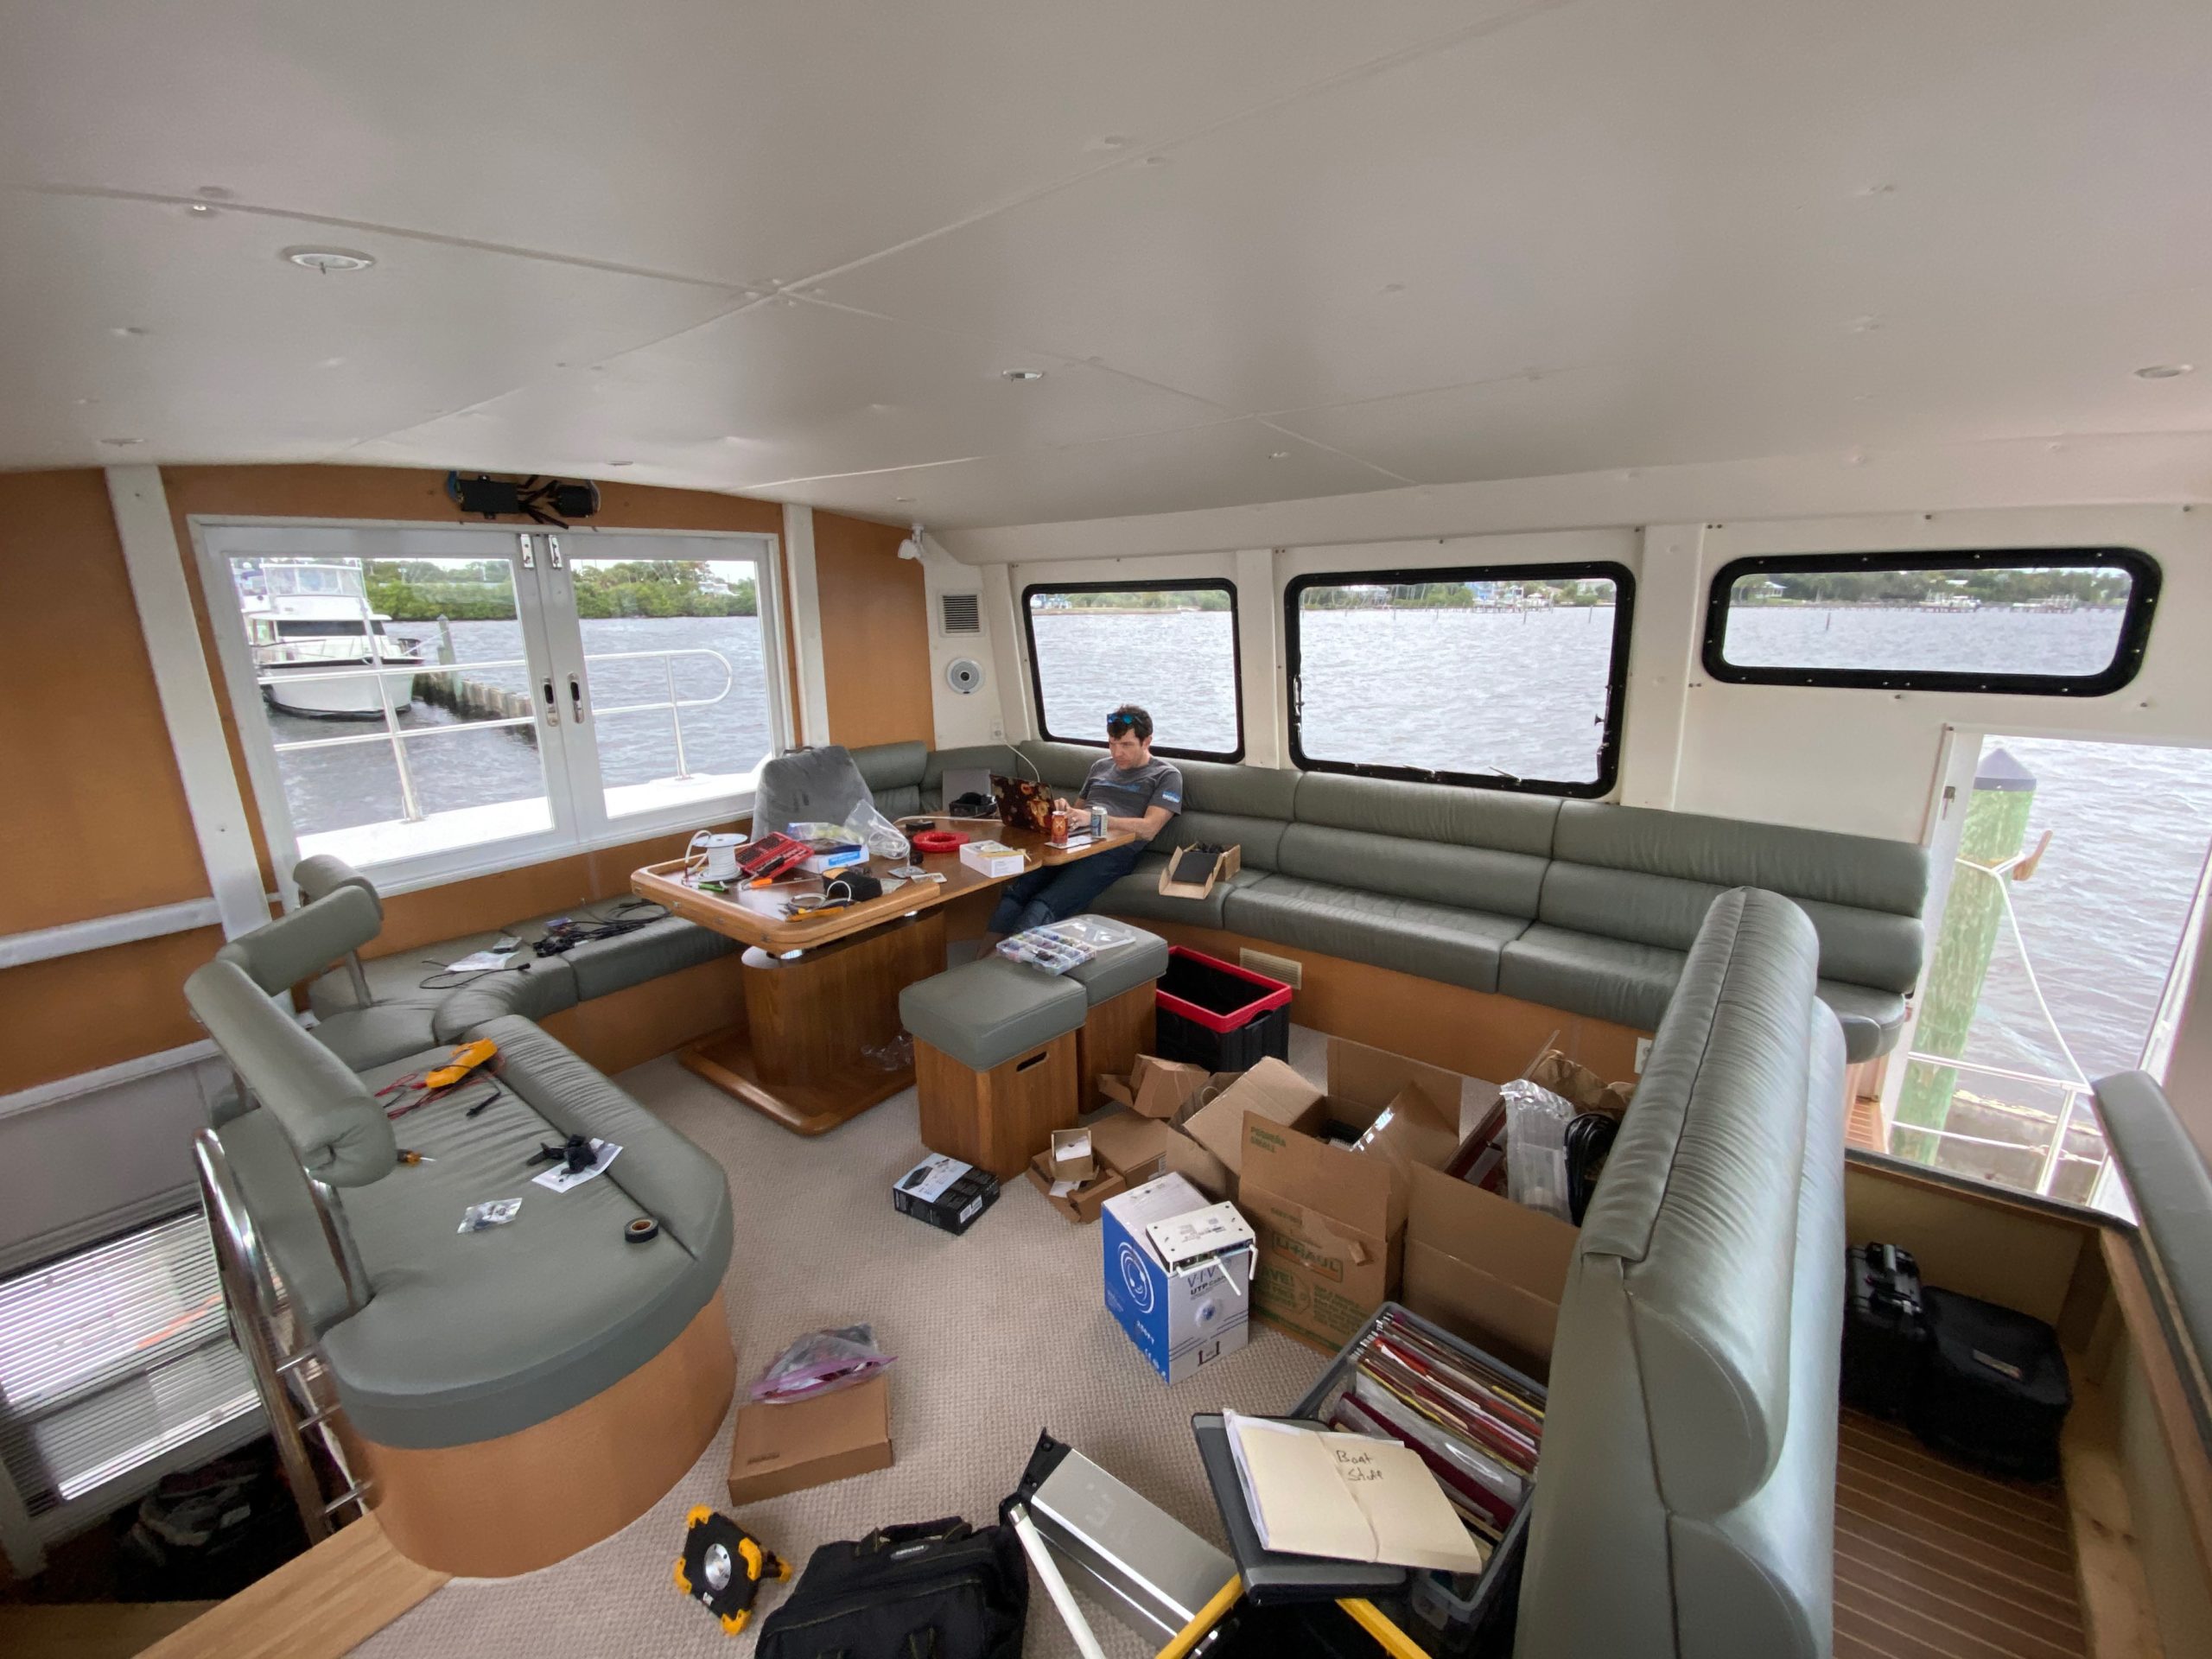
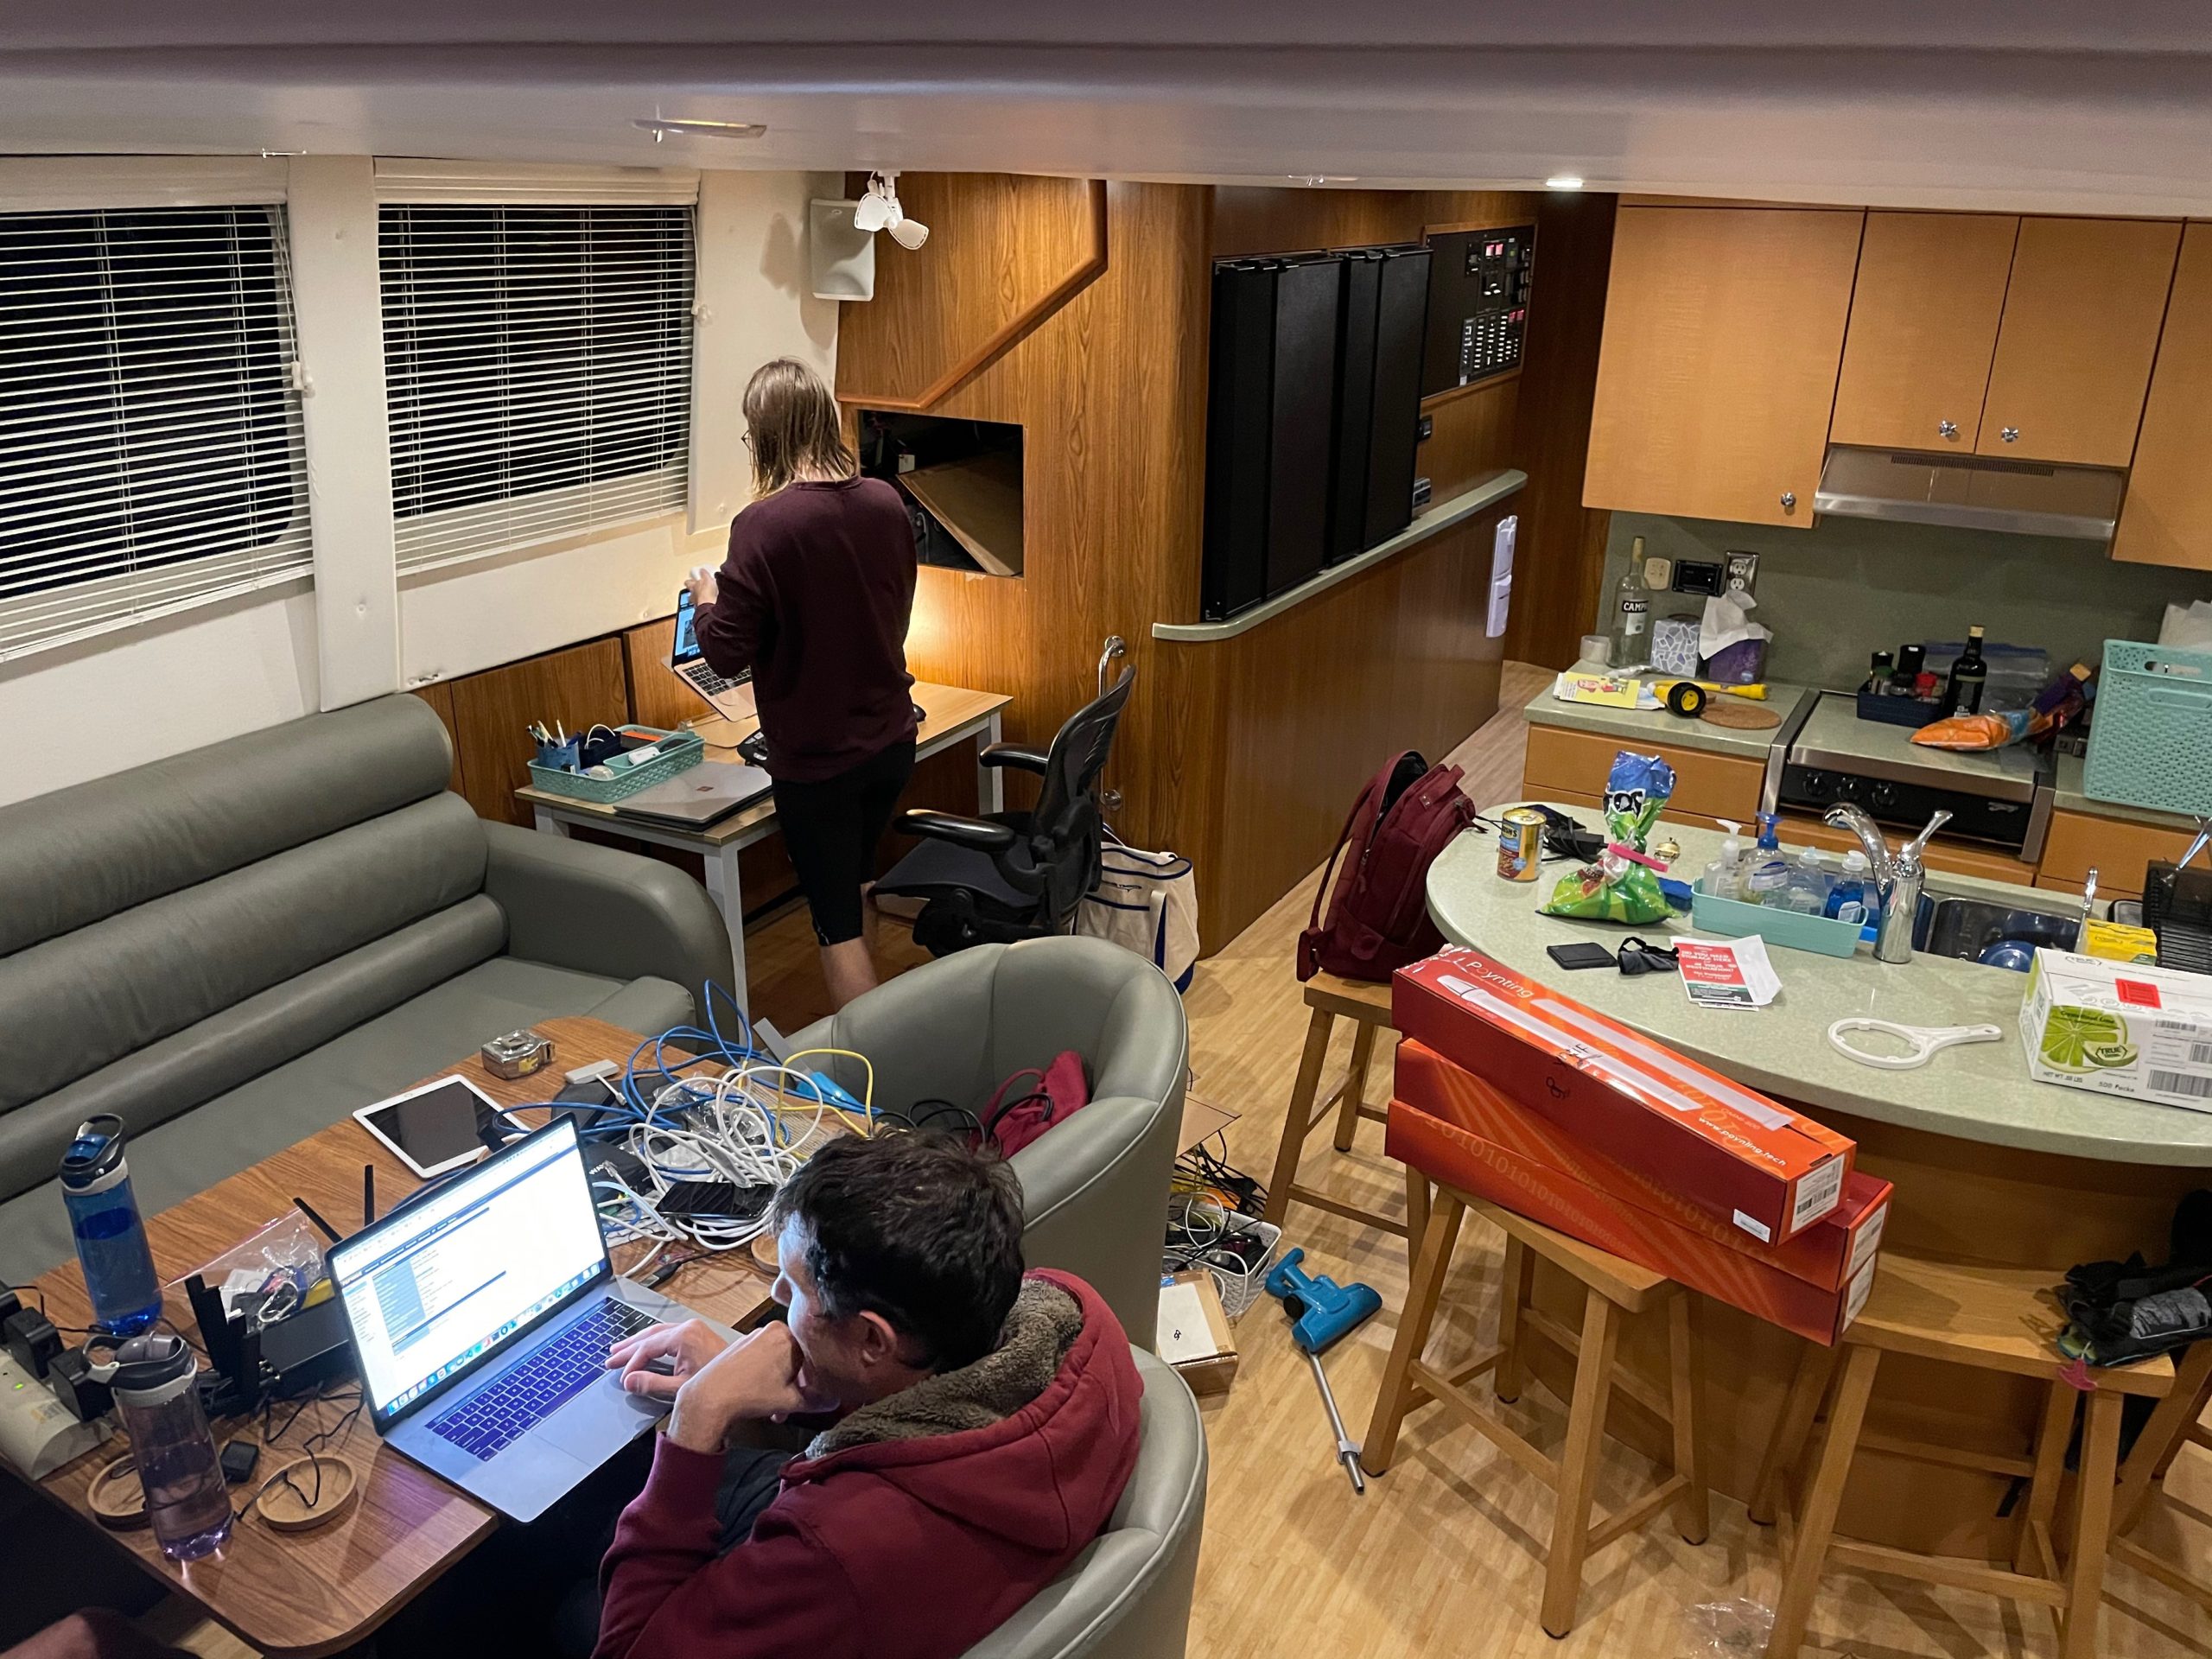
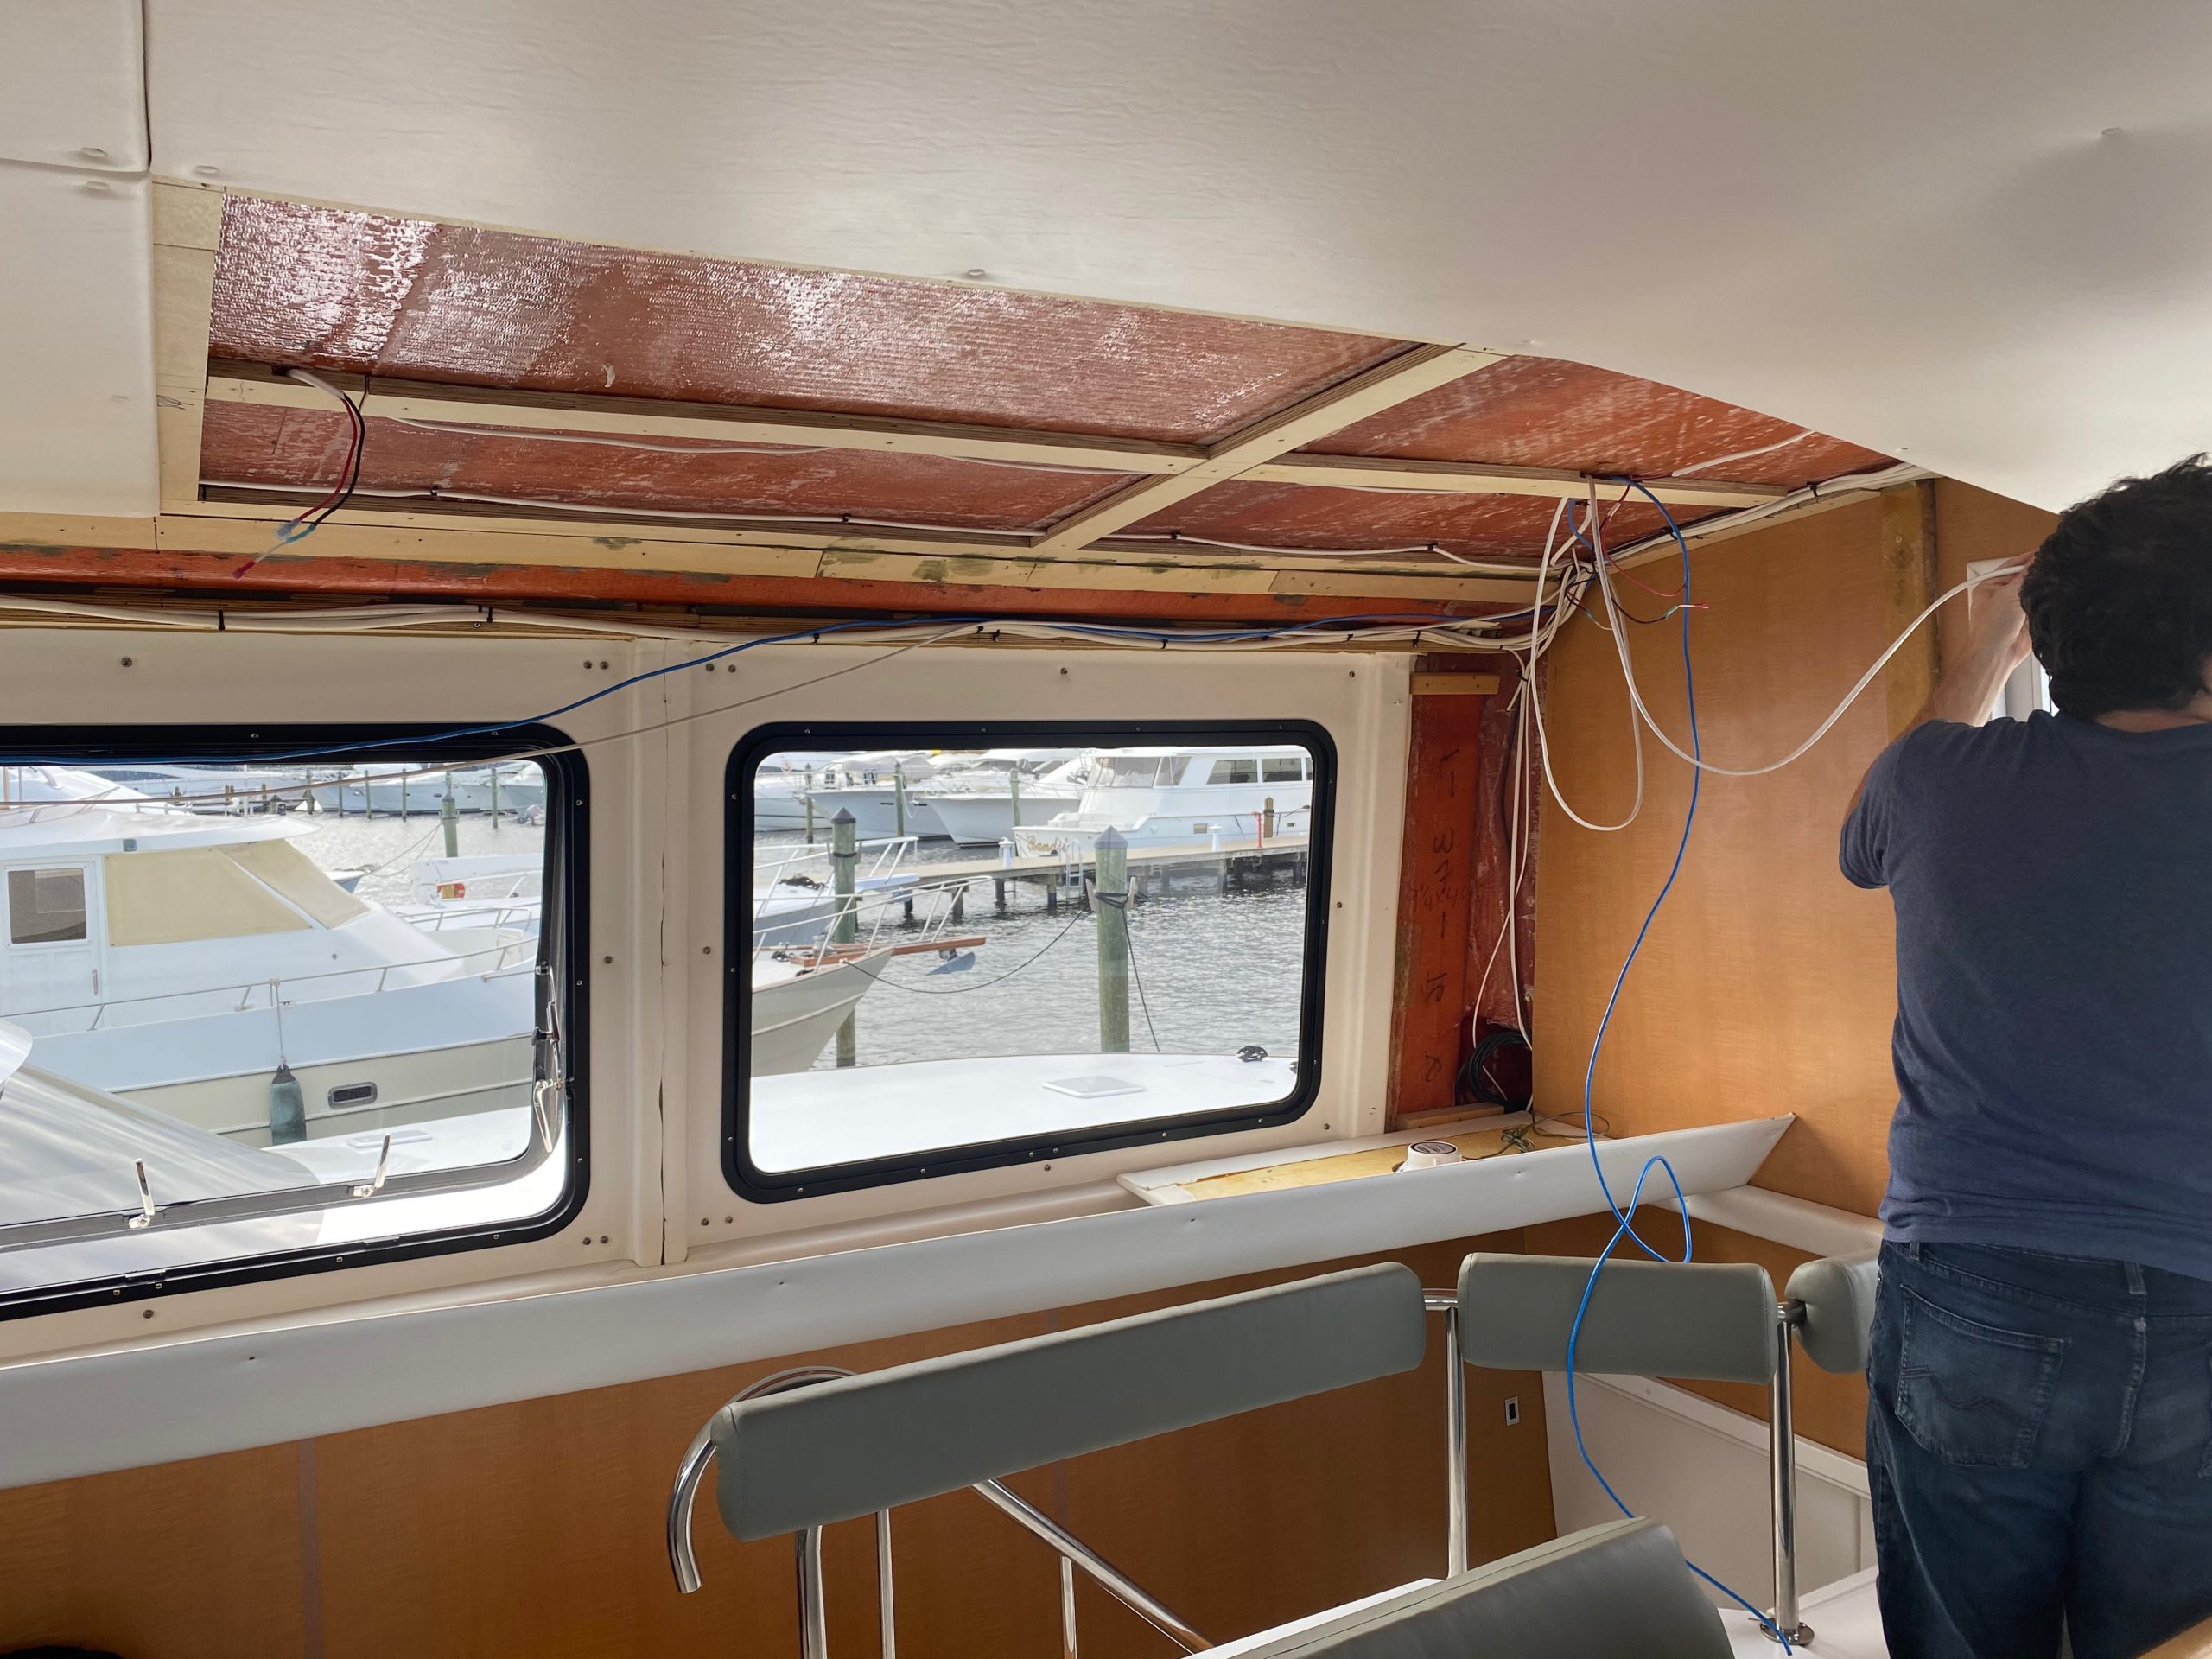

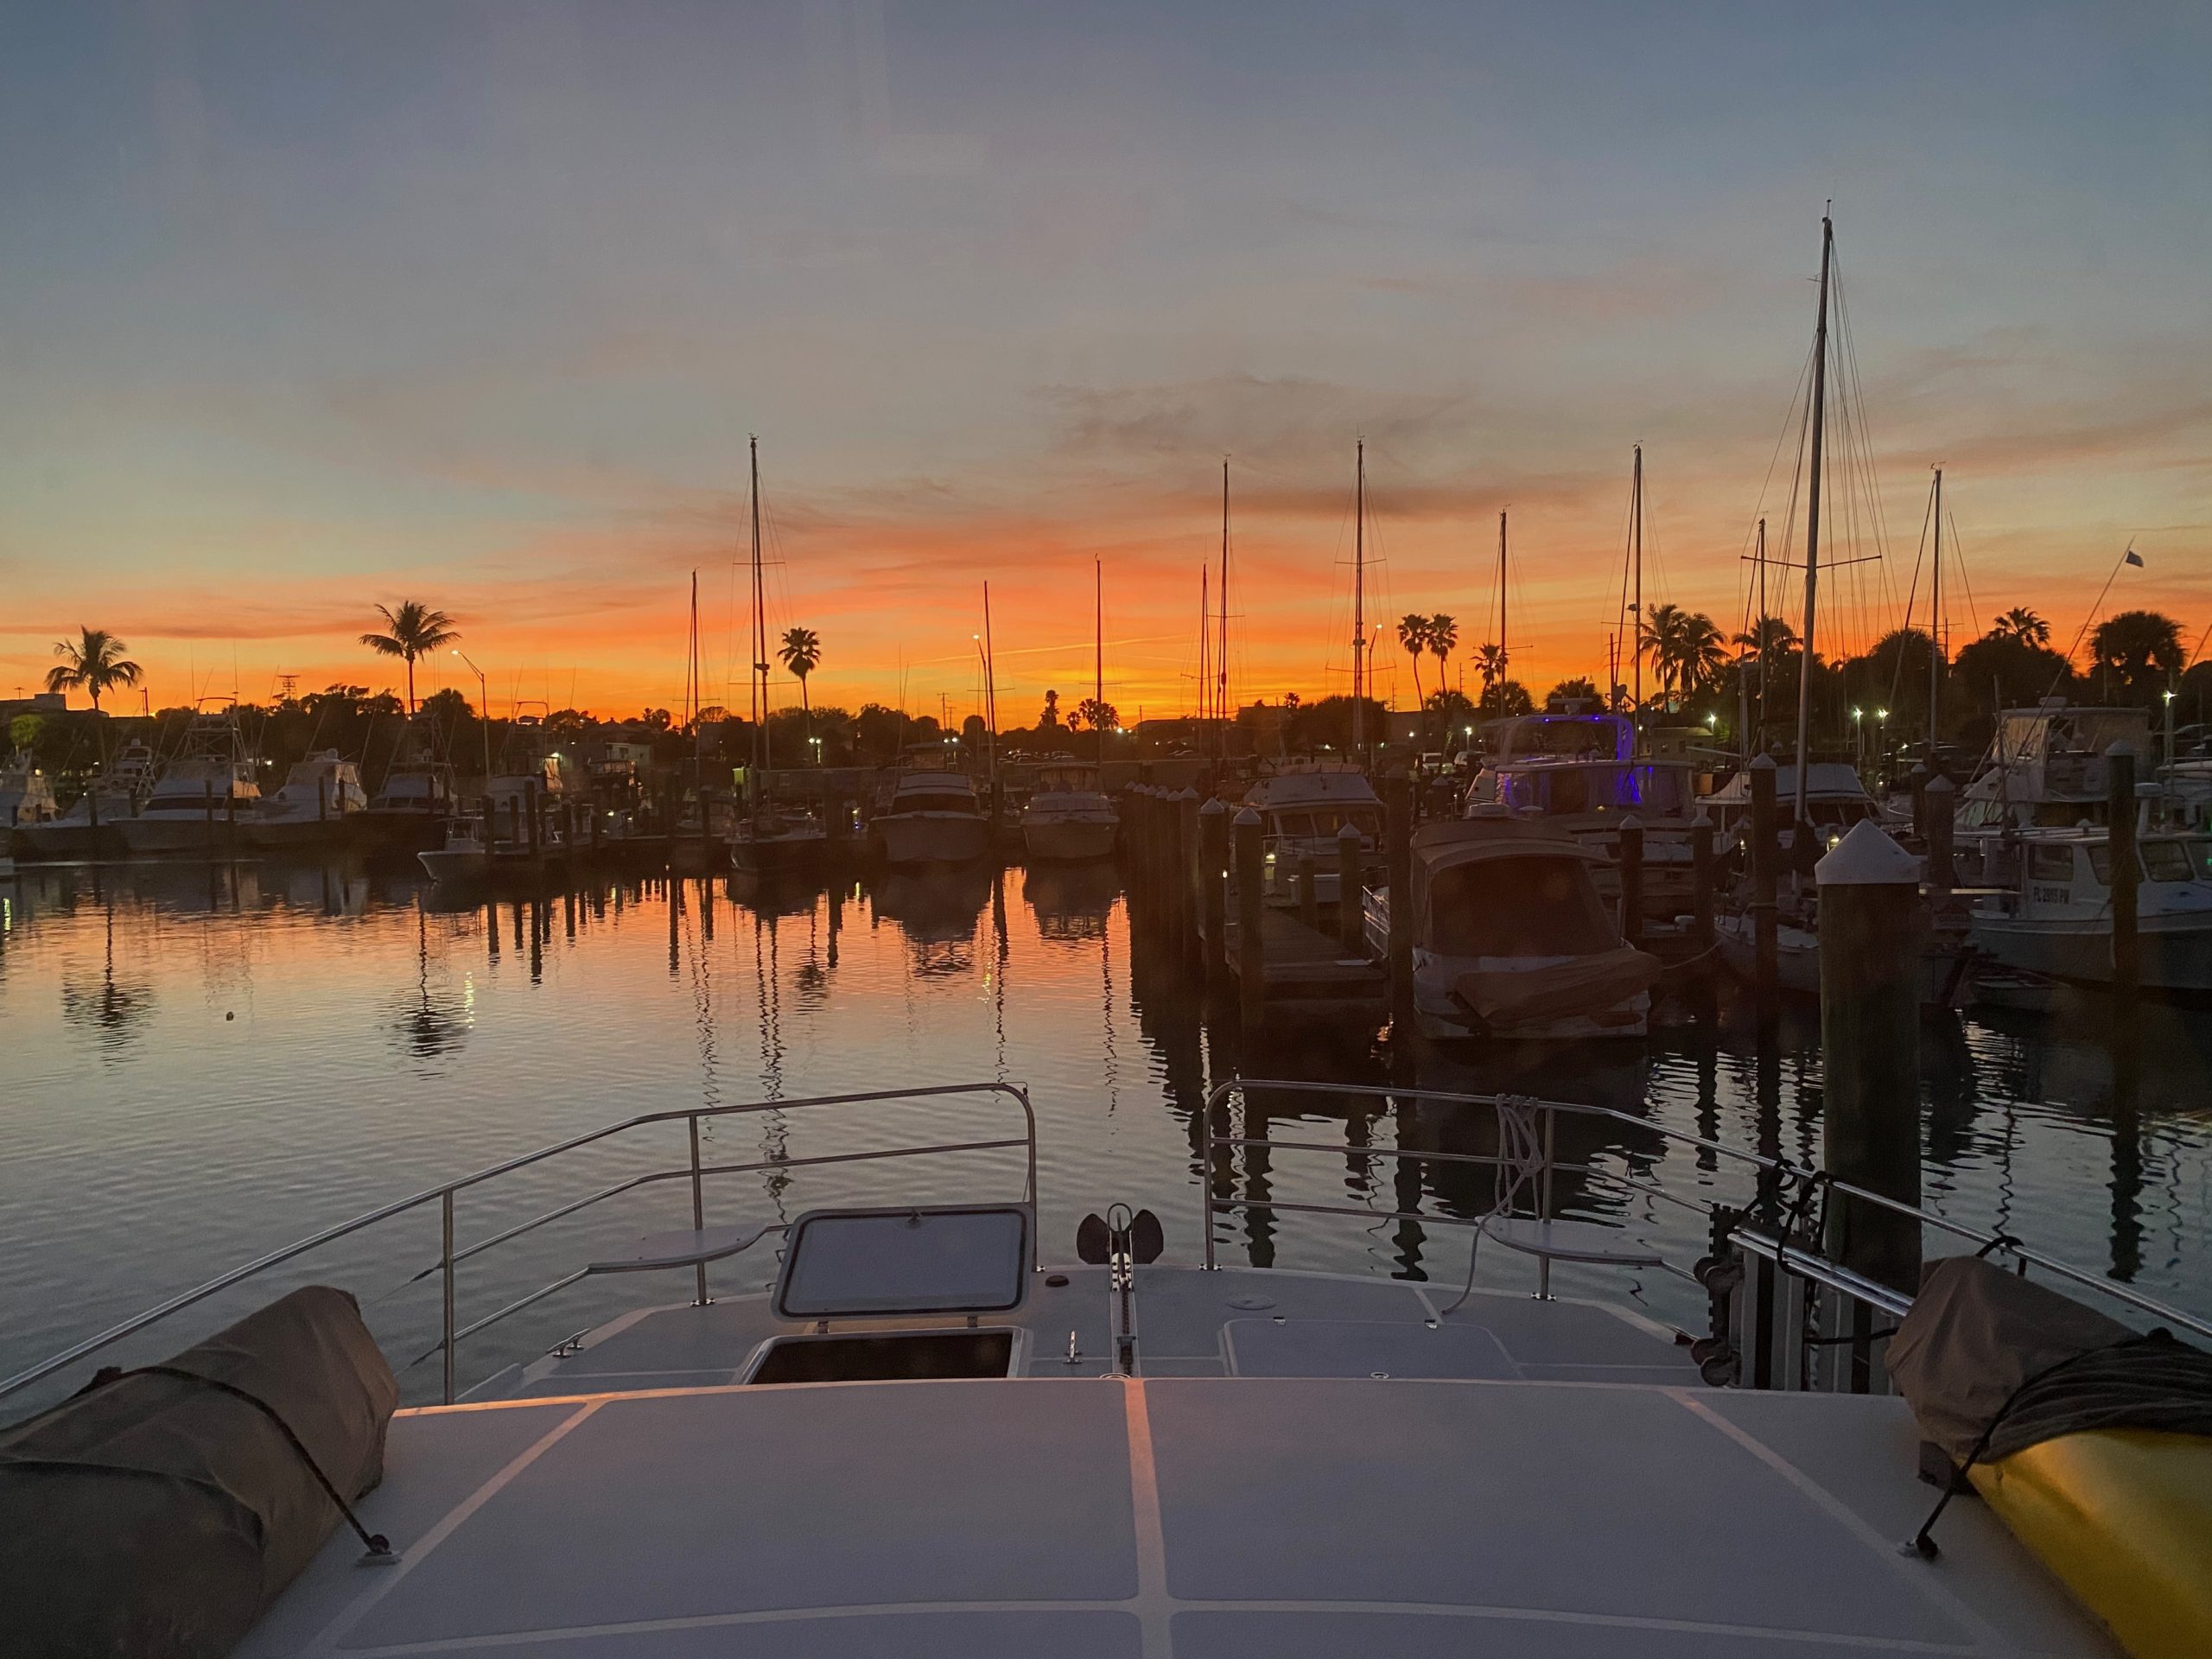


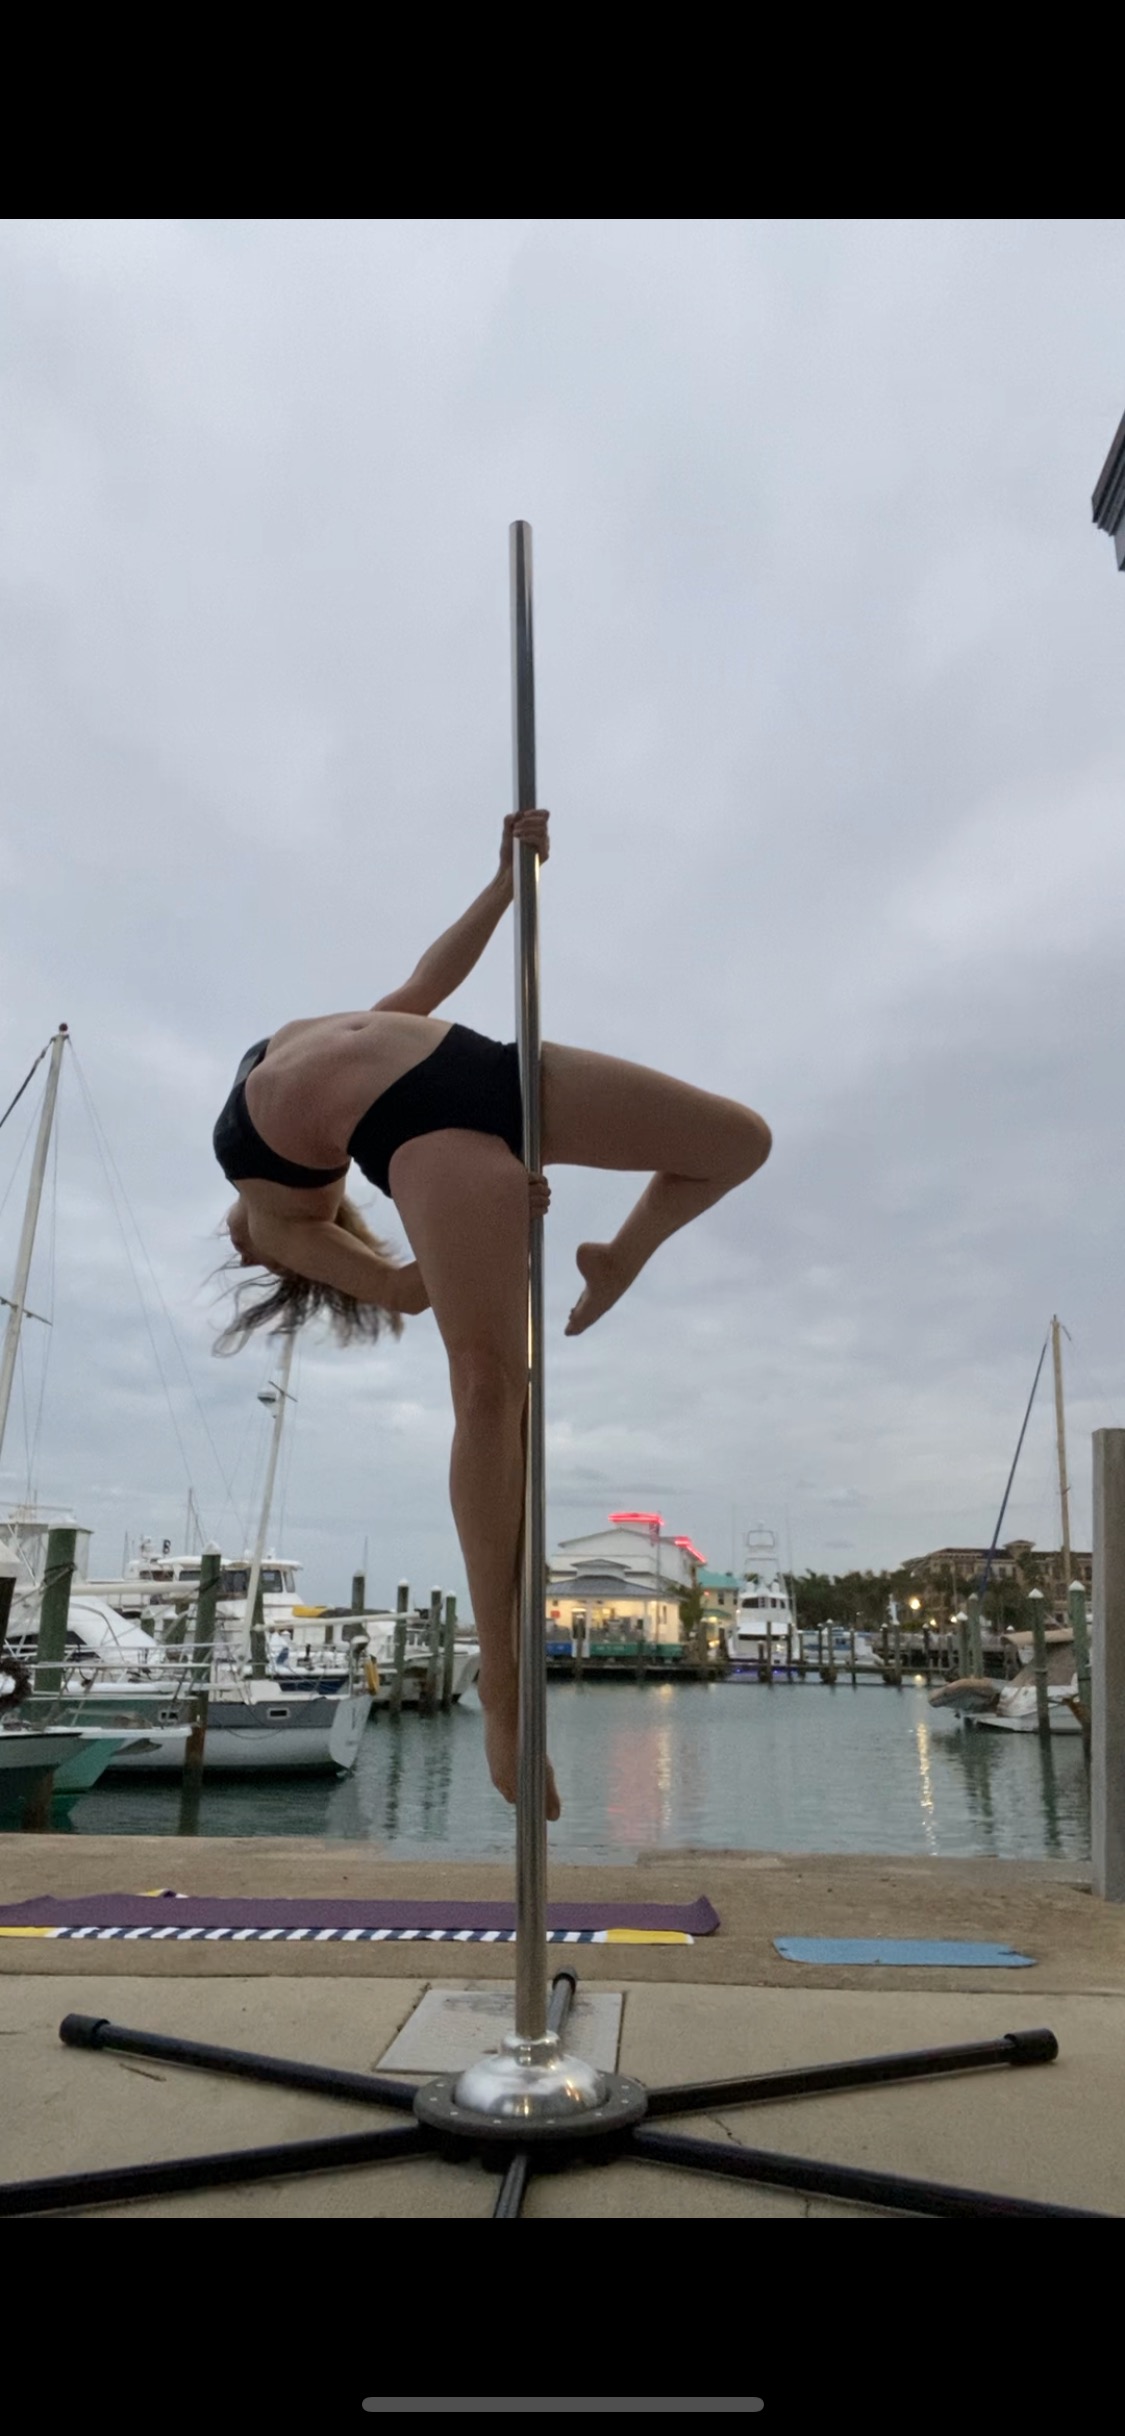
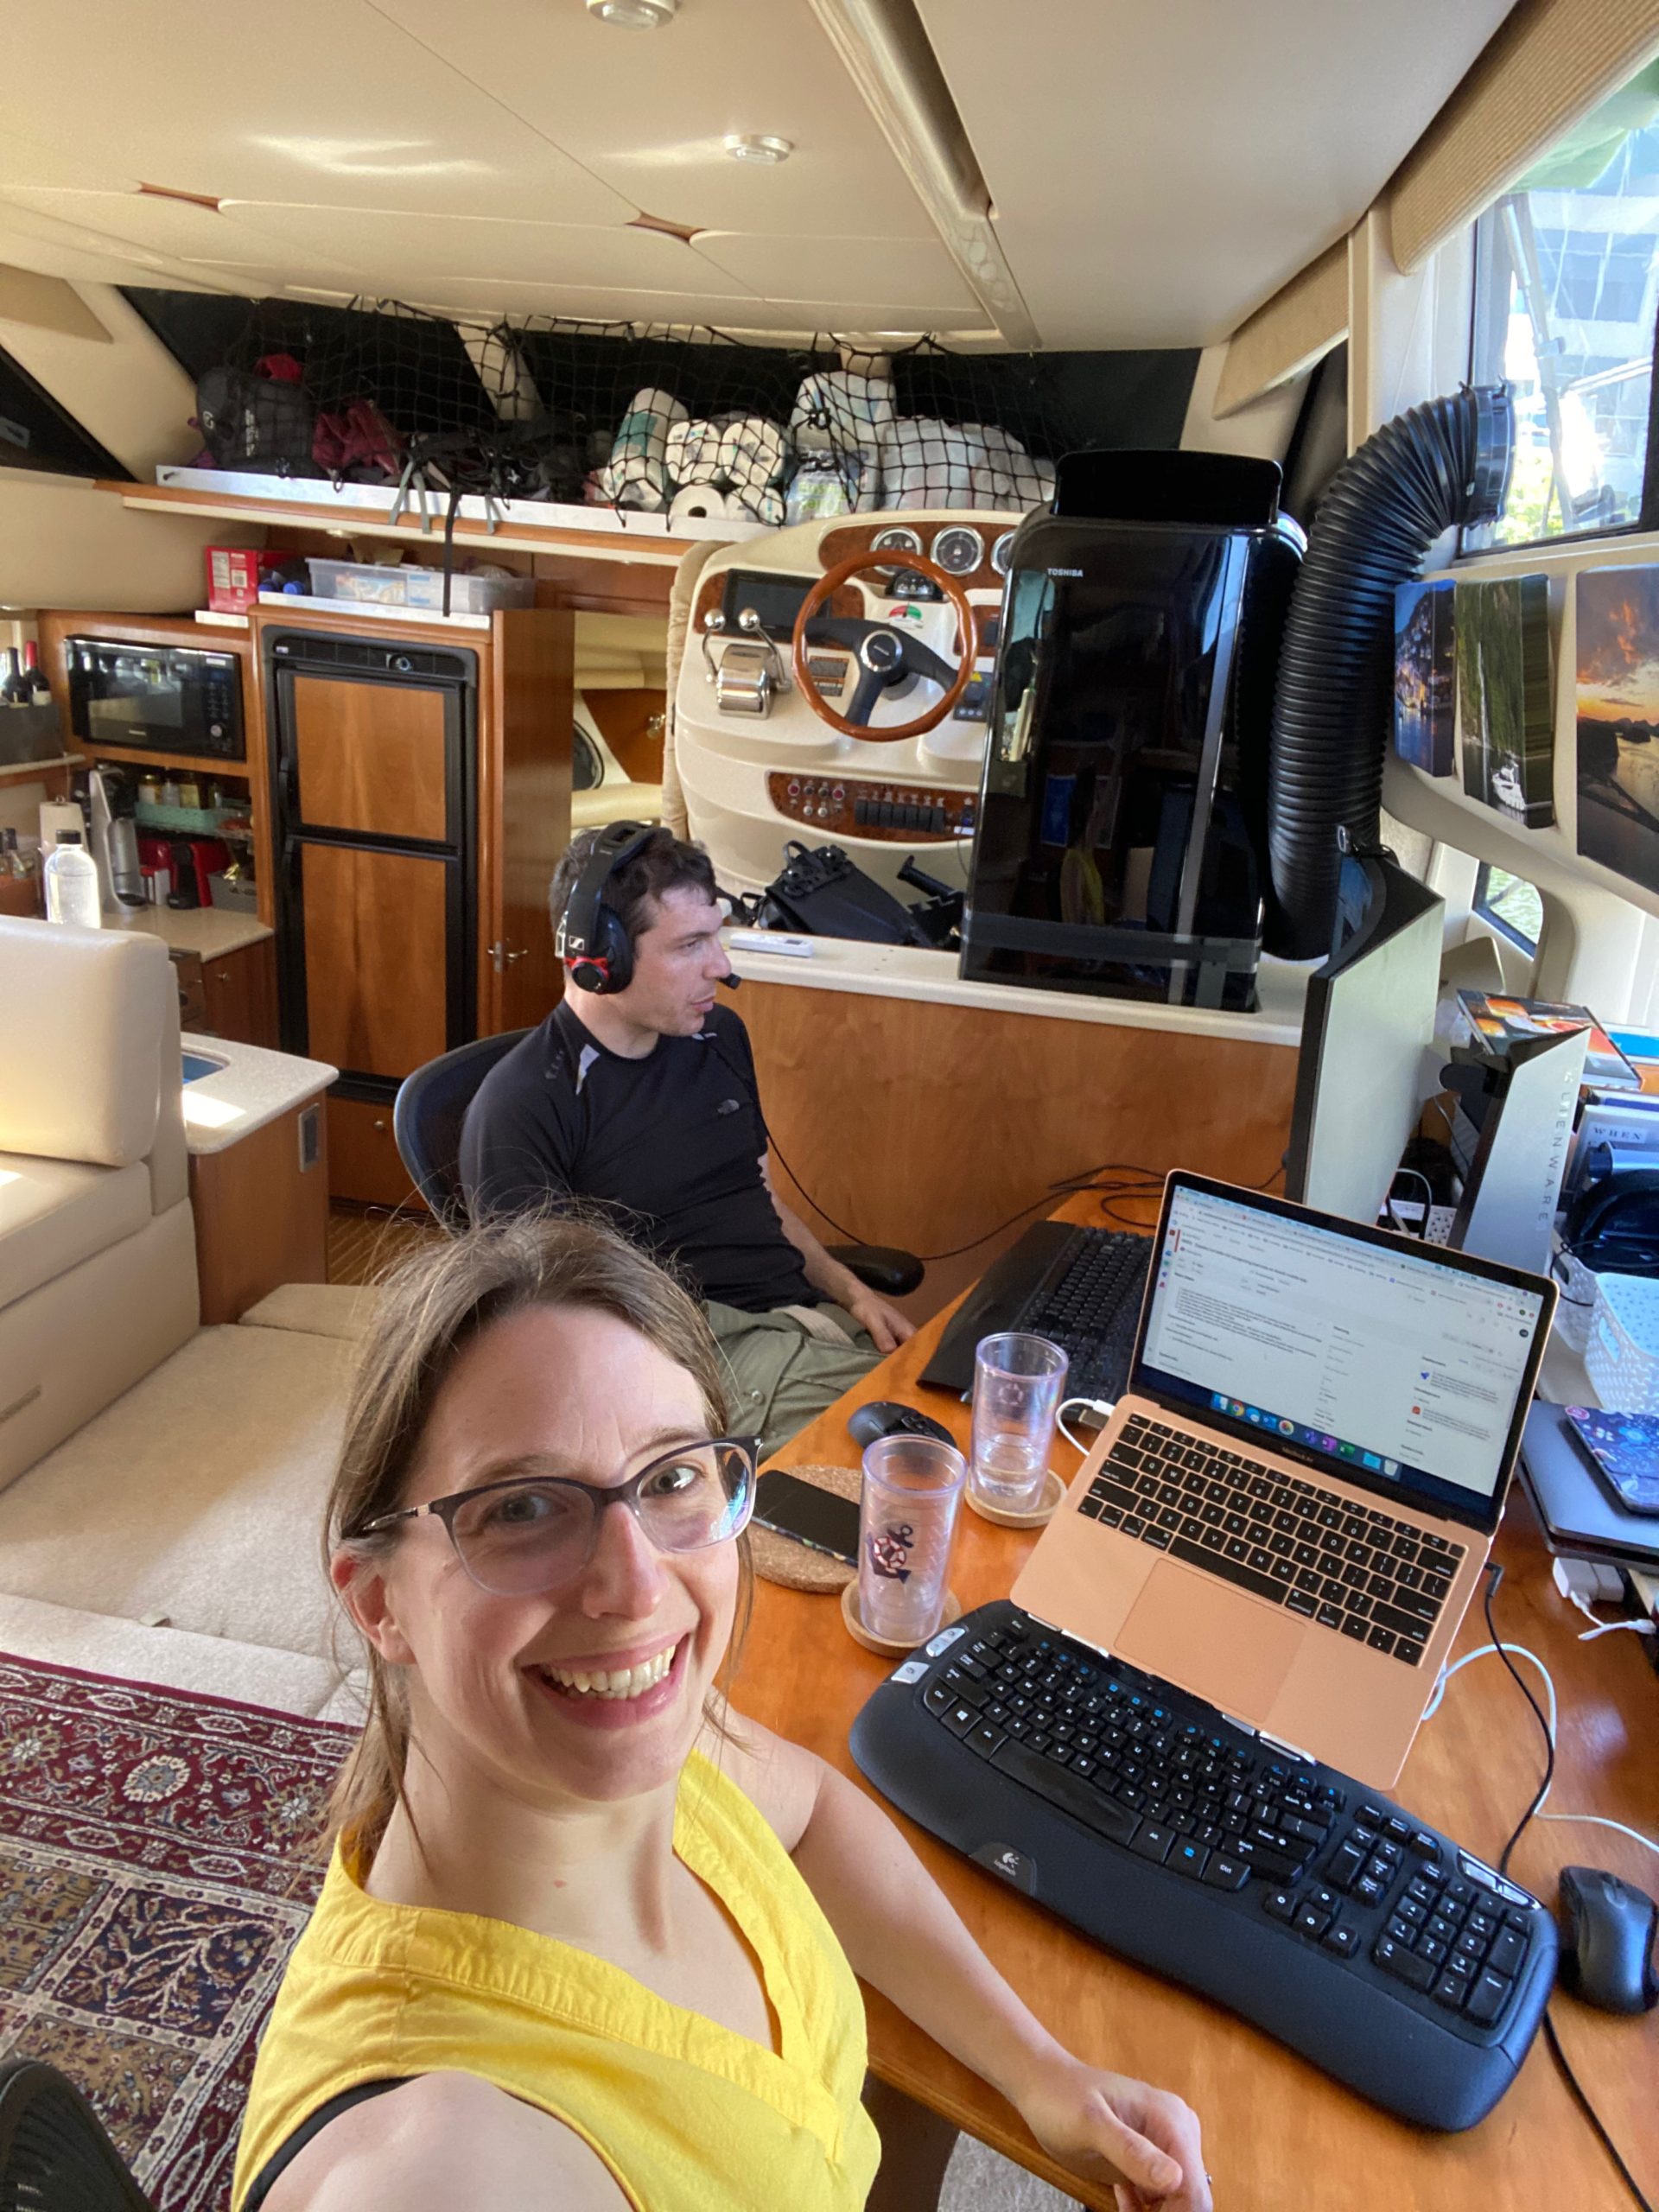
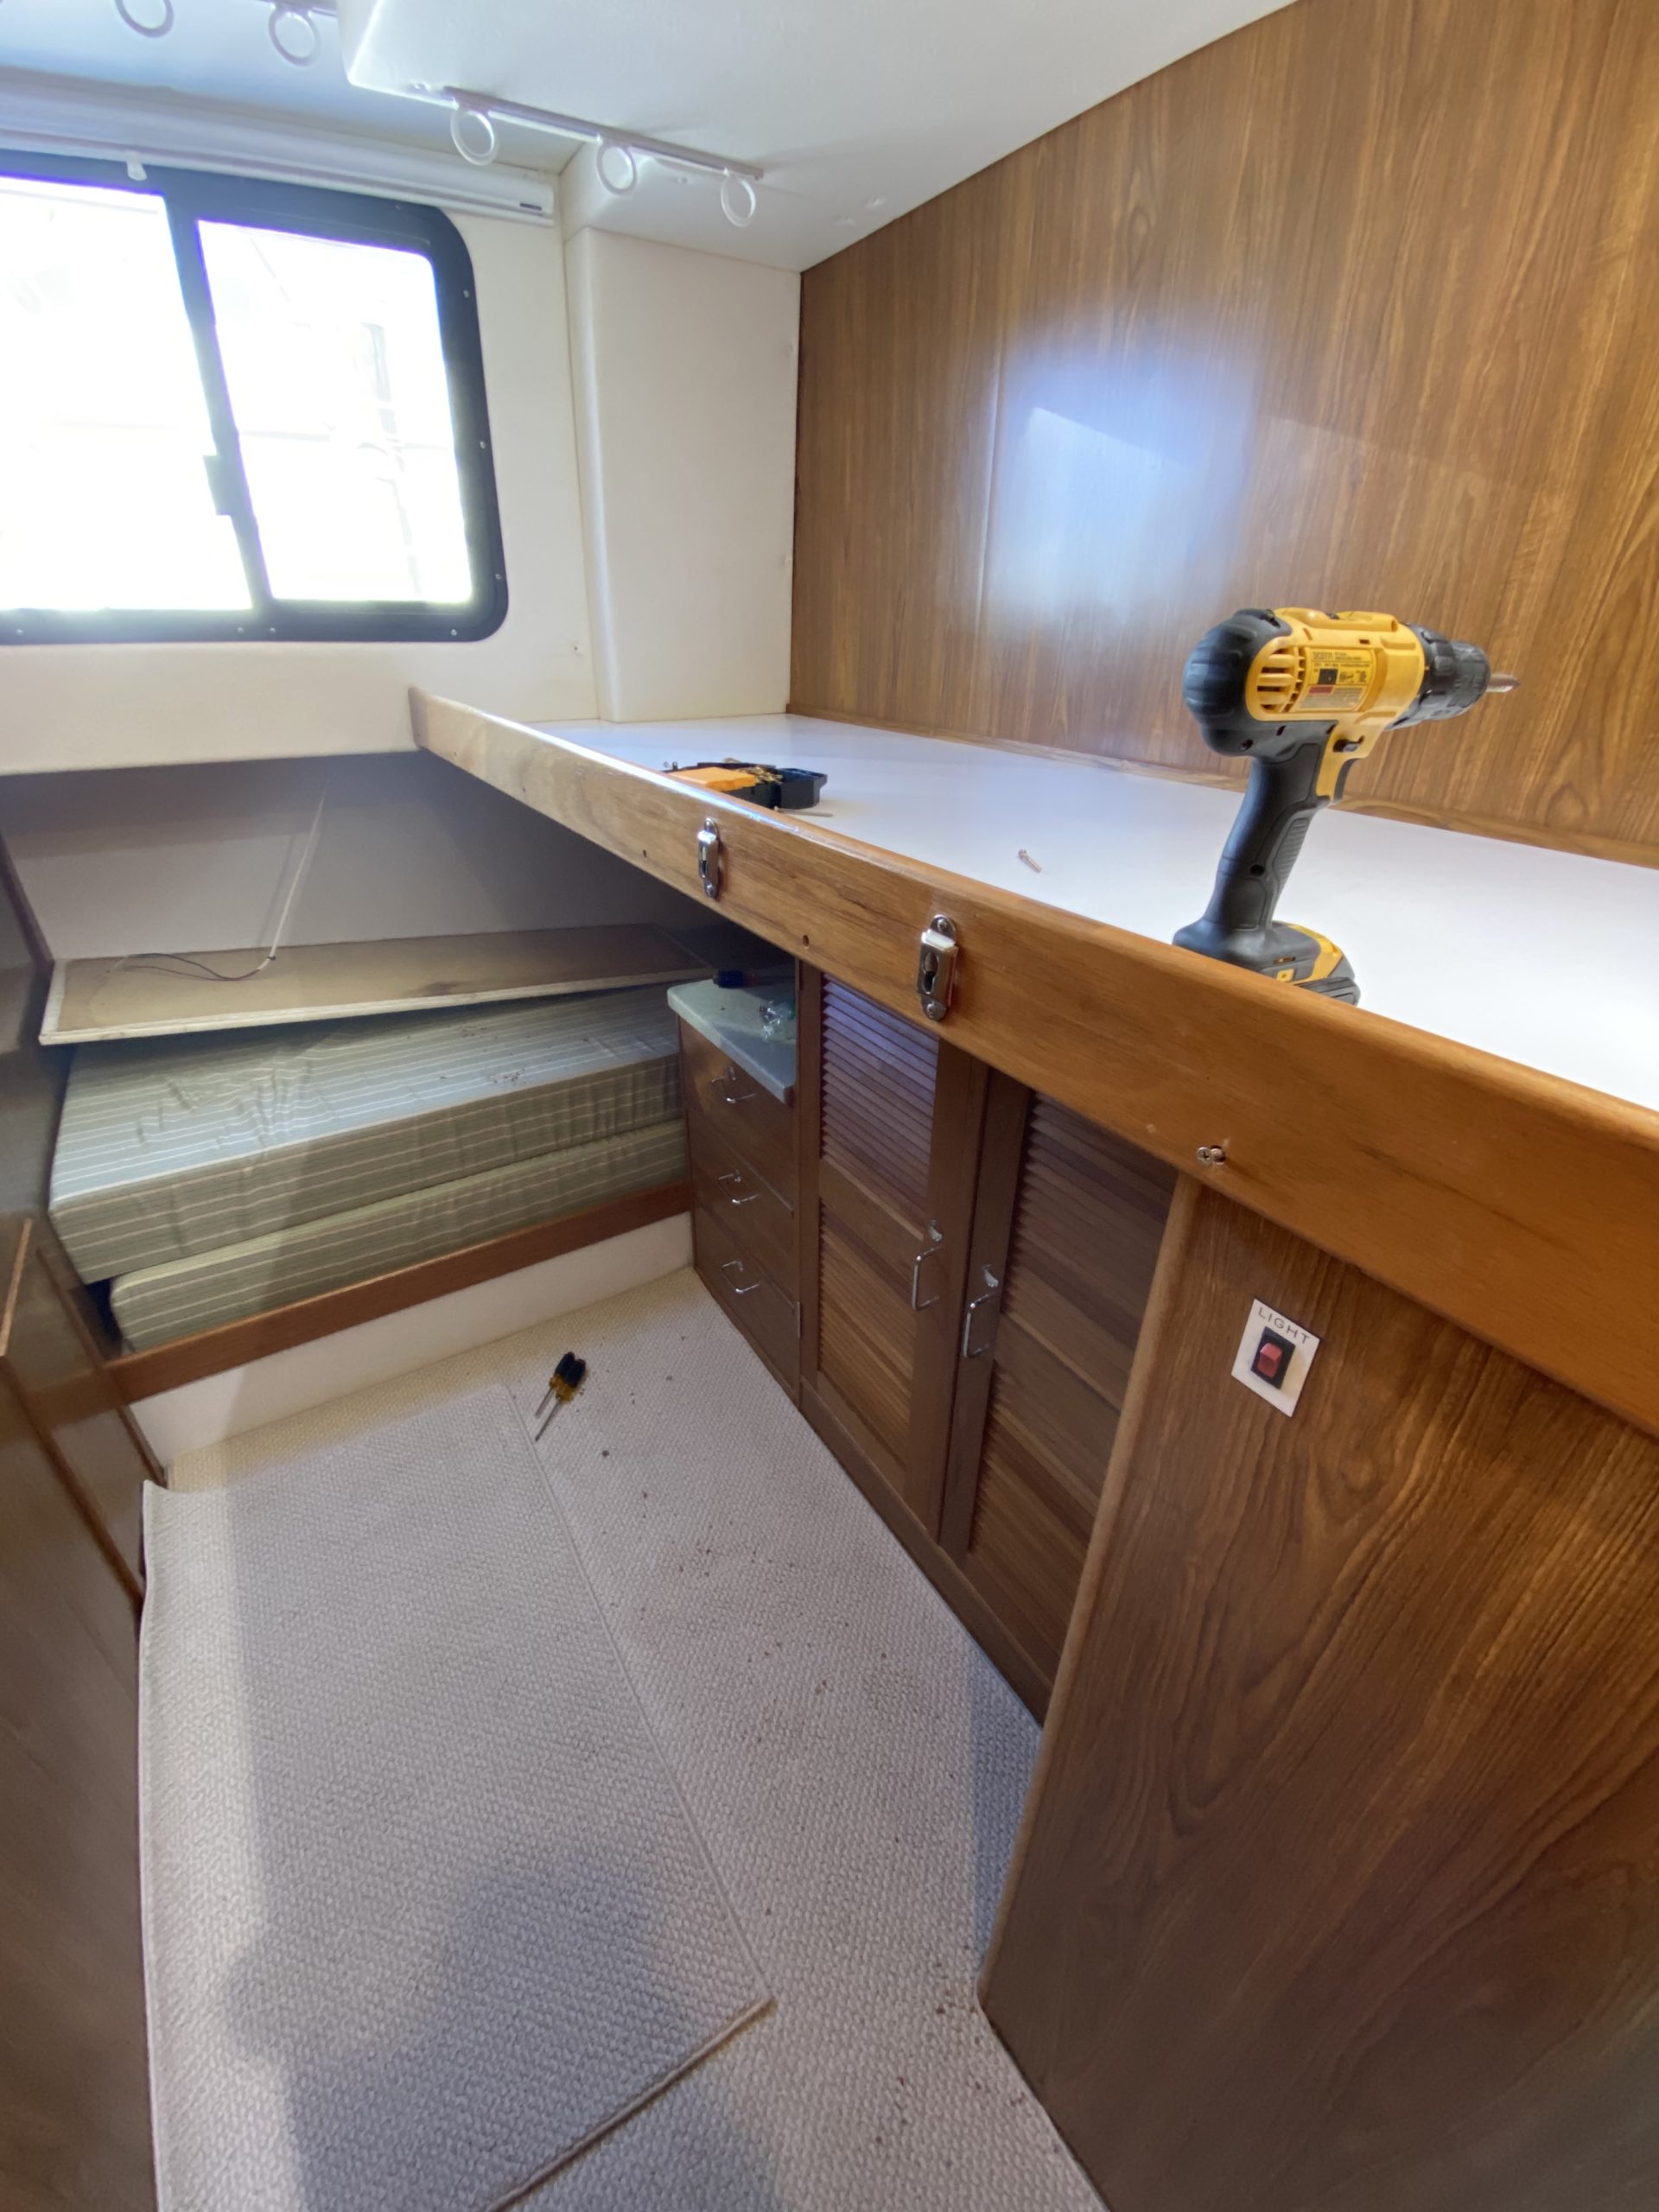
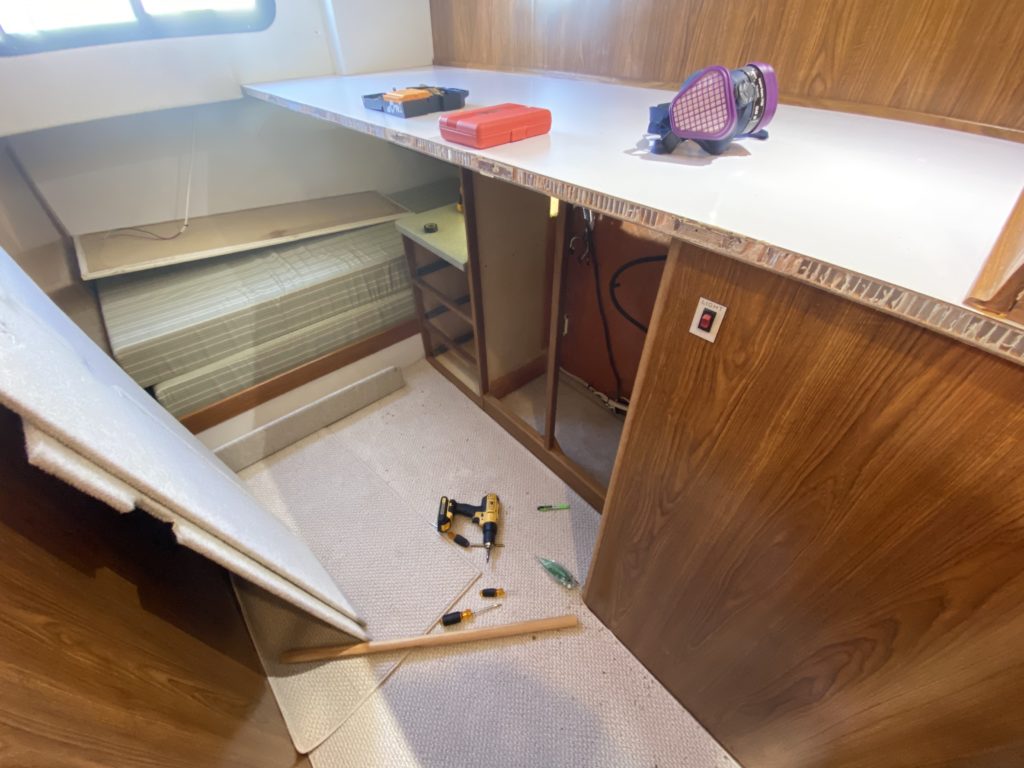
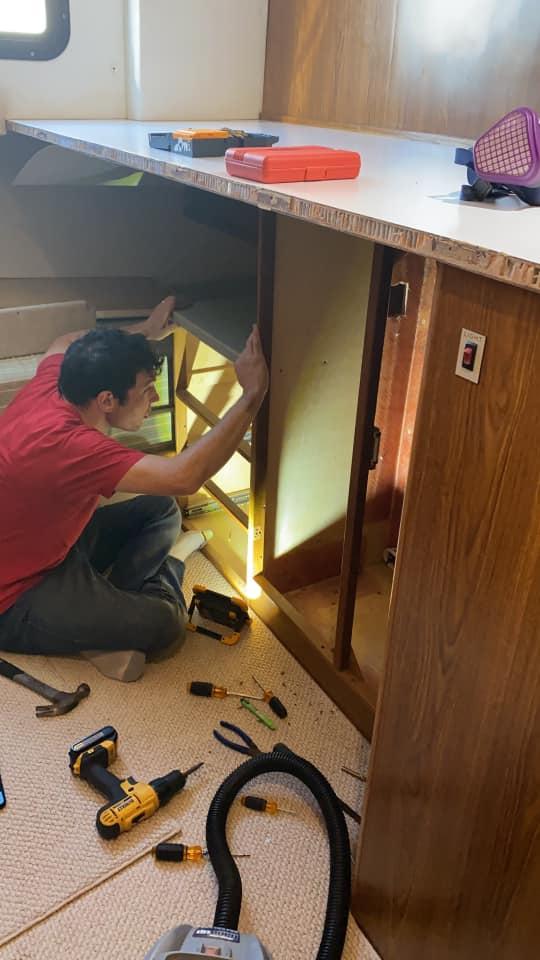


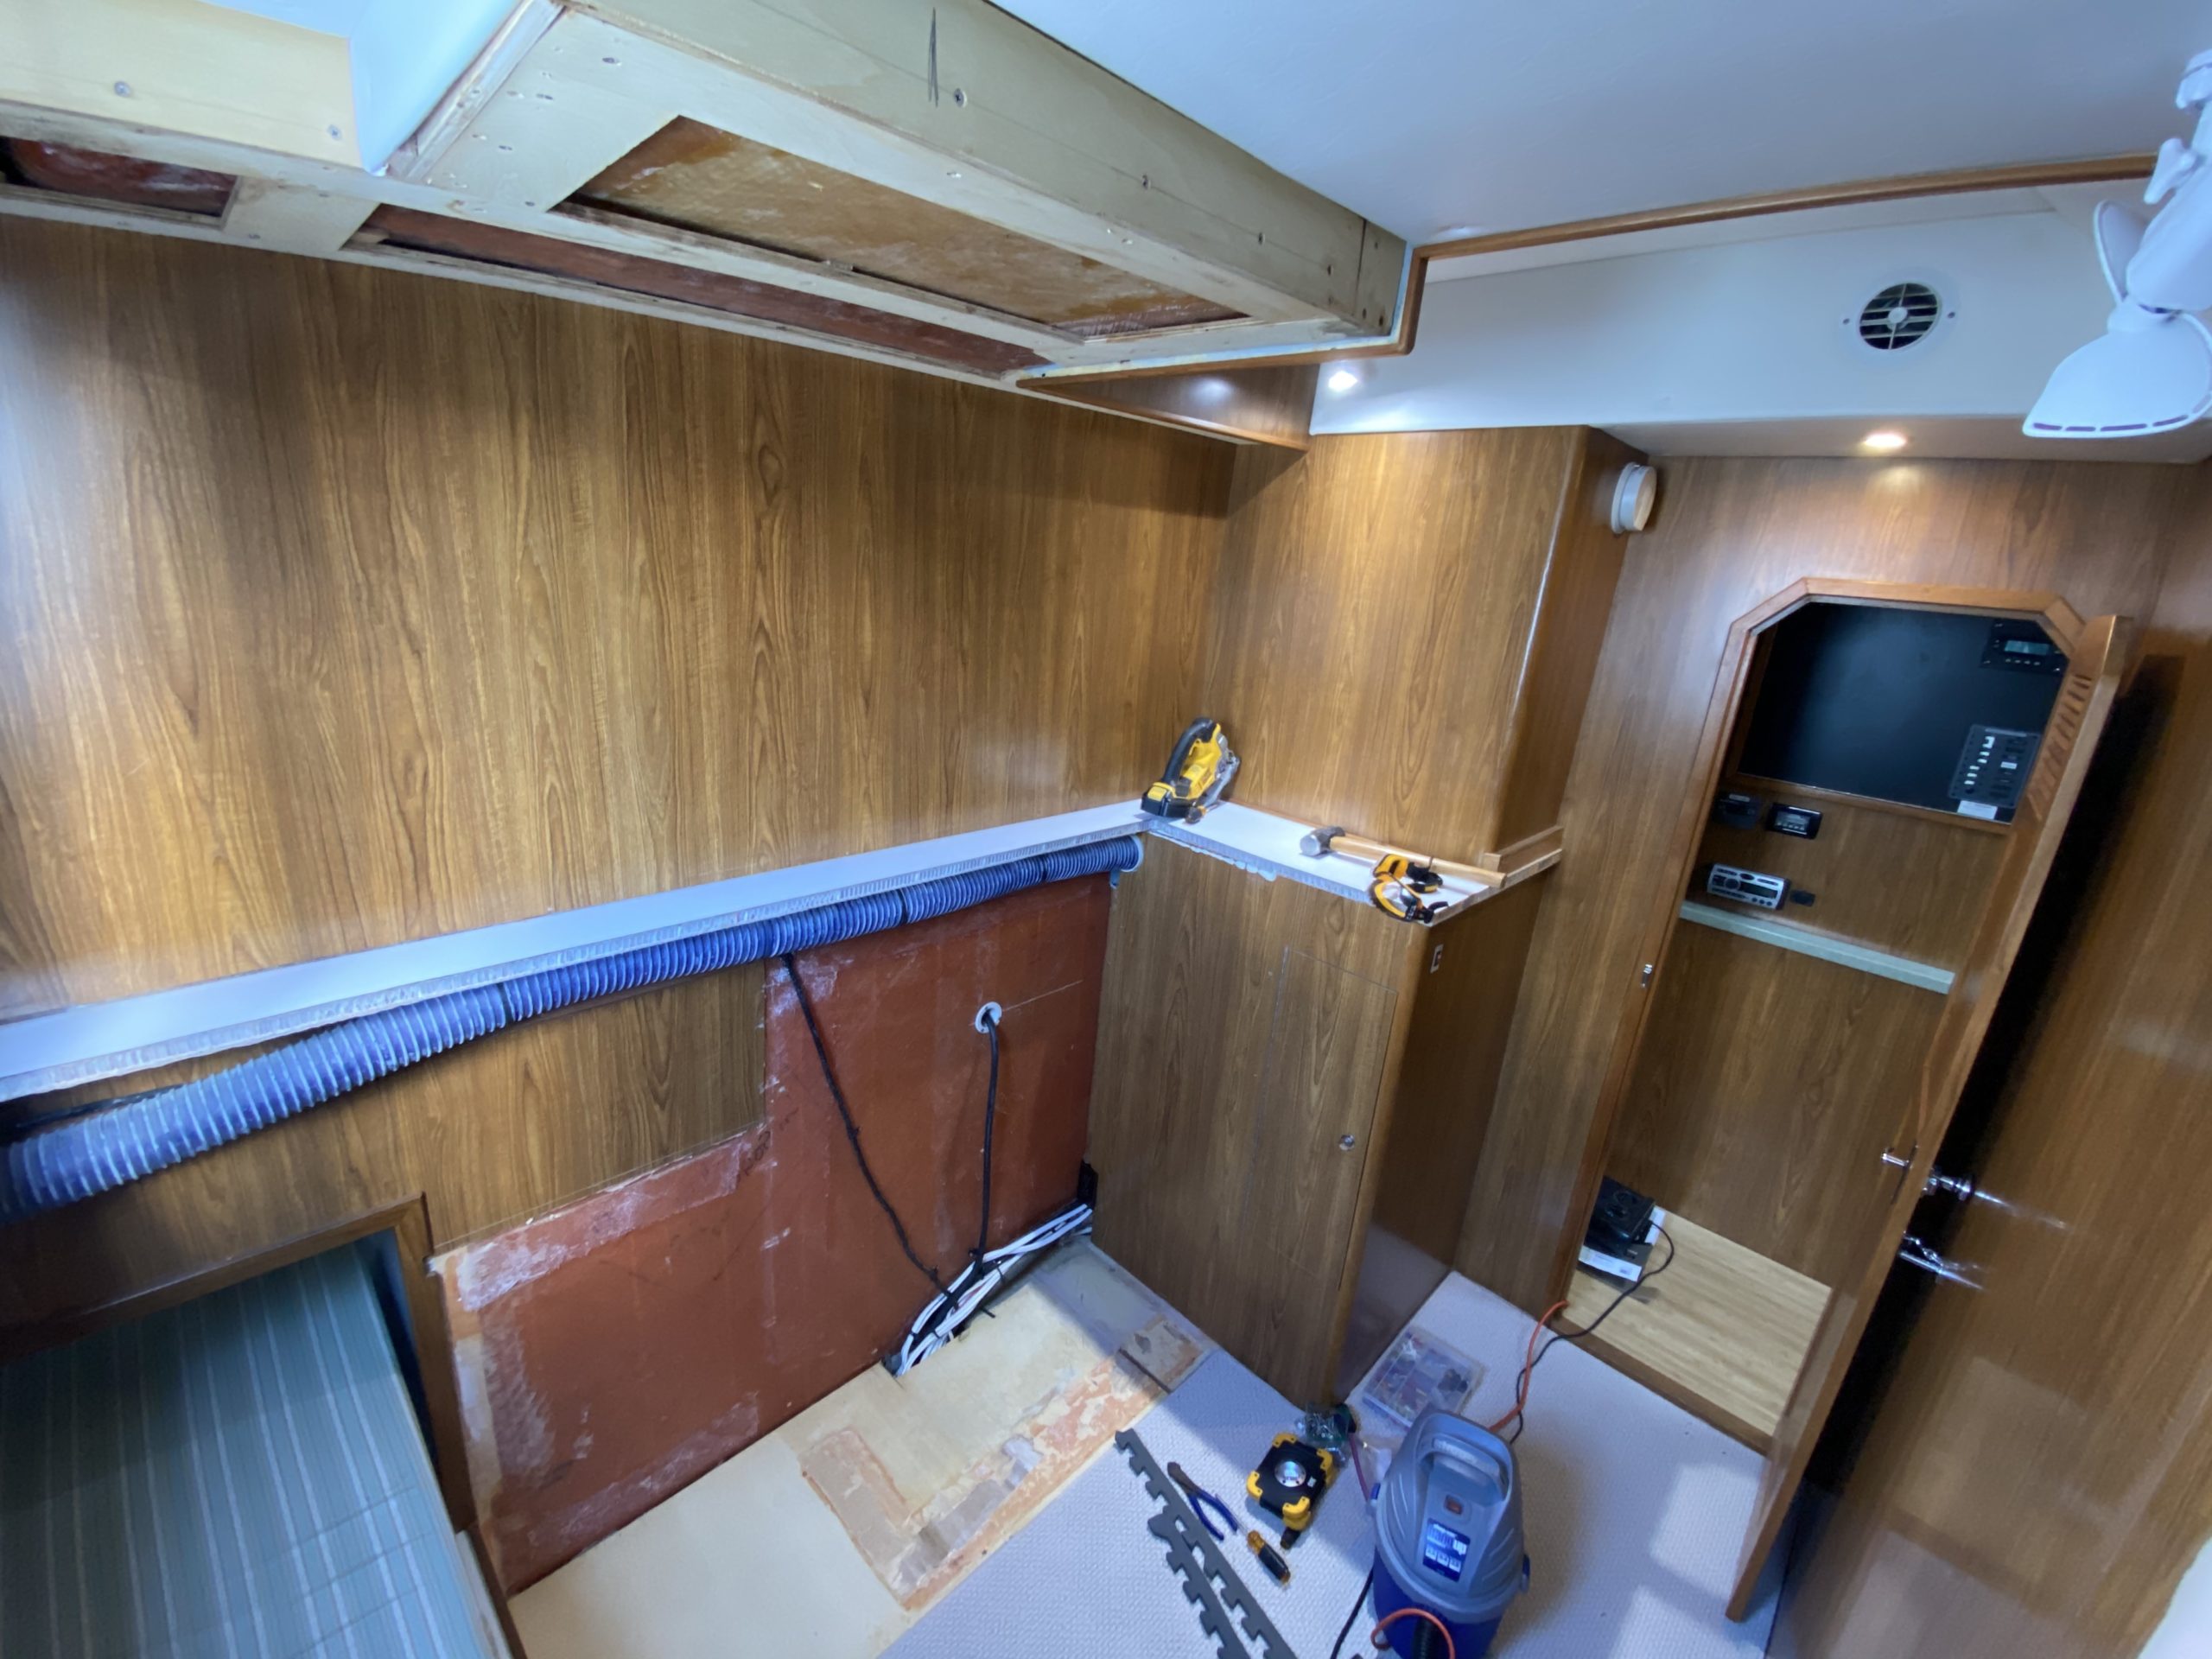
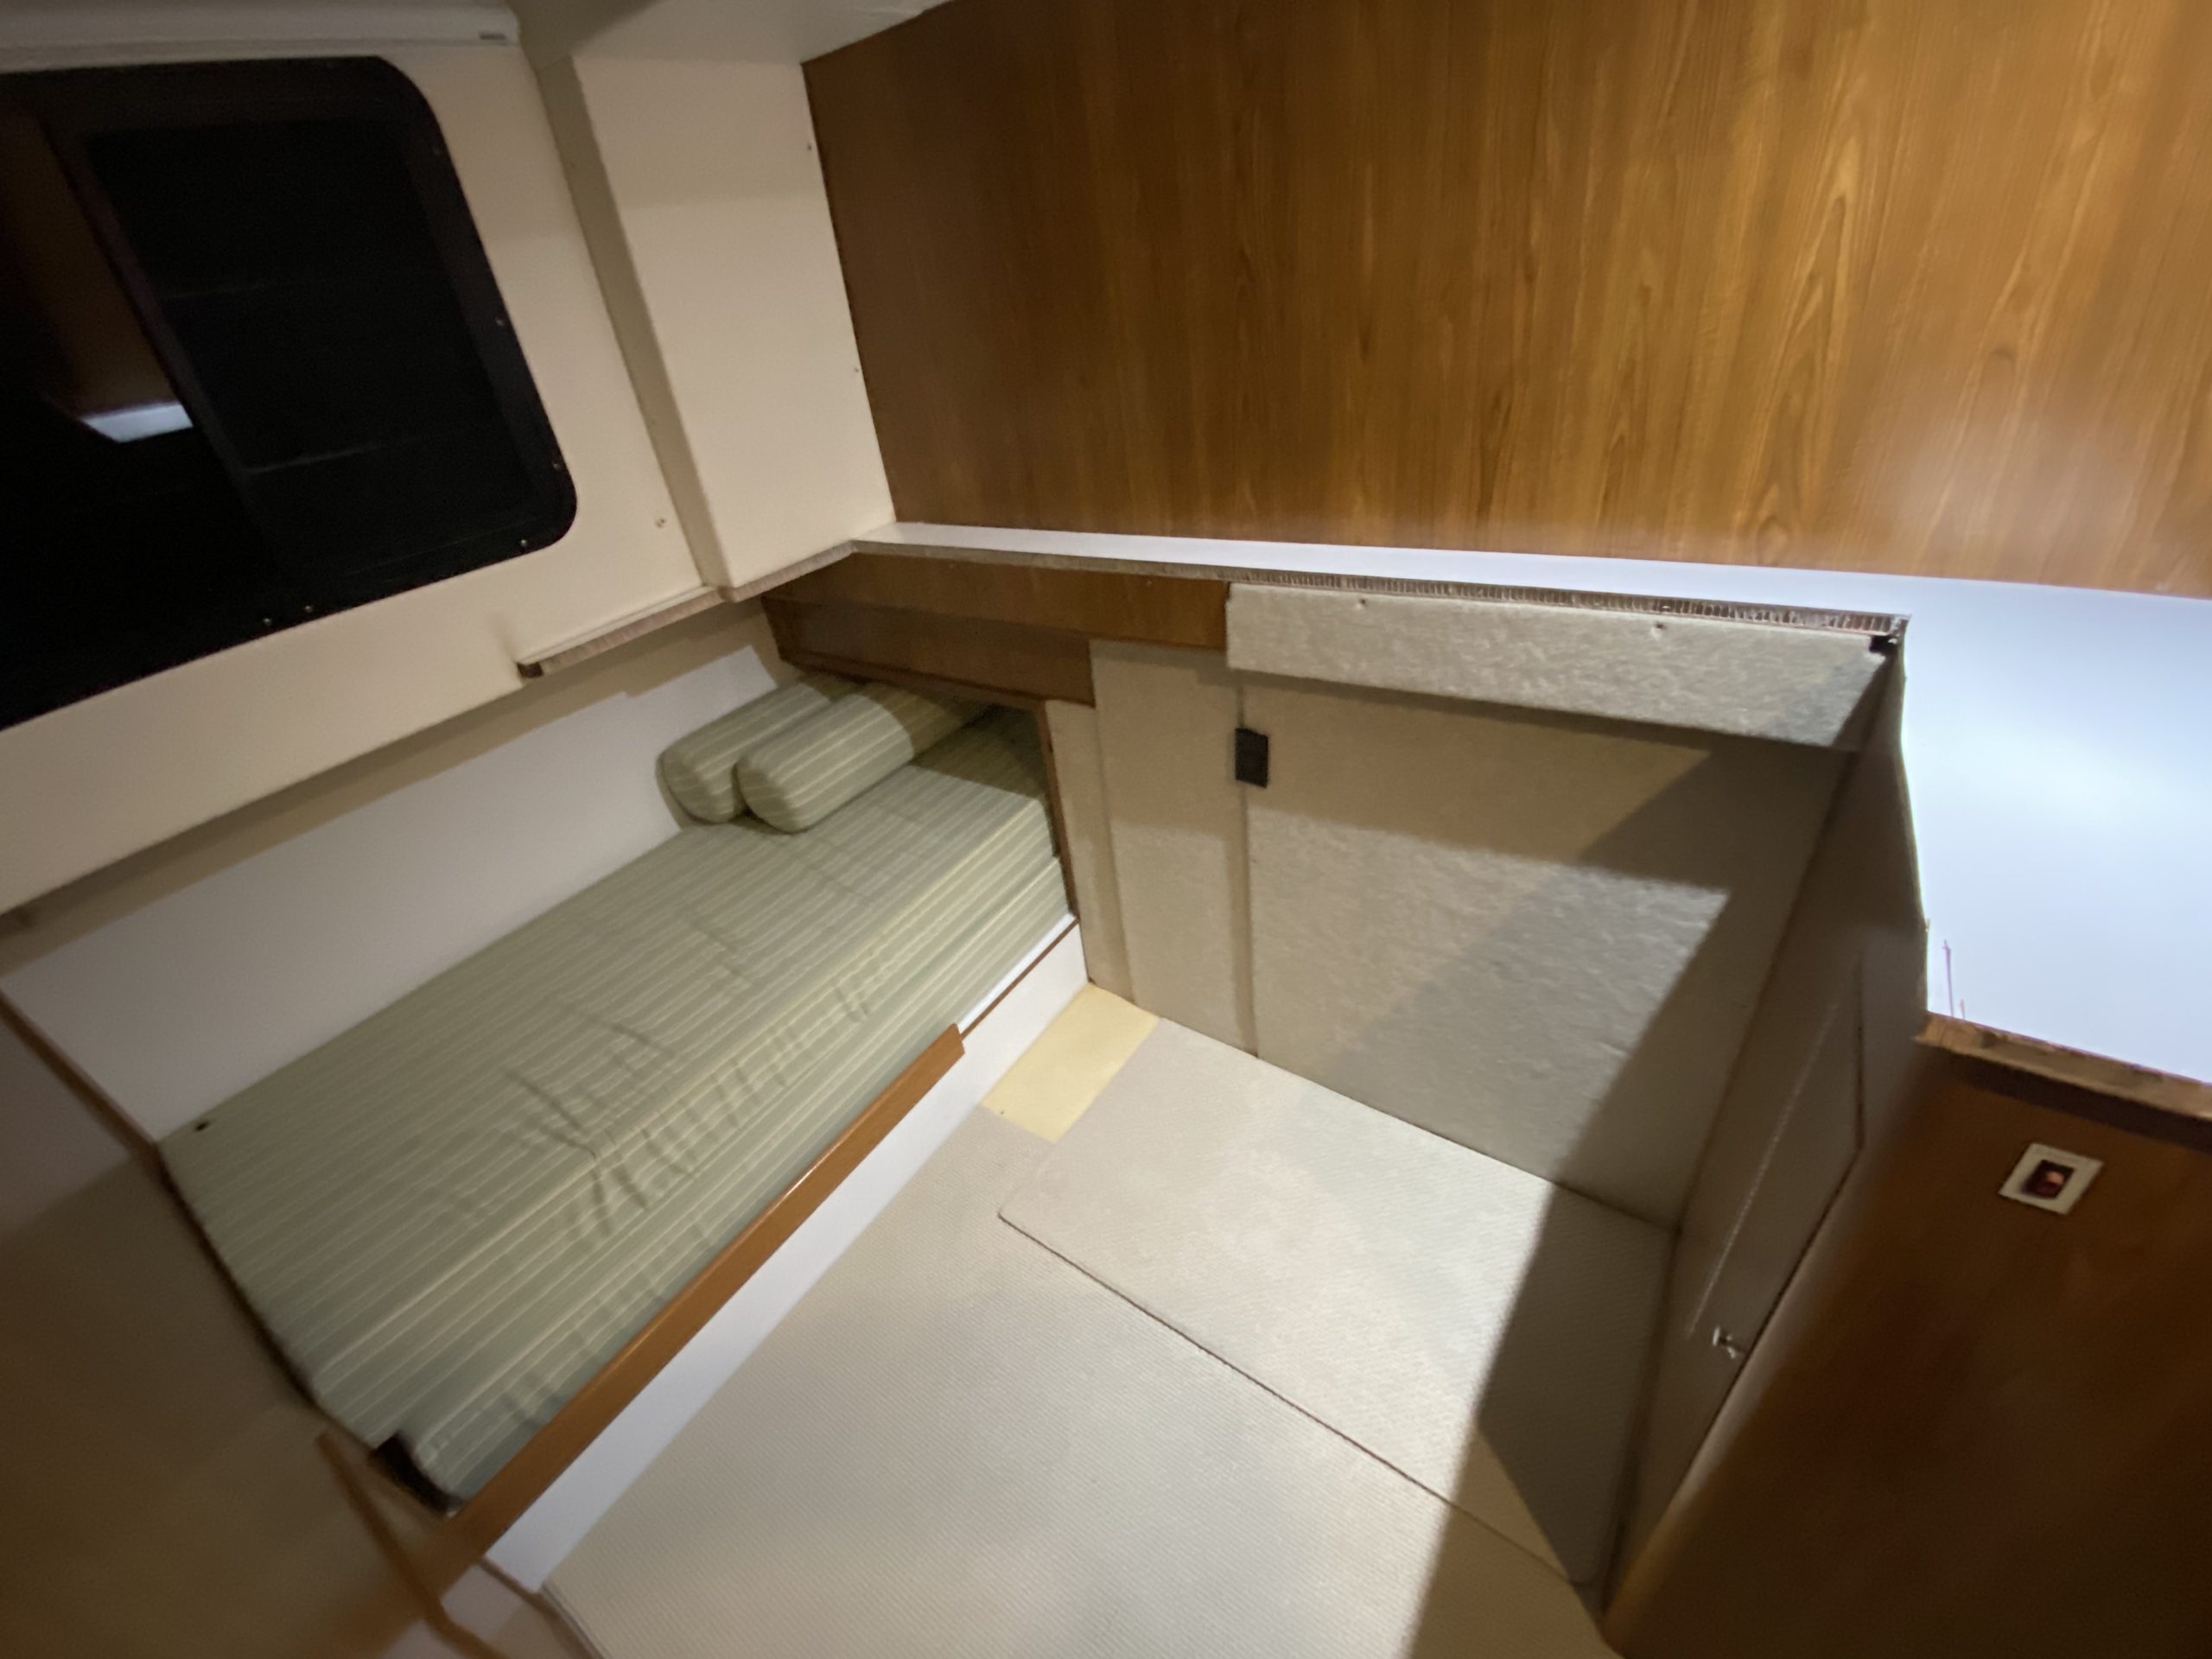
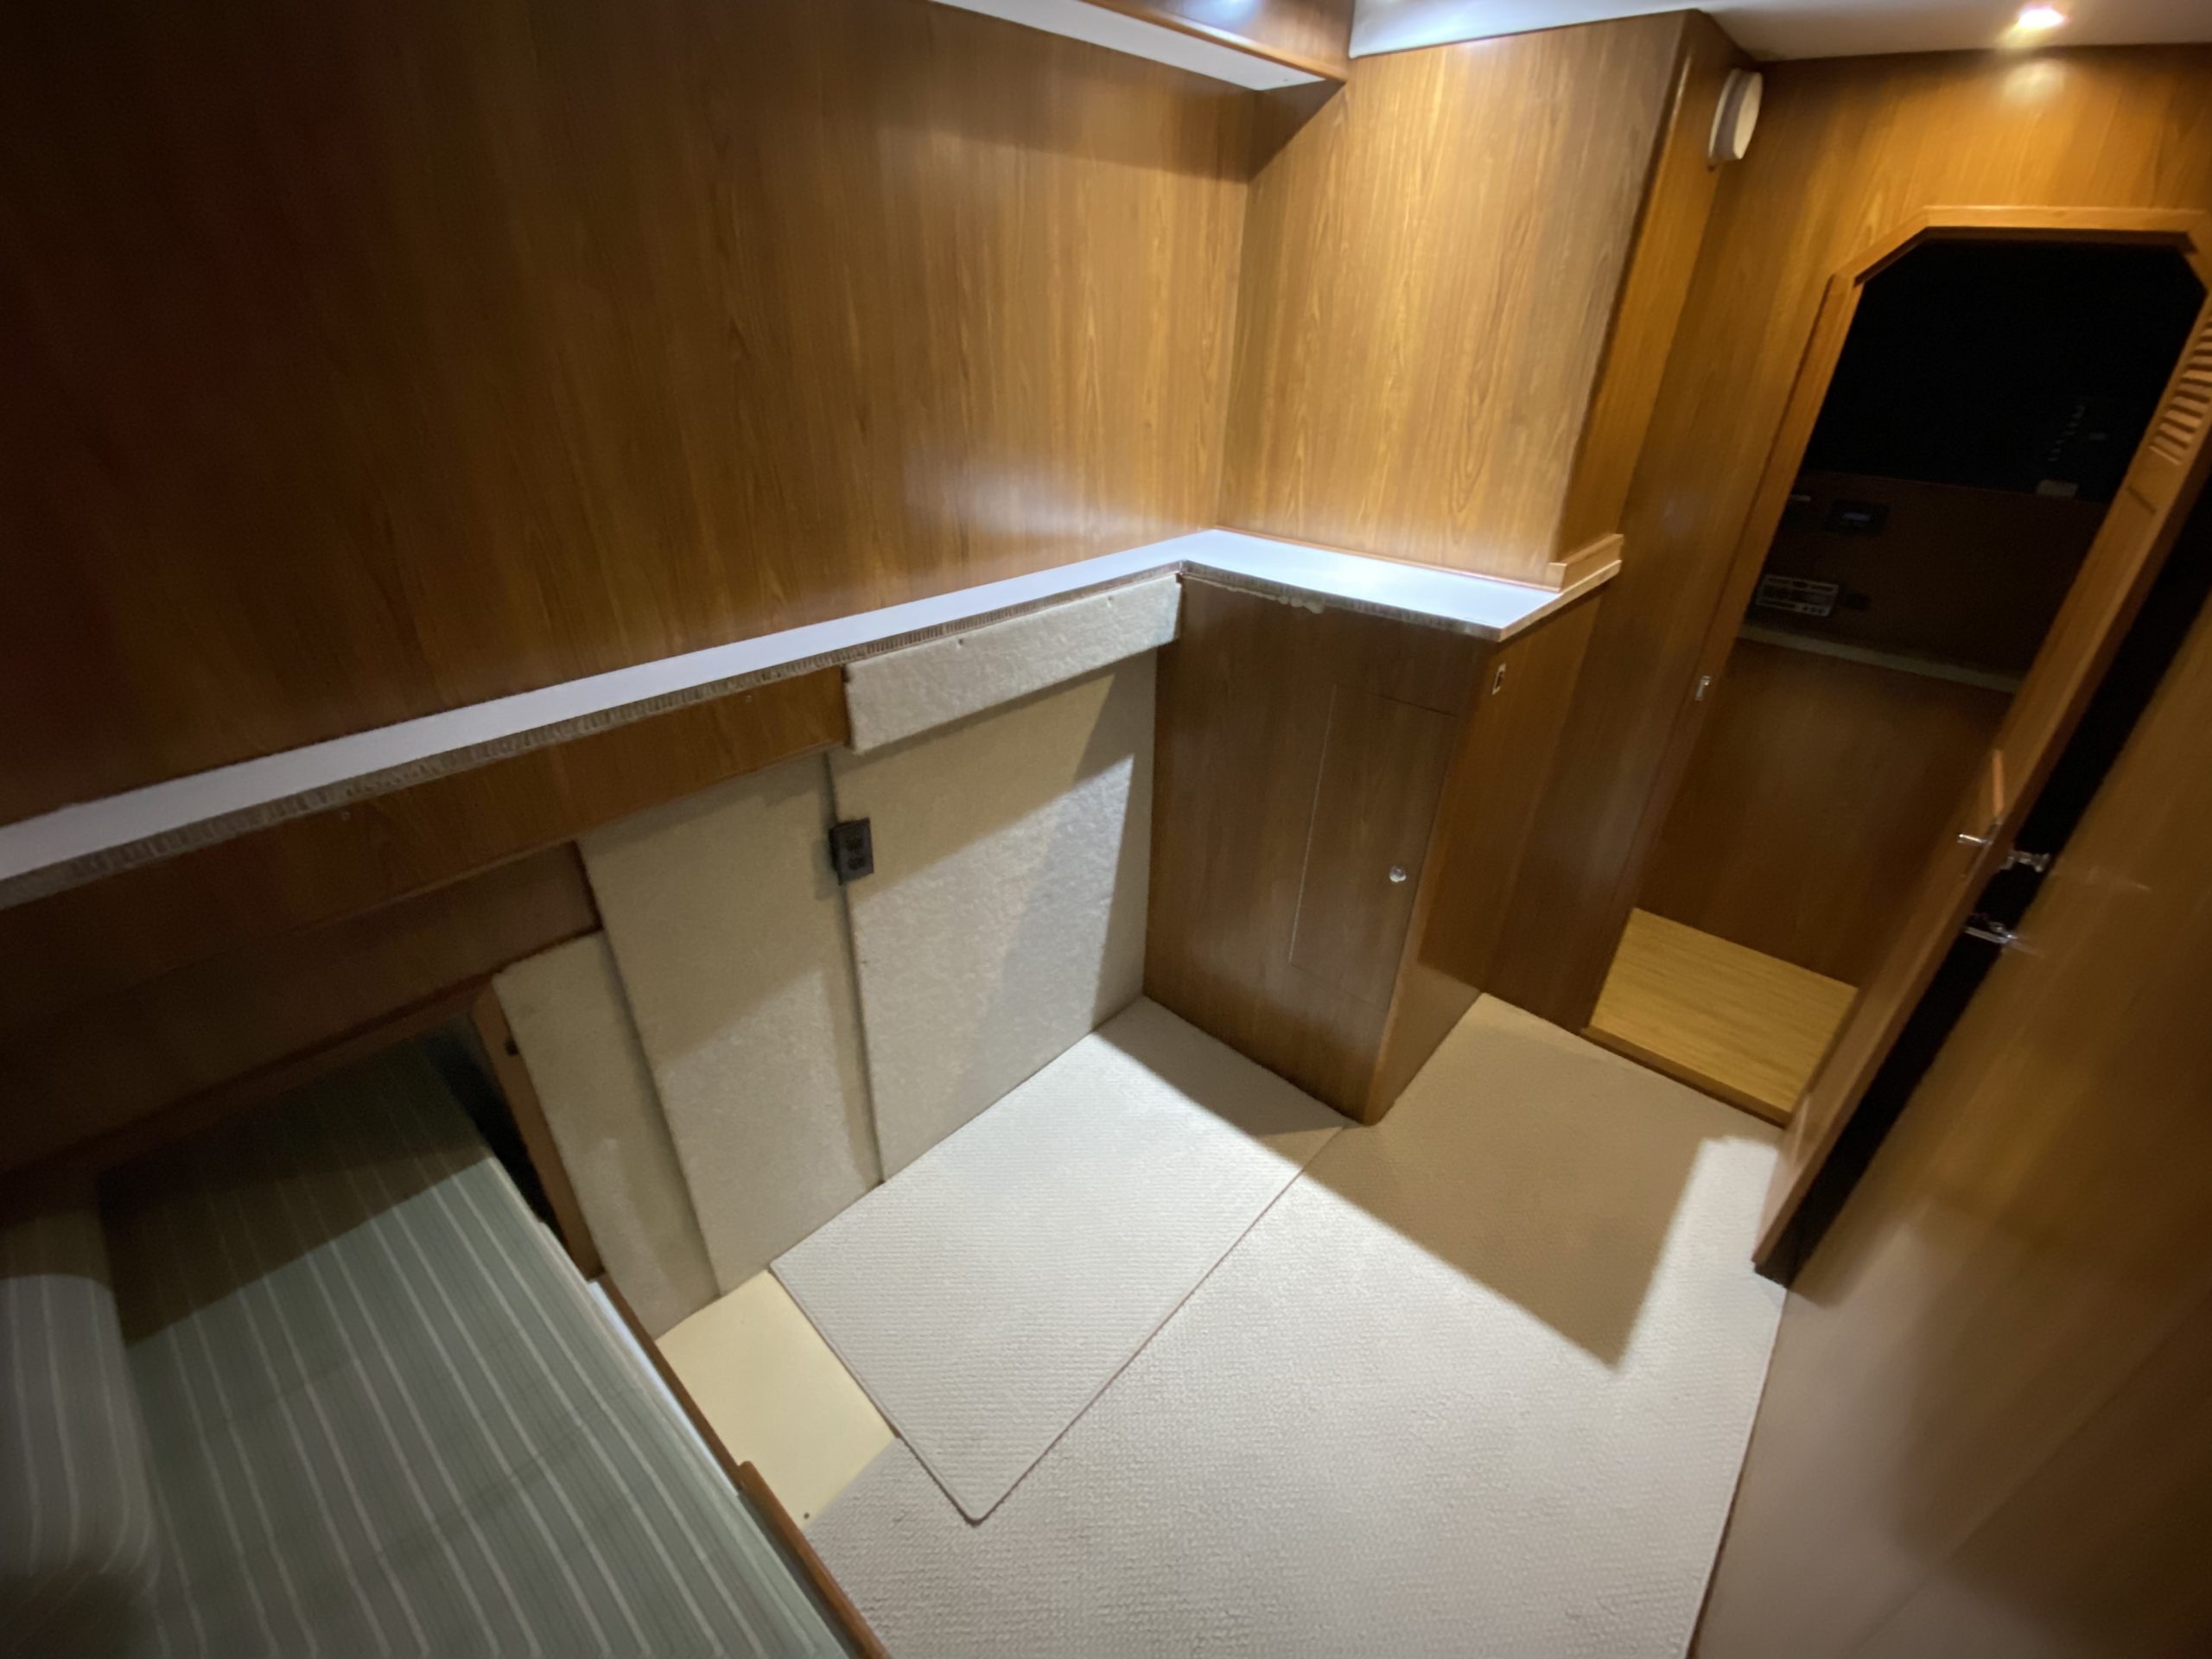
You must be logged in to post a comment.