Hanging out at anchor looking up at our cell antennas and Starlinks
As time marches on, so do our needs for internet reliability and speeds. I’ve been passing around our original post for a while now, but at this point virtually nothing on the boat remains from it, so it seemed like time for an entirely new post…
Routing and Cellular Modems
The core of our latest system is still Peplink-based, but we’ve moved ahead to the 5G device generation. We use the MBX Mini 5G as our primary appliance — it supports 2 wired WANs, 2 2.4/5G wifi connections for WAP or WiFi-as-WAN, and has 2 built-in 5G 4×4 cellular modems. Unlike the Transit line, it has a much more powerful processor that’s able to keep up with the bandwidth its modems can provide, even when using Speedfusion to bond multiple lines. We still want to maintain the three-cellular plan setup (Verizon, AT&T, and T-Mobile), so we also have added a MAX Adapter 5G to augment the two built-in modems in the MBX Mini. Note that the MBX Mini 5G is a very expensive appliance, and, since we bought it, Pepwave has added a BR2 Pro to its lineup, which is slightly over half the price, and theoretically has all the features that we care about from the MBX Mini.
The MBX Mini 5G and MAX Adapter 5G on the ceiling right below the antennas
The two units mount on the ceiling right under our radar/antenna mast, which is a folding unit to be lowerable to clear all the low bridges on the east coast. This setup complicates the need to run as-short-as-possible wires between the cell modems and the antennas, so I had to get some very short extensions to reach between the two. I also wanted to leave the units exposed both to be able to change out SIM cards (which happens annoyingly often as these different MVNOs all go the way of the dodo) and also because the MBX actually gets very hot, just like the Transit Duo that came before it, so this was a nice lazy way to keep it “cooled”.
On-Boat WiFi
Since we’re using the WiFi ports on the MBX for WiFi-as-WAN (bringing outside internet into the internal network), we need some solution for WiFi on the boat. I have CAT6 run all over the boat from the MBX to have reliable hard links to work computers and for some simpler devices without wifi, but also to power an access point. I have a very simple gigabit switch centrally located in the boat, and I POE inject one of the lines off that down to an access point located in the ceiling panel above the center hallway of the boat, about as “middle of the boat” as one can get.
I originally used the AP One Rugged for an access point, both on our earlier Meridian boat and again with the first-gen internet setup on the TrawlerCat, but kept having issues with connectivity dropping out on it approximately daily and needing to hard reboot it to recover connectivity. I had a pile of communications with support at Peplink, and they were completely flummoxed by what was going on. They sent multiple RMA replacements that all had the same problem, did enhanced debugging, had me run special internal firmware builds, and nothing helped.
At the end of the day, fighting with Peplink was less important than reliable internet, so I gave up and bought a simple Ubiquiti WiFi 6 Lite unit, put it in the exact same spot as the AP One had been, and we’ve never had a problem since then. A big downside is that I don’t get AP management through the single Peplink portal, but our WiFi always works, so …
Antennas
For cellular antennas, we have updated to the latest generation of Peplink stuff: the Maritime 40G, which is a 4×4 MIMO unit w/built-in GPS antenna. Steve@SeaBits posted a nice article back in March 2022 testing out a bunch of the next-generation antennas, and these seemed like a good fit for us. One tiny benefit of this is that new antenna I was able to remove the dedicated GPS receiver taking up space on our radar mount tower. But mostly, it’s 4×4 MIMO, so you can use the latest quad-band-aggregation for higher speeds and reliability, and has great omnidirectional gain. On the downsides, not only do you now have to run 5 wires from each antenna through the radar tower and into the boat, but they’re also huge. But they are working better in every way than our older Poynting units.
For WiFi-as-WAN, given how incredibly rare it is that we care about using external wifi these days, I’m still using two of the same old Poynting 496 units (literally the last remnants of the old setup), but we go months at a time in between when I feel like trying them out, being disappointed in the shore-based internet, and turning them off again. So they’re pretty useless at this point, given the amazingness of the rest of the system.
Cell Plans
As mentioned above, we have plans with all 3 of the major carriers in the US: Verizon, AT&T, and T-Mobile.
For Verizon, we lucked out years ago and got an account on the pre-paid plan before they realized they were losing money and stopped selling new ones, but we’re still grandfathered in and using it. It’s definitely lower priority than our cell phones — during high congestion times in busy areas, it slows to low single-digit mbit speed, while our phones (on Verizon) can still pull high speeds. But for 65$/mo, we can’t complain. If we have to end up moving to one of the MVNOs for Verizon, we’ll end up paying over twice that.
For TMobile, I’ve been using atthotspot.com for an unlimited plan since June 2022, after our last MVNO shut down. The guy who owns it has been great for support and I haven’t had a single burp in service.
For AT&T, our last MVNO actually shut down in early January, and I just switched over to atthotspot.com for AT&T as well last week. So far it’s been working great, and only dealing with one MVNO at a time is a nice consolidation. AT&T has been locking down a lot of 3rd party routing equipment on their networks, so we actually had problems with the modem in the MBX Mini getting shut down within a few hours of activating, but after several days in the MAX Adapter, it seems to still be working fine, so crossing our fingers here.
I also keep a Google Fi data-only sim in one of the MBX’s secondary SIM slots to let me switch to it in case of emergency and whenever we bring the boat into non-US waters (until we can find a local SIM). It’s a great cheap backup network, and we do the same thing in our cell phones (primary Verizon, secondary GoogleFi).
Note that I’m not paid anything by the atthotspot.com folks for linking them, they’re just serving me well.
Starlink
One of the biggest changes in our general connectivity has been the addition of Starlink. We first got a residential dish in February 2022 after being on the waitlist for a while, and immediately integrated it into our cellular setup. I got the pole mount for it, used some simple pole clamps to clamp it to a vertical railing support on our Juliette balcony, and ran the wire through the wall into the boat to the Peplink router’s WAN 1 port. It worked great, immediately, and gave us a fairly fast (usually >50mbit) connection that was always up. It struggled a bit when we were under way or moving around on anchor — any time the boat turned significantly it would go offline for seconds to minutes as it reassessed the state of the world and reconnected, but otherwise was fairly solid.
We tested it that way for long enough to be sure that we had functioning hardware, and then quickly did the common POE conversion to save on power. Since we have a 48V house battery system, it’s actually a large efficiency savings for us to ditch the factory router and power brick setup and just go straight to running Starlink off the 48V system rather than through the inverter to 110 and then through a power brick back to 48V, as well as powering an extra router that I had no use for. I used the Tycon POE injector method, since it lets you use a cheap and very small enclosed/protected device, and all you have to do is flip a couple of the pairs when you crimp your ethernet cables both in and out of it. So the dish is DC-powered and uses a fairly low 35-ish watts most of the time. Small price to pay for the level of internet it gives us.
Early experimenting with the two Starlink dishes. They can never agree where to point…
However, in the boonies, where we had weak cell signal and were starting to rely on Starlink for connectivity, when under way especially, it still had significant dropouts, which was impacting our work. I ended up buying a second (RV this time) dish setup, and setting it up in the other corner of the Juliette balcony, POE-converting it, and setting it up as a second WAN. Also, as soon as I was sure the hardware was working, did the motor-disabling conversion, so it always lays flat.
People had been finding that if you disabled the motors, the dish basically just “did the best it could” at all times, rather than always trying to reorient toward the northern pole before getting connectivity back. This was theoretically resulting in increased connectivity for those in motion/rocking around on the water. The logic was fairly sound, but being a science-ey person, I wanted some proof myself. So we did the A-B test of the two dishes — one motor-disabled, one not. While floating around on anchor in a nice open-sky bay in Maine, the dish with motors working had its usual ~50+ connection-drops a day, usually in the 2-5 second range, but some in the 10+ second range. However, the dish that I disabled motors on?
Well. Okay then. We continued the experiment for several more weeks, and consistently got the same results — either zero or very close to zero outages on the motor-disabled dish, and the normal dish had consistent outages, especially under any kind of boat movement. I eventually called the experiment a success, disabled the motors on the second dish, and then both dishes had the same virtually-zero-outages behavior. Great success!
For the rest of our summer in Maine, while cellular was pretty spotty most of the time, Starlink is what kept us happily working, despite being miles from civilization. Working from Maine in 2020 was very difficult, and put a big damper on the spots we were able to spend weekdays. But the summer of 2022 had no such problems — we went anywhere we wanted, whether it had cell signal or not, and had consistently usable internet for multiple simultaneous video calls. It’s truly a paradigm shift in connectivity.
SpeedFusion
The SpeedFusion control panel, showing the different links being bonded
The last critical piece to our current setup is Peplink’s WAN-bonding system called SpeedFusion. It basically takes whatever WANs are currently working (we have 5 possible ones — 3 cellular and 2 starlinks), and for every packet to or from the internet, sends copies of it down multiple WANs (usually 2, but sometimes more, depending on your setup) to the SpeedFusion server in a cloud data center. From there, it takes whichever copy of the packet gets there first, ignores the other copies, and passes it onto the destination. When the destination sends you data back, it does exactly the same thing, but in reverse — sends multiple copies down to your boat, and whichever WAN delivers it to you first, it uses that, and the straggler copies are ignored.
The result is that, at the cost of duplicating data down your multiple connections, you get lowest-common-denominator behavior for your connectivity. If one of your connections has a hiccup for a second or two, you have absolutely no idea, because one of your other connections is still working, and the copies of the data on that link are still communicating happily. When you have inherently-slightly-unreliable connections like cellular or satellite, bonding multiple of them together and smoothing it with SpeedFusion is utterly critical to maintain the appearance of a single reliable internet connection. Our video calls are more stable and consistent than most people on home internet, because of the inherent redundancy that SpeedFusion gives you.
For quite a while, we used SpeedFusion only for video calls — the router has an option to just automatically forward zoom/teams meetings to SpeedFusion, leaving your other traffic to pick a random WAN to go out, stable or not. However, at some point, I got tired of manually managing which WANs were stable or not — you’d try to load a webpage and get nothing, go into the router config, and start trying out disabling different connections and refreshing the page and see when it worked well. While manually twiddling bits makes you feel like a hacker and all, sometimes you just want your shit to work without constant fiddling. So eventually, I bought a larger swath of SpeedFusion data (you pay for SpeedFusion by the gigabyte of data that goes through their servers) and routed ALL data through our computers through it, just leaving media devices (TV for netflix, tablets, etc.) to play internet roulette off speedfusion, since those are what use so much of our bandwidth and needs reliability the least.
In the end, this new setup costs a bit more money in SF costs, but it means that I’m virtually never messing with the router anymore. Things just work. Which is really the goal. Living on a boat brings enough challenges. Sometimes you just want to grab a beer and open up YouTube and know that it’s going to work, without futzing with connectivity for 5 minutes first.
Conclusion
A happy 5 WANs, sitting in Baltimore, MD’s inner harbor
With all of this firepower in place, it’s an incredibly rare day that we have under 50 megabits of downlink at any time, are usually between 150 and 250mbits, and periodically exceed 350-400. It’s actually fairly incredibly how fast the technology in this area has advanced. If you’d told me 5 years ago that we’d be able to do this today, on a boat, anywhere, I’d have said it was at least 5 years too early. And yet, here we are.
An interesting note we’ve learned is what the different parts of our system are good at. Starlink has started getting slower and slower in populated areas as they’ve oversold the network. When we first got Starlink, we were in northern Florida, and easily cleared 100mbit constantly. As the year went on, by late summer, in populated areas, we were often down in 5-10mbit territory until after midnight. However, in populated areas you also end up with great cellular connectivity, so the two systems actually complement each other very nicely. When Starlink is slow, multiple cellular connections are usually working great. Then, out in the middle of nowhere, cellular is only passable in an emergency, but we have two Starlink dishes each pulling over 100 mbits with no one around to share it with.
Sometimes you have to just forget about all the craziness, and have a little fun together
After arriving in Baltimore late Friday night, we woke up at a decent hour Saturday morning, saw Nick off to the airport, and then settled in to dismantle most of the starboard motor. We had tickets to fly to Seattle on the following Saturday, so we had a full week to get the job done if it ended up taking that long, but we did need to get the head to a machine shop by then to have any prayer of continuing south in a reasonable timeframe.
The Yanmar service manual is astonishingly useless — the description to remove the head is only 3 pages long, most of which are instructions like “remove intake manifold”, without any nuances about the multiple water lines with seals attached to it, so the entire process was fulled with, uh, “creativity”. I’ve dismantled and fully rebuilt multiple types of smaller gasoline engines before, but this was my first large diesel. So while I can wing a lot of the process and feel comfortable about my ability to put it back together, I was not really duly prepared for hauling several awkward 150+ lb parts out of the engine bay. However, at the end of about 10 hours of work Saturday, the upstairs area was full of engine parts, and the head was actually fully out and ready to go to a machine shop.
I identified a few machine shops, narrowed it down to a recommendation from a local Yanmar service guy, and on Monday they ended up actually coming by the marina to pick up the head from us. Ahead of schedule! We had a pretty uneventful week in Baltimore from there — mostly cold and rainy, so we didn’t do a lot of leaving the boat. We even managed to see our friend Matt, who moved to Norway before the pandemic, and meet his wife for the first time, and hang out for an evening catching up.
We flew home to Seattle for a week of work events for my company, and had a great week catching up with family and friends each night, and my teams and running some holiday events during the days/evenings.
Fun with friends and family
We even got a fair bit of snow in Seattle after going to a Kraken game!
Hannah’s first NHL game
Unfortunately, at the same time, bad news started coming in from the machine shop. The head was actually pretty messed up — it looked like there had been a small hydrolock event, likely due to the excessive cranking the mechanic had to do after he messed up installing the diesel lines making it unable to start, sucking water down the exhaust into the motor. All of the valves were slightly bent and many had munged-up tips from bouncing around the rockers, but at least the head itself had no damage. While that wasn’t great news, the worst news came later that week: new exhaust valves are completely unavailable. They list 100 business days out from Japan, which really means “absolutely no idea when”.
By the time we’d gotten to that conclusion, it was the end of the week, so I spent the weekend digging up any used heads I possibly could. Again, we get pretty screwed by this low-production-run engine — there’s just virtually no used parts around anywhere. I chased down two used heads in Florida. One guy looked really promising, but eventually when I wanted to send him money he switched to saying that he will only do local pickup. Then the other one when I got to the point of sending money, finally took detailed enough shots of the motor to see that there were only 5 cylinders’ valves in it, leaving me 2 exhaust valves short. I confirmed with the machine shop — really, all 12 valves are unusable? Yep. Back to the drawing board.
The picture of despair
I found one more used head in England, but by the time I could exchange enough communication with them to agree to buy it, all of the shipping companies in the UK had closed up for the holidays. So, at this point, our best case scenario is likely picking up the head on Jan 4th or so, shipping it to the machine shop, which will take weeks, and then repair time. So, we’re hoping to be able to start putting the motor back together around the end of January or early February, best case scenario.
This, of course, leaves us in Baltimore through then. We are pretty stuck in limbo on deciding whether it’s worth bothering to take all the time, energy, and expense of going south at all, given that timeline, or just spend the winter on the Chesapeake (probably mostly or entirely in Baltimore). We’ll make that call when we get a more-firm timeline, but for now we’re thinking we should be laid in for a long winter in Baltimore. I’m also exploring repowering the boat to Cummins QSB6.7s — I’m exhausted with horrible parts prices and availability on these Yanmars, plus what has only been an utter recurring disaster of incompetent shops in the very limited service network for us.
Lots of time in limbo has been giving us plenty of time to consider what our future plans are. While we’ve been enjoying our time boating on the east coast, had a blast doing the Great Loop, and we had the best possible weather and experiences in Maine this past summer, we’ve come to the conclusion that the boating around the northwest, in the summer months, still beats anything the east coast has to offer. We largely came out to the east coast to be able to do boating adventures where there was safe internet — in the northwest, as soon as you go north or west from Vancouver, there’s basically no cell coverage anymore until Juneau. With Starlink now being a robust solution for us, we’re ready to do more extended cruising away from cell coverage in the northwest.
To that end, we have been, for a couple months now, exploring options to get back to the northwest. We could obviously buy a different boat over there and rebuild to our liking, but that sounds exhausting. We’ve been getting varying degrees of burned by every shop we’ve used to do work, and with how the industry is known to be at extreme levels of worker shortage and quality, I wouldn’t trust anyone other than myself to do that work. We’ve looked into transport costs, but between the price of diesel and pandemic limiting shipping options, prices for yacht transport are astronomical — I’ve been getting quotes of over 75k$ to ship our boat to the northwest from Florida, which is just shy of four times what we paid to send the (slightly smaller) boat that same route 2 years ago.
I started turning to the more interesting option — what if we did it ourselves? Just like there is the AGLCA, an organization for resources for everyone doing the great loop, there’s another group, the Panama Posse, for cruisers exploring everything between California and Florida. There’s forums, live chats, tons of marina discounts, cruising guides, and more. It’s definitely less well-organized than the AGLCA, but it gives one a lot of confidence. I joined the group a month ago, just to see what was available and what sort of communication was happening, and it is a very lively group. There’s usually over a hundred messages a day on the chats, with people all over the place providing advice, asking questions, and gorgeous pictures of sunsets. We couldn’t really consider this route with our original Meridian due to limited range, but this boat has well over 1000nm of range at passagemaking speed (~8kts), so going through the Panama canal is actually a completely viable option. By next winter, Starlink will be active through the entirety of Central America, so it’s actually a very interesting option for us to consider.
So, we want to get back to the PNW by summer 2024 — what do we do in the meantime? We’ve talked about looping again, but with my work schedule being what it has evolved to in the last year, another several months of being second class citizens through major lock systems is fairly infeasible. Also, we didn’t really enjoy almost anything between Chicago and Mobile. So we’ve thrown that option out. We could do Maine again, but we had such a perfect experience last year it will be hard to replicate. However, there’s one interesting option that was largely closed to us during the pandemic — the Triangle Loop.
The Triangle Loop, including the two different routes between Kingston and Montreal
This would involve another replay of going up the Hudson River (which was pretty), with far less schedule pressure this time, running the Erie/Oswego canals again, possibly with some stops in the finger lakes of upstate New York. Then, instead of heading into the Trent-Severn, you head east, and explore the 1000 Islands National Park for a while (cruisers say you can easily spend an entire summer there). From there, you can either go straight up the St Lawrence Seaway to Montreal or you can take the preferred scenic route of the ancient Rideau Waterway up to Ottawa and from there down the Ottawa River to Montreal. Then you take the Richelieu River down to Lake Champlain, and through another canal back down to the Hudson River. We can clear the max 17′ air draft for this route with over a foot to spare, and it sounds like it’s some of the most gorgeous boating the northeast has to offer, so it feels like a good capstone trip for our east coast boating. Also, Russ and Jax like the idea, so we’d have a buddy boat again, which is part of what made the Maine trip so much fun this year.
So we’ll see. But those are our tentative plans for now — Baltimore for the winter, head north when it’s warmer and do some combination of Long Island Sound and the Triangle Loop with no time restrictions, then head back south down the east coast to Florida in the fall. Then we would either transport the boat over the winter if prices come down, or spend the winter doing an amazing adventure through the Panama Canal back to the west coast. But who knows — plans do tend to change!
Hannah and Matthew got everyone matching onesies for xmas!
In the meantime, we’re enjoying taking some time off in Big Sky with friends and family before the January madness commences. I’ve been doing Advent of Code for the month, using it as an excuse to learn a new programming language (Rust) and really enjoying it. We also have an escape room advent calendar we’ve been working through that we had to leave on the boat to finish when we get back.
Absolutely fantastic Christmas with Family and Eric
We had a scare a few days ago when the polar vortex hit Baltimore and our boat, which we’d partially winterized, but not prepped for multiple days around 10F, plunged well below freezing, despite multiple heaters on. We have temperature sensors all over the boat we can read remotely. We sent a desperate message to the amazing dockmaster at Anchorage Marina who went over to our boat and put some more heaters in, and we’re desperately hoping that that was just enough heat to keep expensive things like the watermaker from freezing and exploding, but we’ll see. We could have a large and potentially very expensive mess to clean up when we get back in a few days, which we’re trying not to think too hard about. I’ve also ordered several heaters to hard-mount in the engine bays and lazarettes, in preparation for harsher winters to come…
Yep — starboard engine bay got down to 16 F for quite a while there…
More updates as we get them, we’re pretty much in waiting mode for the moment.
General overview of the power system, including the large loads
After over a year with the power system, and several tweaks, I’m at the point that I’m very happy with where things have landed, and figured it was time for an update. I also convinced a buddy boat of ours, Inquest, to do the same system, and we’ve been iterating with each other for the last year, which continues to be helpful. The original post from last year has more details on some of the history on why I went in this direction, if you’re interested, but this post will be self-contained about the current system if you just want to know where we landed and the benefits.
Why 48V?
Let’s get the basic question out of the way — why the heck did I go with 48V? Most boats are 12V, with some natively 24V, but no one is doing 48V.
So, I don’t just hate myself. I mean, obviously there’s a little of that, but there are some tremendous advantages. If you look at off-grid systems for homes, they’re all 48V, and my target was a lot closer to an off-grid home than a traditional “boat”. And a lot of that is because converting back and forth between 48VDC and 120VAC is more efficient than to/from 12VDC. Similarly, for MPPT conversion off solar, downconverting to 48V is more efficient than all the way down to 12V. But even moreso, at house-level loads (i.e. regularly dipping into multiple kilowatts), the sizes of cables that you need to run to safely transfer power to/from 12V batteries is some combination of absurd, heavy, and somewhat dangerous.
Running 5kVA inverters with 12V batteries, we would need to run four 4/0 cables each for the positive and negative terminals (and, realistically, to be safe, another set of four for the ground), to each inverter — they need around 1000 amps! With 48V batteries, we only need to run one each. Simpler, cheaper, far less inflexible cable to run around the boat, and generates much less heat at the terminals from 1/4 the amp load. I only have to run 4AWG wires from each battery to a common terminal, because 100 amps is more than they will ever see.
This is a picture from the Slowboat article from a couple years ago, showing high temperatures from a very-carefully-engineered 12V all-inverter system under load.
Finally, because of the low amp loads, battery chargers are simpler, cheaper, and more efficient. The same Quattro in 48V that charges at 70A will only do 120A at 24V or 200A at 12V (28% less power). Where I would need multiple MPPT chargers for my solar bank, I can instead use a single not-horribly-expensive one. Basically, everything in the 48V world is smaller, lighter, cheaper, and more efficient.
The downside to 48V, of course, is that you now need some way to feed your native 12V loads, but that turns out to not be too bad of a problem to solve, as I’ll discuss later. That said, many devices are coming natively in 48V these days — we have a native 48V windlass that plugs right into the house bank, POE networking gear uses 48V, there’s a new generation of thrusters out that use 48V, and even watermakers are starting to come out in 48V. So it’s becoming more standard in the marine world, but I would say it’s still in the “bleeding edge” territory for most things.
Batteries
The core of the system is a 600Ah 48V house bank, made of six 100Ah BestGo packs in parallel. I picked these packs because they, at least at the time, were the best value in US-company-warranty-backed Lithium packs available (the 6 batteries were around 11k$ shipped to my door). They’re also IP66-rated, which, on a boat, in a cabinet right under the A/C drip tray, next to a washer/dryer unit, and with the A/C water lines running literally right over them, seemed like a good idea. Lastly, Will Prowse did a teardown on them and found the build quality to be unmatched in their price range. They’ve been working flawlessly for me, with very little temperature buildup even under heavy charging and discharging.
The batteries form the core power storage for the system, which is then mostly transformed to the other working voltages around the boat (12V and 120/240VAC), though more and more native 48V equipment is coming available. I’ve converted to a larger 48V windlass which pulls directly off the batteries and I’m running Starlink directly off POE from the batteries.
You can read about lithium batteries and what a different world they are than any sort of lead-based batteries, but you really have to live with them daily to appreciate how amazing they are. There’s no memory, so you don’t have to worry about equalizing or seeing your capacity dwindle every day since you last equalized. You can happily draw them down to 20% or lower and still get thousands of charge cycles out of them. You can pull huge loads off them and the voltage sags by a couple percent, not 10-20%. You just treat them like a big dumb bucket of power — you charge up by filling the bucket, you use it by taking power out of the bucket — and there’s nothing else to think about. It’s just that easy. We will never go back to lead after living with lithium for a year.
Inverters
One of the goals of my system was to run 100% of AC loads through the inverters, and hence have no difference in anything on the boat between running off batteries and off shore power or the generator. I wanted to build the system to just leave the inverters on 100% of the time and not have to care. Leave the water heater on full time, it’ll be fine, and you can shower whenever you want and not have to think about it, basically like you’re living in a house.
And it’s worked — every night, Hannah and I charge our phones off outlets with integrated USB ports that are powered off the inverter, because it’s easy and the tiny efficiency gains by going directly to DC don’t matter to us anymore.
It looks like a Victron ad in here
I went with two of the Victron Quattro 48/5000/70 units. The Quattros have several neat features for us:
Auto switching between shore power and a generator, with different input power limits for each.
Supports constant draws of 4kw each, and burst up to 8kw for a brief period of time, like for A/C compressor startup.
Charges at up to 70A each (though with the 4kw limit, this tends to actually be more like 60A, in our experience).
PowerAssist — if you’re on shore power/generator, and you need to pull more power than the input power gives you, it will simply augment the extra load from the batteries. When we’ve been stuck in situations with only a single 15A 120V outlet available on a long extension cord, PowerAssist has been awesome — run the A/C for a while, batteries slowly drop, turn it off, batteries charge back up.
Handles split phase power, even when we’re plugged into single phase power — one inverter charges and the other inverts, but the boat still has 240VAC available.
I was thinking there would be a lot of nuance to getting this system to work correctly in a wide variety of circumstances, but there was actually only one semi-hidden thing I had to figure out. You really need to fire up their ancient Windows-based administration software and specifically change the two inverters to disable “Switch as Group” — this means that, if one leg has power and the other doesn’t, or if the second leg isn’t actually split phase (i.e. run in parallel with the first leg due to lazy marina electricians), the first inverter will still switch to using that external power, but the second one will stay as an inverter, providing that second leg of phased power for the boat. We have used this feature dozens of times at this point in the last year and a half, and it really is what makes the system set-it-and-forget-it under virtually all possible shore power electrical wackiness.
12V System
This area has undergone the most iterations since getting this boat. My original system was basically using the Port start battery as a “12V house”, and using DC-DC converters to keep it charged/fed, with the converters feeding all but burst-overloads (i.e. dinghy lift, windlass, etc.) However, this system had two primary categories of downsides:
Your “house” is your start battery — if something goes wrong with the dc-dc converter, you’re rapidly going to nuke your start battery. There was an ACR that would keep the other start battery isolated, but still, one of your motors would be dead for a while until you got enough stuff safely running to nurse it back to life.
When you crank the motors or otherwise pull high current (windlass, etc.), the lights in the boat dim, some sensitive devices reset, etc. The DC-DC converters don’t keep up with engine cranking, so the voltage sags down to ~11V, which isn’t enough for many devices. I kept having to put small buck-boost converters on sensitive electronics like the router and the N2k network to keep them from dropping out every time I fired up in the morning.
I ended up wanting to move to a completely isolated 12V house setup that had nothing to do with the start batteries, and, ideally, was not, itself, battery-backed at all. I spent too much money on a 3000W 48->12V converter from Zahn, but after a couple weeks of being frustrated at how it did not respond well to transients (flushing a toilet made all the lights in the boat dim), we dinghied back to the boat one afternoon to find the entire 12V system dead with the Zahn board having completely died.
Final system setup of the Orion-Trs in parallel
I returned the Zahn and decided to go with the tried-and-true-and-cheap Orion-Tr converters, and am now using three in parallel. That gives 90A of continuous and up to 120A of burst capacity, which is more than if we had every house-DC device on the boat turned on at the same time, and a bunch of redundancy (2 of them can die and we can still survive on a single 30A Orion-Tr). I have a backup switch to link the 12V house back to the port start battery if I need to, for some reason, which is also very helpful — if something goes wrong in either direction, I have another 12V system waiting. It also means I can do maintenance on aspects of the power system without actually having to turn the lights off, which has come in handy a few times.
Charging from the Alternators
One of the weak points of the original power system was charging the 48V house system off the alternators. My engines don’t have any sort of kit available to mount a second 48V alternator on them, and there’s not really a good place for one to hack one in, so I’ve given up on that route and am sticking with 12V alternators so that the motor systems are still self-contained for safety/redundancy.
So, with 12V being where I was stuck, the factory “80A” (I never saw them able to put anywhere near that amount of current) alternators weren’t gonna cut it. For the port side, I ended upgrading to a Balmar 94LY 210A alternator, which required a little custom hacking on the alternator bracket to make it fit, but ended up nestling in there just fine with the factory belts.
So, now I have the ability to generate something north of 200A while under way. But how can I utilize that when it’s at 12V and my batteries are at 48V, and how can I make sure it only tries to pull that charging current when there’s actually alternators providing that current, and not just drain the battery down?
I originally got in on an early alpha test of the upcoming WakeSpeed WS3000 bidirectional DC-DC converter, which was something that you would plug between your 12V start battery and your 48V house battery. When the 12V system was charging, it would pull current from the low side and send it to the high side to charge the house batteries. Then, when the motors were off, it would send power from the 48V high side to the low side to trickle charge any of your 12V loads (or, in my original case, “my entire 12V house load”).
To control the alternator itself, I first tried using a WakeSpeed WS100, a simple 3-stage charger. However, we quickly found that, the way the WS3000 was working, it was basically fighting with the charging algorithm of the WS100 and confusing the hell out of it, since it wasn’t responding like a battery would. I ended up converting to using a stupid-simple automotive adjustable-fixed-voltage regulator, which worked great for a while and I just locked to outputting 14.5V. After several months, though, that unit just magically stopped working and I switched to a Balmar BRS-2T, which is just a beefier adjustable-fixed-voltage regulator, and that’s been solid ever since.
Unfortunately, after working extensively with Wakespeed for around 9 months to tweak the WS3000, we both came to the conclusion that the way they were approaching the charging algorithm needed some fundamental reworking. They were more focused on other product areas, as a tiny company, so they had to put the project on ice for a while and come back to it at some point, but it had left me without a particularly usable solution here.
Primordial BoatKit — now controlling the Calex board full time
I ended up buying a Calex 3000W Bidirectional DC-DC converter board as a bit of a hail Mary and built some software to control it with a Raspberry Pi. I was thinking that a basic PID control loop would work really well to have the unit basically self-report how much current you could pull off it — if voltage dropped below X, pull less current; if voltage goes above X, pull more current; and just keep continuously tuning. Turns out, this idea actually worked unbelievably well. The very first outing, I watched the telemetry with joy as we started out idling and watched the converter fill in the current that the diesel preheaters were using. Then as we added RPMs, the motors heated up, and the preheaters turned off, it switched to charging the high side and the current quickly jumped up and found its happy place all on its own, every time we changed RPMs.
One of the early BoatKit test runs, slowing down into a bay and dropping anchor
At this point, when at hull speed, I can safely pull ~180-190A from the 12V side to charge the high side at around 45A, for hours on end. When we’re on plane at higher RPMs, I easily cap out the 3000W converter around 225A of low side draw. It’s fully automatic, and just works, running in the background, doing its thing.
It’s really a game-changer for us — when we’re moving every day, we can usually get pretty close to fully charged with every trip, combined with solar. We’ve put very few hours on the generator since getting this system tuned around late June, despite spending almost two full months without plugging into shore power in Maine this summer. Inquest also installed this same system and has been beta-testing the BoatKit setup and has ended up in the same place — very little generator running required anymore.
Solar
The present-day setup
The boat originally came with four older rigid solar panels that were nominally rated at around 200W each. That just wasn’t gonna cut it — we go through a lot of power. Also, the rigid solar panels are heavy.
I’d had very good experience in the past with flexible solar panels and using Eternabond tape to hold them down to fiberglass — the panels on our last boat survived a (non-direct-hit) hurricane just fine, and installation becomes non-permanent and super-easy. After measuring really carefully and deciding how much to work around the radar tower and FLIR on the front, I settled on putting 15 of the SunPower 170W flexible panels up top, for a nominal power capacity of 2550W. To help with shading issues, I connected them up in five parallel groups of three panels. This put the panel voltage at around 90V, with a peak current of around 28A. Better still, the total weight of the 15 flexible panels, including installation tape, is still less than the 4 rigid panels they replaced.
Getting the wiring routed semi-cleanly was not a fun endeavor, but in the end it looks pretty decent, and no one can see it from below anyway! It’s all running through a single Victron 150/70A MPPT charge controller, which seems to be doing a great job, after replacing an initial buggy one with an RMA’d one that’s now fine.
A month in Maine — roughly 15kWh a day of solar on sunny days!
As you can see, solar is covering a significant portion of our usage. We basically only went significantly over on hot days when we had A/C on or overcast days where solar was bad. But even with running A/C regularly (it was a hot summer, even in Maine!) and all the other crazy things we do, we only averaged around an hour a day of generator usage (usually 2 hours every other day). So, the solar system is a complete success.
Generator
The boat came with a Northern Lights 12kW generator, configured to output two phases of up to 50A of 120V. It’s a simple but known-to-be-reliable generator with fully analog controls and simple maintenance. This is actually a pretty perfect setup for the boat, because it matches the shore power input size (50A/240), and the two inverters want to pull around 8kW from it when charging the batteries. Running a diesel at high load is much more efficient than running at low load, so in our setup, we only run the generator when we need to charge the batteries, not just to run loads.
To keep us from having to think about generator timing, for the most part, I’ve set up a full autostart/stop system. Since the generator is fully manual/analog, I had to install a DynaGen TG410, which can be configured to take a single input line of high/low voltage and trigger a start/stop of the generator. It runs the preheater for a set interval, cranks, checks for voltage, etc. — it’s a full generator controller, basically.
The dynagen on our main power panel — ignore the sensors that don’t read correctly!..
I then configured our Victron Cerbo GX’s generator start/stop module with simple simple parameters — fire up when we go below 40% SOC, stop at 85%, and during quiet hours (middle of the night) only start in an “emergency” of 20% SOC. With this setup, we basically don’t have to think about charging. If it gets lowish at any point, the generator charges back up. Or we can easily manually trigger timed generator runs if we want to take control of the situation. Super helpful.
Monitoring
One of the key reasons my cabinet looks like a Victron ad is because of how nicely the whole system plays nicely together to tie into the Cerbo GX. It’s a cheap box you add onto your Victron setup that you can plug a little touchscreen (Touch 50) into for your power panel, and it displays all kinds of neat info, also allowing you to control important aspects of the system. But it also connects to your boat’s internet and can stream your data to the VRM online system for monitoring reasons (it can email you with issues) and digging into data in more detail.
With VRM, you can look back in time at incredibly important things like your holding tank levels!
After over a year of having this system, the sheer novelty of the monitoring system has worn off, but it is still incredibly useful. Especially after installing a third party modpack called GuiMods, you can fit a pretty crazy amount of critical data on one screen. We have detailed info about the shore power and usage, what the inverters are doing, AC and DC loads at present, state of the batteries, the solar array, our pile of temperature sensors around the boat, and our tank levels.
Cramming a pile of info onto one little screen
The Cerbo is really what seals the deal on the Victron suite, at least for me. The rest of the equipment also appears to be top-tier, but the Cerbo tying it all together is some sweet icing on the cake.
Summary
The system is really honed-in at this point. We can plug into any power source from 15A/120V to 50A/120-240V and the system just works. Speaking of plugging in, unless you already have a motorized shore power cord setup, just go get a SmartPlug. It’s just worlds better and safer, in every way. Stop delaying or saying it’s not that important. It is. Just do it.
We very rarely have to pay attention to power in the slightest unless we want to run A/C for a while, at which point we usually want to plan a generator session to make sure we start the night with pretty-full batteries to make sure we can keep the A/C on for the whole night and still be fine in the morning. Power stats are a fun thing to watch, rather than something to be carefully managed. There’s always hot water and ice in the icemaker, the TV can go on whenever, and I play computer games on a desktop computer with a giant monitor all night.
The system’s mature form is now designed around redundancy, with many different ways to do everything from charging the 48V batteries to powering the 12V house system to starting the engines or generator. It’s being run full time on two boats that are both techy liveaboards that spend more time at anchor than in marinas.
Hopefully sometime in the next year I’ll be able to get the BoatKit stuff out to the wider world so this last piece of the 48V puzzle can be accessible to the masses. But even without that piece that ties the 48V system to the motors, the rest of this setup is still something to consider if you’re looking at rebuilding your power system. Hit us up with any questions!
Look, a giant hole in our boat, in the wrong place, that’s still here to this day.
Note: this isn’t really designed to be a standard blog post for readers to read and care about. This is an accounting of an unbelievably horrible and expensive experience dealing with what should have been a very reputable shop. At this point, I just want this post out there to try to prevent other customers from making the same mistake we did: using this establishment at all. If you’re a standard reader, don’t read it unless you’re really bored.
We’ve been accumulating winter projects for the boat for much of the year aboard. Last year, we had such a great experience with Hinckley in Maine, across several different projects, that we ended up communicating with Hinckley in Stuart and deciding to embark on several major and many minor projects with them while we had to spend a month on work travel flying around the world. And so, at the end of February, we pulled the boat up, spent a week having them scope projects, and then flew away for a month. What should have been around 30k$ of work ended up turning into 71k$ of half-finished, mismanaged, boat-damagingly-bad jobs, that we back negotiated down to 54k$ to get our house back from their threatened months of legal purgatory. And here’s how that happened.
The first week, while we were on the boat, we worked with our service manager, and scoped out several of the more nebulous projects to see where we wanted to land. I had a 15 page google document with all projects listed, scoped, with pictures, descriptions, and more, that they used to form the basic project plan. We quickly figured out, from initial estimates, that we wanted to scope our more advanced projects way in, which was not surprising in the slightest, but arrived at proposals that made us happy, both for cost and scope. We departed on great terms with work underway on some basic jobs, and then communicated via calls and text with our service advisor for the next couple weeks.
The first major project, and a substantial crux of the dispute, was a big job where we destroyed a stack in the middle of the boat that had the washer/dryer and a cabinet in it, to instead place an RV fridge there, and move the washer/dryer over to across the hallway, to replace where one of the two fridges is, and take out the other fridge and build a simple box cabinet. Quite a bit of work, but nothing horribly complicated. We worked with our service advisor to get the estimate down to $11,900, which was a bit higher than we wanted, but we were hoping for some very high quality work that we’d come to expect from Hinckley, so we were willing to pay for it. As they got started, they said that the cabinet over the fridge was going to make the ceiling modifications far more complicated and we could get the price down by about 2000$ if we pulled out the requirement. I figured I could build another cabinet myself down the line if we wanted it, so we took the discount.
I get an early picture of the demolition work progressing, but it’s hard to tell anything from the picture other than that their sawsall skills are a bit haphazard, which starts making me worried, but the service guy insists that it’s just the first cut and will be cleaned up later — fair enough.
Another week passes, with a few smallish questions and some basic status updates, but sounds like all is on schedule and budget, and then I get a text from the service guy saying that today didn’t go how he expected, he ended up getting let go, I should call the company in the morning to figure out what next steps are, but that I should be very wary about cost overruns with the other managers. He goes into details about how he was let go unceremoniously, but likely because he was constantly revising bills down by 50% or more because the service department was always go so horribly over estimates. Not terribly surprising that they let him go, but his messages are going to be good evidence down the line for us about how unapologetically systemic this behavior is here.
So first thing in the morning, I call the shop, and the new manager says that she’ll get me a full accounting ASAP. We talk later that day, and I’m told that we’re something like half done with the fridge/washer project and the bill is already at 17k$ for that project alone. I freak out, since the boat interior is literally chopped to pieces and now we’re basically hostage. I tell them to get the bare minimum done from here to get things back together, since we won’t even be back in the country for another week, much less back at the boat. We set a date for our return and schedule a meeting with the head of service for that morning.
By the time we get back to the boat, the stale bill (for this one project) is at 19k and they say a bunch more work is yet to be added to the total. When I have my appointed meeting, they put another bill on the table for around 26k (for this one project) with everything added in, and I’ve already gone over the boat and seen that the woodwork is shoddy (jigsaw cuts over the edges of the fridge hole, formica already delaminating, etc.) and that the pantry cabinet was never made — there’s still an old fridge in place there.
Further annoyingly, they made the box several inches larger than it needed to be in all dimensions, making the office more claustrophobic than it was before, despite the incredibly clear instructions in the fridge manual to add zero extra room around the listed box dimensions, because the cooling is carefully engineered to flow through designated channels. Then, they also put the fridge on top of a ~14″ high pedestal that they found in the wall when they demoed it, so that the fridge goes nearly all the way to the ceiling. So not only is the box far too large, but it also goes up so high that the room feels even smaller and essentially removes service access to the ceiling panels over it, and looks pretty awful from inside the room. Now that they’ve cut such a large hole in the wall, it’s going to be a complete bear to rebuild the room, so it’s likely to never be properly fixed, but it’s infuriating how this turned out.
Oh, and also the fridge was throwing error codes that took me hours to diagnose and fix. Oh, and the first time we were in vaguely heavy seas, the fridge shifted and dropped an inch or so, and the freezer was locked behind the lower retaining panel, requiring me to break the panel to get it out to let us get into the freezer. I haven’t yet dismantled the box to figure out what critically moved and figure out how to properly support the unit.
Look at that quality woodworking. Definitely worthy of the Hinckley name.
So we’re at about 3x the estimate, with a shoddily done project. I argue with them and they literally say to me, “it’s only an estimate, this was a big project, we think you got great value for your money here.” …
At this point, since we end up doing a couple back and forths where I complain about the bill and they send me away to ruminate internally, I’ve had a chance to check over major project #2 — the bow thruster.
So, we had them install a bow thruster tube, for a backordered bow thruster, so that whenever the thruster comes in, it’s a few hours of work after being hauled to put the hardware in place. They estimated around 5000$ for this, and that was actually right on track with my guess ahead of time — it’s a lot of work to build a fairing, make a giant hole, mount a tube, glass/gel it all in, etc. The tube costs about 1000$ on top of that, so we had them go ahead and do it.
I sent the manual for the thruster over, which they confirmed receipt of, and I gave them three locations, in descending order of preference, to install the thruster, based on where it would fit the very explicit clearance requirements in the manual. The manual said the tube needed to be twice the diameter in length. 250mm tube, 500mm min length, and some other requirements around the top of the tube on the inside to fit the motor unit. Guess how long the tube is where they installed it? 200mm, and that includes the fairing making it “longer” than it would otherwise be. The thruster would literally be in free water sticking out either side of the hole. It’s not even close.
In Hinckley’s defense, I showed them the hole and the manual, and they admitted “we can’t really charge him for this”. But then, I asked what to do about fixing the hole, since this is thousands of dollars of hull damage to repair, and they said that they’d refund the labor cost for the thruster install, but that’s it. So now we’re out a thousand bucks for the tube and thousands more to get this hole repaired by a competent shop. Cool — definitely a reasonable response to admitting that you did a bad job.
The stories are just equally weird and dumb from here. We wanted to get two waste hoses behind the two heads replaced, and they originally estimated 1000$, which seemed like a lot, but it was a shitty job that I didn’t want to do, so I said ok. They got into the job a little deeper and said that all of the waste hoses on the boat are actually not waste hoses and need to be replaced with proper waste-compatible hoses, and estimated 2800$ to do everything, parts and labor. I cringed a bit, but again, shitty job, so I said okay, it’ll at least all be new and last another 10-15 years. We get to the end of the job, and the bill is for 8000$. “They had to do a bunch more work than they thought, so it just took a long time, and there were a lot of parts costs.” I didn’t know what to say.
One of the big reasons we came into the shop in the first place is that, as regular readers know, we’ve been fighting vibration issues, especially with the starboard engine, for ~9 months now. After all the other shops had done smaller jobs, we wanted to go nuclear and entirely remove the shafts, couplings, and props, and send it all away to a prop/shaft shop with a scanner. So they did this, somehow managing to charge us 6000$ of labor just to remove the parts, despite that a shop in Deltaville, VA had literally just done this exact same job with one guy in a couple afternoons, 9 months earlier, so it’s not like they were seized up with 15 years of corrosion or anything. They also did stuff like charged 1 hour of labor each for three separate trips to the prop shop to drop off individual shafts and props, 3 days consecutively, 3 weeks before we were going to return to the boat — it’s not like there was a mega hurry to do them one at a time.
By the time we got the final bill with reinstallation, we were north of 10k. They did end up doing some extra work to debug what appeared to be a bent strut on one side, but that was a small portion of the cost in the end. And they ended up only doing the alignment out of the water, never doing it in the water after settling, which, from talking to multiple other shops, sounds like the number one rule of doing engine/shaft alignments.
Those were the most egregious jobs, money-wise. There were a pile of other large annoyances:
They were asked to do blister repair on a zone of the bottom, then barrier coat, and then do a bottom job. They ended up doing no blister repair, no barrier coat, and the basic bottom job was 6000$. So now we still have the major blistering problems that was why we went in to get a bottom job in the first place, no barrier coat, and an early bottom job.
We asked them to look into a leak on the bridge, and in the writeup, clearly stated that we had pulled down ceiling panels, and the leak is coming from forward of the leak. We’d already eliminated a few sources of potential leaks by re-sealing things, leaving one likely location needing re-sealing. So, we get the bill, and they’ve done 500$ of leak checking, pulling down all the ceiling panels and determining that it was all dry and the leak must be further forward. Thanks.
They installed a salt water washdown pump, which, to this day, lightly trickles water out when activated, and I haven’t yet figured out why — there’s plenty of voltage at the pump, and it’s 3.3GPM, so something else is awry.
They installed a new 48V windlass, which I clearly told them was 48V and to not wire into anything, and wired the old 12V power line directly into the 48V setup. Fortunately, anticipating something like this, I hard disconnected the line at the panel, so it didn’t damage anything.
So, at the end of all of this, I’m staring at the 71k$ final bill, pointing out all of these errors, and also how their service contract clearly states that estimates must be approved by the owner for all work done and any work over the estimate must be approved as well. After all that, they say that they can remove the most recent bill entirely, which gets us “down” to 54k, since the final invoice hadn’t hit the system yet, and then they wouldn’t have to work with the CEO directly to go further (I suspect this is them trying to save face with corporate and not arise suspicion). I say that’s not good enough, we’re still way over even at 54k. They go away for a while and come back and say something to the effect of, “this is the best we can do. Pay this and leave and never come back, or we’ll take your boat and you’ll have to work it out for months in the legal system.”
So, we paid their extortion, got our boat back, and will never return. And neither should anyone else.
Getting a haircut on the Tennessee River — from this angle you can’t see the look of fear
We headed back from Nashville on Sunday night because we’d learned something annoying on Saturday — the Kentucky Lake Dam and Locks were closing for the month of November. To get to Kentucky Lake, there are two ways off the Ohio River: the Tennessee River to the Kentucky Lake Dam/Locks and the Cumberland River to the Barkley Lake Dam/Locks. The guidebook suggests going the longer way to the Cumberland because the Tennessee gets all the commercial traffic, since it’s a much shorter route, so pleasure boats end up getting through faster via the longer way despite going twice as far. However, with the main route closed for a month, all commercial traffic was forced to go through the one lock up the Cumberland. I called the lockmaster Sunday night to ask if it was expected to be incredibly busy — he replied “yes, and then some.”
Tuesday looked like it had a passable schedule for us to potentially spend an entire day hanging out in front of a lock waiting for any sort of slot to pass, so we decided to set off at dawn Tuesday to make the best of things. It was around 45 miles to the dam, most of which through a fairly narrow river that was now also full of commercial barge traffic, so it took us until around noon to get to the lock. We’d also been checking in with them on the phone every couple hours to get an idea of when we might have an opening and they had been aiming for around that noon timeframe for us, so had been adjusting our speed to hit that window. When we showed up, they said probably one more hour, and so we hung out in the current of the dam until around 1pm when they actually did let us into the lock. We exited the lock and pulled right into Green Turtle Bay, where we intended to spend a couple days, grateful at only having to be delayed a couple hours instead of all day long.
We had intended to spend a couple days here to get our shit together — we had been rushing hard for the last few weeks due to busy work schedules, visiting parents, and weather constraints, and periodic boat maintenance had been stacking up. Literally — there was a stack of parts on the floor of the living room that Hannah was losing her mind over. Weather for the week was also showing below freezing for the next four nights, which isn’t a thrilling prospect on anchor. Also, my quarter was ending at work and so I’ve been frantically finishing up Q4 planning, including ramping up on two new teams that just got given to me on Tuesday. Hannah had started looking around to find somewhere to get booster shots and found that we a nearby pharmacy was accepting walk-ins on Friday if we stayed around until the weekend. We looked at all those good reasons and decided to give ourselves some breathing room and just spend the week here.
There’s really not much around the area here, so we didn’t have much to do all week, which was a welcome respite. A mile walk away was Patti’s 1880 Settlement, an awkward themed resort with a gigantic restaurant full of waitresses (exclusively women) all wearing matching prairie-ish curtain-like dresses. But they served delicious pork chops. Outside of that, Hannah did some grocery shopping in the nearby town, which required borrowing the warning-light-riddled loaner car from the marina, and we mostly hung out on the boat all week.
I had Friday off work (first Friday of every month) and we drove in around 10am to get our Moderna booster shots. As soon as we got back, I set to work doing all of the maintenance on the boat — oil changes, filter changes (oil and fuel), and changing the three start batteries that were all starting to show their age. Amazingly, the marina had an attached boatyard that had ways to dispose of all of these things, so we aren’t going to have to carry 8 gallons of used oil and 3 used batteries around for a few months. They even had a shop with reasonably-priced oil to refill our reserves.
Right around 7pm, we both started feeling like crap from the boosters, and by 10pm we were both independently wrapped up in multiple blankets, furiously shivering, and decided to go to bed, where we spent a long sleepless night alternating between overheating and crazy chills and enjoying crazy fever dreams. In the late morning, starting to slowly recover, we went and got fish and chips at the resort restaurant for lunch before heading out in the early afternoon.
The leaves had been turning all week we were here, starting to show lovely fall colors. All afternoon, we had a calm passage down the river, passing countless pretty coves. The area between the Kentucky and Barkley Lakes is called, you’d never guess, “The Land Between The Lakes”, and it’s well known as a fall wonderland, with campgrounds everywhere. Judging by the continuous morning gunshots, I’m guessing the hunting is decent too. We set up for the night, just as the sun fell, in a pretty anchorage on the east side of the river.
Kentucky Lake was formed in 1944 when the TVA built the Kentucky Dam and flooded the region. That had the side effect of inundating several small towns, which are still under the water off channel. Charts still show where streets, buildings, and bridges used to be, as well as the original boundaries of the Tennessee River, so that you know where it’s a bad idea to wander around and/or drop anchor, in case you happen to drive your boat into a barn. The anchorage that we set up in used to have several bridges and roads through it, so we set up right in the middle of what looked like a dead zone, trying to avoid hooking something manmade and well-secured.
Roads under the water next to our anchorage
The next morning we woke up to something we hadn’t seen in a while — thick, opaque fog. It was almost freezing overnight, with water temps slightly above 60 degrees — in retrospect it shouldn’t have been surprising, but here we are.
For the first 30 minutes of the morning, it was basically driving slowly by instruments — radar and charts alone — but eventually it started to clear up/burn off.
Eventually Kentucky Lake turned back into Tennessee River and we were back in familiar territory — winding river surrounded by fall foliage. We set up on anchor for the night in an oxbow just north of Clifton, TN. We decided this wind-less and warm-ish evening was a good opportunity to give me a haircut, so that was the evening activity.
We’re going to make very little/possibly zero progress in the coming week, since I have meetings from 9am (local time, while the fog is still thick) through 6pm (after dark) solid this whole week for quarterly planning, so we expect to finish this part of the Tennessee River next weekend and head into the Tennessee-Tombigbee waterway towards the gulf.
For one evening in Killarney, we validated that the cell reception was bad and the marina wifi was worse, so in the morning, we booked it over to Little Current, which is a small town at the confluence between the Georgian Bay and the North Channel. You have to pass through this swing bridge in a small channel that actually has strong and shifting tidal currents because the size of the bodies of water on either side of it. Right on the other side of the bridge was the small town, and we tied up in their marina, quickly verifying that internet was usable for work starting the next day.
The Little Current Swing Bridge
It was a cute little town, and the marina actually had a few Canadian loopers, both past and aspirational (since the US is still rejecting letting Canadian boaters into US waters) that we chatted with. There’s even one guy who does a daily radio show on VHF 71 with the latest news, weather, and has boaters from the whole area check in to keep track of them. We went to a local brewery that was decent, but there was a known squall coming in in the afternoon, so we had to head back to the boat and hole up pretty early, at which point it rained cats, dogs, farm animals, and more, for quite a while.
We holed up in Little Current for two days of poor weather, leaving on Tuesday morning when the weather cleared up. All of the interesting spots on the north channel appear to be on the east end of the channel, so we had to figure out what to pack in during the work week.
Entering the Benjamin Islands south anchorage
The Benjamin Islands were a constant feature in everyone we talked to’s hit lists, so we headed there first. There were pretty strong predicted winds from the east overnight, so I picked the south anchorage, which is protected from all directions other than SSW. Unfortunately, the first thing we found was that Rogers had virtually no coverage here, so we had to fall back to our emergency Google Fi plan to work, and knew that meant our time here was limited.
In the evening, we both called it quits somewhat early so we’d have time to explore before sunset. We put the dinghy down, and tootled over to one of the other boats in the anchorage that had people hanging out on the back deck. We asked them where we should go to check out the sights, and they told us to go outside and around to the main anchorage to see the formations over there. We thanked them, headed out of the bay, opened up the throttle, and … plowed water for a minute. Incredibly perplexed, we checked the motor and propeller, fuel lines, and everything. No damage that we could find. Eventually, I just tried forcing the bilge pump on out of curiosity, and water came out … for about 90 seconds straight. So, apparently, at some point recently, the level switch on the bilge pump stopped working. We were used to, during rainstorms, hearing the dinghy periodically eject water onto the swim platform, so checking the bilge pump wasn’t part of our list. Woops.
After that short debacle, we finished emptying several hundred pounds of water from the dinghy and hopped right up on plane to head over to the other anchorage. The predicted winds for the night had started picking up, so after we got out of the bay, until we got into the lee of the island, it was pretty spicy — riding out ~2-3 footers in a 12 foot dinghy while trying to stay on plane isn’t the most fun. But this dinghy actually rode it pretty well. Despite being a cheap thingy, it’s proving to be quite seaworthy.
The sunset was rapidly getting very pretty, so despite the waves, it was looking worth it. We made it around into the central anchorage, and followed some other dinghies over to a rock formation with a view of the sunset, and were rewarded with a great view.
After catching most of the sunset, we chatted a bit with the locals there, who turned out to be one of the Sault Ste Marie council members and her extended family. She convinced us that it was a cute town worth going to, which nudged us over the edge to give it a shot later in the week. With the sun rapidly heading down, and a journey back directly into the waves, we headed back to the boat, and got to catch the last of the sun as we pulled into our bay.
I checked the Google Fi report in the evening and it didn’t look like we’d used too much data, so we went to bed and started working in the morning. Then a few hours into the work day, we get a text saying we’ve used all of our data and are now on reduced speeds. Oops. I checked the report and saw that the reports are delayed by quite a bit, so we actually used most of our monthly bandwidth the day before and had polished it off with the morning meetings. So we both tried audio-only calls all day with marginal success, and managed to get through the day, ish. But this was the end of our emergency backup plan — we had to make Rogers or marina wifi work here on out for the rest of our time in Canada. We were really sad we couldn’t hang around for more days there and the nearby islands, but without more internet plans we were completely hosed, having used our one emergency fallback day. Maybe next year.
Weather had also socked in, and I had late meetings anyway, so we didn’t bother going leaving the boat in the evening. Looking at the forecast for a few days, it was going to stay socked in, and start getting real windy later in the week. So we headed northwest to what looked like a pretty anchorage that was protected from all angles of winds (needed for that overnight), Beardrop Harbour, planning to head to a marina instead if reception was bad there, or the next day to avoid wind if not. It rained on and off for the day, and the anchorage was actually pretty bland, so we didn’t end up taking any pictures there, but at least the internet was decent.
Heading around St. Joseph Island, getting close to Sault Ste Marie
The weather forecast continued to degrade, and we actually had to wait to leave in the morning while the heavy winds from the early morning shifted direction to a more palatable forecast around 11am. We had checked out all of the marinas along the way from here, and all of them looked pretty much like small towns with nothing suggested by boaters or google to do there. With the forecast continuing to look bad, we decided to bomb straight to Sault Ste Marie at the end of the channel, hoping for some stuff to do for the weekend in the rain. Hannah and I traded off driving all afternoon between meetings to make the long trek, and pulled into the marina in some driving rain. But at least it was a Friday.
We spent a very rainy Saturday exploring the city, which was, well, actually kind of a dying town. 2/3s of main street was boarded up or for rent. Tons of closed restaurants and shops in the outskirts. The mall is close to empty. We had a fun time touring the Bush Plane Museum, which gave me some fun flashbacks to my year off after high school, working for Brooks Range Aviation in northern Alaska. We tried a brewery that only had things I wanted to drink. We stopped at a board game store and bought what turned out to be a good recommendation for a new game, Smartphone, and picked up some fancy olive oil from a local shop. We had two decent dinners at local restaurants, at least. And got rained on, a lot. ‘Tis the season. Time to head back south!
While we can skip Sault Ste Marie, at least the Canadian side, the pretty eastern part of the North Channel was definitely worth a revisit. We just need to come armed with all 3 cell providers next time…
Going through the Erie Canal and the Trent-Severn, we’d been lucky enough to have wildly unseasonably good weather, basically the whole way. Very warm, clear sunny days, with very little wind. Great for living and traveling on the boat. However, the day after we left the Trent-Severn, the fact that we’re actually getting pretty deep into fall finally caught up with us, much to Hannah’s chagrin. And the weather theme has been pretty consistent ever since, unfortunately. On the bright side, we are no longer having to consider the power usage nuances of running the air conditioning all night every day… We also were extremely bad about taking pictures for a while in here, so this post will be a significantly worse picture:text ratio than usual.
Picture of the Cedar Springs dock on Beausoleil Island, not taken by us
Leaving the Trent-Severn, we were well into the afternoon, and decided to stop at a suggested side trip, Beausoleil Island. As part of our paid ticket through the Trent-Severn, we also got a season-long moorage pass, so we could stay for free at any of the other Ontario parks docks and moorages, which included Beausoleil. There was a suggested dock that we pulled up to, and despite being a Tuesday afternoon, only the slip closest to shore was available, so we slowly jammed our monster cat into a ~30 foot long slip with about a foot of water under us and set up for the night. The shore had what looked like a lovely paved foot path, and had a great trail map showing long trails around the island, so we got the scooters out, anticipating a great tour of the island, but around the first corner from the visiter’s center, in any direction, the trail turned to dirt and rocks. We tried to be a little ambitious, made some questionable choices, got dirty, and made our way back to the boat pretty quickly, after exploring a small native graveyard with storyboards. Hopefully the scooters aren’t too permanently damaged.
An average portion of the small craft channel — keeps you on your toes. Basically the entire week looked like this, which is why we didn’t really take more pictures.
We left Beausoleil the next day, and the suggested path through the Georgian Bay is the “Small Craft Channel”, which really means “not for giant commercial vessels”. It turns out to be a very narrow and windy channel, with the whole coastline of the Georgian Bay being rocky glacial moraines from the last ice age. It was fairly pretty, though the entire bay looked very similar — rocky islands everywhere, only reaching up to a few feet above water level, with scraggly trees. It was neat, but stark, and definitely not terribly inviting. Navigation is a bit treacherous, and if you don’t have really good charts and know how to read them, even the extensive buoying of the channel often times could lead you astray.
Henry’s Fish Restaurant (pic from their website)
We stopped for lunch at a strongly suggested spot, Henry’s Fish Restaurant, on Sans Souci island. Locals from the whole area migrate here every day by boat for a meal, and it turns out that there were only 2 days left in their season before they shut down when we stopped in. When we pulled our boat into the dock, in pretty heavy wind, they were very explicit that we couldn’t use the cleats on the dock with lines to help lever us into the dock, since the cleats would pull out, so it made for an exciting docking exercise. We had a great lunch here and then continued on our way.
Our stop for the night was Parry Sound, which we expected to anchor at, not needing to stop for anything. It’s a pretty protected bay along the small craft channel, and was just going to be a nice restful stop. However, our fridge situation, which had been tenuous all summer (really struggling to hold reasonable temperatures), was rapidly decaying (since the end of the Trent, the fridges really weren’t able to get even below 50 degrees most of the time), so we were regularly consuming food that should probably be killing us, and throwing things out on a short timeline. On a whim, we tried calling the one boatyard in town, and they actually referred us to a local HVAC group that had marine experience. I told them all the debugging I’d done on the fridges, that all signals pointed to it just needing a recharge, and they said they’d have someone meet us at 9am the next morning! So we got a spot on the town dock for the night, while it rained profusely, and tucked in.
The glamorous boat life — you can see the new tap in the top right
In the morning, a very nice gentleman from the company showed up with tools and some R134a. He poked around a bit, confirmed my suspicion, and spent some time adding taps and refilling both fridges. When he left a couple hours later, both fridges were coming down in temps, and the suction/hot lines were both behaving far more properly. He was in and out so fast that we actually took off from the dock before lunch to continue our travels.
We meandered through the sketchy rocks for the afternoon and, with winds predicted for the night, decided to set up on anchor in a very protected anchorage north of Shawanaga Island. It was a nice little spot with great holding, and it even had a short dinghy trip to a narrow “hole in the wall” that the local kids were cliff jumping off, with a little beach that we hung out at for a bit until the winds picked up and it was too cold to swim anymore. We went back to the boat and tucked in for the night.
At this point, the next week of forecast was starting to look pretty nasty. Our two week vacation was drawing to a close, and we had to get back to enough civilization that we could be working full time again in a few days. It looked like, if we made one long trip up to Bad River, that in the morning we’d be able to wake up before a storm moved in and make it the rest of the way to Killarney, the end of the Georgian Bay, which is back in moderate civilization and marina wifi, so that we could work if cell internet continued to be as terrible as it had been. So we made that the plan, and headed north for a long day on the channel.
The Bad River area – Devil’s Door Rapids
The trip up to Bad River was uneventful. More of the similar views, more rock-dodging, and an easy anchoring. This spot, however, had a pretty cool “rapids” area called Devil’s Door that we got to explore on the dinghy. There was one section where we had to go “upriver” a bit against a strong current (6+ kts), and then came back down the next channel over, jumping off a ~1 foot “waterfall” in the dinghy. Hannah freaked, but it was fun, and later on she admitted it was worth it. We would have explored more, but it was already late in the day after the long trip, and raining on and off, so we went back to the boat to warm up and settle in.
Our ill-fated morning departure attempt, in absolutely pouring rain
In the morning, we woke up very early to the disappointing reality that the storm had moved in early and the wind was blowing, even in our quite-protected anchorage. Given how badly we really needed to get to civilization, we tried peeking our nose out of the bay, only to be met with ~7 foot short-duration choppy waves, with some peaks way higher than that. Water was coming up over our bow regularly, and the tunnel slap (waves bashing into the “tunnel” area between the two hulls) felt like the world was ending, so we turned around and headed back into the bay. The forecast was that, later in the day, the conditions would possibly be better, but still pretty bad, so we resigned ourselves to trying again before sundown.
At about 5:30pm that evening, about the latest that we could leave and still get to Killarney before sunset, we tried poking our noses out again, and weather was still pretty bad, but the waves were down to a much more manageable ~4-5 foot range, and had started to take a little more directional formation than the random-chop of the morning, so you could figure out an angle to not get beat up quite as bad.
We rode it out, made it all the way to Killarney, and happily tied up at the marina there, one of two boats in the whole place. As the evening wore on, conditions slowly improved as well, so we were on autopilot most of the way, surfing the waves all the way into town.
After getting in, right at sunset, we weren’t in any mood to make food at that point, so we went into the hotel attached to the marina, and sat down to what looked like a pub meal there. The waitress then explained some specials that sounded amazing, and we ended up getting a surprisingly incredible meal. We mentioned to the waitress that our dishes were way more amazing than the menu would indicate, and she lamented that, most seasons, they have a full fine dining experience, but with COVID they just didn’t get the muscle going this year, so instead the chef periodically would flex and offer some great specials on top of the usual pub fare. The chef later came out and chatted to us a bit about the place as well. It was a lovely night after a long hectic day, and a great way to end our short week on the Georgian Bay.
We are a bit torn about the Georgian Bay after our time there, which you can probably guess by how few pictures we took, when usually we’re pretty voracious iPhone-snappers. Weather and internet conditions definitely dictated that we move through it faster than we might have otherwise, but a lot of the scenery was pretty indistinguishably identical, and without any hint of elevation to add some layers to the beauty, it felt a bit like boating through a dangerous wasteland. We also didn’t get any pretty sunsets/sunrises due to the cloudy/windy/rainy conditions, which I’m sure hurt the memories a bit. And with it being so late in the season, and with Canada having opened so late, there were almost no other boaters around either. Marinas everywhere were severely hurting for business, and anchorages were empty. There’s definitely a bunch more spots to explore and other nooks and crannies, and in the middle of the summer, being able to jump in and swim at the end of the day would have been great as well. So, we’re giving it the benefit of the doubt in case we want to do another lap through this way next summer on another Great Loop. But mostly we are looking ahead to the North Channel, which people keep saying is the actual highlight of the great lakes portion of the Great Loop. So, onward and forward!
The last week, our patience wearing thin, we got down to business riding the shop pretty tightly on a daily basis. They actually got the running gear back together, the cutters came in and got installed, they fixed the fiberglass damage below the waterline from when Hannah wrapped the line around the prop, and we got dropped back in the water late Thursday afternoon! The whole week has been in the 90s and quite humid, so it has been pretty painful working from my little office on the boat. The fridges also haven’t been keeping up, hovering around 50 degrees in the heat, so we’ve had to throw away anything vaguely temperature-sensitive. Turning the A/C on Thursday night was lifechanging, and I slept for ~10 hours that night, trying to make up for almost two weeks of way-too-hot fitful sleep.
Finding shade and reading was about all Hannah was up for last week
While they were working on our boat, we received two freight shipments. First arrival was replacement lithium batteries. We originally ordered a slightly different model of the batteries, but ECPC made a mistake and sent us the wrong ones back in February, so we’ve been waiting for the correct ones for a few months to swap back out. After a bunch of hernia-inducing hauling around of all the batteries, I swapped everything back out, and we’re basically exactly where we started, but I have the ability to tie the BMSes into the WS3000 now, for the future.
Next, we finally got our pallet of stuff sent from WA, with everything from the storage unit that we wanted out east — clothes, tools, knick knacks, records, etc. We’ve spent much of the week with the boat a complete disaster of a mess merging the stuff from Seattle with everything already on the boat, but by the end of the week we’d mostly sorted through everything and put a bunch into storage, merged wardrobes, etc. It was a good excuse to actually throw away a bunch of extra hoarded spares (used wiring, used plumbing bits, stained clothing, etc.) and get some weight off the boat, now that our projects are mostly done.
Donating ~70 lbs of wiring to Alex’s project, after still throwing a bunch more into a box to save
Friday, now that we were in the water, we got down to our big unknown — we’re at around 975 hours on the motors, and so I wanted to get the 1000 hour service done while we were here. They got started on checking the starboard motor and immediately found some bad news: the injectors are all pretty gummed up, and the turbo has significant shaft play. Hannah and I were busy with work so we couldn’t do any checking on things, but they checked their usual shops, and the turbo rebuilders are backed up by a month, and injector rebuilds are backed up several weeks.
Our poor dying turbo, an IHI RHC7W
While the news is bad, it’s also not surprising. Since we got the boat, the starboard motor has always consumed significantly more fuel than the port motor — over a gallon/hr more at basically anything above idle. And recently, it’s started surging a bit at idle even when warm. So I had an inkling that something was up with the fuel injection system. It’s annoying that we have yet more things that our fairly-useless engine surveyor didn’t find on the PPI, but at least we have some answers about why that motor’s been acting wonky. With how quickly the behavior has been worsening, it didn’t feel worth the risk to continue north without fixing it right away, so we decided to stay tight and get some more information, about both motors, before proceeding.
I spent some time this weekend doing some research on the turbo and injectors, and found some other options to call early Monday morning and hopefully get some more options. But we may have some uncomfortable choices coming up between being down for another month to get things rebuilt, or coughing up for new parts to get under way much sooner and send away used parts for rebuilding to come back as spares/sell them off later. We’re intending to be liveaboard on this boat for many years at this point, so it’s not the end of the world if we get some prebuilt spares for critical components like this ready to go in the hold. We’re going to be putting ~800-1000 hrs a year on the motors doing the loop repeatedly, which means we’ll need turbo replacements and injector rebuilds each in a year or two anyway, so it’s not totally wasted money.
A 7 lb can of nacho cheese sauce in the Deltaville grocery store that my unsupportive wife banned
In the meantime, we’ve been continuing to explore the Deltaville area a bit. The guy that I originally met here to sell the inverter to turns out to be a really nice guy with an interesting life story/mission, spending 3 years in the boatyard here completely rebuilding a 50 foot sailboat down to the hull and back up again, after sailing it 9000 miles from Europe. Check out their blog to read about their adventures. So we’ve been hanging out with Alex now and then in the evenings and exchanging stories of our respective projects.
This afternoon, we decided to check out the Deltaville Maritime Museum, since we’ve been riding by signs for it the last couple weeks. It was a neat museum talking about the extensive boatbuilding history of the area — from the 1700s through to the early 1900s, the extensive timber of the area bred an industry of affordable and reliable boats that serviced the Chesapeake for centuries.
The museum also had an outdoor sculpture garden!
After returning from the museum, we spent some time in the sun on the roof of the boat trying to decide on a solar strategy. The boat came with 800 watts of old 2008-era solar panels, but we’re looking to go way beyond that. I was originally going to go with a stack of newer rigid panels, but was getting uncomfortable with how much weight that was going to add way up high on the boat, so I’ve since leaned toward doing flexible panels again. The efficiency of the newer flexible panels is very similar to the solid panels, but they’re a fraction of the weight, and much easier to mount to the roof. After being up top with a tape measure for a while, we decided to go with 15 of the Sunpower 170W flexible panels, giving us 2550 watts of theoretical power. I also may be able to fit a 16th one, but it’s really close, so we’ll order 16 and possibly just have one spare panel for down the line.
So now we just need to come up with a plan, once we talk to a million shops in the morning…
Note: This post has been superceded by an extensive newer post going into the details as the system has evolved over time.
We’ve been running the power system at full strength for over a month now, with a couple weeks away from a marina at this point. Improvements will continue over the year, I’m sure, but it’s final enough to share with the world at this point. I also apologize that this post kinda looks like a giant Victron ad. While I wish that they’d paid me a dime (or two) to do this, they actually didn’t. It’s just a great set of equipment that I’m super pleased with and think you should buy the same stuff if you go down this path.
Around the time we decided to buy the Endeavour, I had come around to the idea that, if we instead committed to sticking with our old boat, I was going to have to redo batteries to non-lead-based technology of some sort. I was tired of always running out of power, managing/timing generator runs, carefully running as absolutely little as possible, timing showers to after we made a travel hop, etc. and wanted a change for our next year+ of east coast cruising.
When we looked over this Endeavour, in the electronics cabinet I found mostly original equipment with a few awkward slightly newer pieces thrown in. I quickly came to the conclusion that, if we bought it, it was a good excuse to do a complete writeoff of what it came with, and go nuts with something I’d be really happy with for years.
The electronics cabinet of the Endeavour as we bought it. A whole bunch of older cobbled-together stuff. And a stereo amp, because, well, why not, or something.
A couple weeks before we looked at the Endeavour, Kevin @ Airship posted a fantastic blog post talking about their power system. They’d been working on it over the last year, and were finally pretty happy with it. They had decided to do what most boaters consider pretty crazy — run 100% of their AC power through inverters. I’d been contemplating a system like that for a while but it seemed like absolutely no one did it, so it had been simmering on my back burner throughout 2020. However, when this article came out, it validated all of my beliefs about a modern power system for uses like ours:
Lithium really does live up to the hype in liveaboard boating usage
Heavily load your generator if you’re going to bother starting it — running a 9-12kW generator and pulling 1kW slowly charging batteries is inefficient and bad for your generator
Run everything through inverters and use power boost as needed if shore power isn’t enough
Get to a place where you barely have to think about power on the boat anymore
Throughout 2020, every day we weren’t plugged in at a marina, power was a foremost concern and dictated much of our scheduling. When are we going to generate so we can time our showers around the limited duration hot water? Are there people around us? Crap it’s 8pm we should probably not generate at this point, but our batteries are getting lowish so we have to either go to bed early or just read books or whatever to avoid using too much power overnight and drawing the batteries down too low.
Early in the trip, the mental load of managing all this was a little fun, even though we were already used to it from before we came out east. To semi-quote JFK, we don’t do these things because they’re easy, we do them because they are hard. But at some point it’s basically just an algorithm and it gets old to manage. So I decided I was done with it.
Victron Quattros
The Slowboat article led me to a newer suite of products from Victron called the Quattros that are a bit of a godsend for this sort of marine off-grid system. These actually go above and beyond the standard age-old inverter/charger combo unit. There’s two AC inputs, so you can put your generator in one, fix the current limit (50A for us), and then plug the second one to shore power, and, from a monitoring panel, easily update the current limit depending on whether you plug into 50, 30, or even 20A at a marina. Then it would use whatever power source was available as input.
Our boat has one 230VAC device currently: the older watermaker that came with it. While I may replace it someday, I wanted to make sure that we could support it, so I needed to keep the full split-phase system that the boat came with. I also figured I’d probably upgrade the heating/cooling to a chiller system that would much rather be on 230VAC than 120VAC. While there’s a few options for accomplishing this, I decided to go with using two slightly smaller Quattros (5KVA) in a split-phase configuration, so that if one of them broke, I’d be able to quickly rewire/reconfigure the system to still function off the one remaining unit until we could get a replacement.
The Quattro has a bunch of neat features, not least of which is the PowerAssist functionality, which is part of what really sold me on the system. If you’re plugged into shore power of a certain amperage, and your panel needs to draw more power than the shore power can provide, the Quattro will fill in current from the batteries. So if you’re in a smaller marina with single-phase 30 amp, you can run the microwave for a while or the air conditioning, and it will fill in any extra power requirements over the limit. Then, whenever you drop below 30 amps again, it’ll go back to charging the batteries up with whatever spare current is left. This is really useful for marine air conditioning units, which traditionally require huge loads at startup (30-40 amps) for a few seconds, which tends to blow breakers, but this system totally avoids that problem.
So pretty early on, I decided to pick up a couple Quattros, and was able to move on to figuring out what to do for batteries. The first step down the carefree-power path I’m heading down is getting a silly amount of battery capacity, so this was going to likely be the most expensive part of the new setup, and hence required a ton of research.
Why Lead Batteries Are Terrible
Lead batteries have a bunch of nasty characteristics for long-term usage. When you start at 100% charge, you can only really bring them down to around 50% before you risk dangerously shortening their life span. So you start charging there. Then, once they get back up to ~80% charge state, they start increasing internal resistance and accepting charge slower and slower. Traditional logic is that to get from 85% to 100% takes ~3-4 hours for lead acid batteries. So you just don’t do it if you’re at anchor. You cycle between ~50% and ~85%. We had our auto-generator-management on the Meridian to cycle from 55-85%. So if you have, say, 1000 Ah of capacity, you get to use ~300 Ah of it from your main cycle. Not a great return.
But wait, it gets worse. The chemistry of the anodes in lead batteries is such that, when you run them down, on the exposed areas (where the electrolyte goes down), they get a little lead sulfate coating that you need higher voltage to get through. And you only uncover that surface up to the % that you charge back up to. So when you cycle up to 85% and then back down again, 15% of the anode starts building an ever-thicker coating on it and starts to crystallize. The next time you charge back up, to get back to 85%, it takes even more time than last time. By the time you cycle 50-85% ~4-5 times, you’ve lost 10% or more of your battery capacity, and you’re actually cycling between 50 and 75% — now you get 200-250 Ah of your 1000Ah bank to avoid damaging your batteries.
The only way to restore that capacity is to get back to 100% with a really long generator run as soon as possible, and every few weeks you need to run an “equalize” cycle that runs very high voltage through the batteries to “break through” that crusty shell on the anode and get your lost capacity back. It’s a pretty terrible system, all in all. And so not only are you constantly just managing these tiny-range % cycles on your batteries, you’re also managing plating that you need to work these really-long generator cycles in to break through, and every few weeks get a full ~8-10 hour generator run (or be in a marina) in place to do an equalize cycle.
Even being “nice” to your batteries and following things by the book, even “good” AGM lead batteries only get around 500 cycles down to 50% before they’re at a fraction of their initial capacity. So, doing 1-2 cycles a day, we basically had a year or so before we were working with a pittance of capacity. After a year of this game, and changing out the batteries once already, I was pretty tired of it and ready for a change.
I spent some time looking into Firefly (carbon foam-based) batteries and a couple other intermediate chemistries, but very quickly settled on a much better option.
Lithium Batteries
Lithium, specifically LiFePO4 chemistry, is in a category of its own in the battery world. These batteries can be around 1/4 the weight of traditional lead-acid batteries (either FLA or AGM) for the same capacity, and around half of even a carbon foam-based setup. So on things like boats, where weight is the devil, if you want a ton of capacity, you go Lithium, or you end up putting a thousand pounds of lead somewhere on the boat. The weight consideration is a nice boost in and of itself, but the biggest wins with Lithium are actually in usable power.
Remember my rant above about the fun 55-85% cycles on AGM and how you can’t get back to 100% without a ton of time, and the memory effects you need to counter? Yeah, those are gone with Lithium. You can safely draw them down to 20% and charge right back up to 100% and get 2000-3000 of these 80%-capacity cycles out of them. If you only draw down to 50%, you get 5000 or more. Better yet, that 20-to-100% cycle is at full speed the whole way. The batteries accept an essentially full rate of current from the bottom of the barrel right up to the last topoff. So you can really just use them as a reservoir like a fresh water tank — top off when it’s easy, let it live low if you want to and understand the risks, and add a little bit if you want here and there.
To do a little math here, the Endeavour came with 800Ah of AGM. With a 55-85% standard cycle, that gives us 240Ah of capacity to burn through in between running the generator. Getting the same weight of Lithium batteries gives us 2400Ah, and with a 20-100% standard cycle, that’s 1920Ah. That’s an eight-fold improvement in usable capacity for the same weight. Plus you’ll get many years out of the packs with the 2000+ cycle lifetime. The primary complaint about Lithium batteries is up-front price, and rightfully so. They’re expensive. But especially if you’re going to spend any significant time on your boat, do all parts of the math — cycle time and cycle count. You might find that lithium batteries actually save you significant money over several years.
So, I’ve convinced you to buy a pile of Lithium batteries, right? Great. I’ve been watching Lithium (LiFePO4, not Li-ion) batteries for years, and they primarily break down into two main camps: US-assembled-and-warrantied packs for around 1000$-per-kwh; and Chinese-assembled-and-basically-un-warrantied packs for around 300$-per-kwh. Forum posts for years have talked about the Russian Roulette of trying the latter — sometimes you get some gold, often you get half-capacity packs, and one dies a few months later and the company has completely disappeared. So, if you go that route, way over-buy for your intended capacity and still pray. For what’s actually our home, I didn’t like either of these approaches. I wanted at least 20 kWh and preferably closer to 30, which was putting the cost of option 1 well into stupid territory, and option 2 still at expensive enough to be a real investment, without any guarantee of success.
The other problem is form factor. Many makers have been making drop-in battery replacements instead of taking advantage of the big improvement that Lithium gets you on power density (capacity per space). So you get, for example, a Group 31-shaped battery for 700-1000$, and it’s still the size of a full Group 31 battery, is only 100 Ah, and is packed full of foam to fill out the space. So, for most of the better units, if you want to get up to 20 kWh or beyond, you end up with a huge amount of space.
A pretty common type of arrangement for a DIY Lithium battery pack
Many people go the DIY route, where you buy bulk Lithium cells from China, throw your own battery management system on it, and solder it all together. But especially for a liveaboard marine environment, I wanted something slightly less hand-crafted than that with at least a vague weatherproofing certification claim. I had confidence I could make the DIY approach work, but at what cost, when every time I screw up a little bit we could be in a pretty bad situation?
The BestGo Preferred battery pack — pretty solid, weatherproof case, and energy-dense
In the last few months, however, Electric Car Parts Company, a company that’s been around in the US for quite a while, and imports and sometimes warranty-backs various overseas options, came up with a new option: the BestGo “Preferred” packs — 12V, 400Ah, a hair under 2000$ each, with integrated battery management (a whole different topic, but suffice it to say you want this). That’s 5kWh for under 2000$ — slightly more expensive than the cheap-chinese-pack option, but a huge discount on all of the US-backed packs. It comes with a reasonable warranty, backed by the US company, and the form factor is awesome.
The pile of lead that came on the boat
When I did the math, I’d be able to swap the four 4D batteries that came with the boat with four of these packs in a virtually identical rectangle (1″ wider, exactly the same length, and about an inch taller). I’d go from 9 kWh of AGM up to 20 kWh in the same space, at 2/3s the weight. And there was a nice little space next to the current battery area to put 2 more if I wanted, to get up to 30 kWh and have weight parity, with 4x the capacity. A plan started coming together. Shipping was going to be a little complicated, since they get “dropshipped” directly from China with a ~6 week lead time. So, we knew that as soon as possible after closing on the boat, we’d have to place the order and sit somewhere for a while.
12V? Bleh. Maybe 24V?
Up until recently, the only thing that made sense on your boat was sticking with whatever its native house bank was. Most boats are 12V, some larger boats are 24V, and none are 48V. You don’t want to change your house voltage. Everything on your boat is designed around it — lights, relays, toilets, macerators, electronics, your engine computers — virtually everything electric that you interact with on a daily basis.
For the longest time, I’d been assuming I’d get a huge stack of 12V battery power, run enormous cables to some huge inverters, just like Slowboat did, and that’s just life on a boat. But there’s a big downside to this approach. 12V is a terrible voltage. Humanity has been using it on mobile vehicles for decades and decades, and it’s so ubiquitous that it’s hard to change at this point. But especially for larger power demands and physically larger installations, it’s terrible. You lose so much voltage over such a short distance that everything is heat management and giant cables. Running, for example, 8 kW of power through 12V to power your inverter means pushing around 1000 amps continuous. That safely requires four 4/0 cables per lead (4 for positive, 4 for negative), and is still converting a bunch of electricity directly to heat. It didn’t excite me, either from a cable management perspective nor from a safety one. Doable, but really not ideal.
Pictures from the Slowboat article I linked above — this is a carefully-temperature-optimized system running their inverters off a 12V bank. So much scary heat everywhere.
This runs into our next problem. With lithium batteries, due to some nuances of the battery chemistry, you really need to run a battery management system on top of the raw battery cells. However, most of the BMS systems don’t really support continuous draws over 100 amps. Even with 6 batteries, that’s only a 600 amp continuous draw. At 12V, that actually isn’t enough to fully feed the inverter behemoth I was looking at doing — I need around 1000 amps. However, BMSs tend to work at the same amp rates independent of voltage. So while the BestGo 12V 400Ah pack supports 100 amp draw rates, the 24V 200Ah pack also supports a 100 amp draw rate, but that’s getting twice the energy out of the pack.
I started investigating running a 24V subsystem — a main large house bank at 24V, with a tiny setup at 12V, and running converters to run power both ways. When the alternators were running, it’d charge up to the 24V house bank, otherwise the 24V house bank would live-convert down to 12V to handle constant loads. Victron makes a bunch of Orion units to deal with exactly this sort of problem, and it’s pretty manageable. However, at the end of the day, I was struggling to convince myself it was worth it. 24V halves the current requirements, but it still adds all the complexity of a new voltage level, and chargers are still fairly low-current. Even going ballistic on chargers, it was going to be ~8 hours on generator to refill a 25kWh drop. There had to be a better way.
48 Volts
Most home off-grid solutions use 48V. It’s still “low voltage” so it’s safe to work with, you get much easier and safer wire runs, and it’s a lot closer to 120V than 12V, so inverting it back to AC is a more efficient process. For off-grid home solutions, no one has 12V to deal with — you’re just storing energy to convert back to AC all day for your house. However, the more I thought about it, the more it seemed like this off-grid usage was actually pretty analogous to our higher-demand usage on the boat. We ALSO have a 12V system that has low-but-constant demands, but, over the course of a day, we lose way more power to an inverter than we do to the 12V loads. Computers, cooking in the convection oven, running the air conditioning, hair dryer, water heater, etc. It all adds up to an order of magnitude more usage than the DC stuff. So what happens if we optimize around that AC load instead of the DC load?
Well, as it turns out, the Victron Quattro comes in a few different sizes at 48V, one of which actually looks great for our needs. Significantly higher power conversion efficiency than the 12 or 24 volt models, actually smaller size and lower weight, and, best of all, a 70A battery charger in each unit (remember 70A at 48V is a lot of power). This started looking pretty compelling. For this to work, though, I needed some way to get, at a minimum, power from 48V to 12V to power the hungry fridges and electronics of the boat.
The Victron Orion line has a cheap and simple 48->12V 30 amp DC-DC converter, which would easily run our house loads 98+% of the time, at very low conversion loss. There’s also a whole pile of 12->48V battery chargers around the world to be able to charge the 48V bank from the motors. I fairly quickly pieced out a set of devices that would entirely solve this problem for me. You keep a small 12V starter “house” battery as a power sink in case you, say, run the toilet and water pump at the same time, the 30A DC-DC converter runs load the rest of the time and quickly recharges any actual over-30A-usage from the small battery.
This seemed like a slam dunk. It was a silly project, but I liked it, and it also seemed like it could be genuinely awesome. Fast charging from the generator, run anything on the boat off the inverters with pretty small size cable runs. Let’s do it. I went with six of the BestGo 48V/100Ah batteries from ECPC and got them ordered up, and got an order together from a Victron supplier for a stack of stuff.
Wakespeed WS3000
As I was about a day from pulling the trigger on a whole slew of stuff, I just kept searching for an even more efficient way to do the 12<–>48 conversions. I had an answer that I found satisfactory, but it still just felt like there had to be a better way. Something interesting popped up on one of my google searches — a PDF of a brochure that didn’t seem to be linked to anywhere. It was from Wakespeed, a company mostly known for their line of alternator external regulators. It mentioned a new product coming soon, a “WS3000”, with this picture, and no other details:
It had to be too good to be true, right?.. I immediately sent Wakespeed an email describing what I was trying to put together, and that it seemed like this WS3000 was the magic bullet to tie my whole system together, but I wanted to confirm that this was what they were going after. Amazingly, that night, I get an email back from the co-owners of the company, “The WS3000 sounds like an excellent solution for your application!”, and offered a phone call the next day to discuss a potential collaboration.
Well, turns out, what I wanted was exactly what they’re trying to build. No one has a good way to bridge legacy 12V systems and high-energy lithium 24 or 48V power banks, so they saw a market opening, and jammed a 3000 watt crowbar into it. Their timeline was getting super-early alpha hardware assembled in a month or so, which was around when my batteries were going to show up, so our needs aligned very well, if I was willing to tolerate early development software and hardware and help them tweak it all. We started planning how things would go by email while we waited for our respective ducks to get in a row.
One interesting insight Al had was to just use my port start battery as the “12V house” battery. With only a 30A converter, I needed some sort of middle buffer, especially since the windlass pulls off the house setup by default on this boat. However, with a 3000 watt converter always at the ready, that changes the game. The idea seemed interesting enough to at least try for a while, so I went ahead with that plan — merge the port start battery with the “house” positive bus, and then feed the house off the WS3000, with the port battery as just a backup/energy sink a 15 foot wire run away. As a safety measure, add an ACR setup to keep the starboard engine+battery isolated from the port/house battery, so that if something went to hell and the port side fully drained, we’d still be just fine to fire up either the starboard side or the generator and restart the rest of the boat from there to get back on our feet.
With the rough circuitry figured out, I started ordering things.
The Build
I had 6 weeks to wait for the batteries to show up, but also a ton of other projects to do on the boat in the meantime. And also, converting over to the “no-12V-house” setup was going to involve a bunch of rewiring. Finally, even when the batteries arrived, there was too much to change to possibly do in one big full day, or even a full weekend, to ensure that we’d be ready for working again Monday morning. So I had to figure out how to stage things out to give myself the best chance for success.
I spent several days going through the two engine bays and simplifying things. The factory and modded wiring in here was incredibly inefficient. Really long large-diameter wire runs to junction points that then had really long large-diameter wire runs back to near where the run started in the first place. Very questionable choices. At the end, I was able to pull out ~80 lbs of cable and end up with a more resilient setup, and get actual wire runs that were topologically similar to my ideal-state block diagram from above. I got to a place where I had both engine bays happily wired up with an ACR between them and the port loads all run to a set of terminal posts on the firewall that I could later run 4/0 cables up to the main electrical panel area when I was ready.
It’s not pretty, but it does work. This’ll all need cleanup once I get the setup more finalized and decide on whether to keep re-using the port battery as “house” or go back to another isolated “house” setup.
Once the engine bays were ready, which took way longer than I expected, I started dismantling everything possible from inside the electrical panel area to get down to the bare minimum needed to run the boat every day — basically, just the existing mastervolt 12V inverter/charger.
So much extra stuff to pull out…
Eventually, over the course of a few days, two freight shipments showed up with the batteries and a stack of Victron stuff, and I was ready to go. I made a pretty serious tactical error here, and despite my plans to first merge the port battery in as the “house” battery, get that working, and then move onto installing the 48V setup, I got cocky. I can just dismantle the panel, throw the batteries in, mount up the Quattros, and be off to the races later in the day to do cleanup, right? How hard can it be. Well, turns out, quite hard, when you forget some important nuances.
Mid-day state: Hannah’s favorite — a floor full of tools, batteries, and spare parts, and the power on the boat not working
To get through the day, when it came time to pull the plug on the charger setup, I wired the house setup to the Port battery, but didn’t really think about how small capacity the port battery was, nor did I have a good idea of what our steady state DC power usage was, since the factory gauges were really inaccurate and I hadn’t measured with a good ammeter or anything. So, barely a few hours into the rewire job, I realized I’d heavily drained the port battery, and quickly threw the manual switch on the ACR to join to the starboard battery to buy me some time. But this kicked off a frantic battle to get something, anything, in place that could keep the 12V system charged while I worked. I’d thought I had several more hours before I needed to be in this state, but now quickly needed a solution, or to revert to throwing the old house batteries back in to buy myself some time.
Tick tock tick tock — nothing’s charging those batteries, and the fridges are thirsty…
I decided to just go straight to throwing a couple of the 48V batteries in place, adding the Orion (48-12V DC-DC converter), quickly wiring it in, and using that to get the system into a recovered state so I could breathe and more thoroughly finish other aspects of the install. For those paying attention, why do I have an Orion when the WS3000 is coming? Backup. Given how utterly dependent we are on 12V power, I want at least 2 ways to keep 12V power going, especially given that one of them is in an alpha-level development phase.
Operation emergency-throw-in-some-batteries
Eventually, late into the night, I got one of the inverter/chargers up and running enough to start charging the 48V batteries from shore power, as well as power outlets on the boat, so we were in a breathable steady-state. I’d misjudged the length of 8 gauge triplex I needed to make nice-looking wire runs between the Quattros and the panel, as well as that I needed a stack of 8 gauge ring terminals, so I had to hack stuff together for a few days while I waited for more parts to arrive in the mail. But several lessons were learned, and a few days later, everything was finally in a full-power-usable state, though not cleaned up very well.
With the last final-gauge wiring hooked up, I was able to disconnect shore power and run about 4000 watts through the inverters for an hour before we got bored of how uneventful it was, and also the boat was really cold since we were running all the air conditioners at full blast on a not particularly warm day, so Hannah wasn’t thrilled. Then I flicked the shore power switch back on, it started charging back up at 120 amps into the 48V bank, and we were back to full in under an hour. It was a pretty magical experience to see it all come together in the end.
I spent the next many days getting the batteries properly hooked up together and secured for rough seas and cleaning up a bunch of wiring in anticipation of someday soon actually leaving a marina.
Love only having to use 4 AWG wire for battery hookups. Still crazy to me that’s the equivalent of 2400Ah of 12V capacity for only 480 lbs of weight.
Panel Considerations
One thing I didn’t think about until much later than I should have was the electrical panel. Boats are usually designed with a front-door circuit breaker breaker + selector panel. You can select shore power (1 or multiple inputs around the boat) or generator, so that, just like with a home installation, you don’t back-feed into the grid. Then, you have a small AC panel that the inverter covers — usually outlets on the boat and the microwave. Then larger AC panels with the bigger loads on the boat that the inverter can’t cover — air conditioning, stove, water heater, etc.
This new strategy blows both of those systems out of the water. As mentioned above, the Quattro takes the generator input straight into itself, so you don’t need to “select” the generator anymore — it can just always be enabled, and can never back-feed into the grid. Also, we’re running the entire load through the inverter, so your runs go from shore power/generator through a front-door breaker, and then straight into the Quattros. Then the output from the Quattros go back and drive the entire AC panel. No more thinking about what works on the inverter or having to fire up the generator. Everything is battery-backed, usable no matter where you are.
This is neat and all, but since no one does a setup like this, there are no off the shelf panel building blocks to do anything like this. So, for now, I’ve kinda hacked my panels to do what I want — joined the “inverter” panel to the rest of one leg of the AC panel, removed the physical block between the generator and shore power connectors and now just use them as breakers, and ran the source wires back to the Quattro output for the panels. It required running a bunch of pretty large-gauge triplex wire (8 AWG for safe continuous 50 amp AC over these distances) back and forth ~6 feet between the panel and the back wall, but it worked out in the end.
Finally, I repurposed one of the 120VAC panels for 48VDC for now, mostly just to coordinate my two DC-DC converters for now, but hopefully over time I can get more 48V-native devices (like a windlass!), since it’s such a better power transport voltage.
Ignore my totally final ACR switch arrangement in the top left there.
Once I get everything more final in the coming months, I’ll probably end up contracting with Paneltronics’ custom panel wing to build a new custom AC management panel for the new reality, but this all works quite well for now, in the end.
Monitoring/Observability
As a total dork, one of the parts of this system I was most excited about was the monitoring/observability aspect. On the old boat, there was pretty much just a voltage display, current in/out display, and state of charge number to the nearest whole % point. This new system is a little different.
Screenshot of my cloud-based dashboard showing several days at anchor followed by a marina stay
The Cerbo GX is a cheap addon for your Victron network that lets you connect all of the individual pieces of your power setup and upload all the data to the internet for observing, as well as convert it to NMEA 2000 messages so the rest of your boat network, like chartplotters and Maretron displays, can display all the power information as well. It has a little touchscreen addon, the Touch 50, you can get for it as well that nicely mounts into your power panel and gives you quick access to all of the info on your power system as well as deep configurability through a touchscreen. It’s a pretty great little setup.
One of the key parts of the observability is the Victron SmartShunt, which is a nice little all-in-one current shunt plus electronics to measure it and integrate it into your Victron network. So I can monitor voltage and current in and out of the low side and high side battery banks and alarm on a whole slew of different characteristics, which was really helpful in the early WS3000 debugging days. It also allows monitoring an auxiliary battery, so I can monitor the otherwise-isolated starboard battery bank from next to the port one.
It’s a nice little interface that even does a calculation of how much power is “disappearing” outside of what it knows about for generation/consumption, and calls that “DC Power”, which happens to nicely correspond to how much power is going from the 48V bank to the 12V house loads. So, at a glance, I can see how much AC power and DC power we’re using, as well as the solar generation and house battery bank levels. Then I show the 12V port/house battery voltage and SOC levels on the little Maretron display at left there, along with our two holding tank levels.
The level of insight this system provides is amazing, both live and using the VRM portal to go back in time and see what everything was doing throughout the day, even showing holding tank level history.
Generator Management
One of the primary tenets of the new system was around effectively utilizing the generator when we do run it, and another was getting to the point of just not really thinking about power usage. So, I wanted to make the generator control fully automatic.
The generator is a 12kW Northern Lights unit, and has a pretty manual panel — you have to hold the preheat button for a few seconds, then hold the start button until it catches, then keep holding the preheat button for a few more seconds until it’s running nicely, then you can let it run until you press the stop button. Being a fully-manual two-handed operation, automatic generator start/stop wasn’t going to be as easy as it was on the Onan generator from our last boat, so I had to go digging.
I found an affordable unit by Dynagen, the TG-410, which you can see mounted in the picture above in the monitoring/observability section, that allowed custom generator control basically through plugging the oil pressure/water temp sensors in as inputs and then running the start/stop/preheat outputs through relays. Setting it up was fairly trivial, once I reverse-engineered the current generator wiring harness and made a new plug-and-play harness to the Dynagen that would let me fall back to the stock controller in a few seconds of swapping a big 8-pin connector. Getting the preheater timing, start-detection conditions, and sensor curves right took a little while (and I still don’t have the temperature one quite dialed in yet), but now it starts and runs without a hint of complaint, and stops when you ask it to. The next step was external control based on battery conditions.
The Dynagen supports taking an input where 12V = generator should be running, ground = generator should be stopped; and its job is to make those conditions happen. The Cerbo GX actually supports a complicated automatic generator management system via conditional setup that, in the end, powers a relay on or off. By putting 12V on the NO and ground on the NC lines, I ran the common output to the TG-410 and it worked right out of the gate. The Cerbo GX supports standard conditions like SOC-based low/high levels for start/stop, but also quiet hours, emergency low/high levels for during quiet hours, and even time-based runs (i.e. it’s been too long, please run).
After a few days on anchor to tweak the settings, I’ve settled on 40-90% runs during the day, and 20-30% runs for emergency night settings. With these settings, ideally I essentially never have to touch the generator myself, though I’m sure I’ll keep fine-tuning this for a bit.
WS3000 Tuning
A couple weeks after I got the main power setup working, the WS3000 alpha hardware showed up in the mail and I added it to the system.
It’s been a really interesting device to tweak. I’m still working through a bunch of learnings with Wakespeed, and we’re learning as we go. The bidirectionality is a nontrivial problem to handle. You need to detect when voltage falls below a threshold and immediately switch to pulling current from the high side to feed the low side up to a setpoint, but when the voltage rises above the setpoint on the low side, you get to pick when to try pulling current off it to charge the high side. But how quickly do you pull current off? Too quickly and you drop it below the setpoint and then you need to fill back in, and get in a really awkward cycle. Too slowly and you’re letting the alternator “charge” a full battery and wasting potential charging. So there’s a bunch to tweak.
After working through a couple major early kinks, we quickly got off to the races of a working system for the basics, and getting to the finer-grained tweaking. So far we’ve largely been playing with the hysteresis between charge points, and what to put the setpoint at to maximize charging from the low side but also keeping the voltage high enough to actually put current back into the low side battery in case you overrun the 3000 watt converter and pull some capacity out of the low side battery.
A really interesting problem we discovered early on was that the preheaters on the Yanmar diesels in this boat are hungry. Each engine pulls ~200 amps from its start battery for ~5-8 minutes after a cold start. The alternators are only 80 amps each under the best of circumstances, and I mostly measure around 45 amp output at idle, leaving a huge current shortfall for the batteries to fill. The WS3000, of course, tries to fill in for the shortfall, but it can’t quite keep up, so it does draw some current down from the start battery every startup. So we’ve been tweaking the voltage setpoint to make it so that it will charge back up after the preheaters turn off. 13.2V was not enough to get anything appreciable back into the start battery, but 13.6V has been a good compromise so far.
Similarly, when raising anchor, we have double the problem, since we have 200 amps of preheater on the port battery plus the windlass pulling 300+ amps as well, vastly exceeding the WS3000’s capacity. This is causing voltage dips in the whole house setup, causing some devices on the NMEA 2000 setup to freak out whenever the windlass is powered, so I’ll need to address that pretty soon with a buck-boost converter expressly for the NMEA 2000 setup.
Next, at 13.6V, you’re pretty close to the alternator output voltage, so it’s way harder for the WS3000 to figure out how much current it can pull off to send to the 48V batteries. So we’ve found that, at 13.2V, it can pull twice as much current than at 13.6V, so we have some competing interests here in the settings.
Finally, the solar setup on the boat was originally plumbed into the 12V side, but with the WS3000 in there now too, it was getting confused with multiple different devices vastly changing voltage levels and sending current in and out, so I ended up moving the solar up to the 48V side pretty quickly to simplify things for the WS3000.
I’m sure we’ll be tweaking settings for quite a while to really dial in the last effective charging nuances, but the system is already working really well, and I’m sure this will be a great addition to other boats trying to follow in my (and the other few alpha testers’) footsteps. Hopefully this writeup gives other people the confidence to come play in these waters!
Summary/The Future
The final arrangement as it sits today
It’s been a long road, but in a Marie Kondo world, this setup brings me joy. We have the battery capacity to run the A/C all night on anchor, wake up, take a shower with hot water because we just leave the hot water heater on, then turn on a crockpot for dinner that night, run a load of laundry, throw some lunch in the microwave, and spend the day playing video games on a power hungry desktop computer. On an extreme usage day like that, we only need to run the generator for a few hours to top off again in the evening. Working full time in more normal fashion, each of us separately taking taking daily showers, spending all day on our computers on video calls, cooking meals, and watching TV all night, we can easily go two full days on anchor before running the generator to catch up. If we were really being frugal, we could go a week or more in between topoffs. And this is before I even add real solar.
Over the coming months, I expect to keep tweaking things pretty steadily. I still have a lot of optimizing to do to get our power loads down while we’re on anchor — right now, I’m running a ton of electronics all night until I dial in a good anchor alarm setup that gives me confidence. And we tend to leave things plugged in all night because we can just be lazy now and not really think about it. This is really the real measure of success here — Hannah doesn’t even slightly think about power usage, and I only barely think about it, thinking less with each passing day. Living aboard and working full time while boating brings enough challenges, we don’t want to also be dealing with power management all the time.
I was originally planning on diving right into an enormous solar setup — my measurements say I can easily get around 3000 watts of solar onto the roof and still have walking access for maintenance. I’ve wired in a new (Victron, obviously) charge controller sized for it, all plumbed in and configured. But once I saw just how long we can go on the setup without generating, I pumped the brakes and haven’t gotten around to even picking which panel to buy yet, much less getting 8 of them delivered somewhere. The ~800 watts on the roof help quite a bit on good days, so I know that quadrupling the generation should make us essentially never need to generate. So I’ll get around to it. Just not as immediately as I thought I would.
I hope this inspires others to build setups like this on their boats, and I’ll keep updating the blog as I make improvements throughout the year. Feel free to reach out blow with comments/questions, I’d love to hear everyone’s thoughts.
The Endeavour TrawlerCat 48 is a tall boat. It’s around 17 feet from the water to the flat top of the skylounge roof, with anything on top of that obviously making it worse. That flat roof is around the same height as the top of the anchor light was on the Meridian, for comparison. With harsh bridge restrictions on the great loop (19’6″ maximum bridge in Chicago, for example), from the moment we considered buying this new boat, we knew we’d have to get creative with how to put stuff on the roof and still fit under things.
The original factory setup
The boat came with what I’m pretty sure was the original factory mount and electronics setup — a 2008-era Raymarine radar dome, a Glomex analog TV antenna booster, and a non-LED light. It was, at least, on a folding tower, so you could lower it out of the way of bridges. However, the wiring was pretty questionable — they basically just cut a big hole in the roof next to the mount and then ran the wires into the interior from there, rather than running it through the tower itself. I basically decided to eliminate every aspect of the factory setup and start over from scratch.
From the final internet and instrument setup on the old boat, as well as some new toys I knew I’d end up buying, I knew roughly what I wanted to put on the new boat:
Three Poynting 402 LTE/3G antennas
Two Poynting 496 2.4/5Ghz WiFi antennas
Airmar WX220 ultrasonic weathervane
Vesper Cortex GPS (dedicated GPS for the AIS system)
Shakespeare SiriusXM Antenna (could also put it on the roof somewhere else, but I want as much room for Solar as I can manage)
I poked around at a bunch of SeaView options, since they seem to be the only real game in town for larger-scale instrument masts, but really nothing off the shelf fit my bill. However, I noticed a custom build section and said why not give it a shot, figuring it’d be crazy expensive.
Within a day, Jason at SeaView had gotten back to me, and to my surprise, based on my rough description, he actually gave a surprisingly affordable early price estimate that made it worth proceeding. I professionally mocked up a rough idea of what I wanted, based on the other legos they had on their site, and he went to work.
At least 5 minutes of photoshop went into what I sent over to Jason to work with and estimate
A couple days later, some neat looking CAD mockups showed up:
From there, I took some more careful measurements of the back of the roof, since he said he could easily guesstimate how far things would be able to fold, and if we should adjust the design to compensate.
Professionally-annotated/finger-scribbled iphone image with dimensions for Jason
He did some math, determined that it was going to stick up a fair ways, and we iterated a bit more. We lowered the sweep angle of the “wings” such that it’d be able to just clear down to the sill above the door — the best we could possibly do.
At this point, it looked awesome, and we gave the goahead and put down a deposit. 5 weeks of leadtime started then. This was all done from the rental house on Key Largo, well before we moved onto the boat, since we knew it’d have such a long lead time. So we got started ordering all of the various antennas that’d go on top, and went back to sipping margaritas every night.
Fast forward 6 weeks, and about half way through our stay at Cocoa, a pallet shows up (which YRC unceremoniously drops in the street and drives away without calling us):
We unwrapped it and got to work! The first major job was disassembling all of the old stuff and patching any necessary holes from that job. Hannah loves what I did to her yoga space all month. Also, when we went to actually remove the old folding mast, it was on what turned out to be a painted solid fiberglass plate, which must have been 5200’d down to the roof, because it took a pretty good chunk out of the gel coat when it finally pried loose. The sledgehammer was clutch for this and Hannah couldn’t believe how hard I was wailing on the damn thing.
With impending possible rain and the day waning, we decided to not be too ambitious for the day and just go for getting the plate mounted up.
A week prior, I’d ordered a foot square 3/8″ thick aluminum plate to be the backing plate for the new mast, knowing that the roof wasn’t all that thick, was just cored fiberglass, and just had some flimsy wood on the bottom to space off the roof panels for wires to run. So with the mast finally here, I took some rough thickness measurements and brought the top plate over to the hardware store, and ended up buying some 1/2″ diameter countersunk bolts and matching fasteners.
Hannah and I spent a while measuring and cutting the appropriate holes in the aluminum plate, then we roughly lined up where the folding panel would go on the roof, marked the holes, and proceeded to drill half inch holes straight through the roof. After some tweaking, the plate looked like it’d mount up well, so then we took the 2.5″ hole saw and slowly cut a huge hole through the roof right in the center of the plate. Not stressful at all.
At this point, everything looked ready to go, and so we pulled out multiple tubes of 4200 and 5200 and frantically started our work. We coated all of the exposed fiberglass with 5200, filled in all of the wiring and screw holes from all of the things we took off with the old mast, and then lined all of the new area that needed sealing with a tube and a half of 4200. We had no time to take pictures of this part, unfortunately, and we were also covered in 4200. We threw the new plate on top, quickly bolted it down to the aluminum backing plate, just as it was vaguely starting to stiffen up, and stood back to clean up and admire our handywork.
Rain was predicted later in the evening, and we were pretty exhausted, so we called it for the day and went inside to other projects.
The next day, we resumed work. We figured we should do some more final test fits at this point to see where we’d landed. We’d done some really rough “hold the heavy thing up to the wall and see how we feel about it” checks that seemed fine, and, fortunately, they held up under final prototyping.
CAD is neat. Even though I’ve been a software engineer for most of my life, and the process, decomposed, is thoroughly uninteresting at this point, it’s still sometimes amazing when you can give someone some rough napkin calculations over the internet and they can get something calculated and fabricated that lands within millimeters on your handbuilt boat. Everything looked great, so it was time to get down to the dirty work of actually building the mast.
Boy did that turn out to be an unexpected pain in the ass. The outside of the mast looks lovely, but of course the inside has sharp edges and corners and support structure that make running wires through it a chore. It took us nearly two hours, and we both sunburned the crap out of ourselves since we kinda lost track of time in our annoyance, to get everything mounted up and wire-fished through the beast. And when it was all together, we had a nice rats-nest-of-the-gods that we had created for ourselves. However, at this point, it was just an awkward game of muscle-ups to get the assembled mast, now twice the weight, up onto the hinge, and bolt it all up. Of course, we discovered that the antenna arrangement I’d picked meant that, at full droop, the LTE antenna tips JUST touched the ground, so Hannah got to hold it all up while I ran the cables into the roof, since it couldn’t rest there. Measure once, cut twice, or something.
It looked great! Just one problem.
Hannah was now able to go read a book while I spent hours running and cleaning up wiring, and testing the results.
This whole time, I’d been very nervous about the hinging process itself, since the size and location of things meant that the cord moved almost a foot through the tube when the mast went up and down. With no room in the ceiling, it was going to to be a challenge to make it so that we could raise/lower this thing several times a day in Florida and then every so often past that, without eventually snagging a wire on something in the ceiling and making for a very expensive and time-consuming problem. I decided to try out using braided plastic sheathing over the section of wire that would slide in and out of the roof hole, and spaced off the roof panel by a little over an inch, to give a little bit of play for the cables to live in. Some early testing looked promising, so, at the end of the day, we put the roof panel back up and had a drink.
It looks a tiny bit awkward if you’re really looking for it, but it’s pretty hard to notice otherwise. I’ll probably tweak it over time to try to make it a little more flat across the roof, but I’m incredibly pleased with how well it all came out in the end.
We finished off the project by ordering a rubber stop for the mast to touch down against and keep the antennas from hitting the floor while everything is lowered, and it worked out perfectly.
Hannah’s already had to raise and lower it for a bunch of the bridges coming up through Florida, and it’s worked like a charm. So, cross our fingers, maybe this project is basically all done, at least until the next gadget catches my eye…
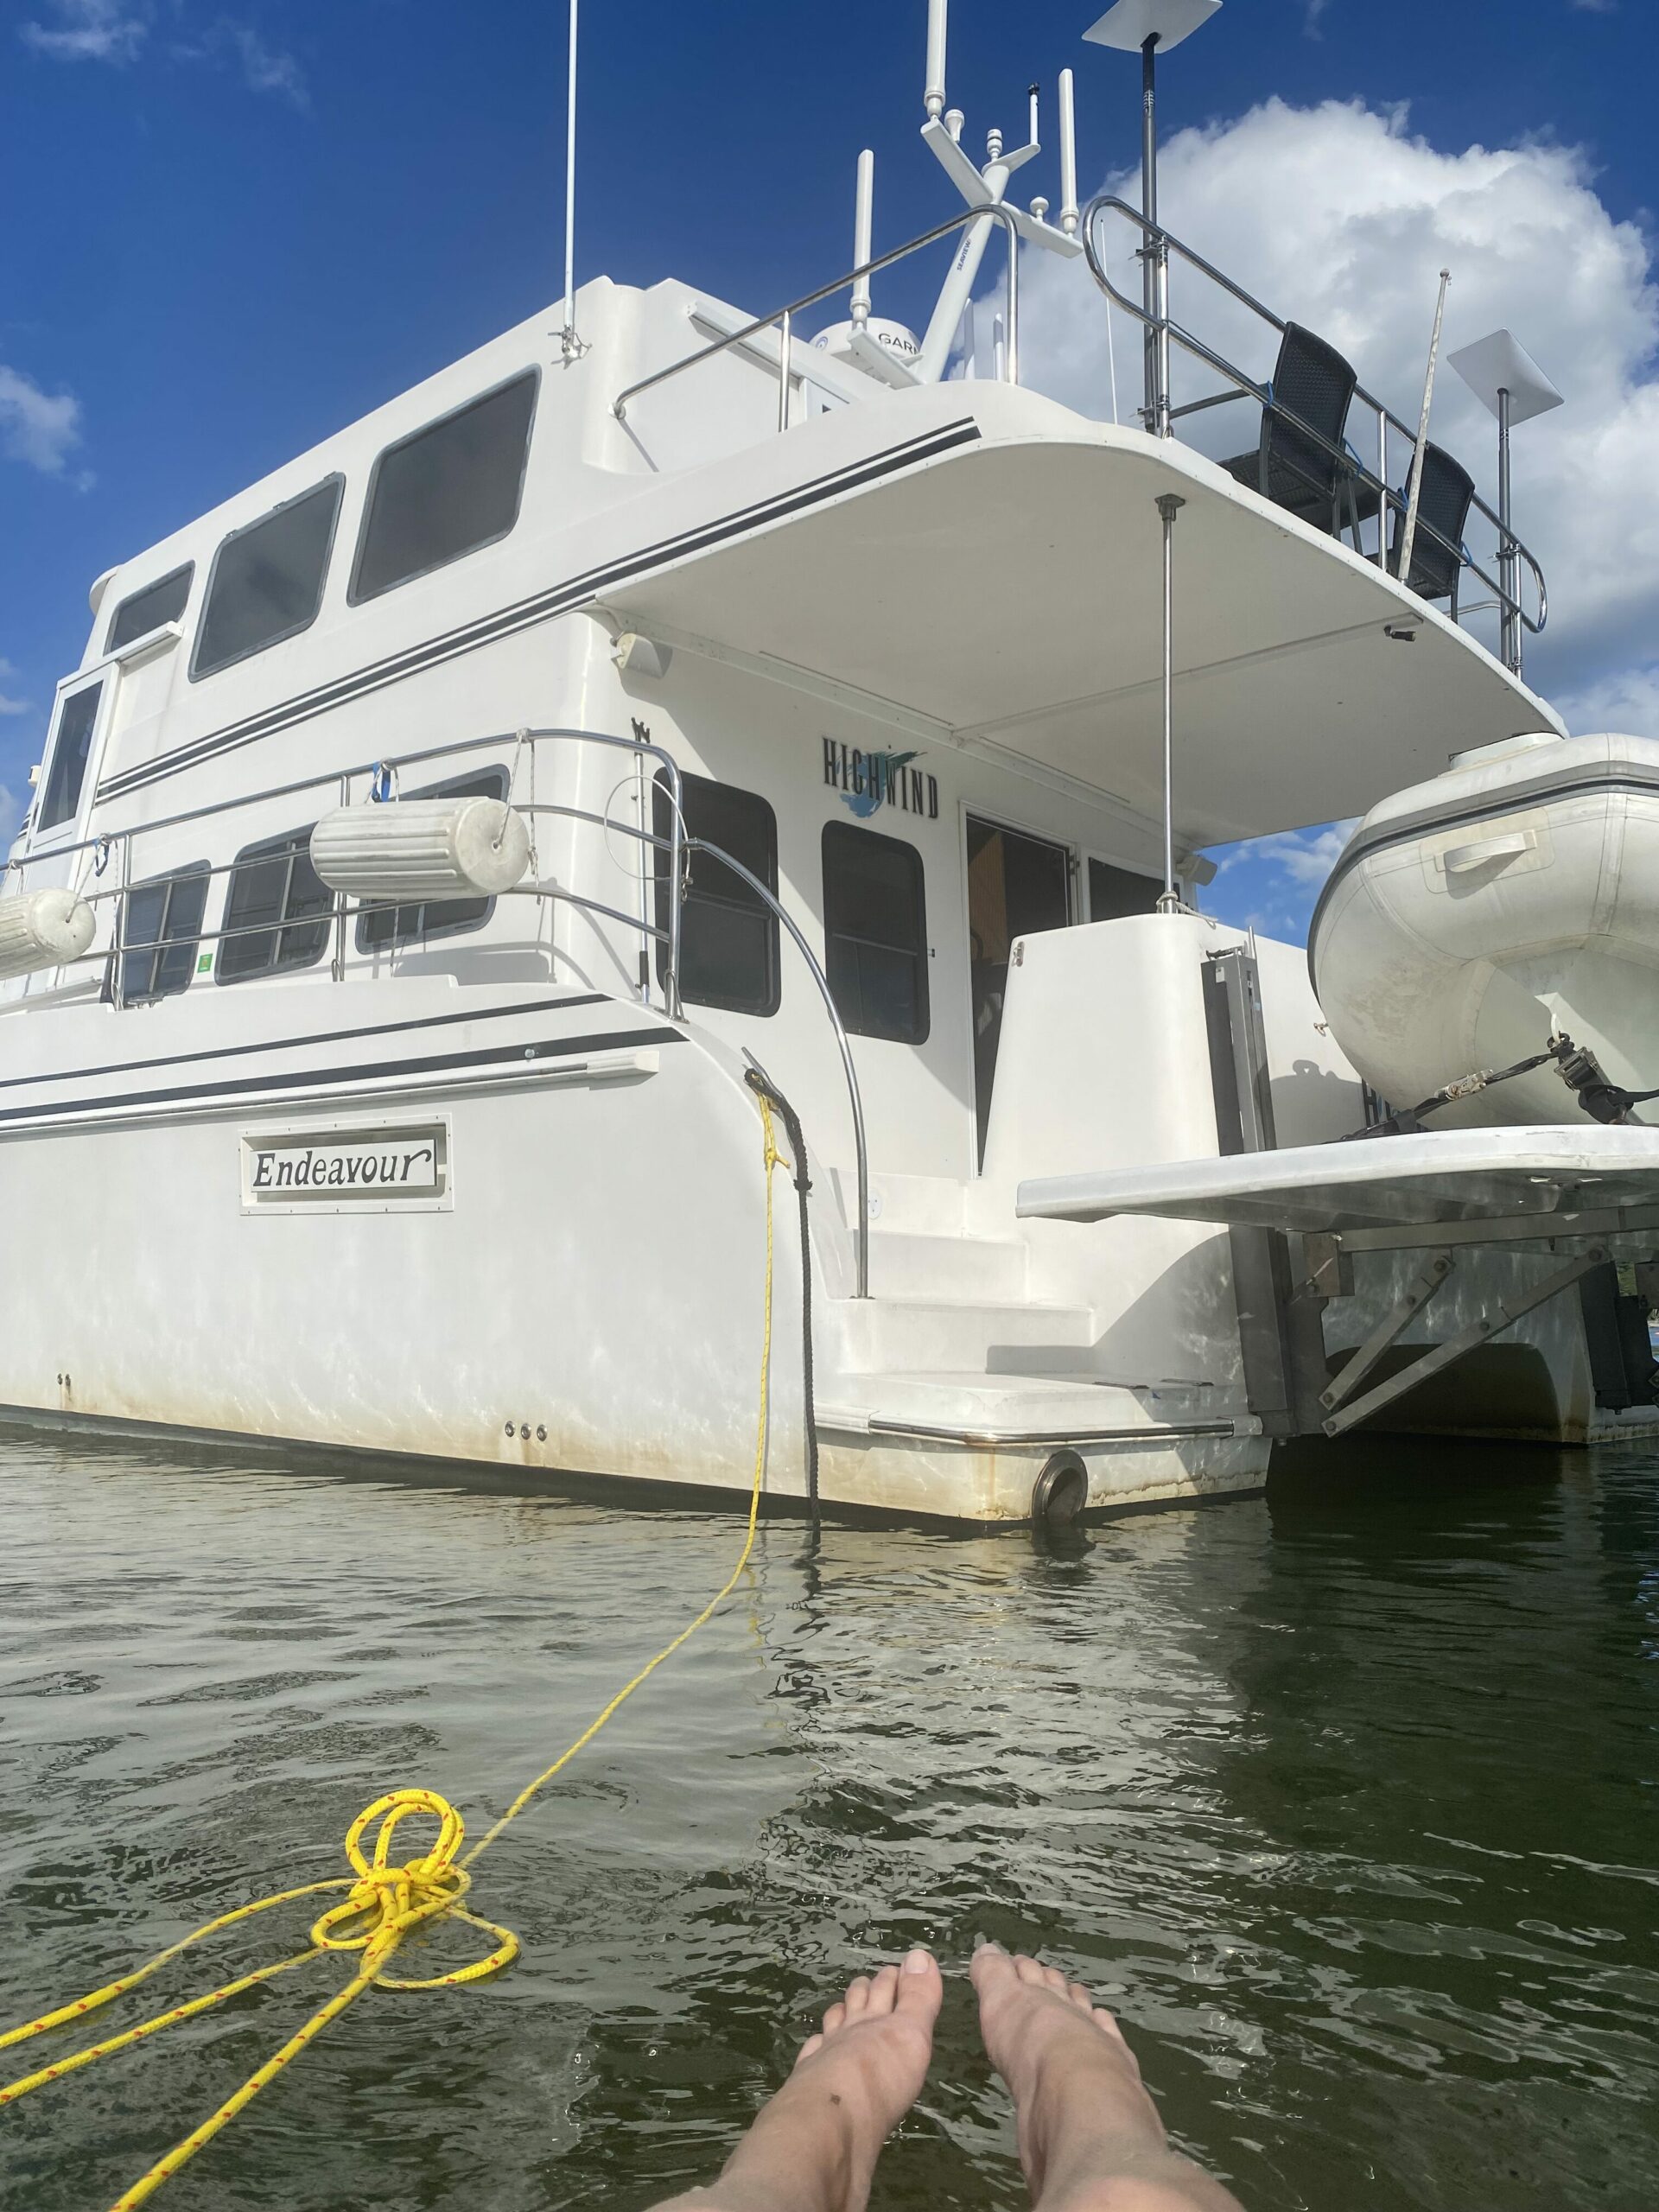
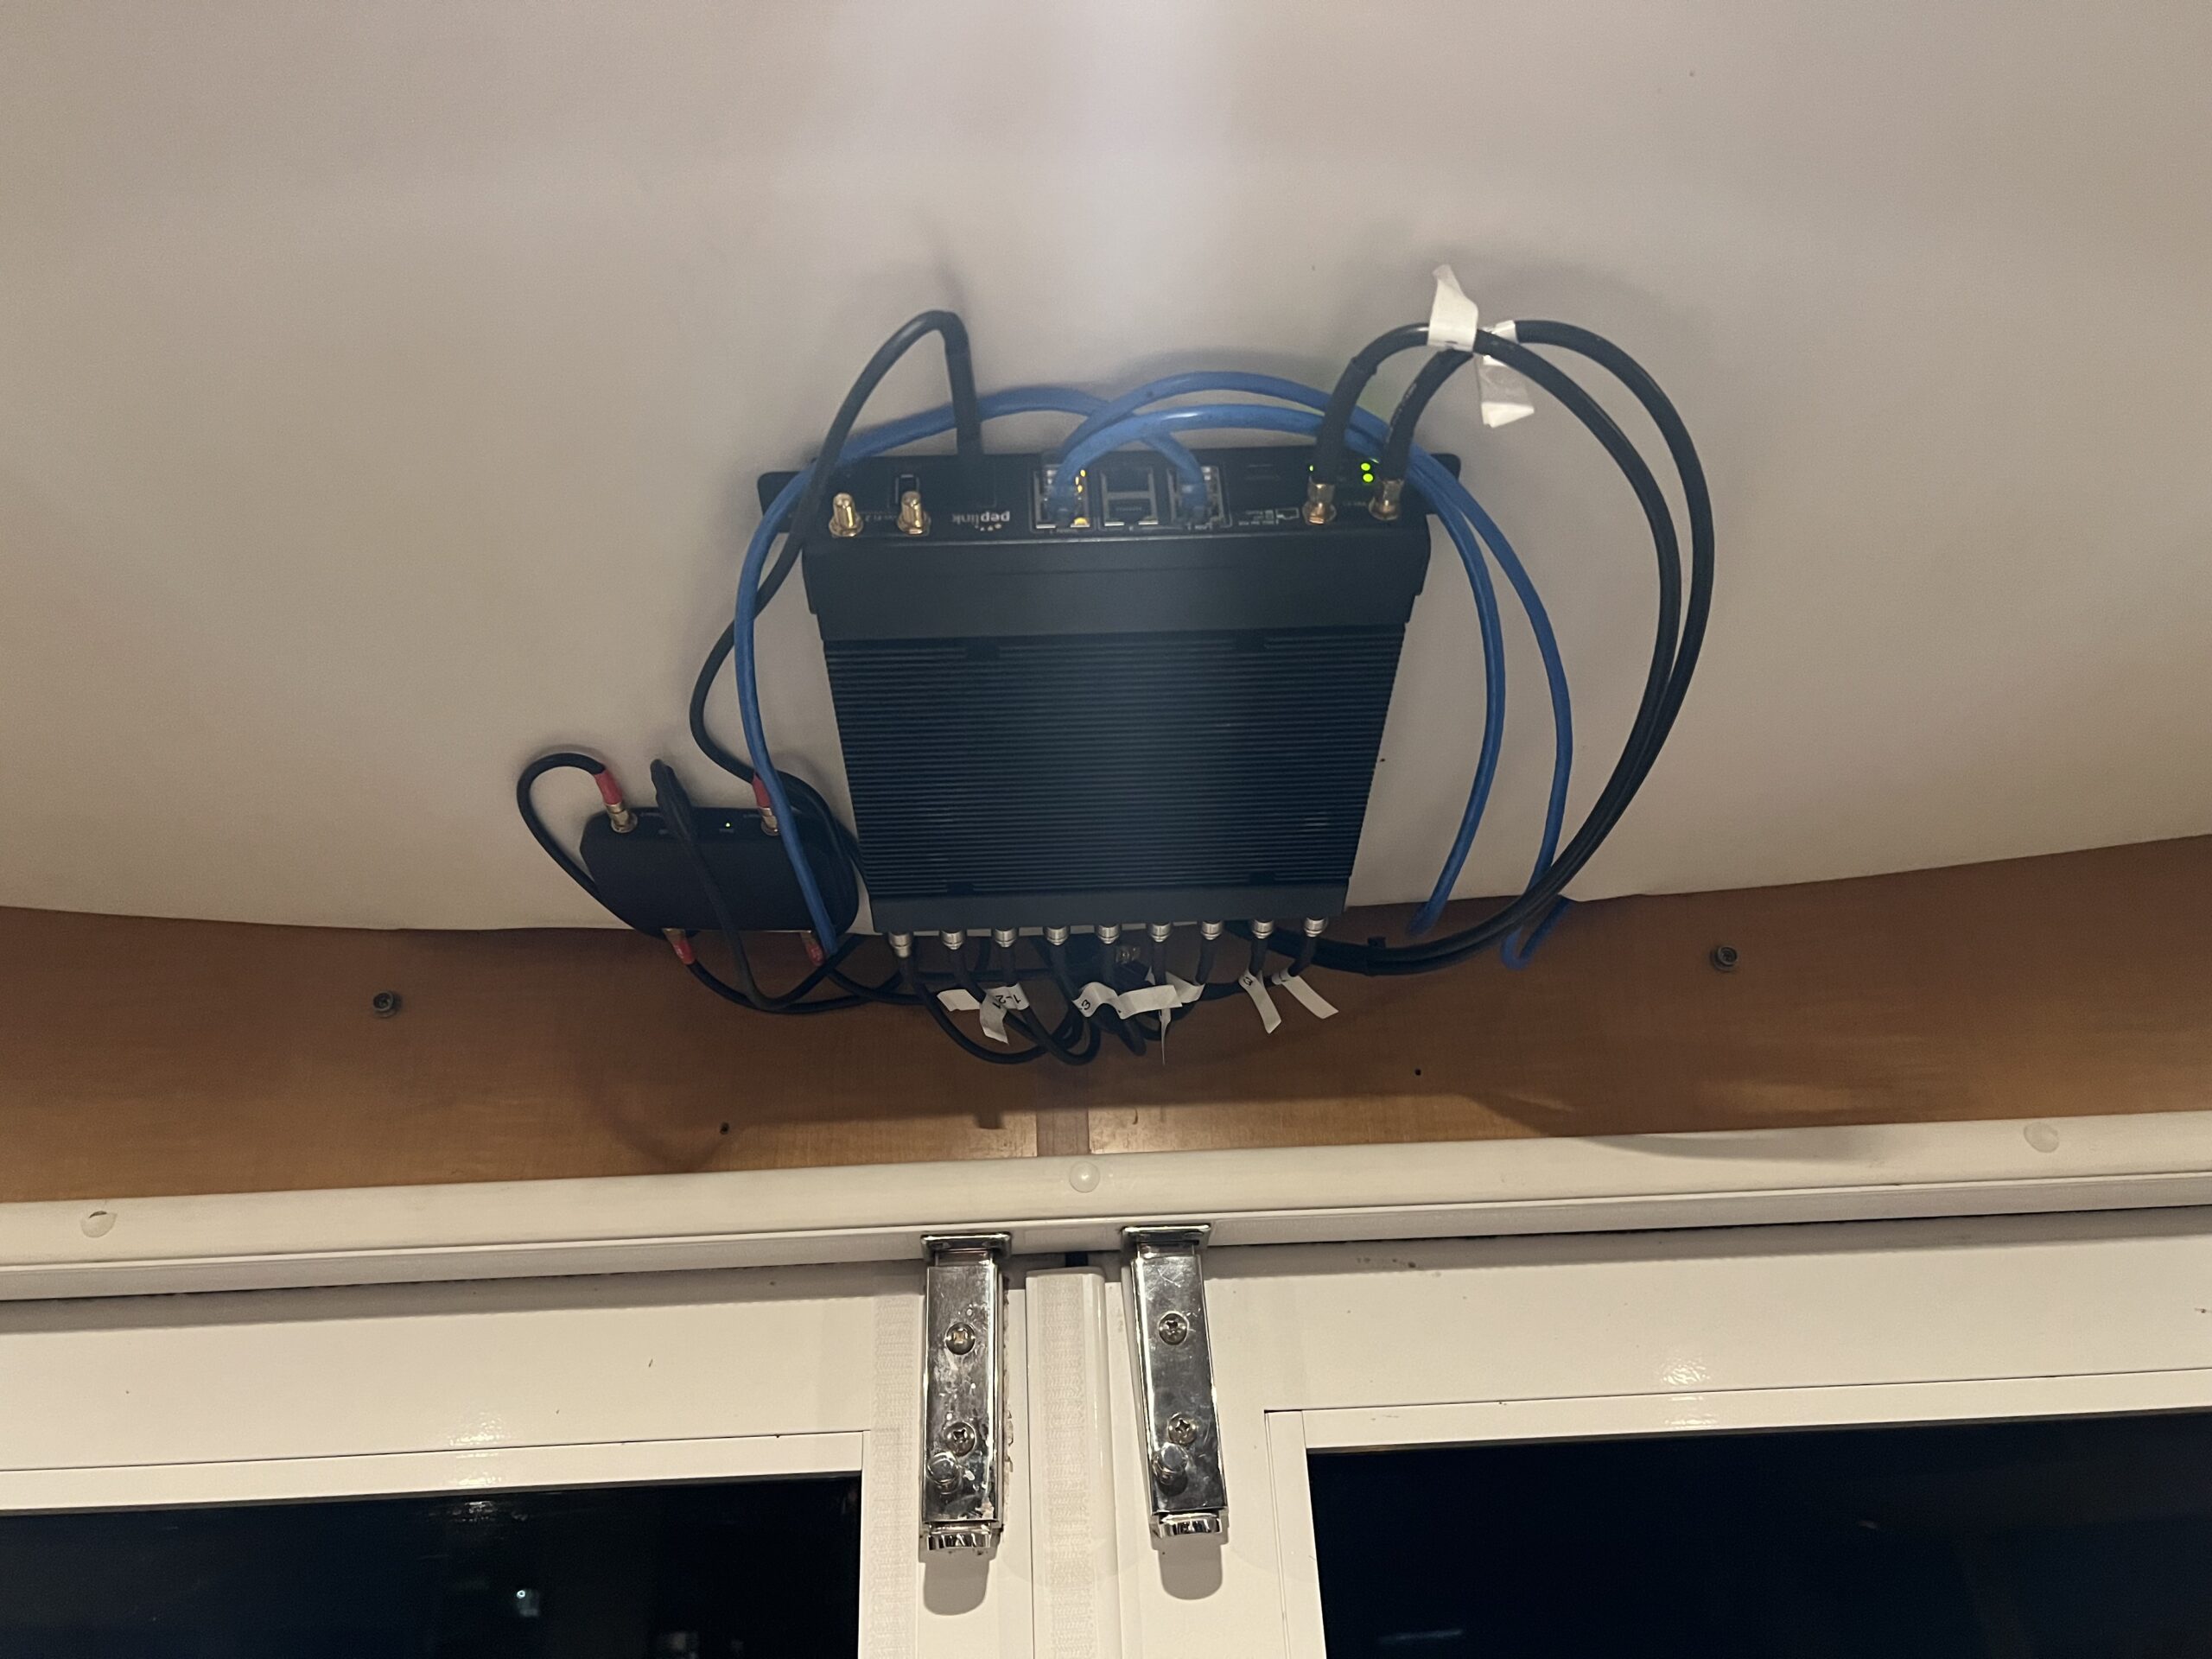


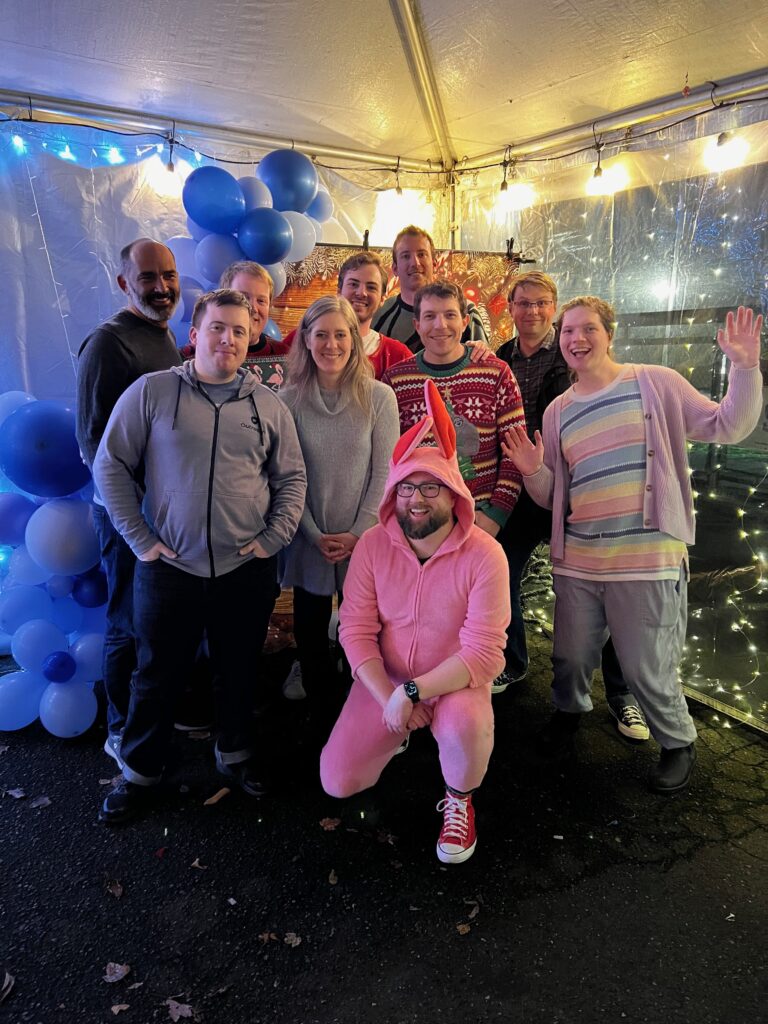

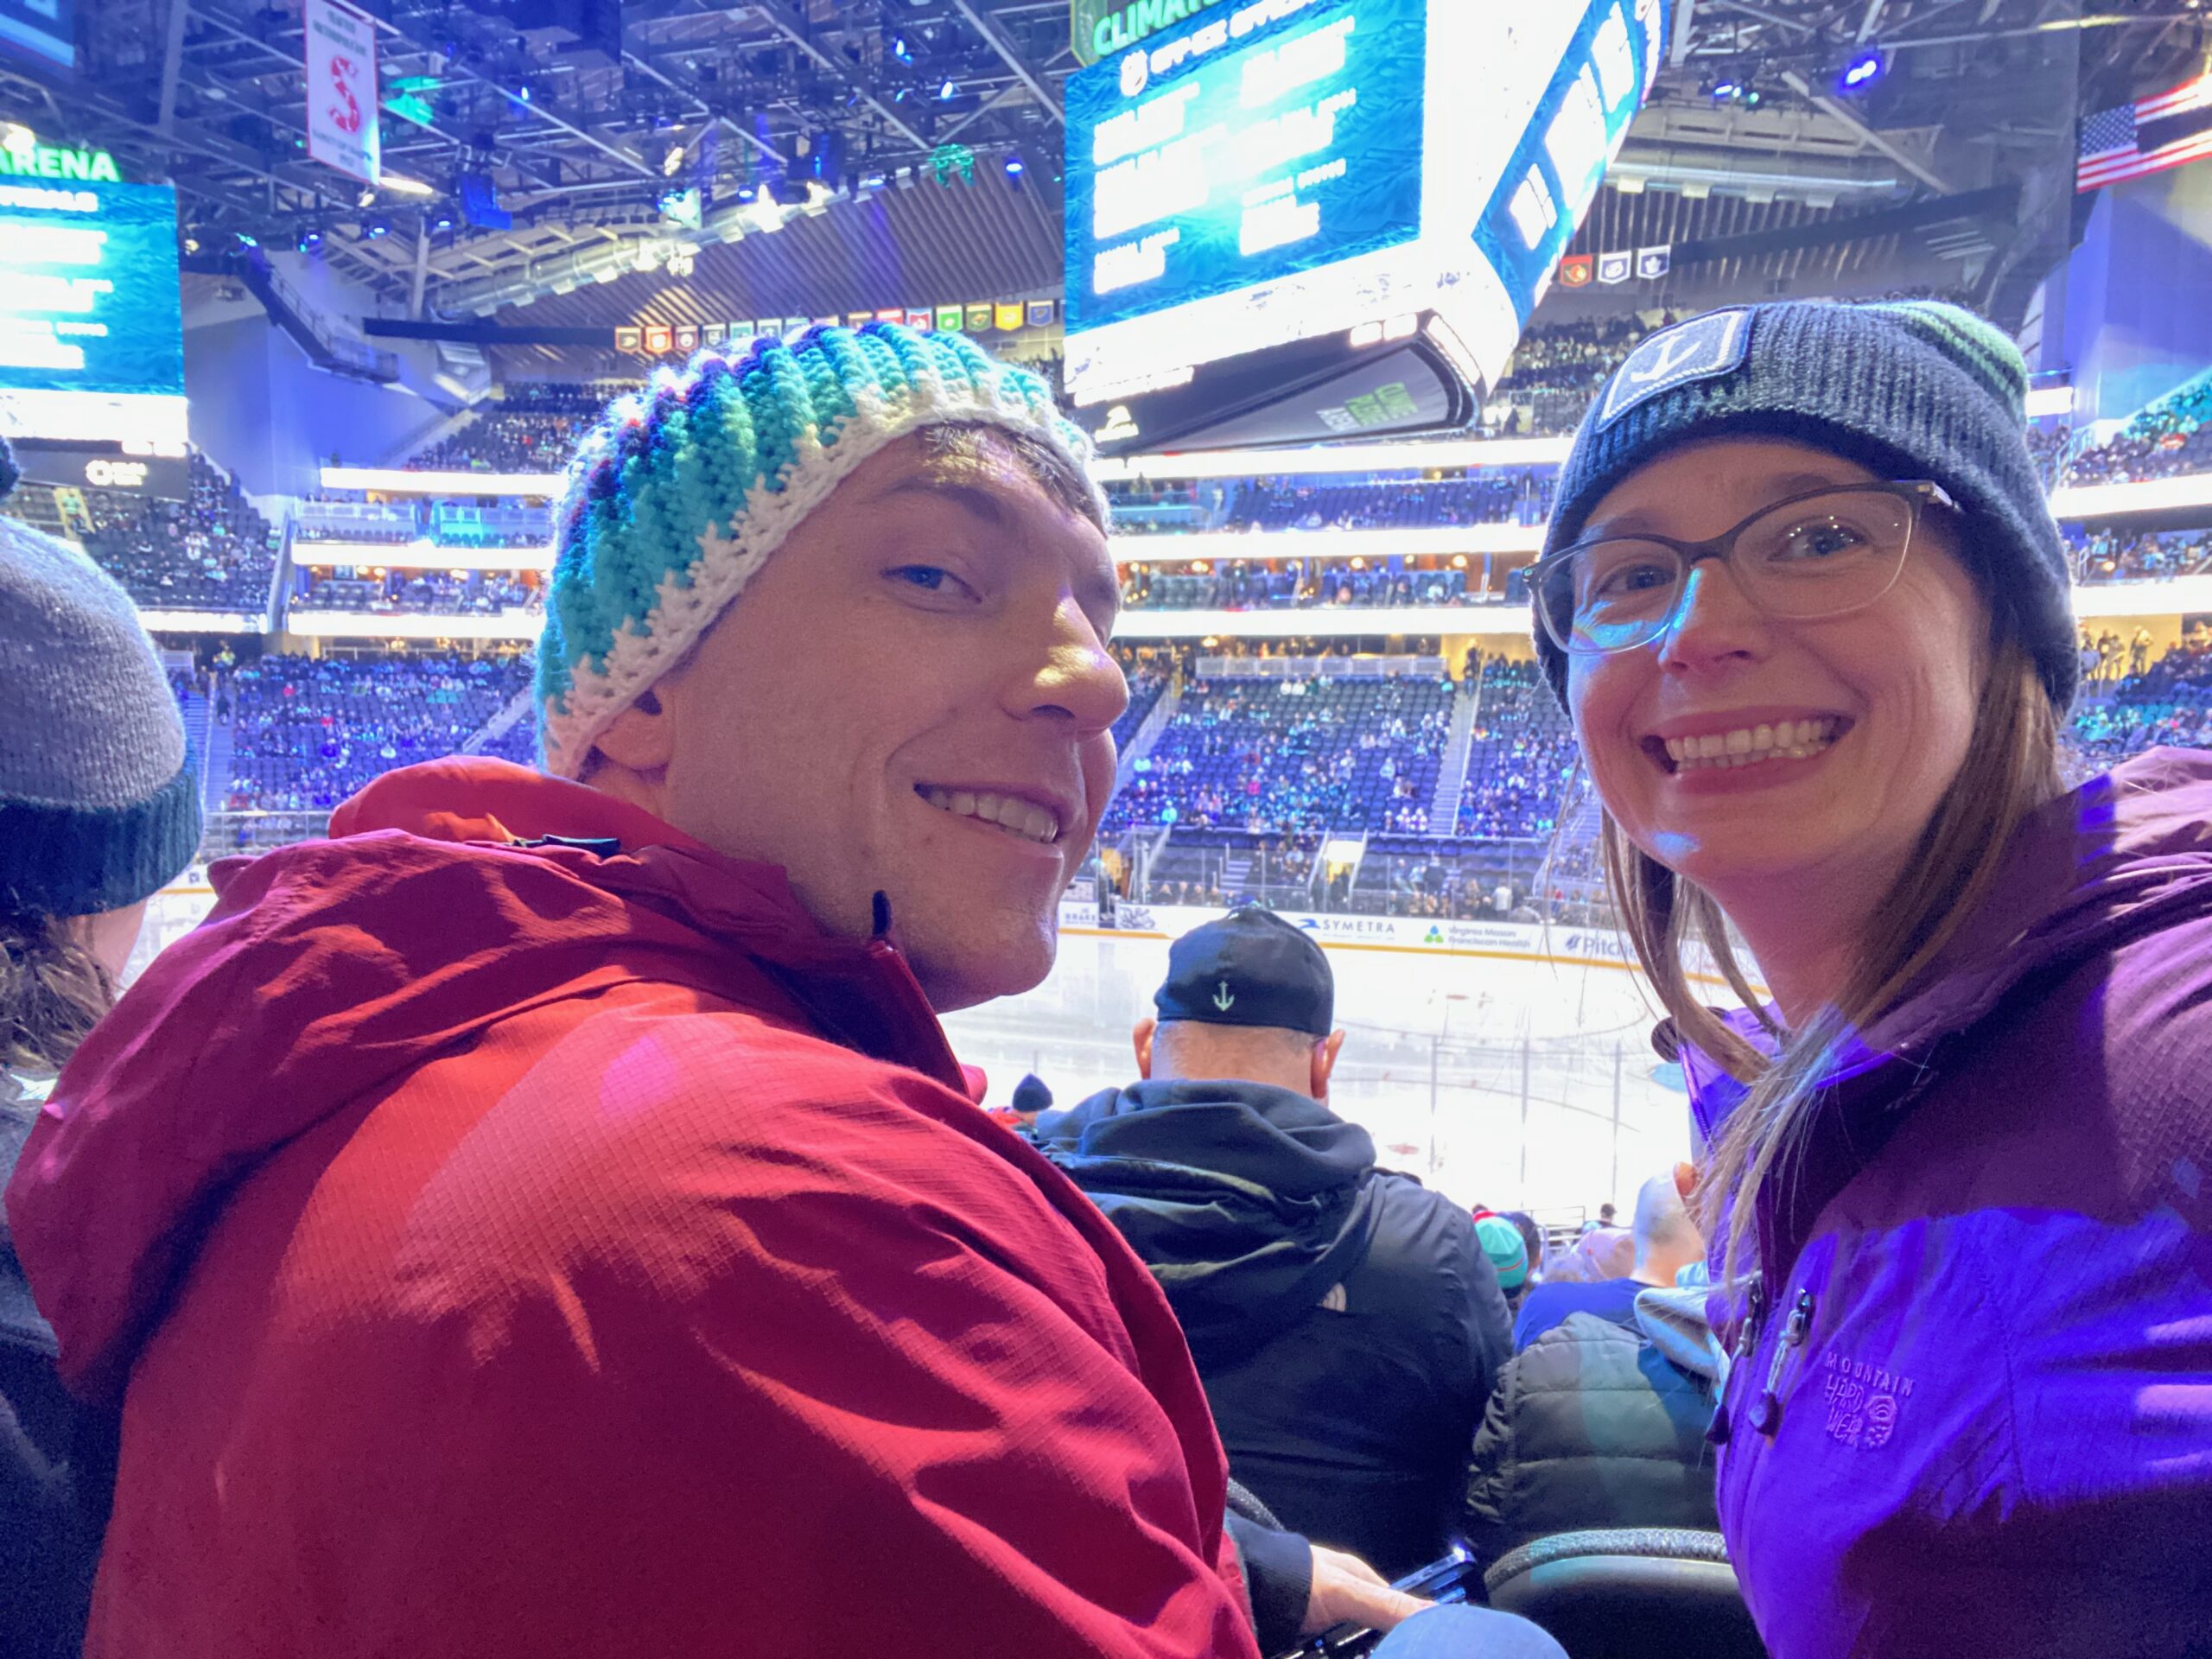
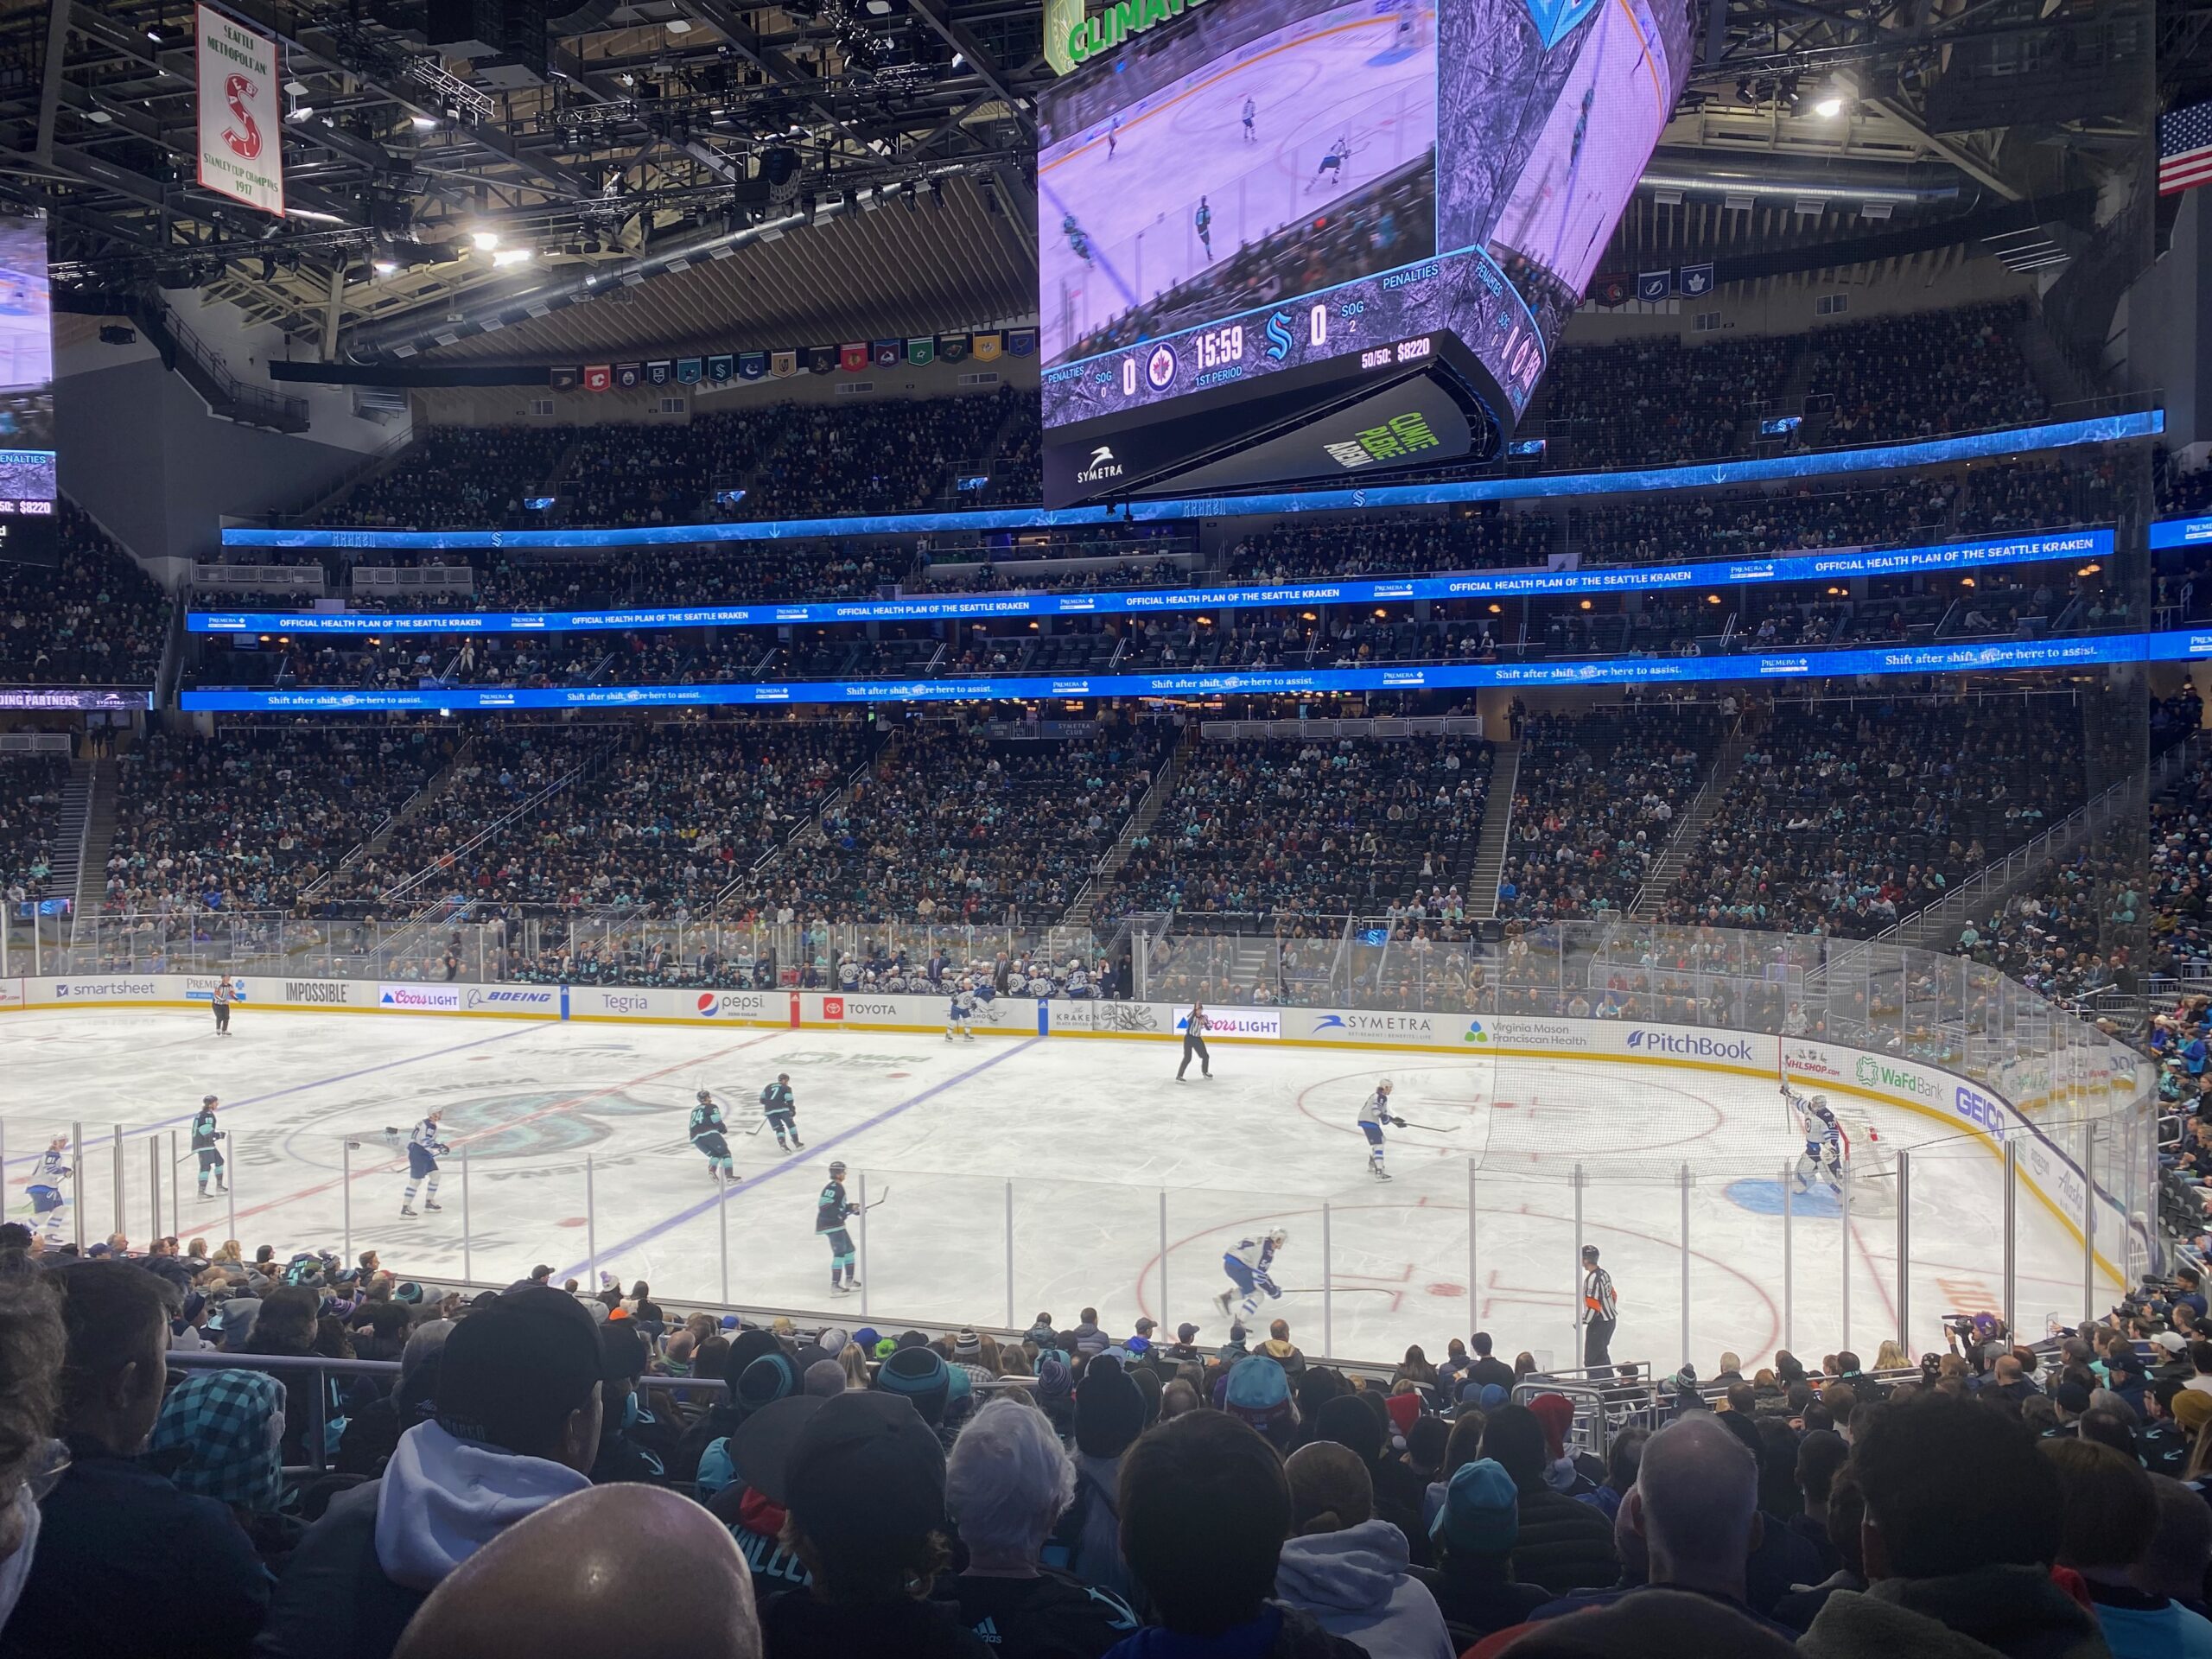
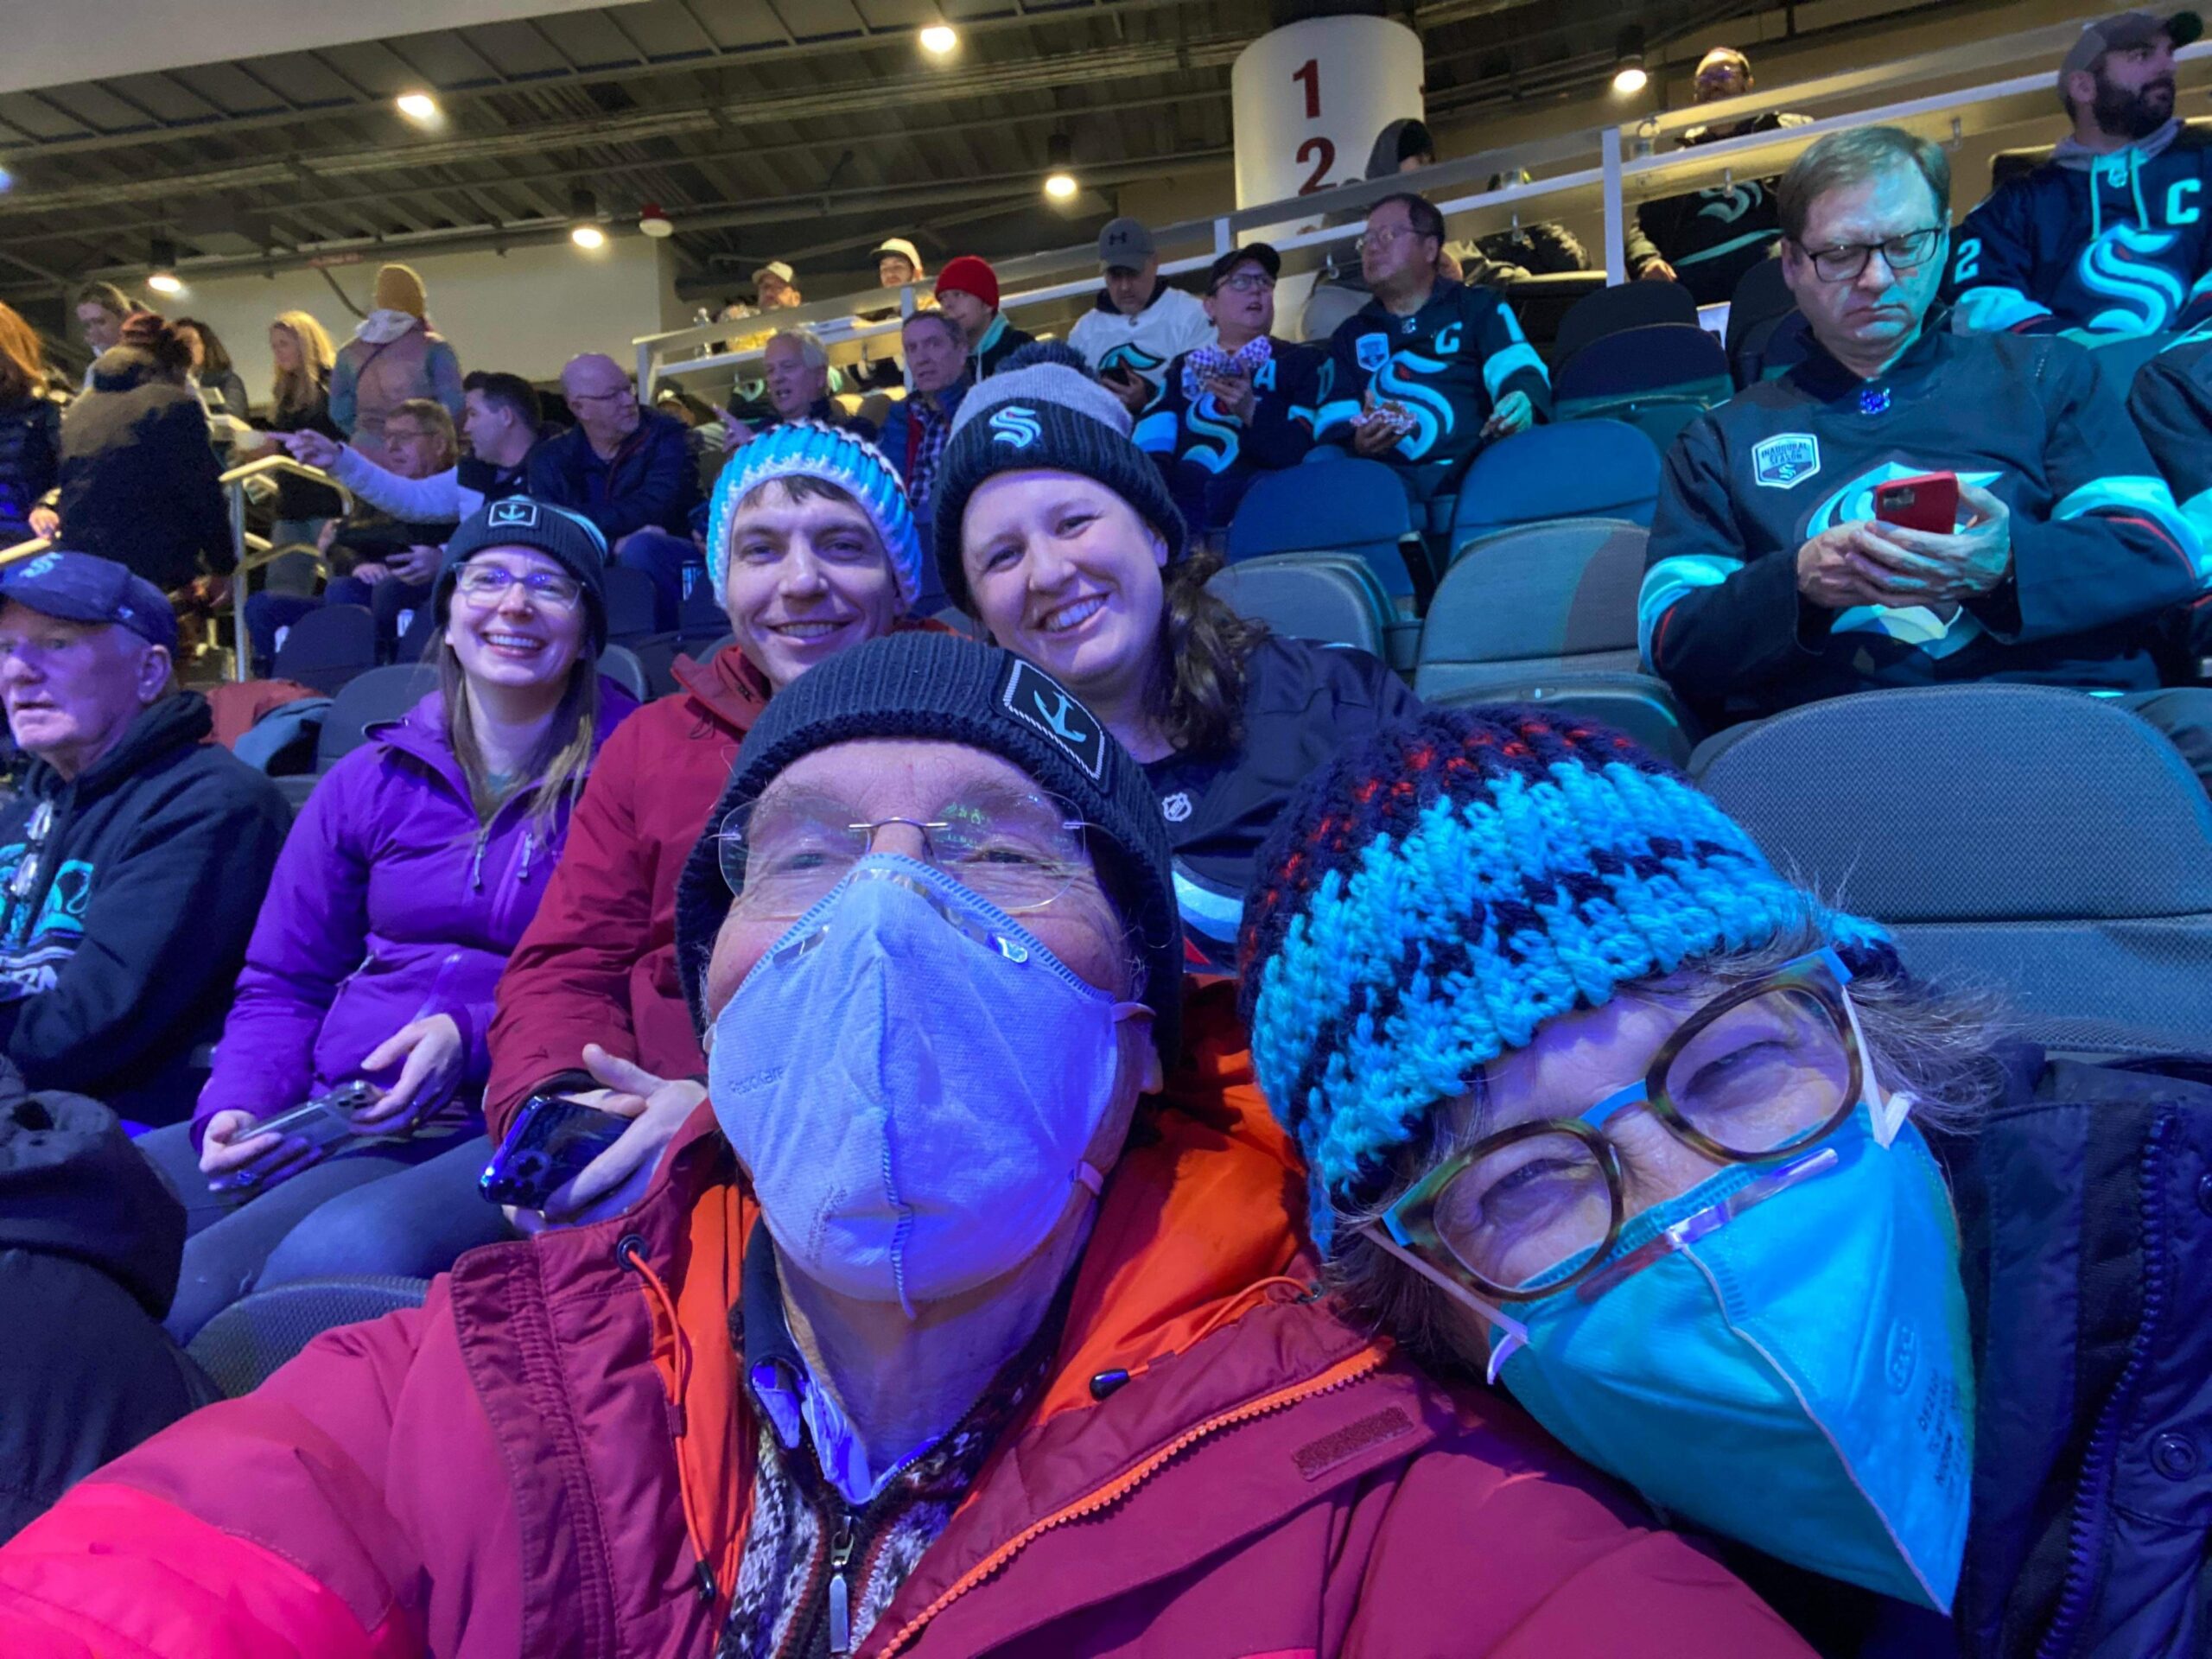
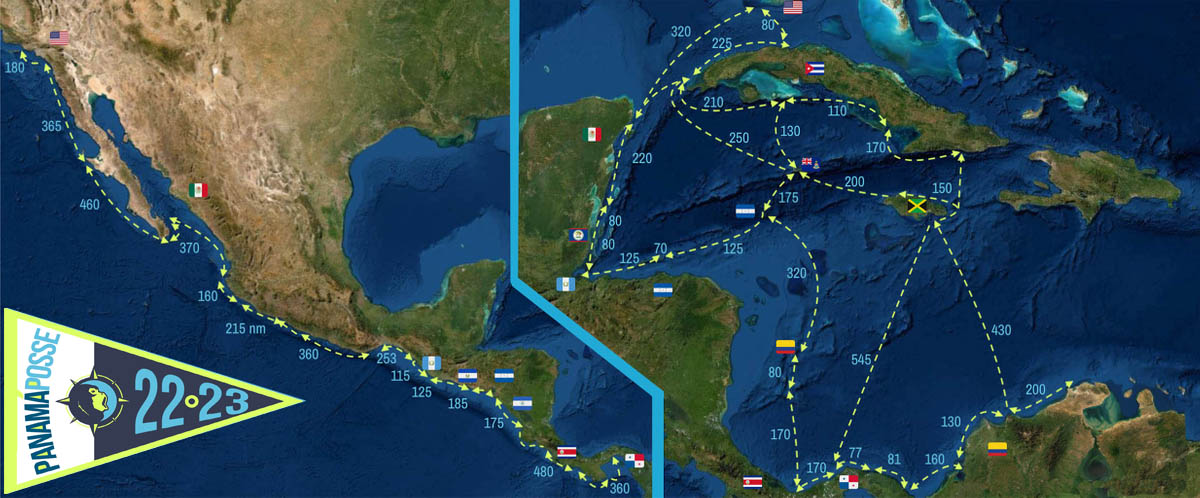
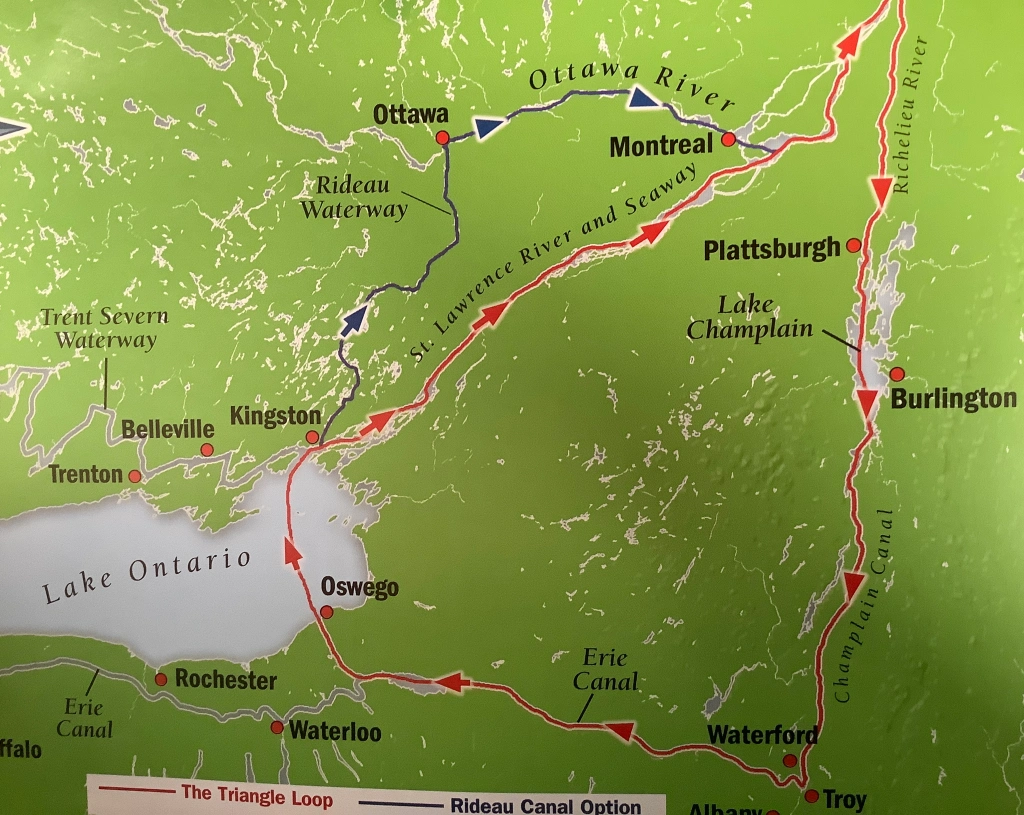


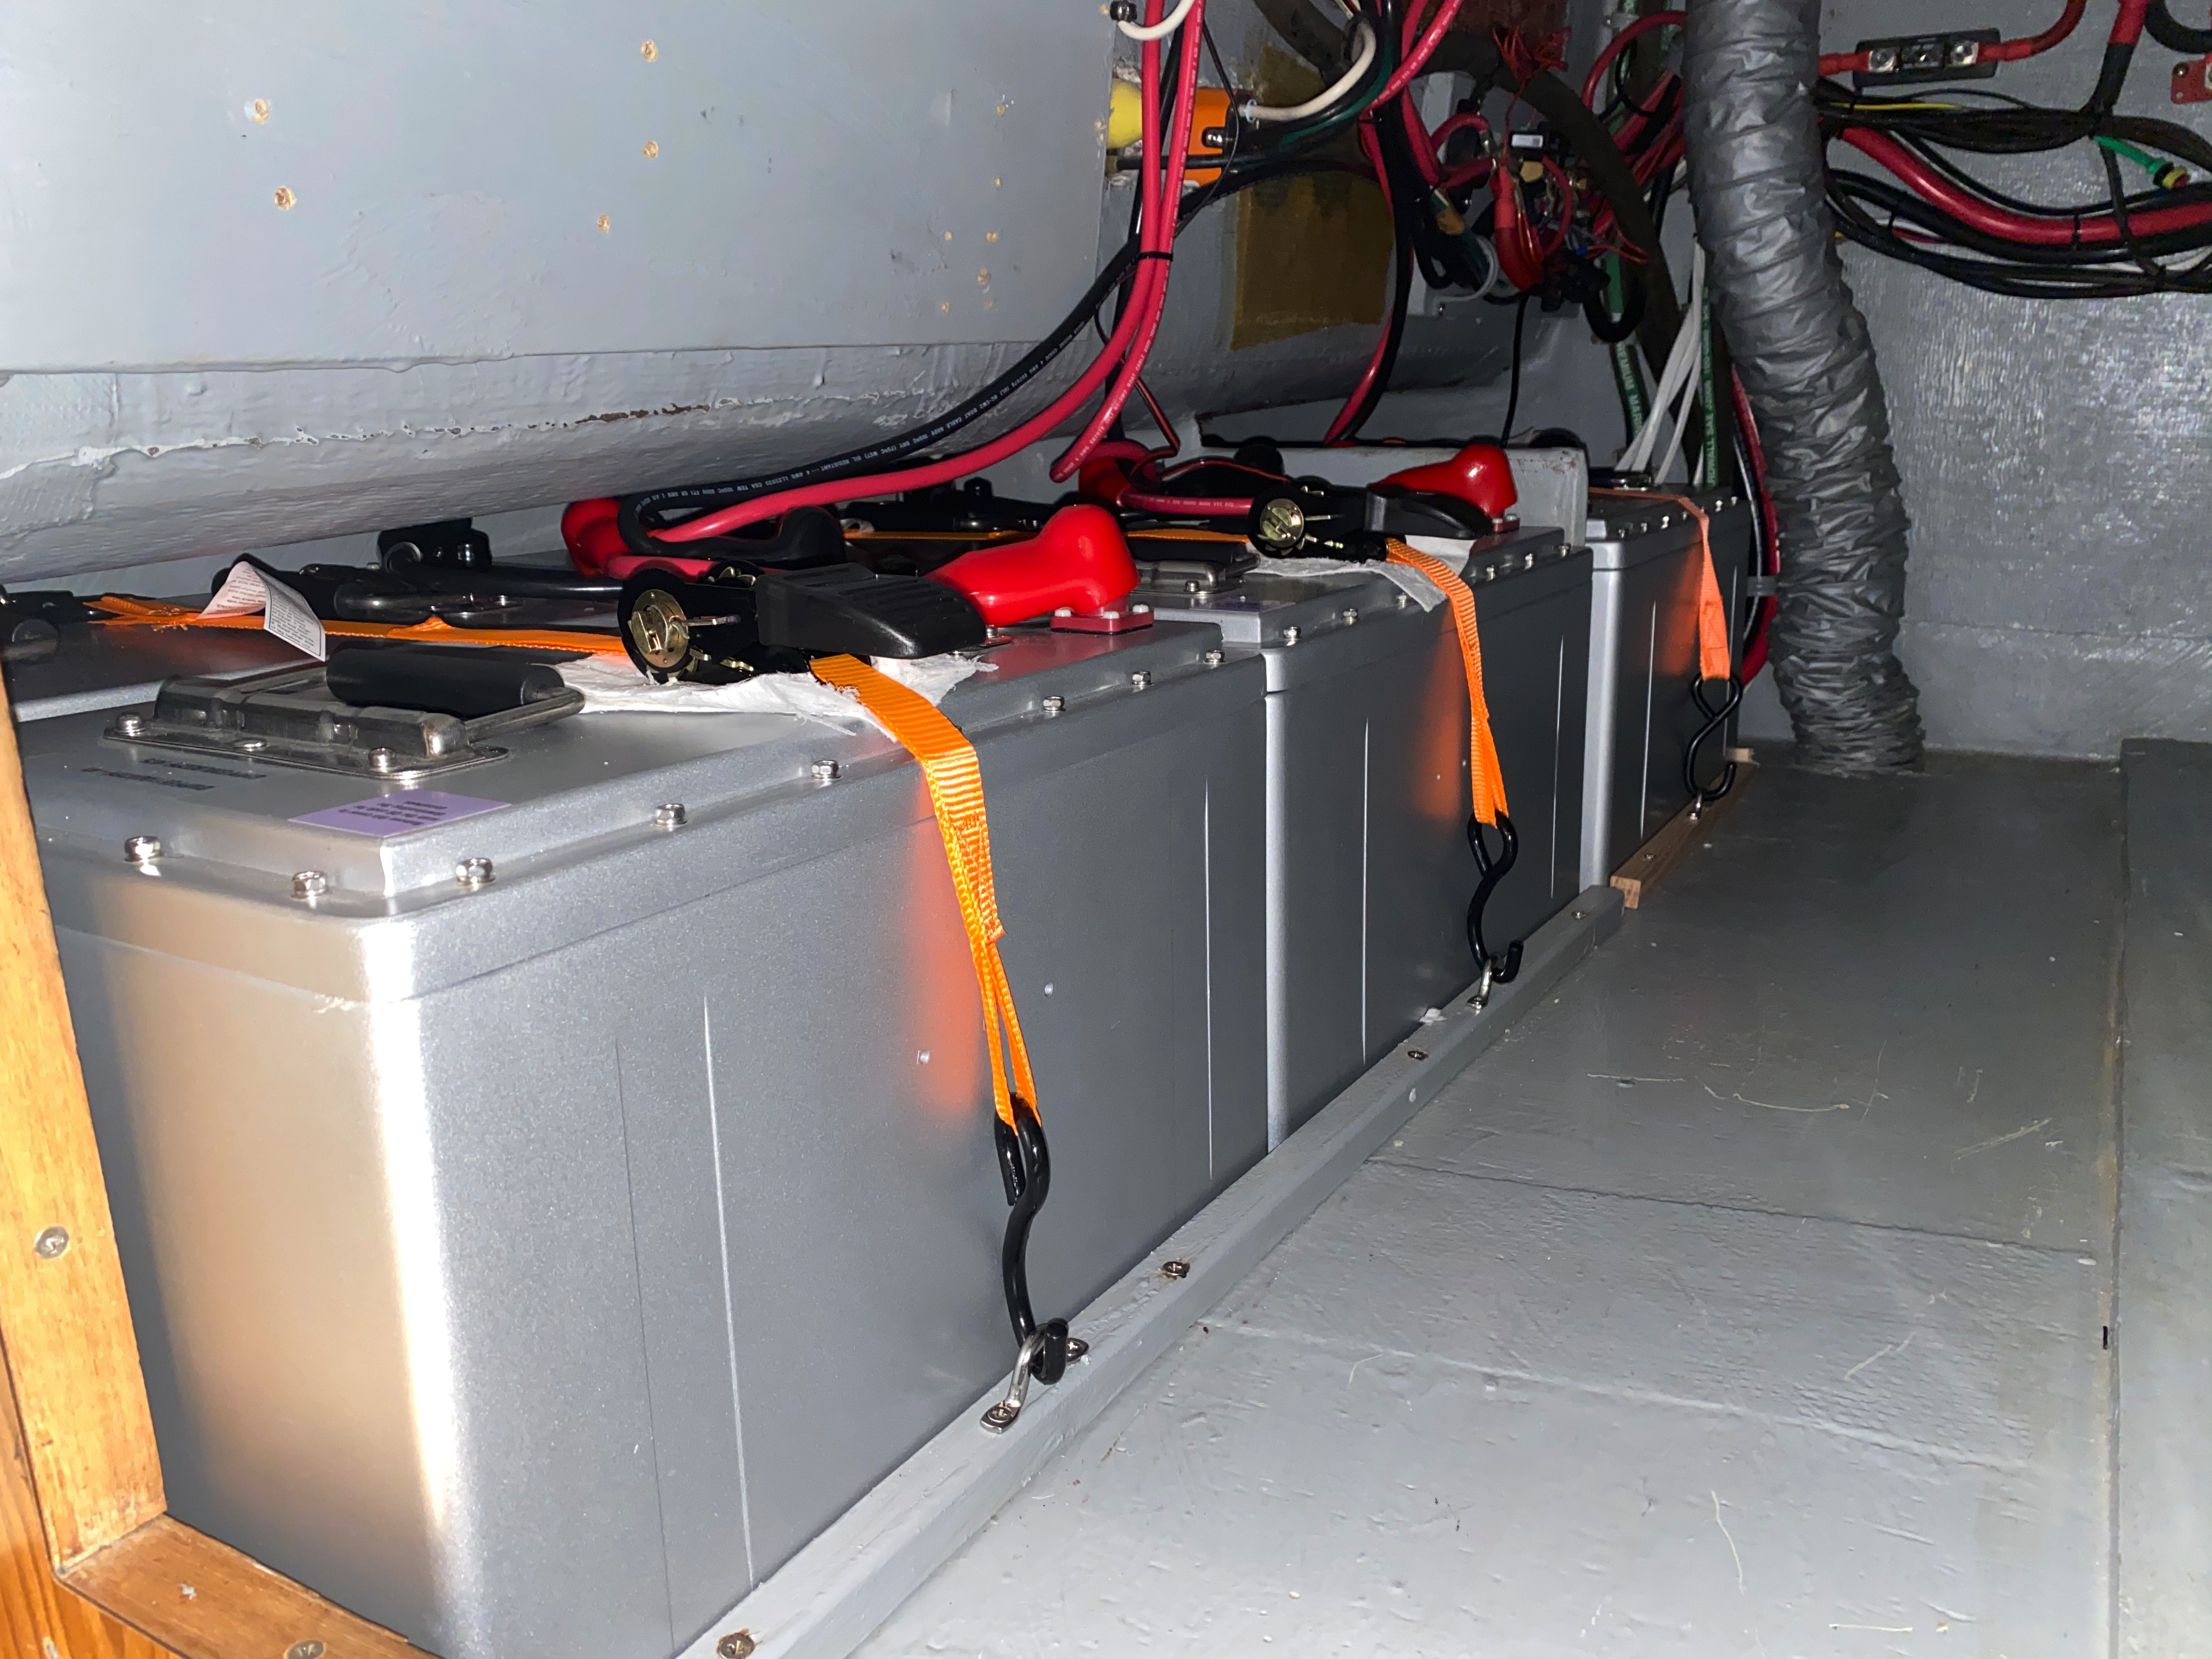
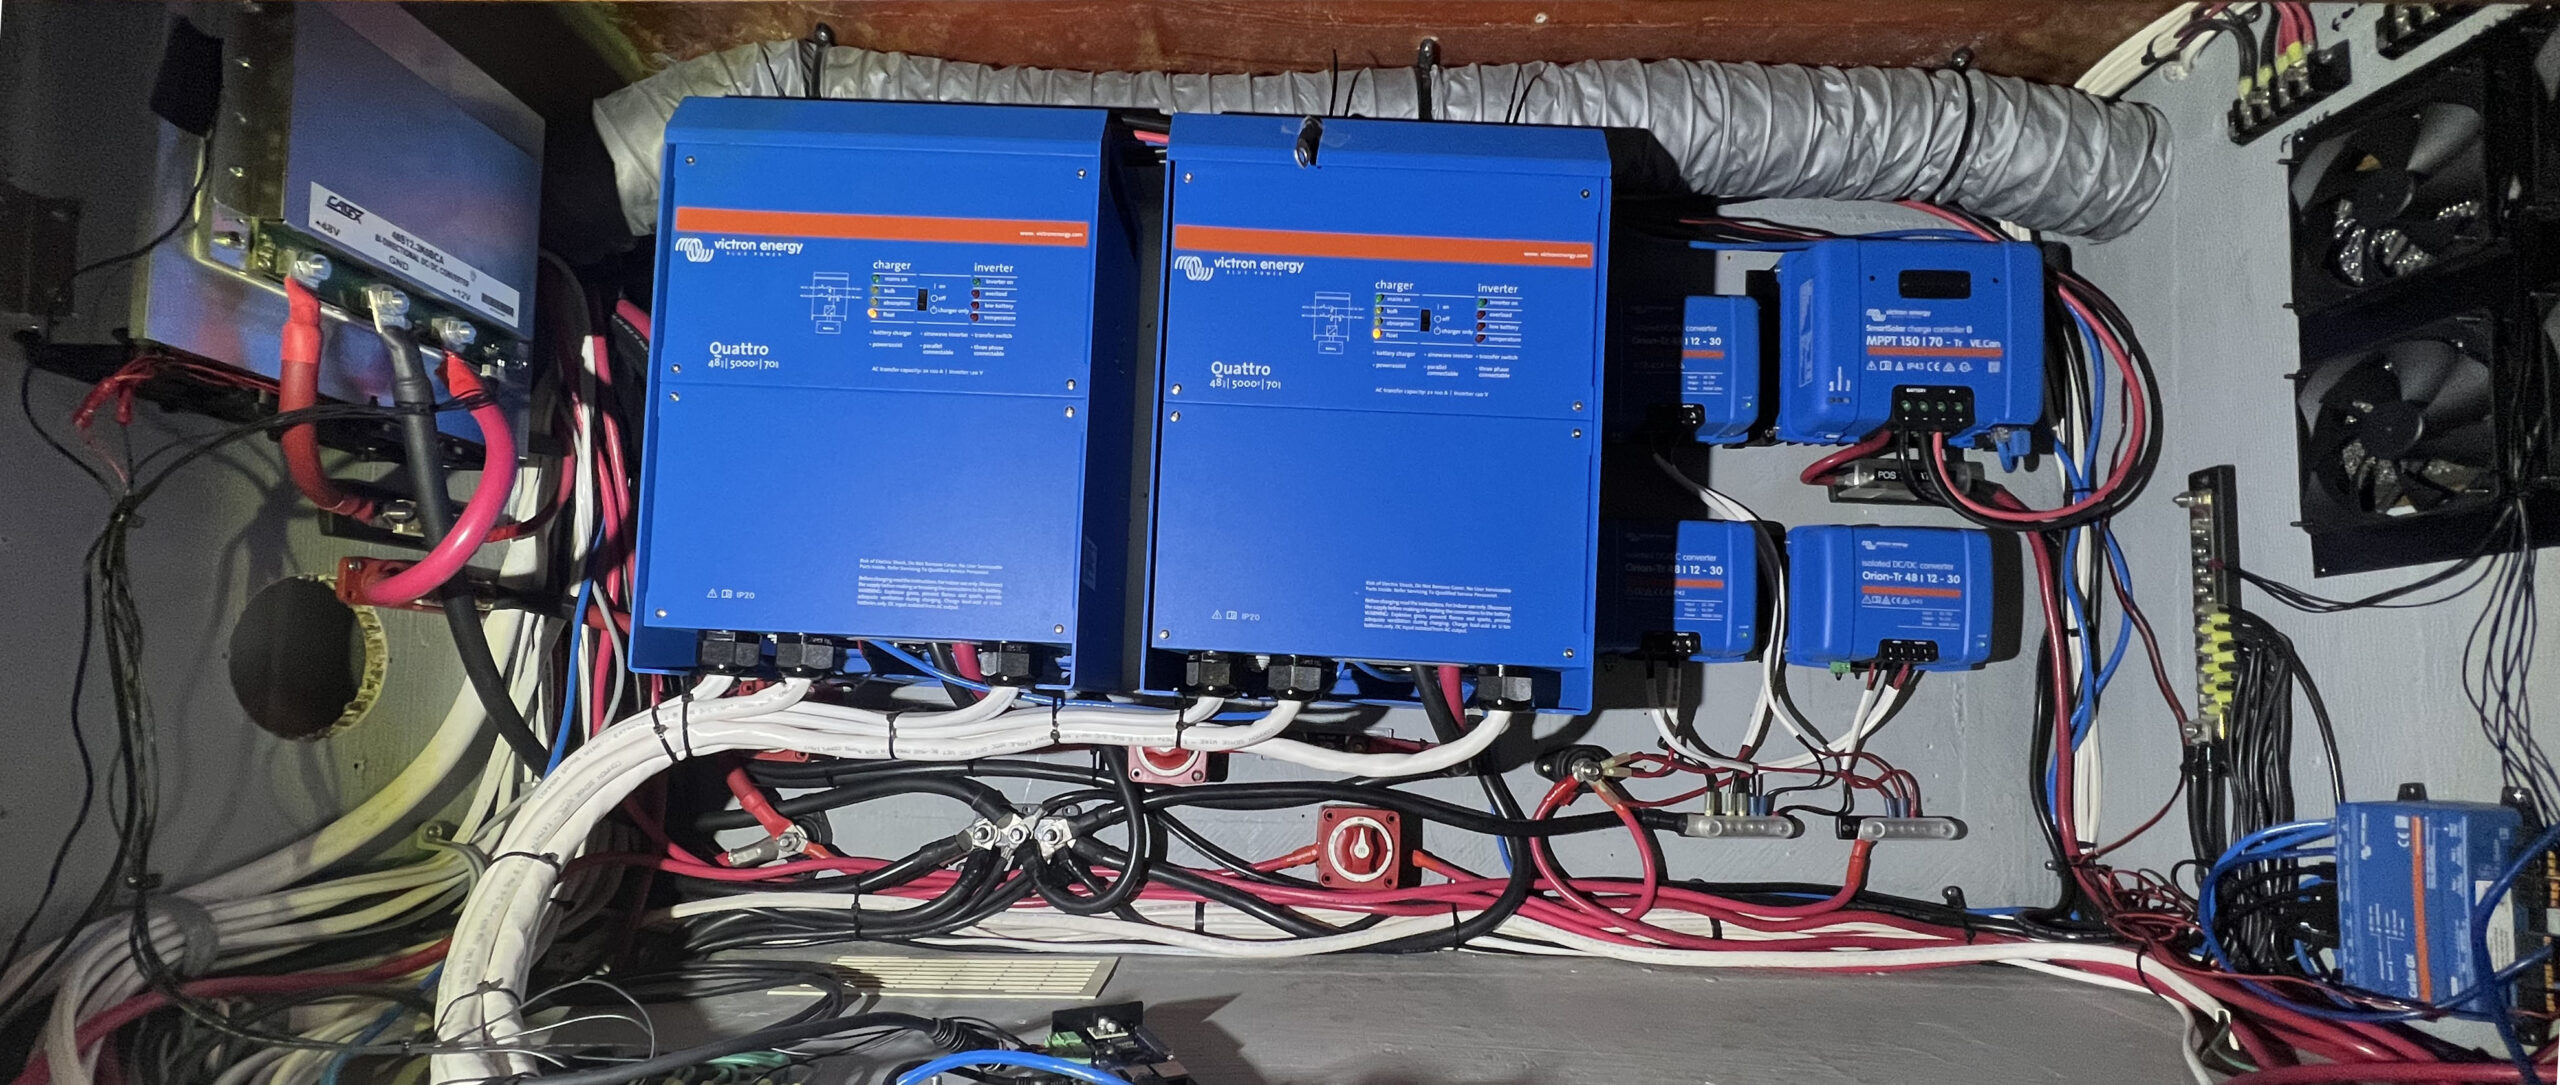
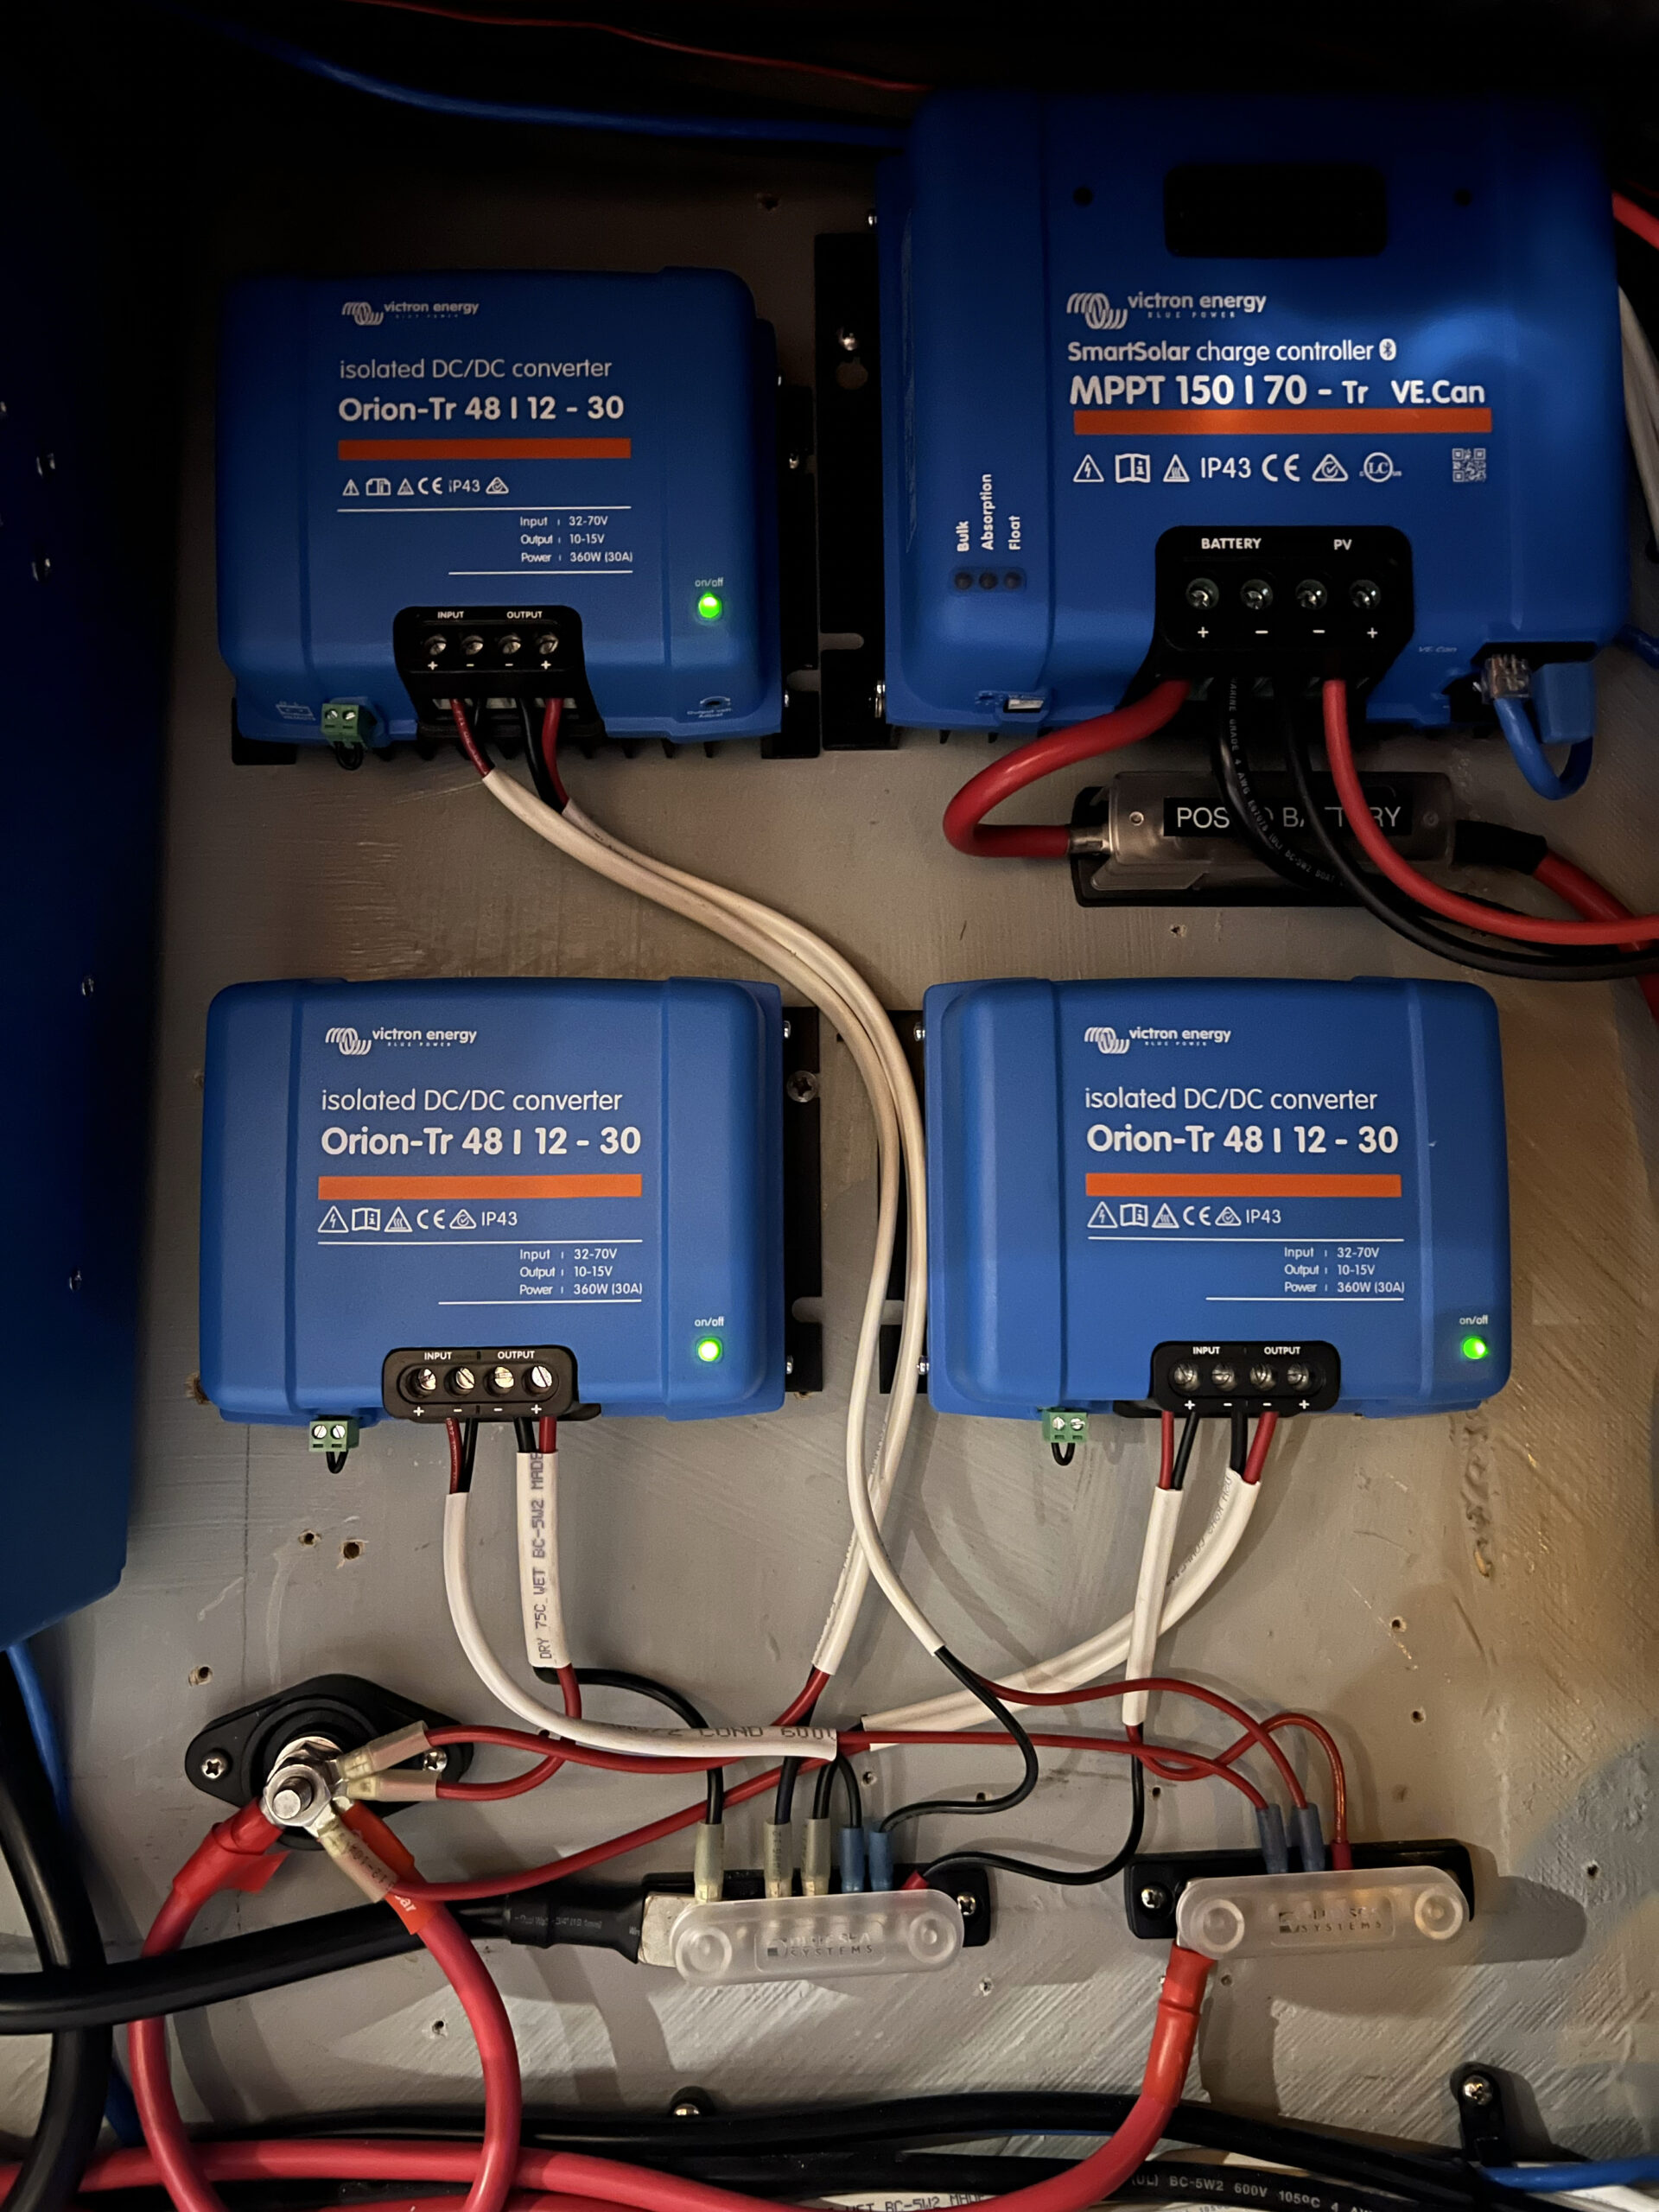

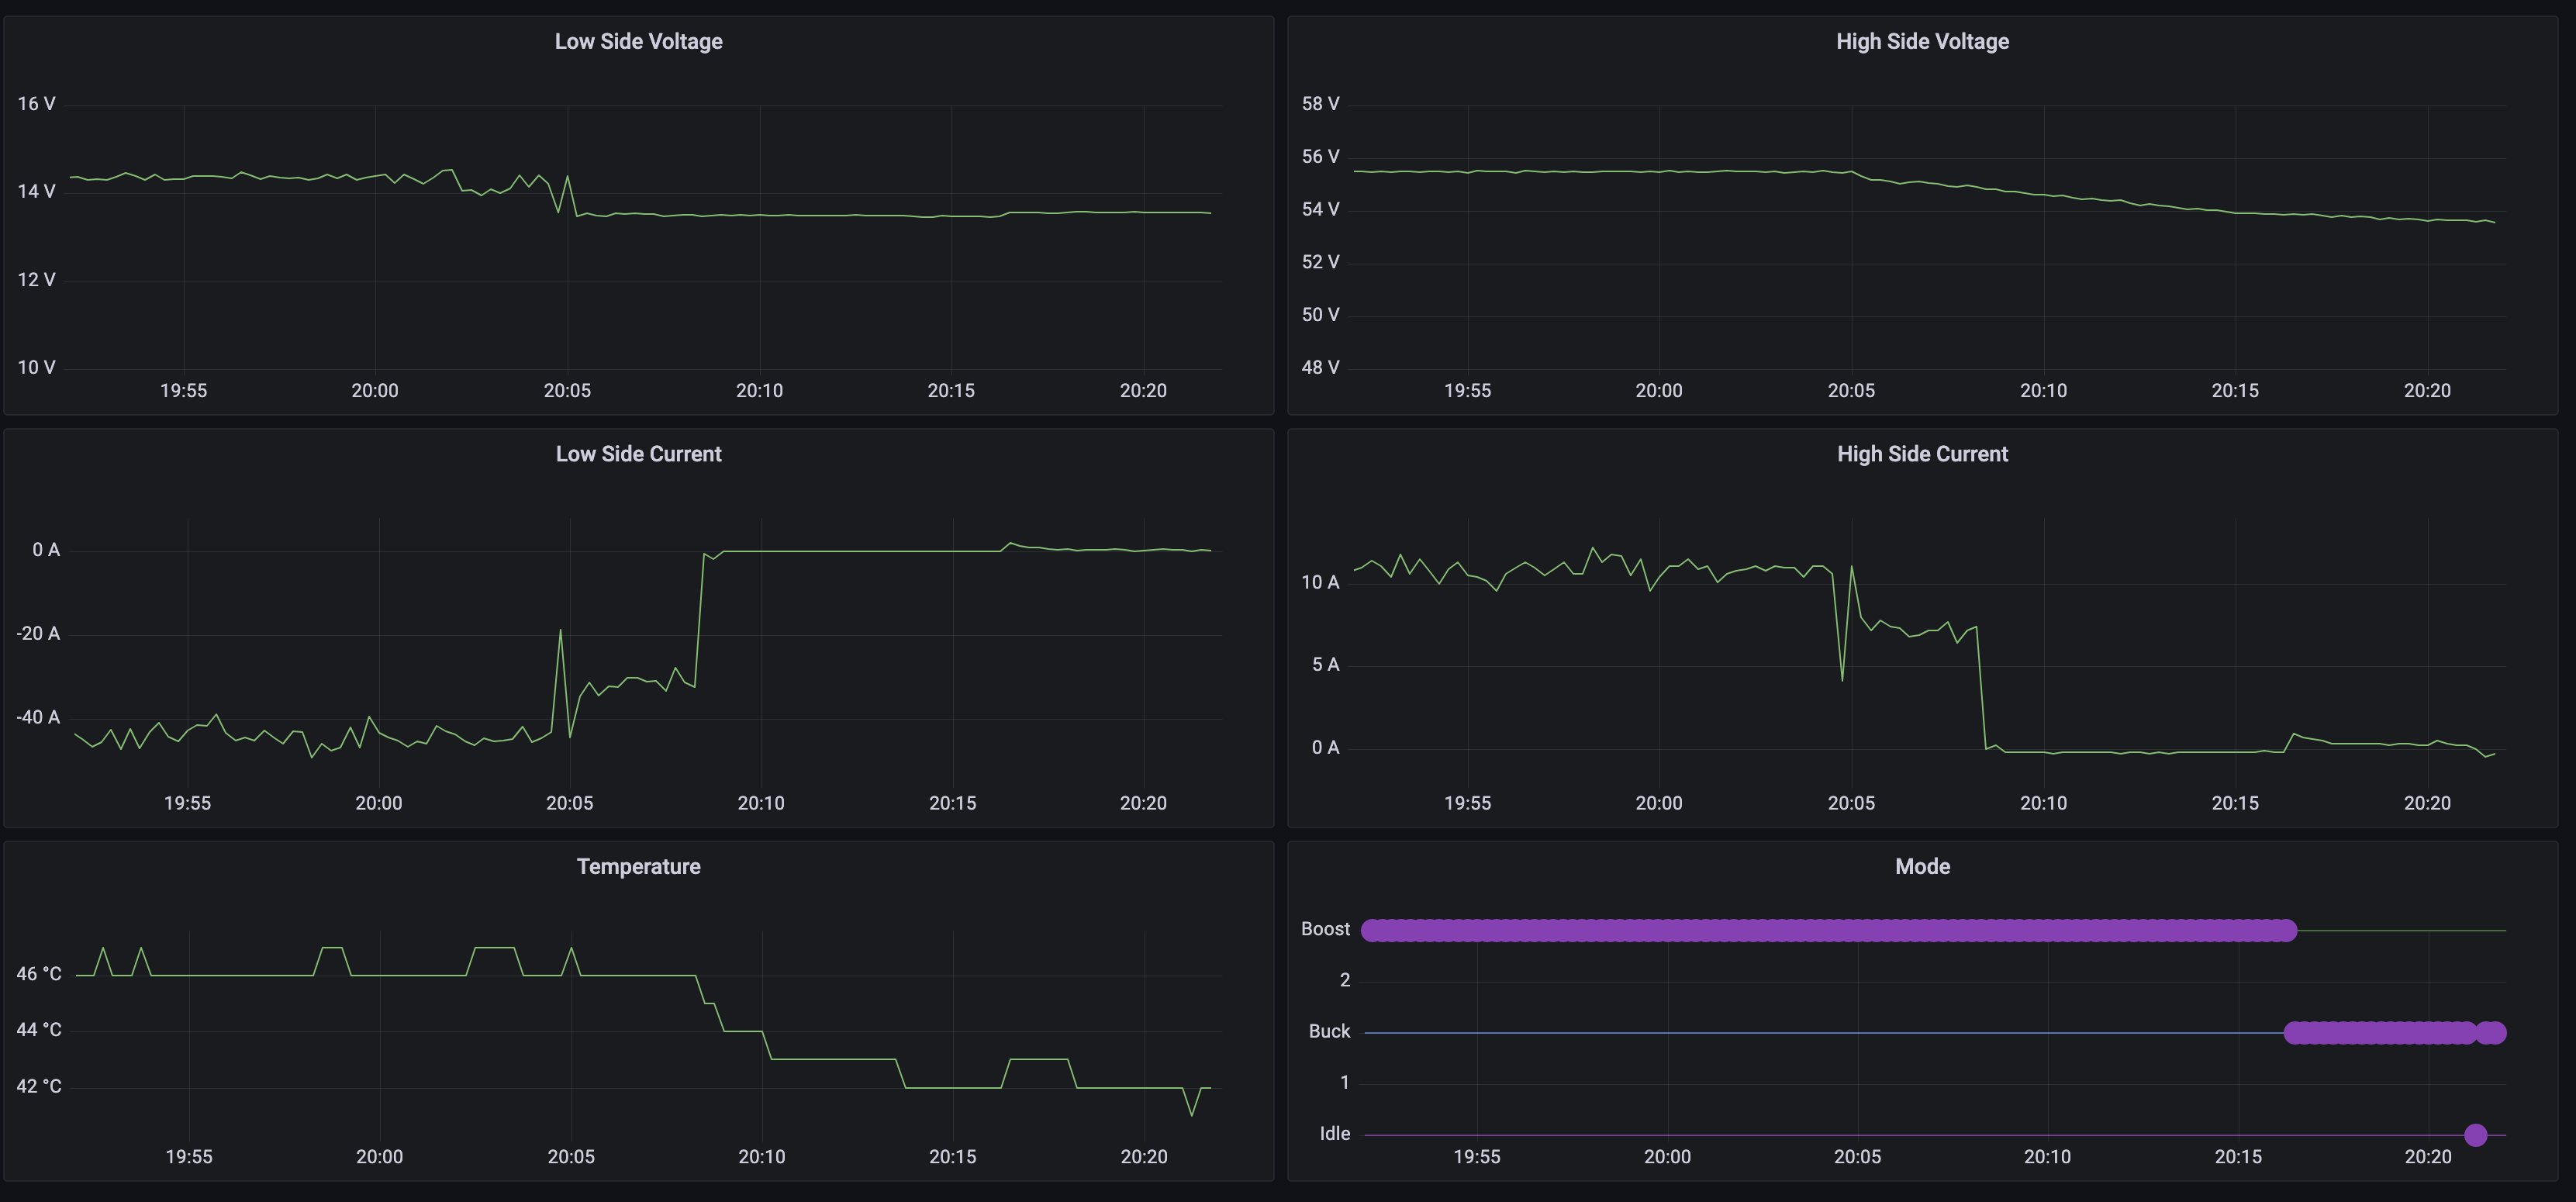

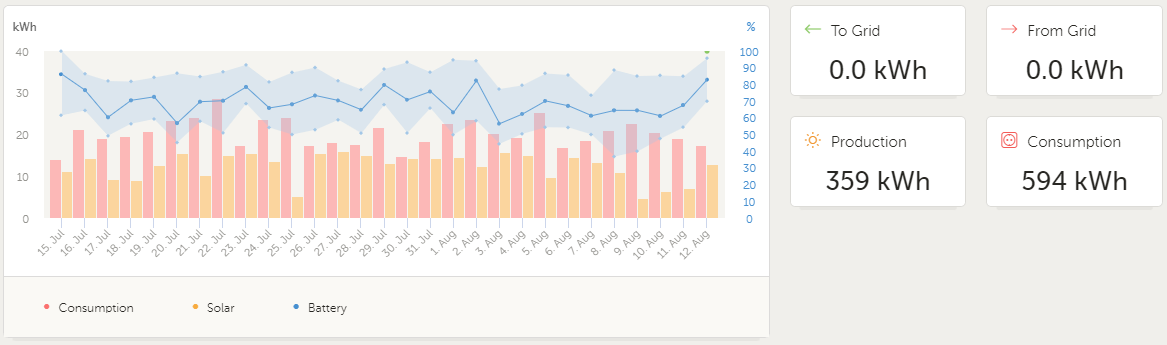
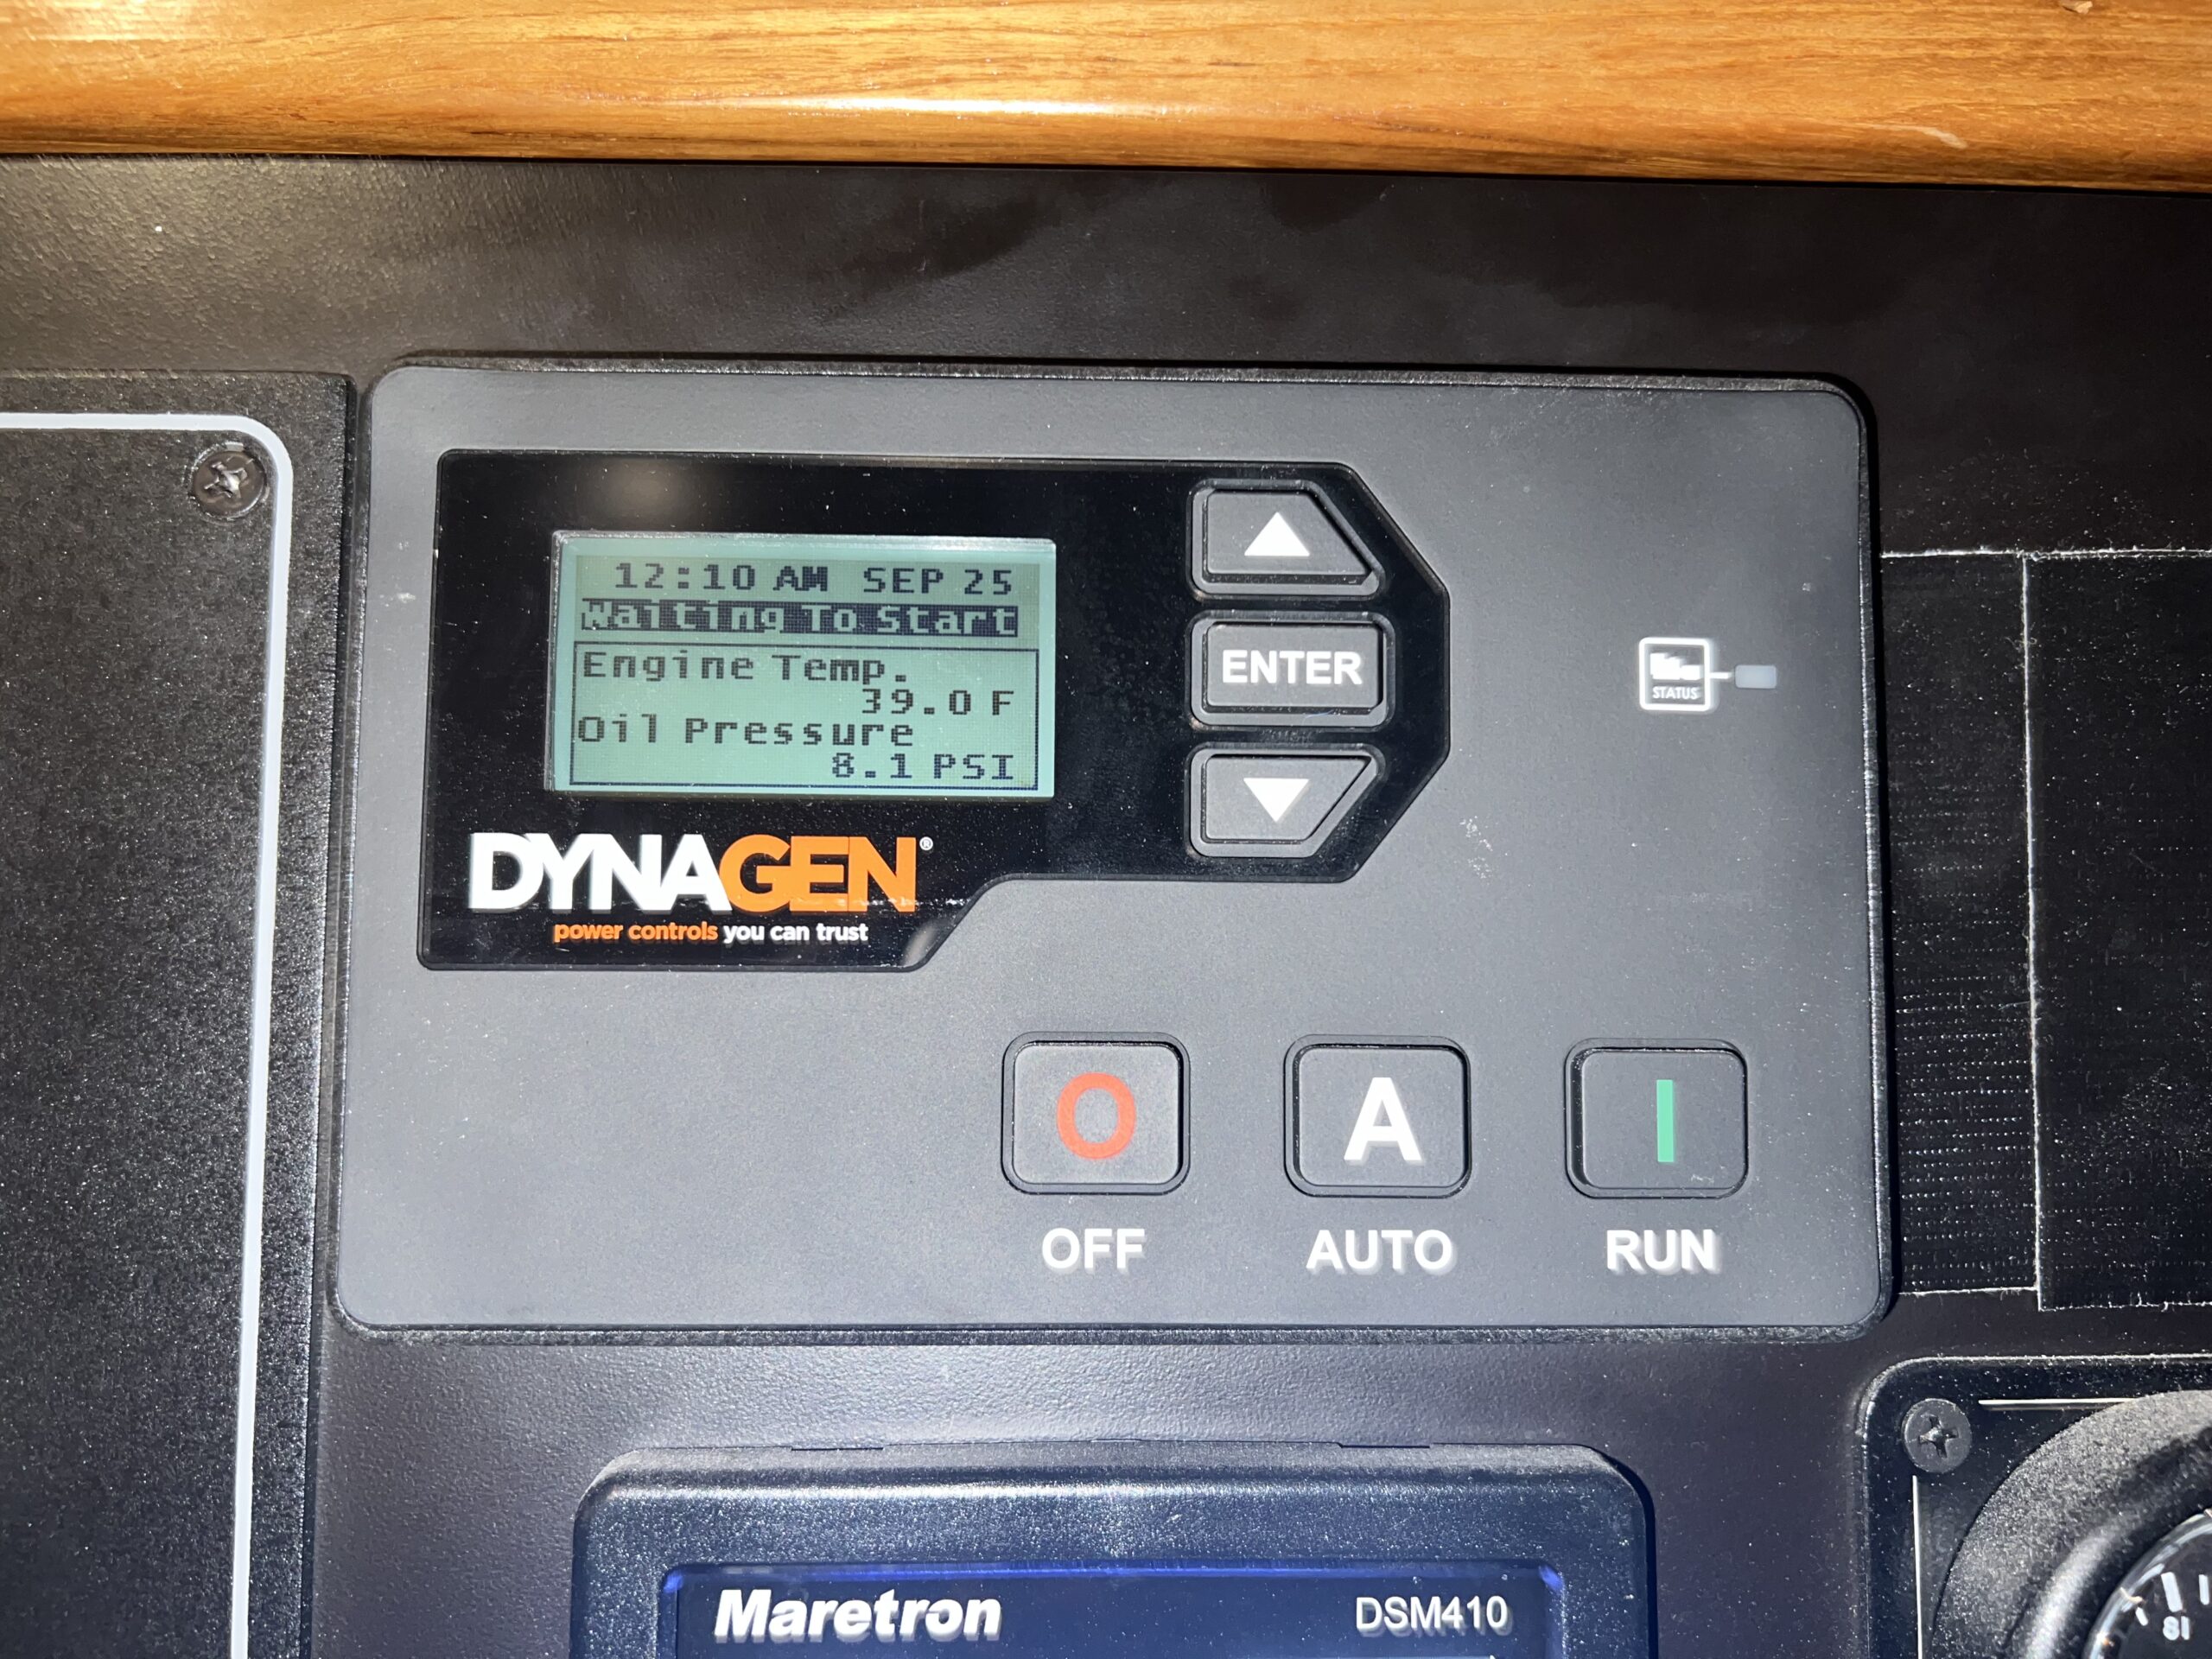
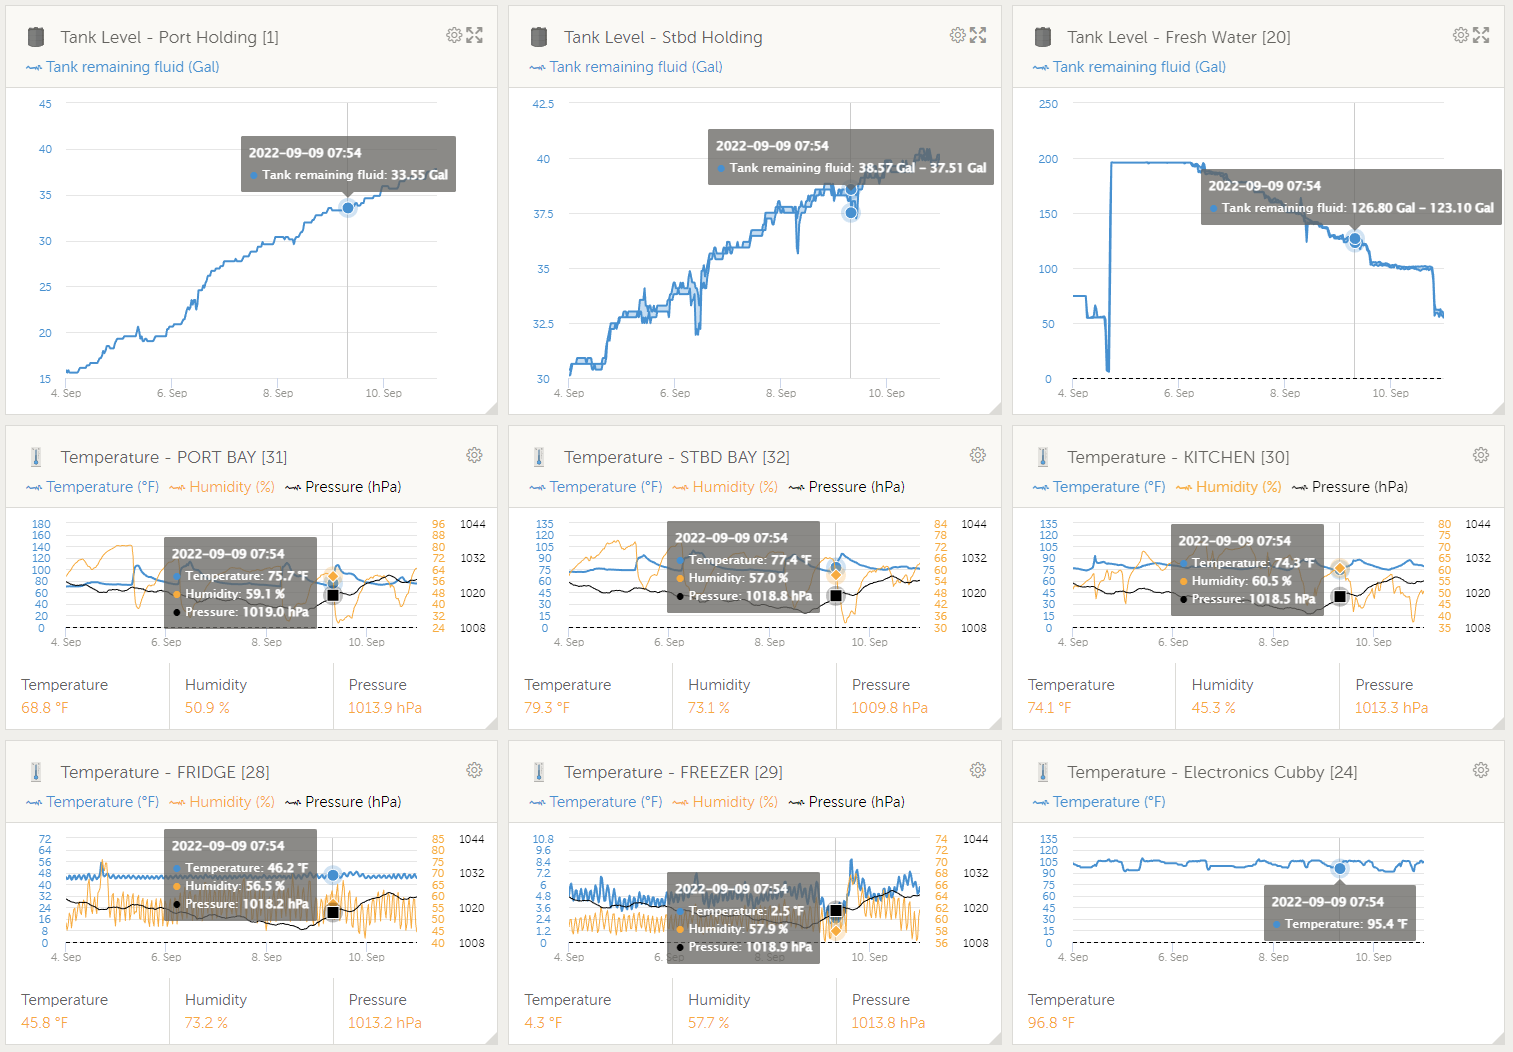
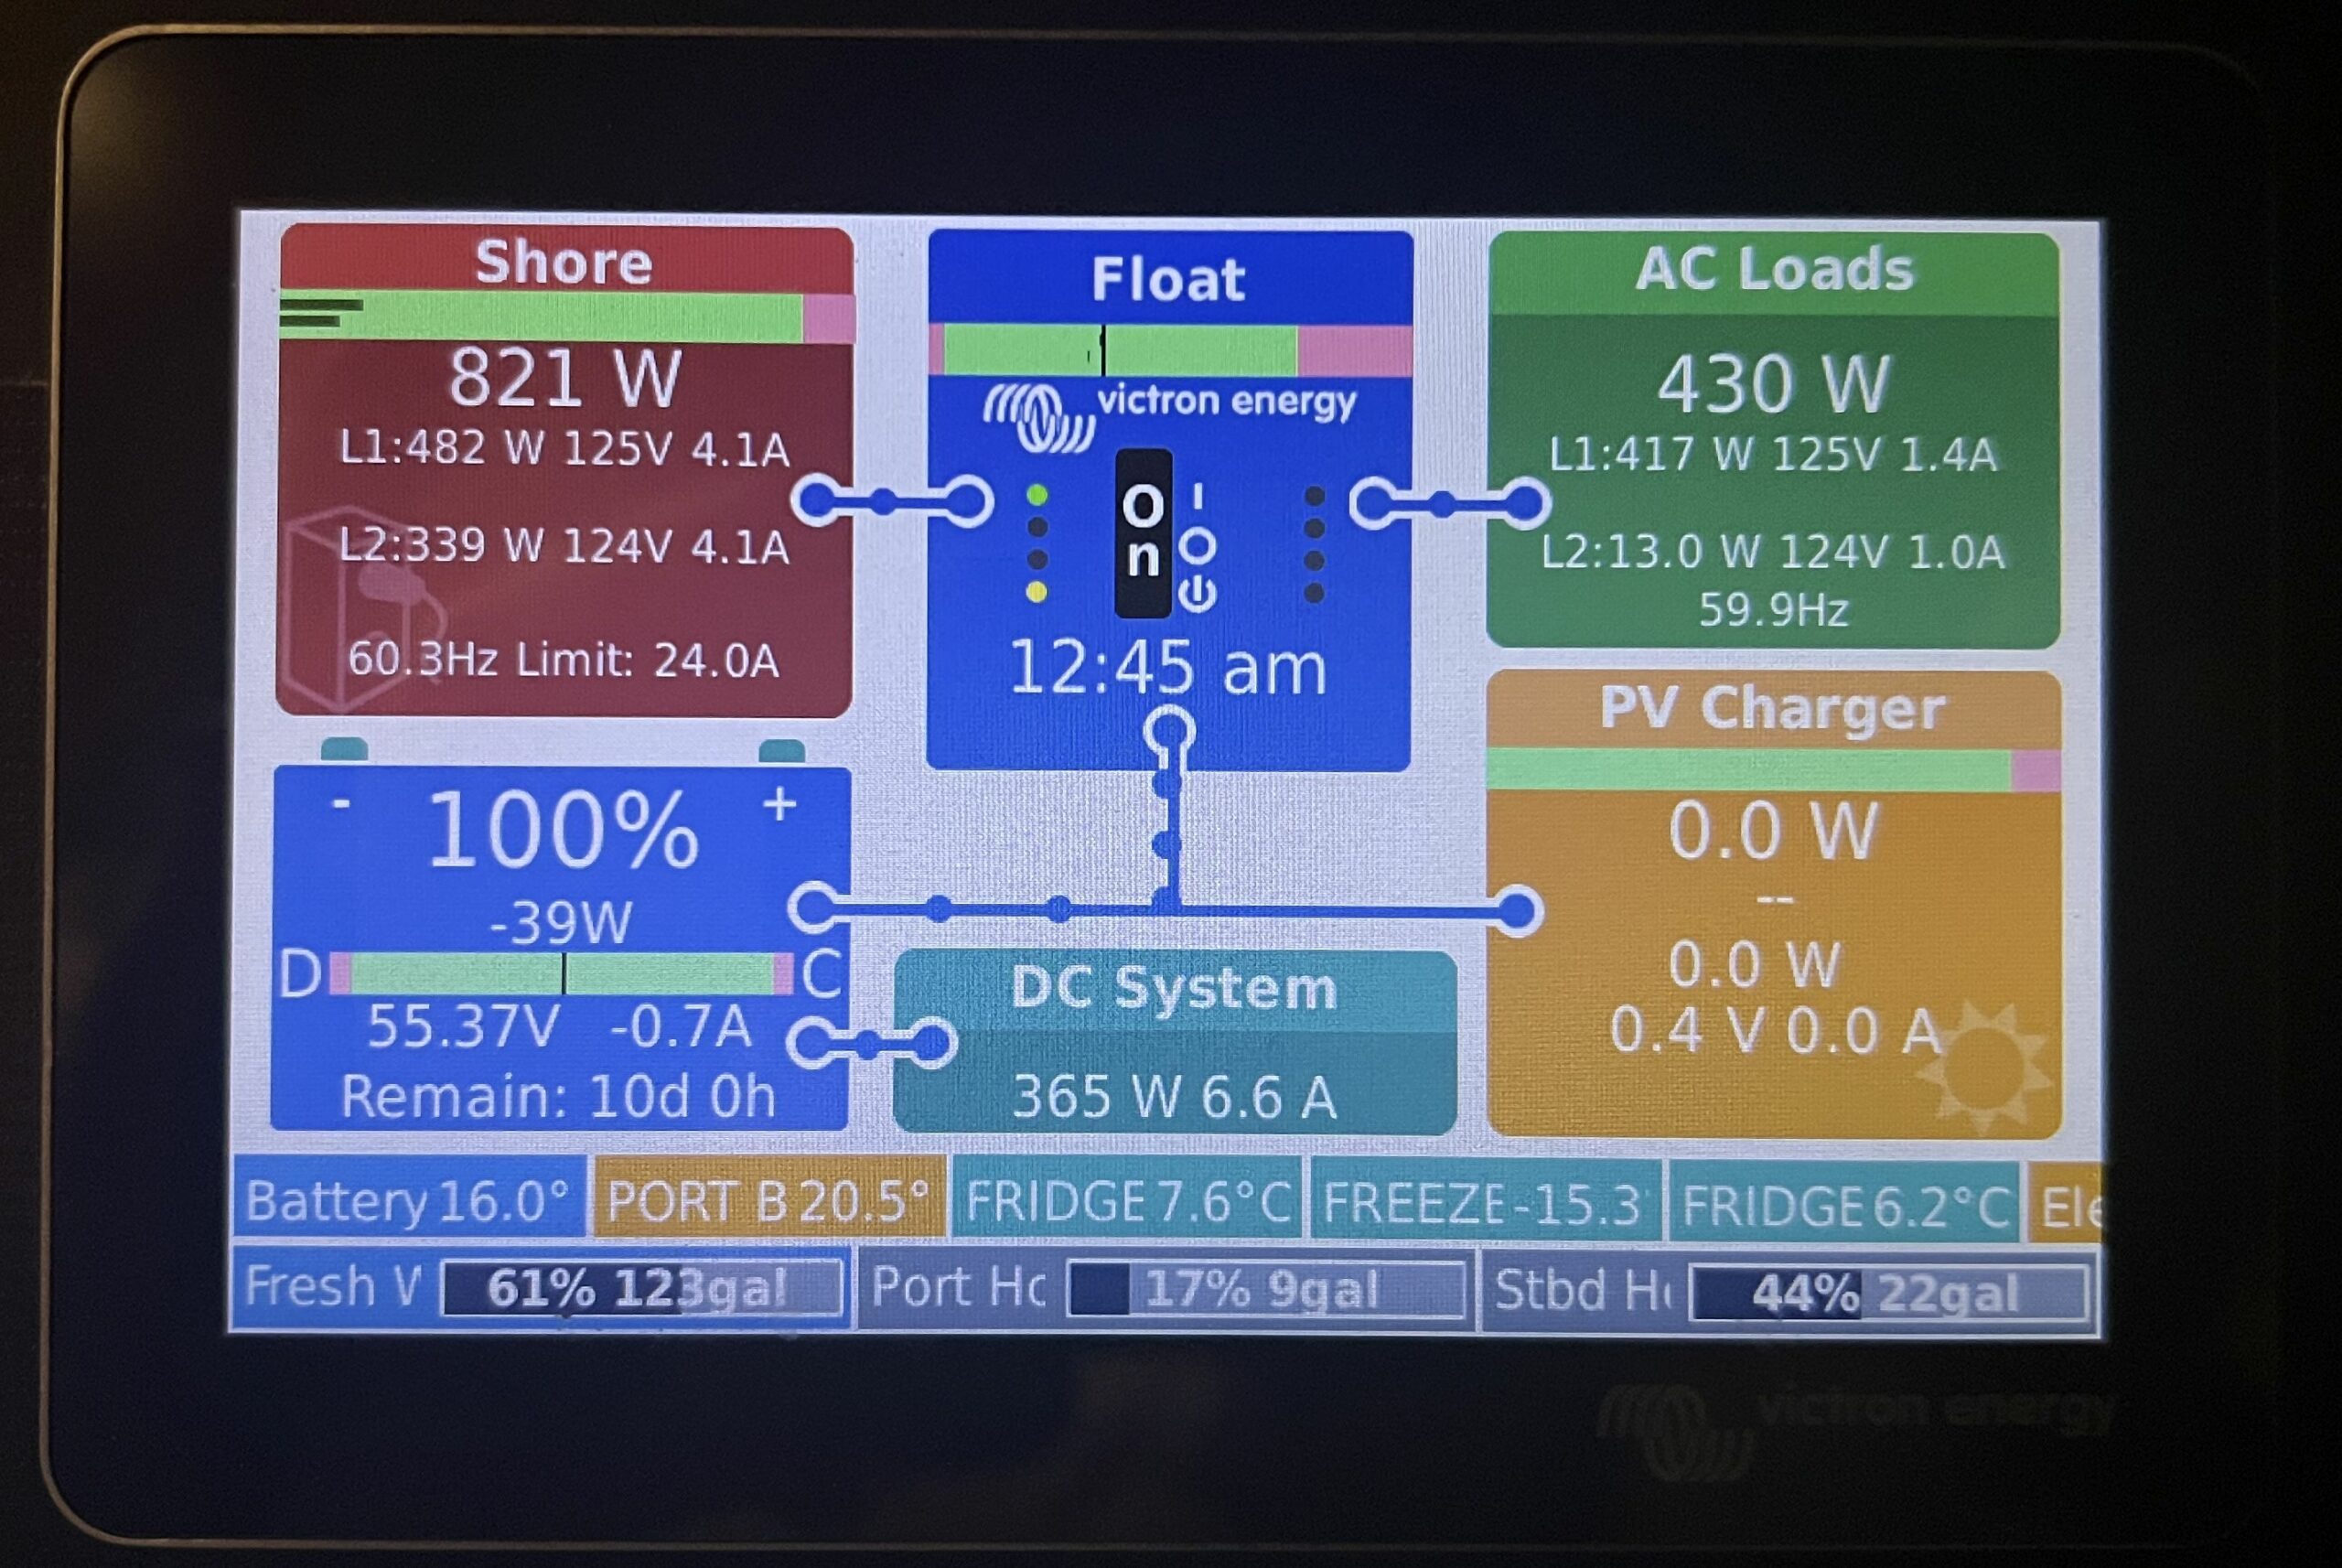

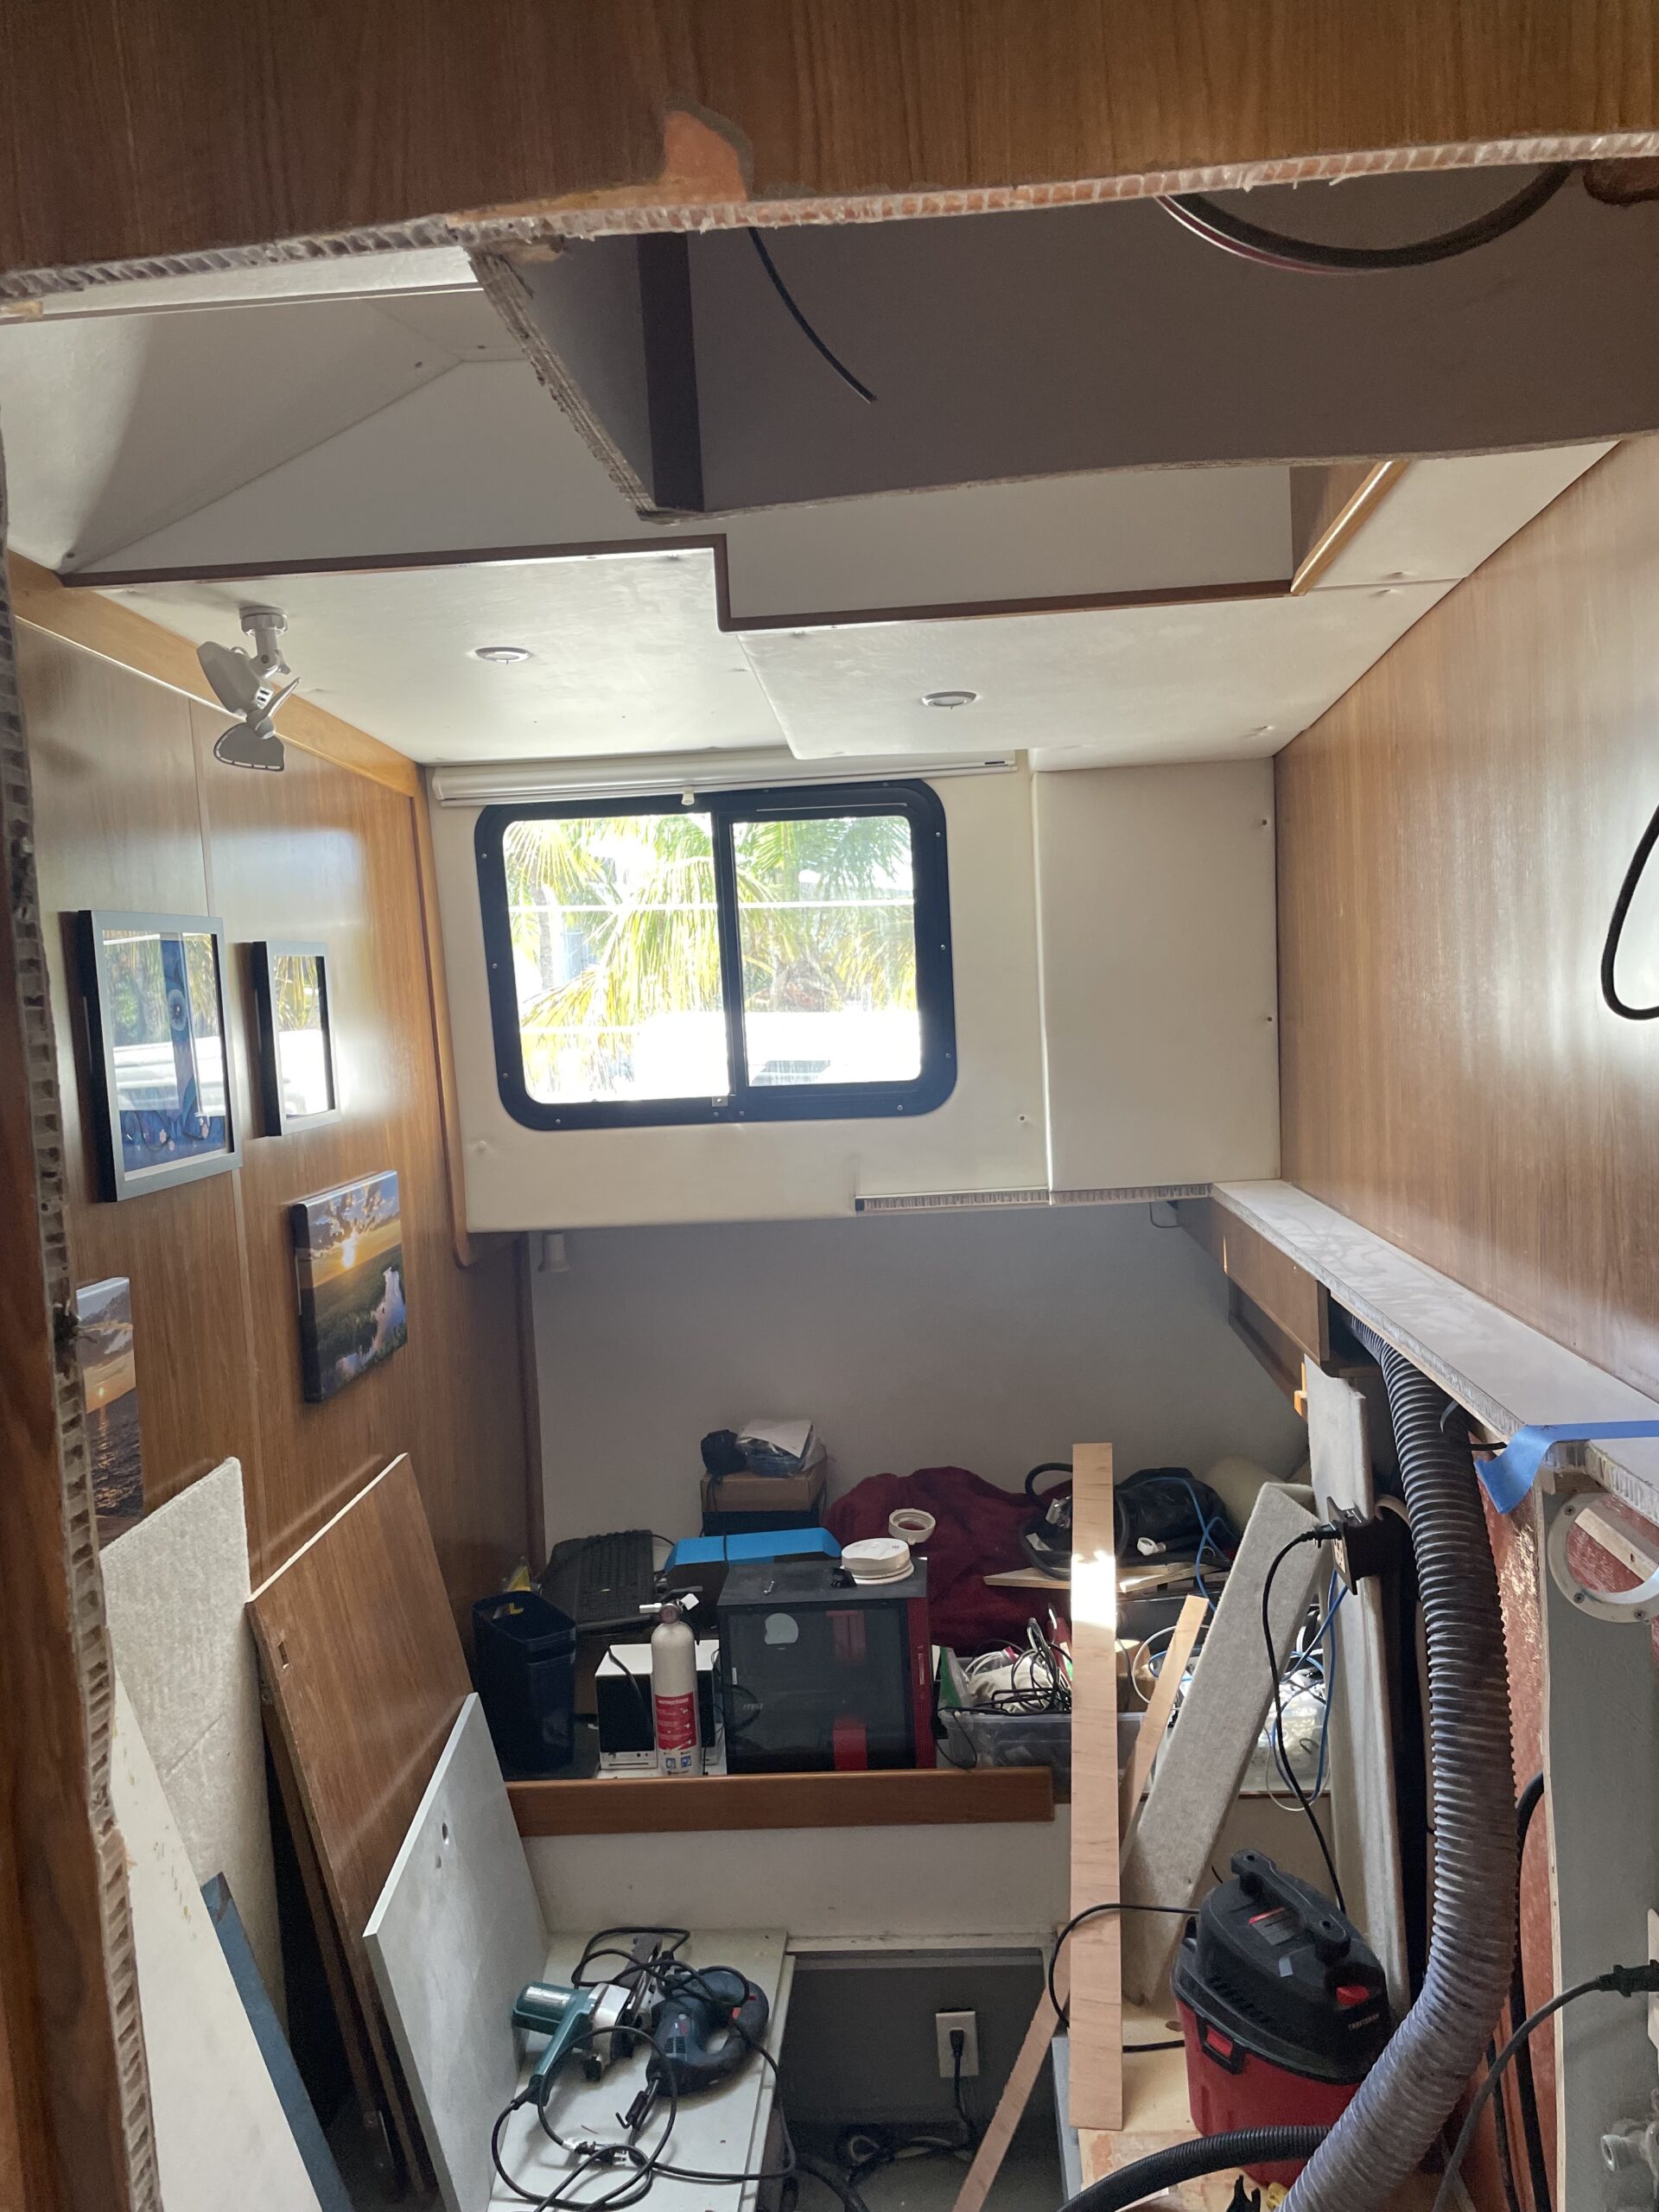
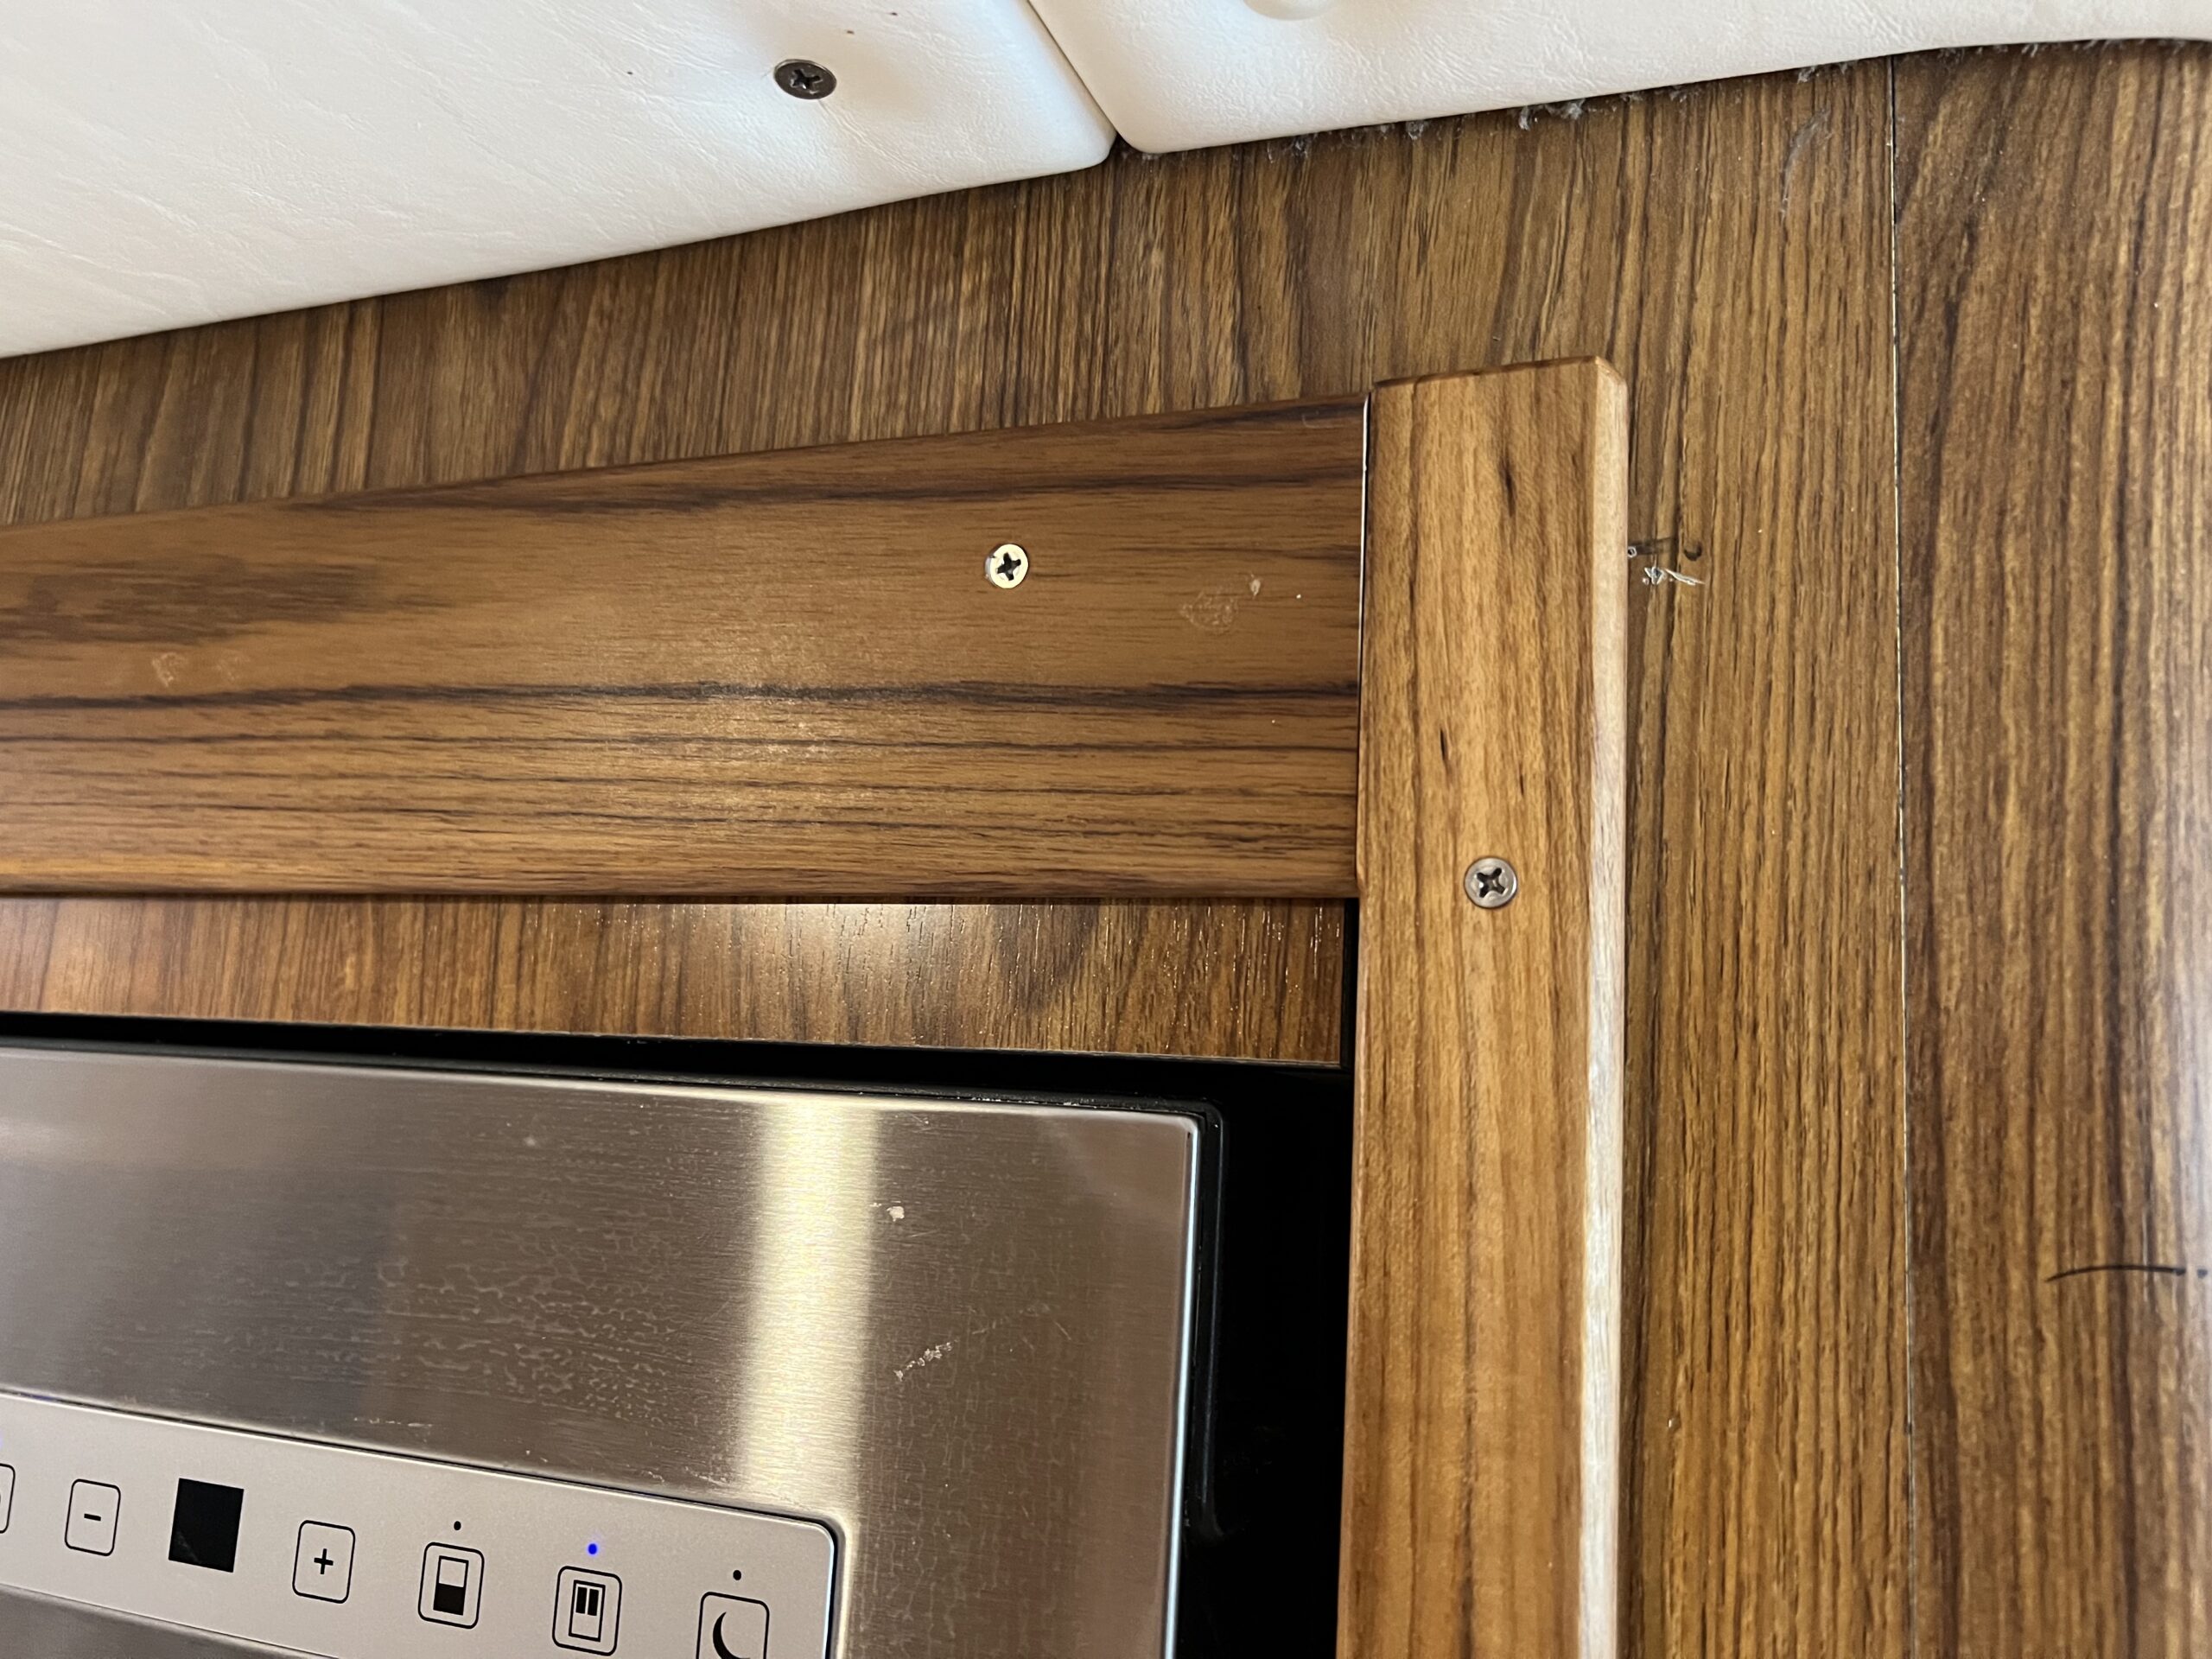
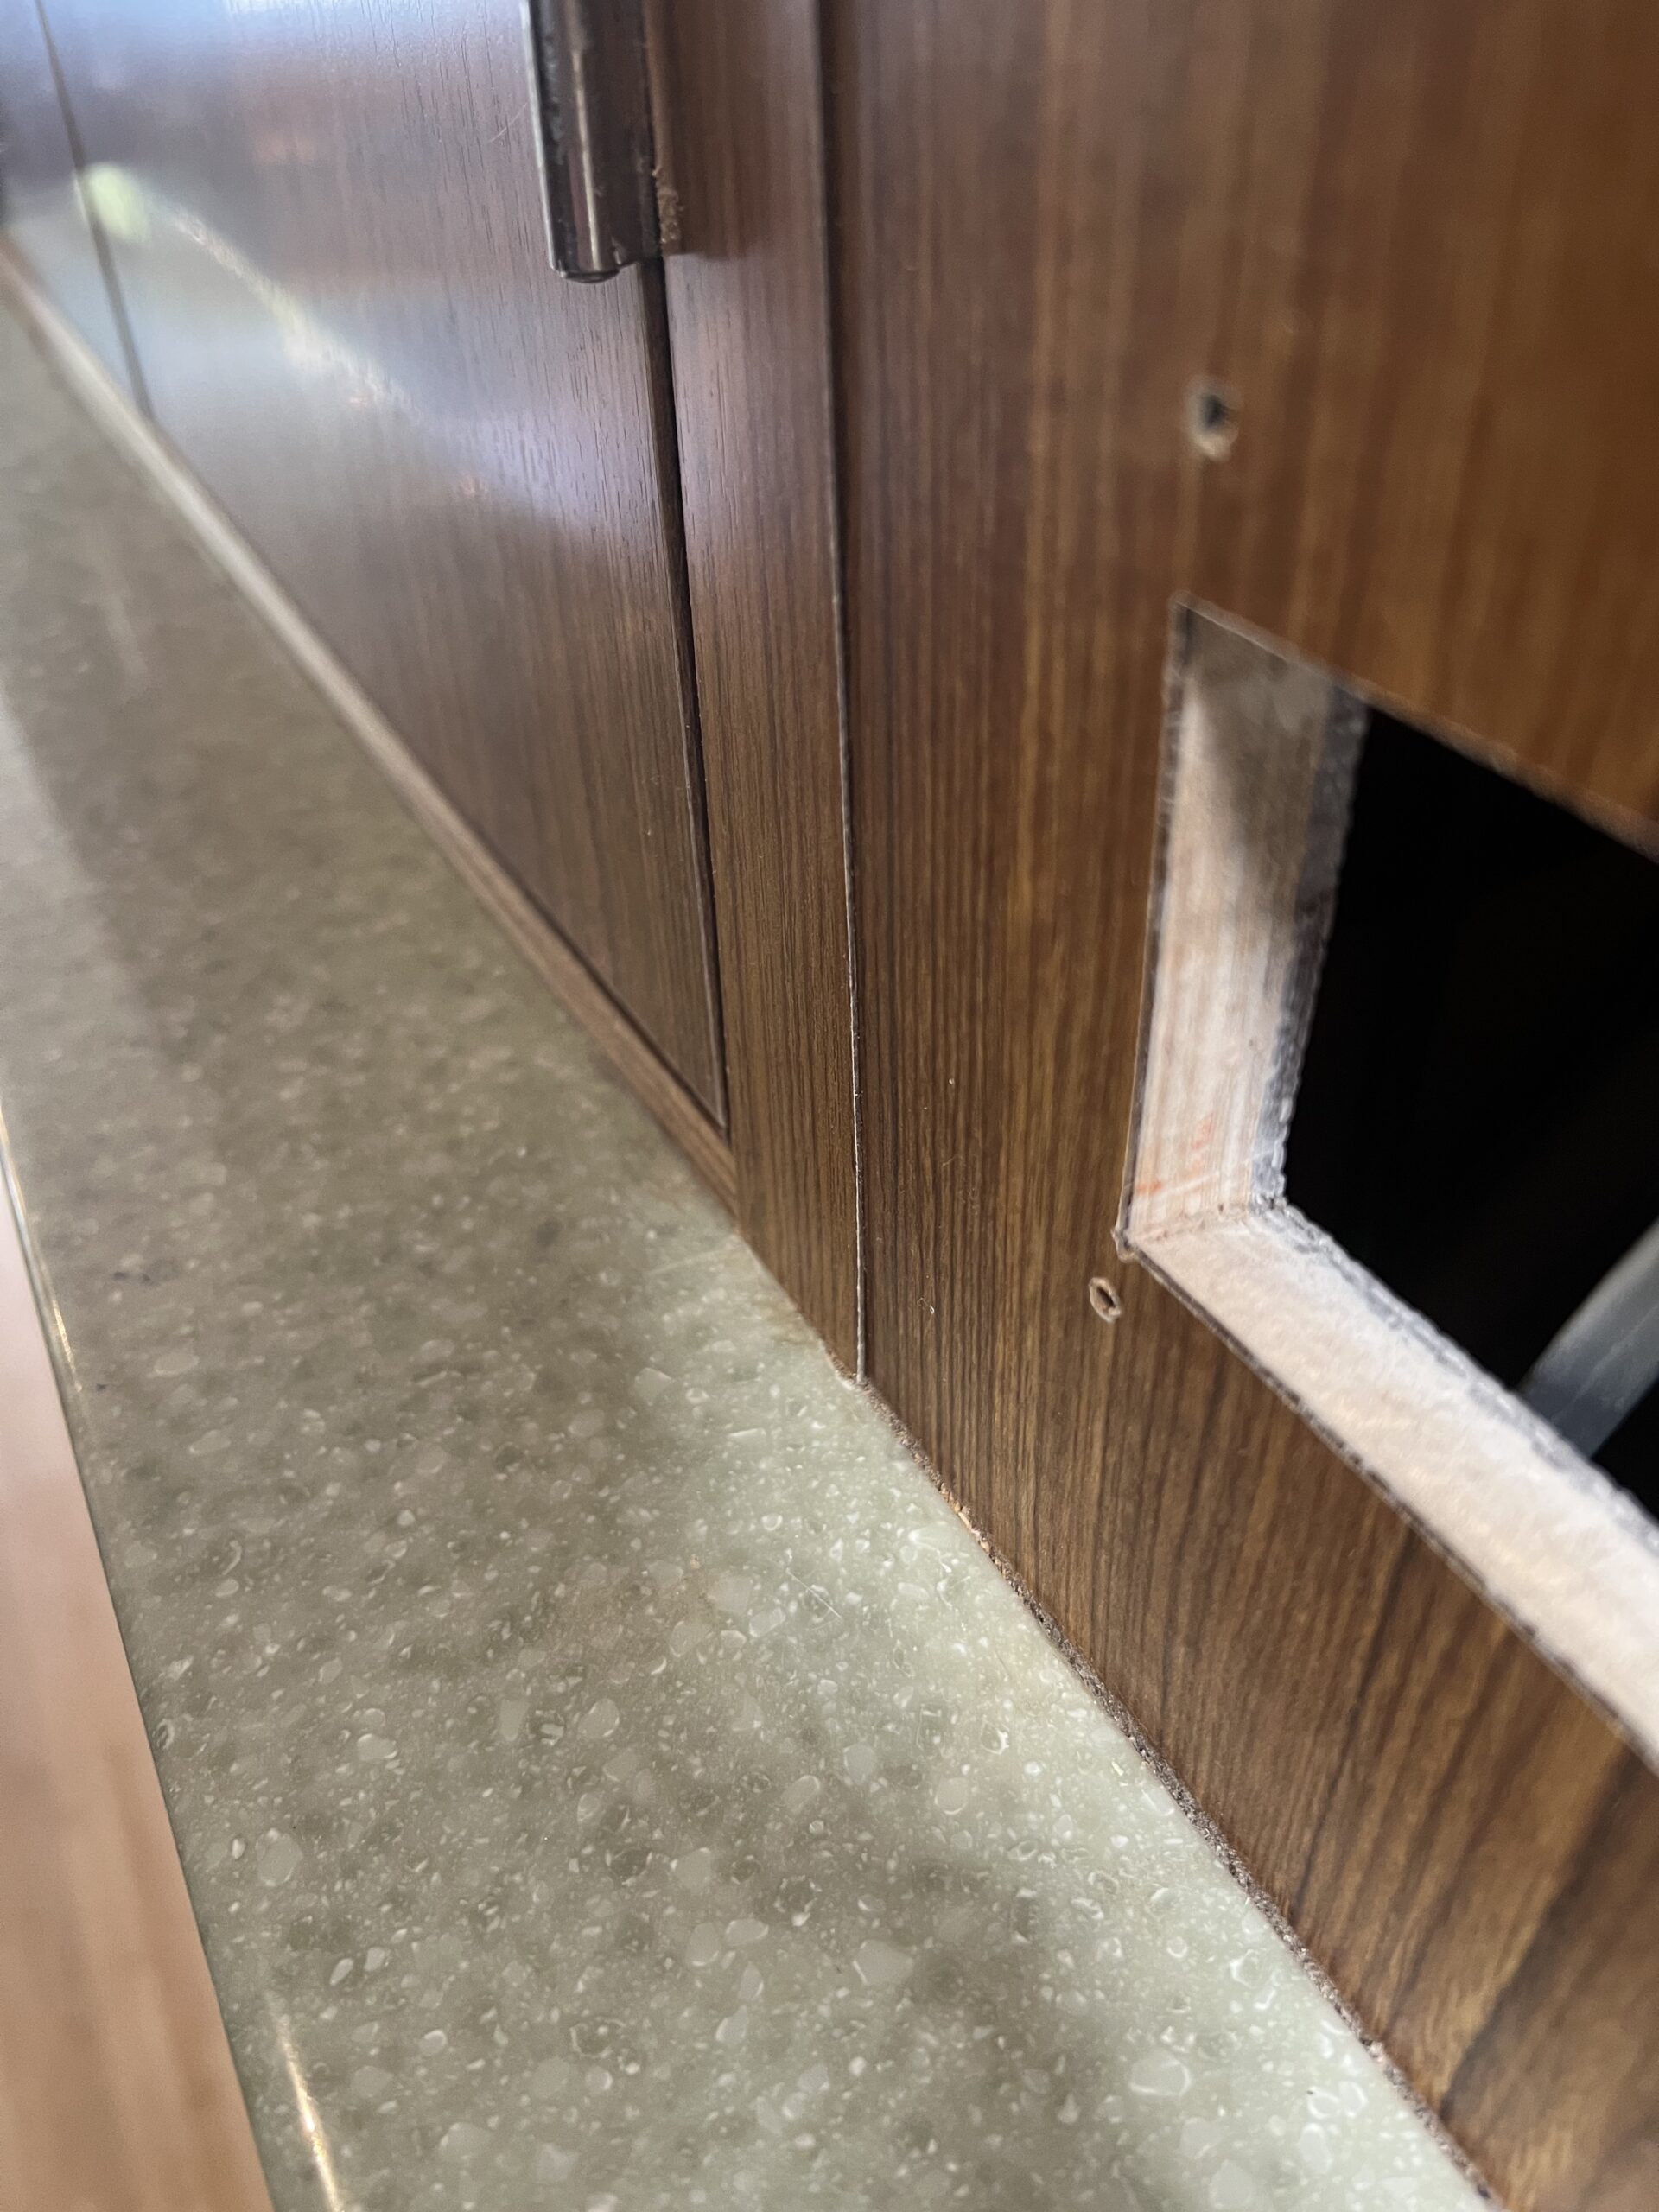


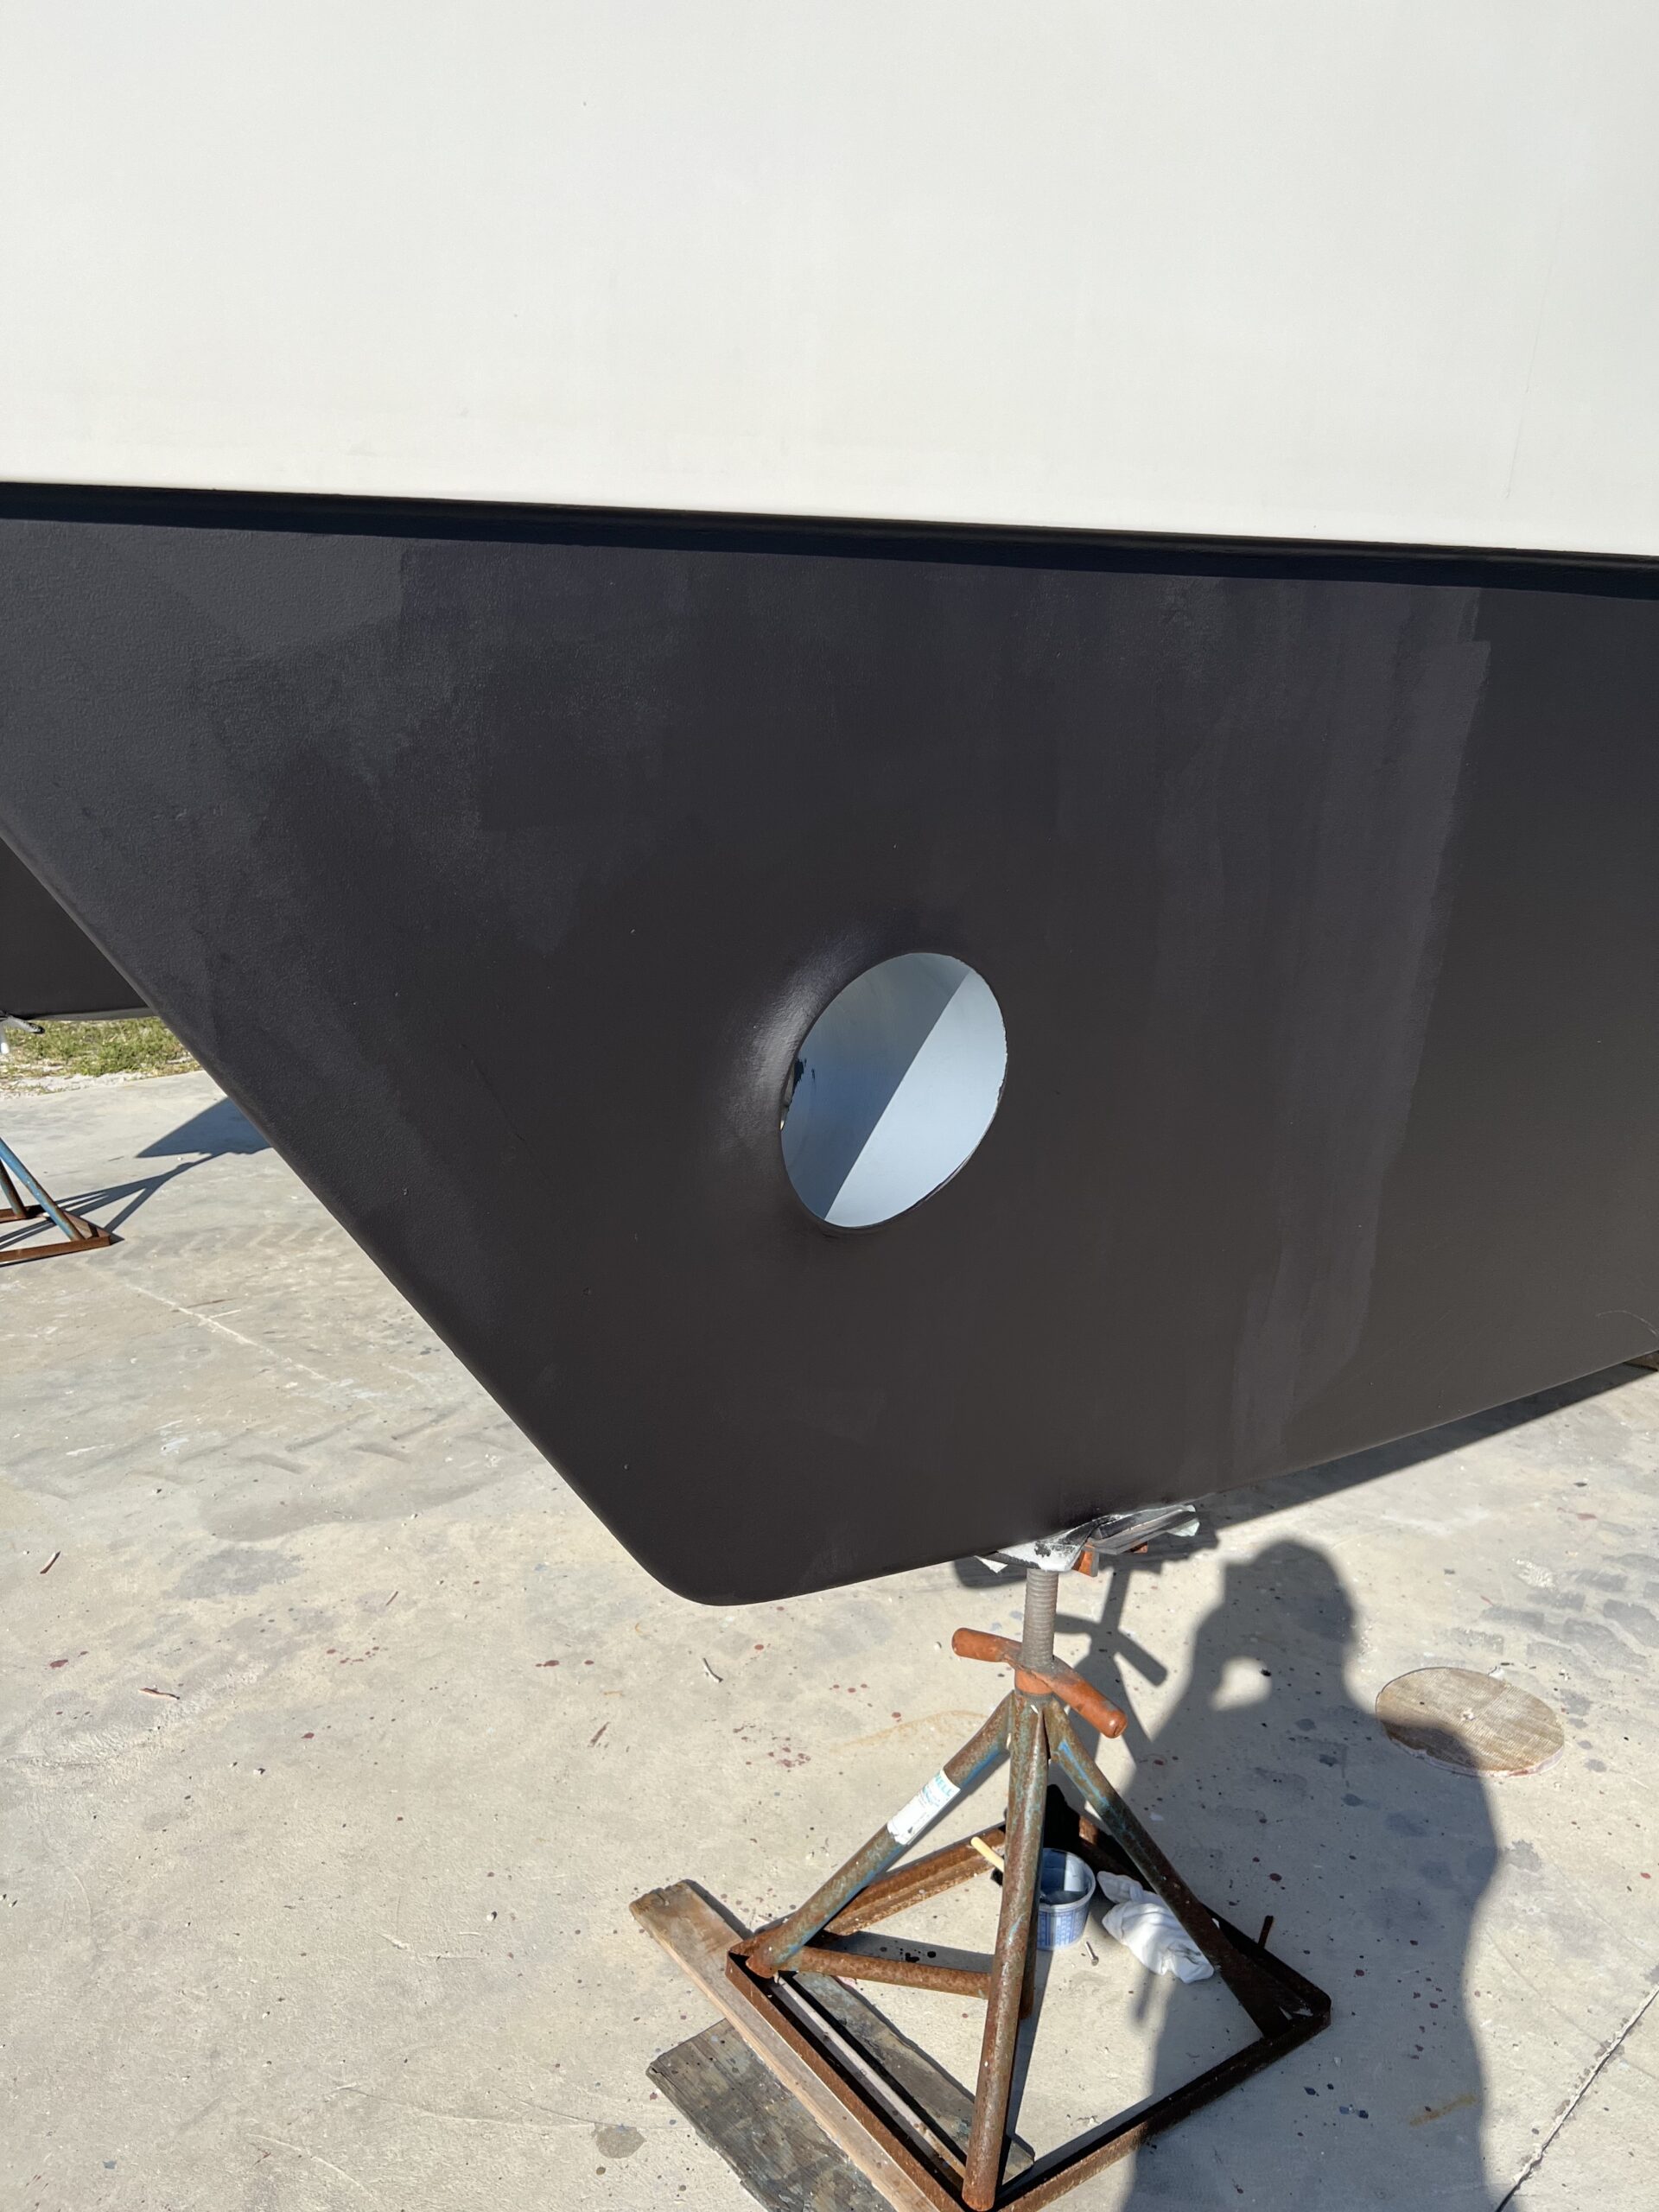
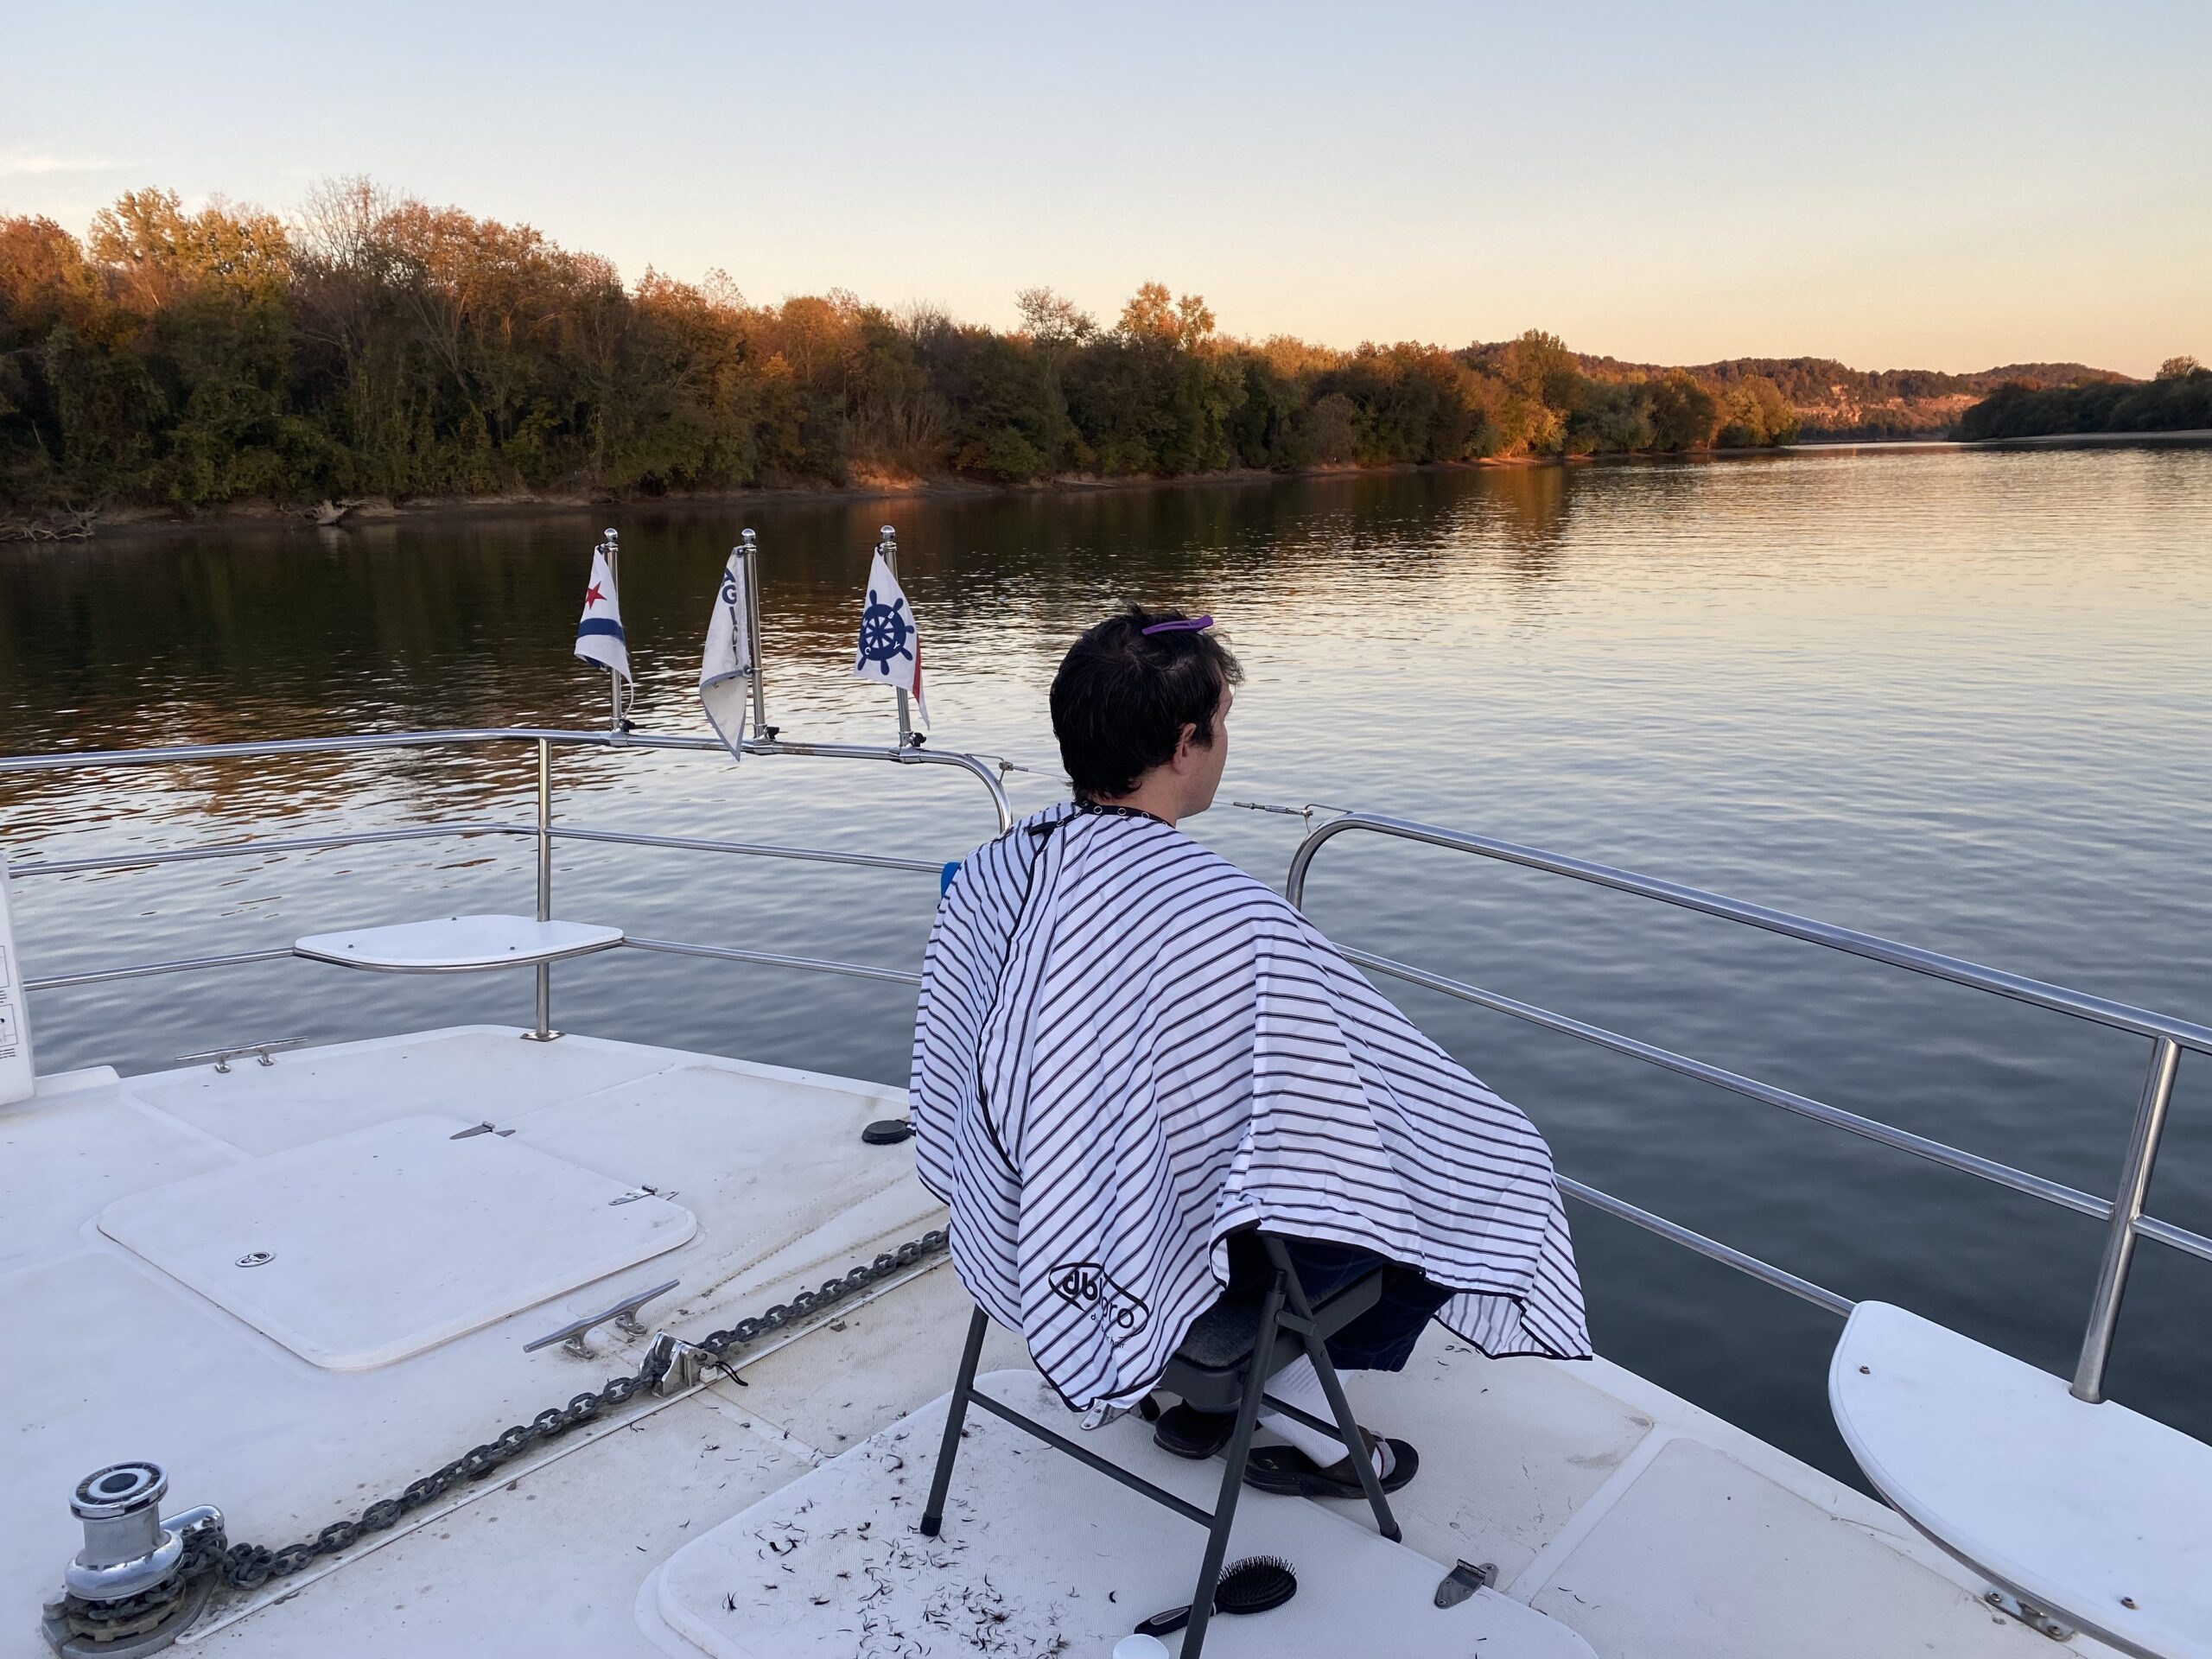


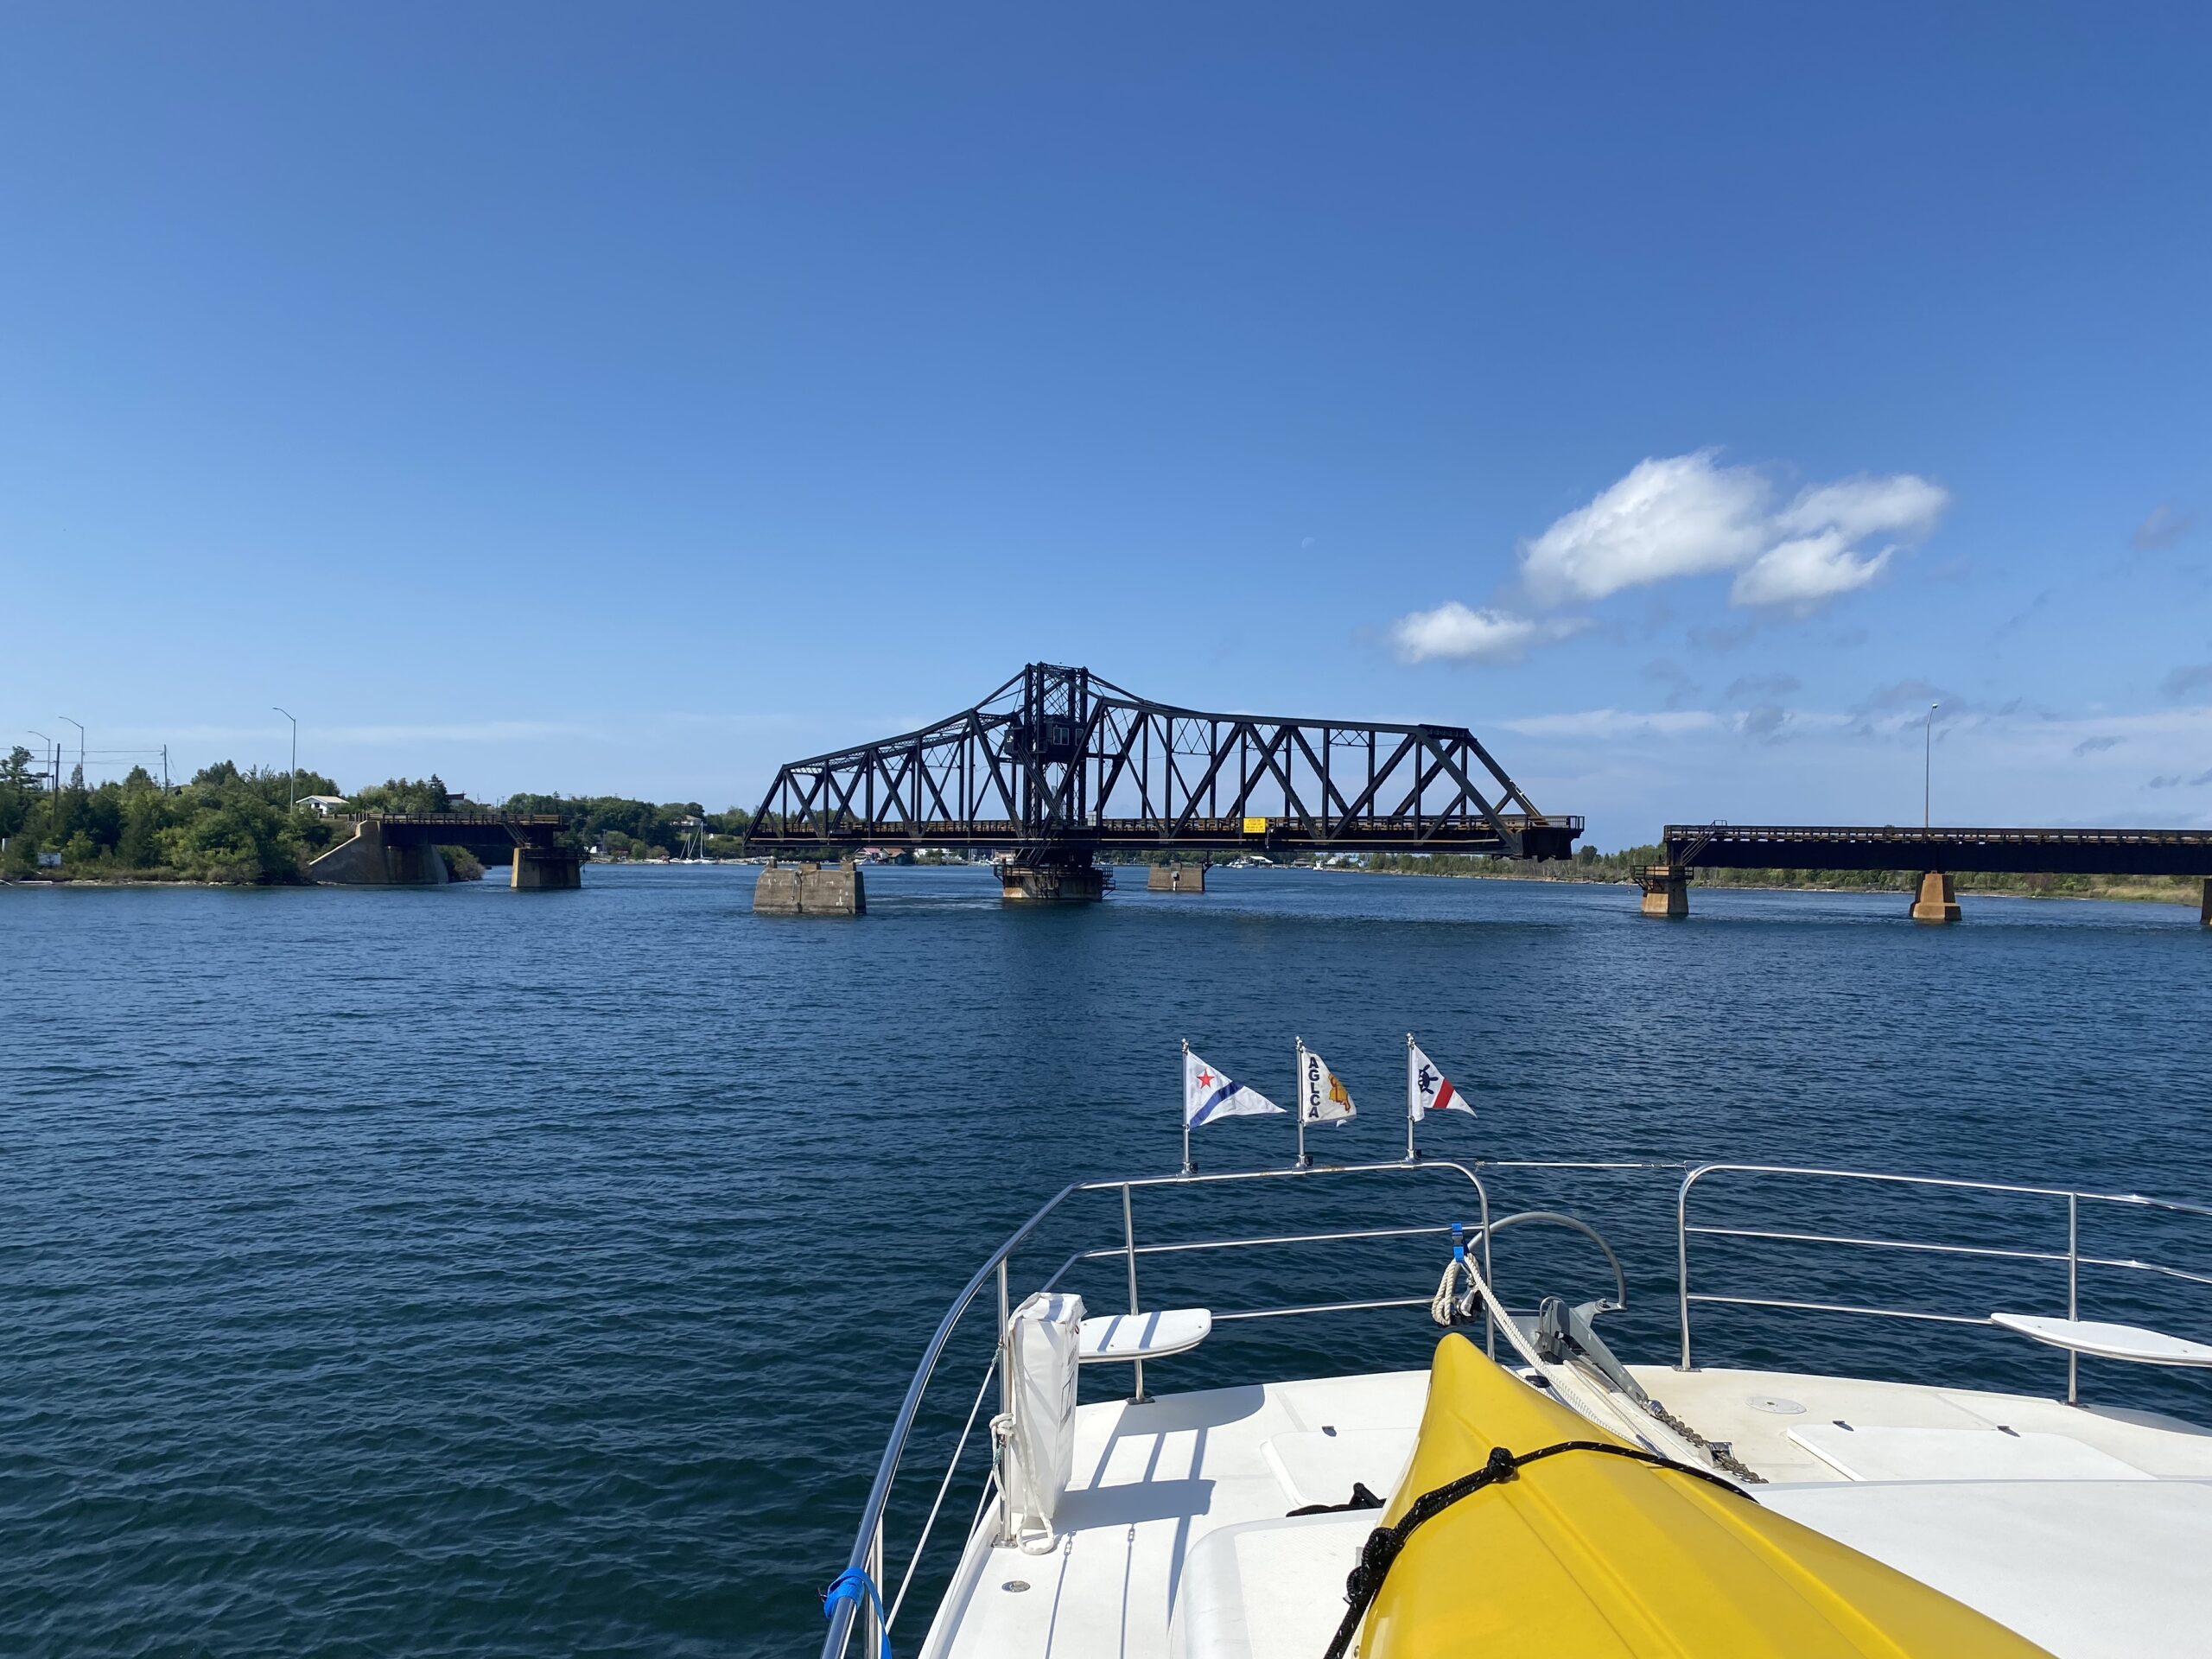
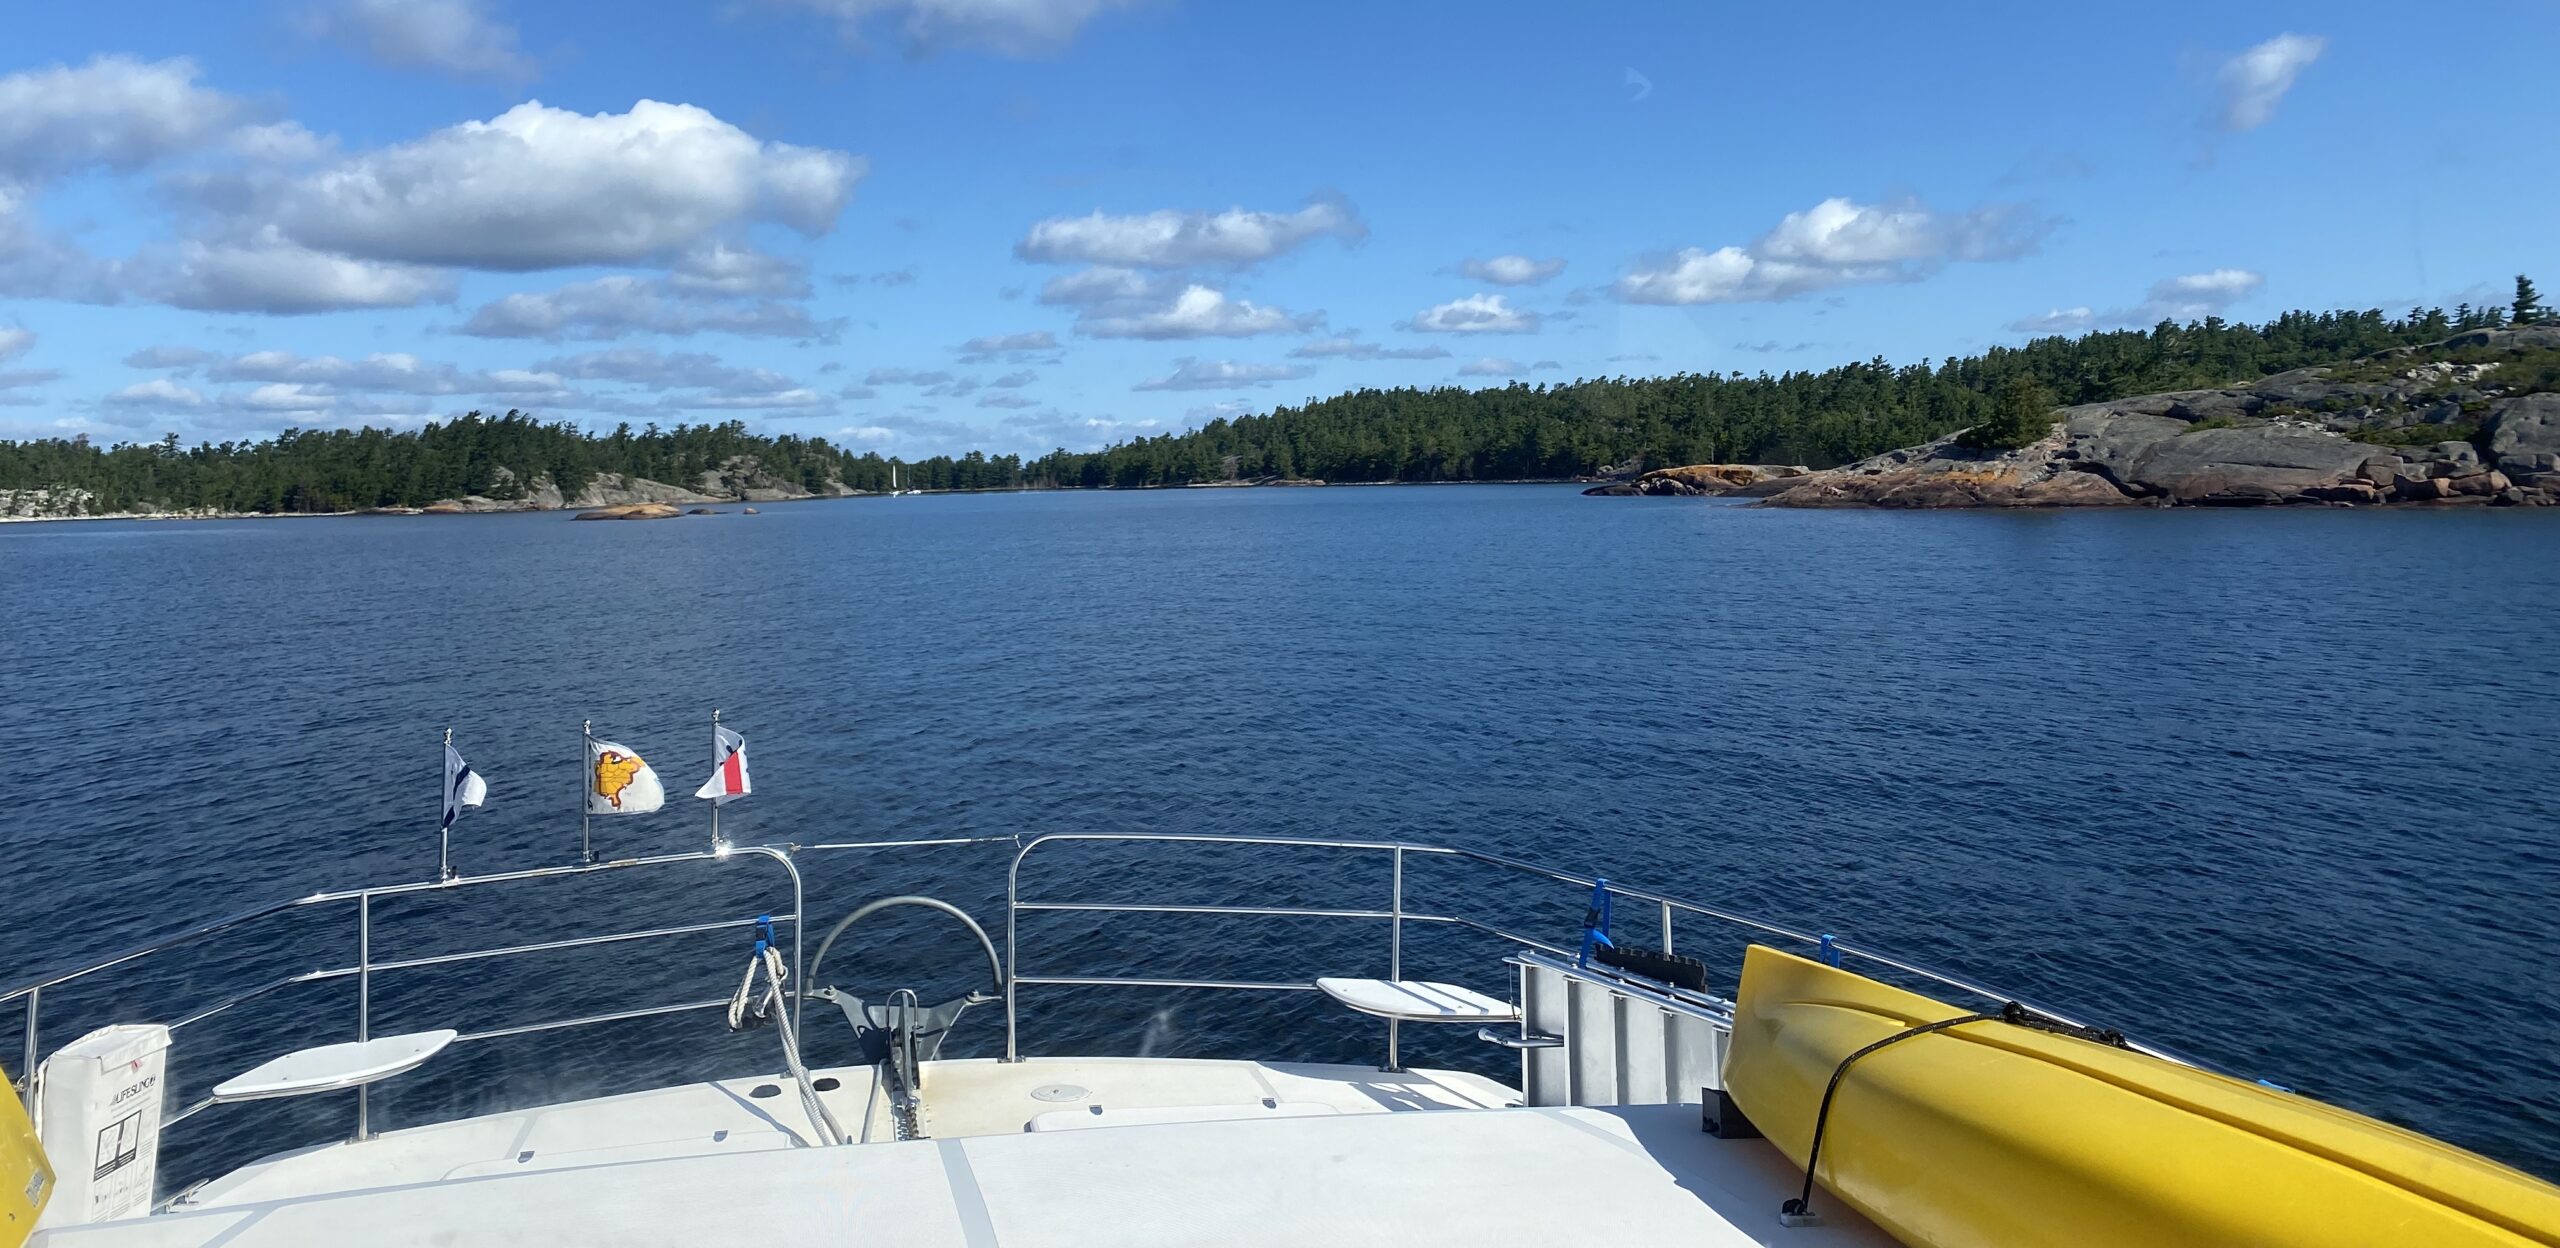
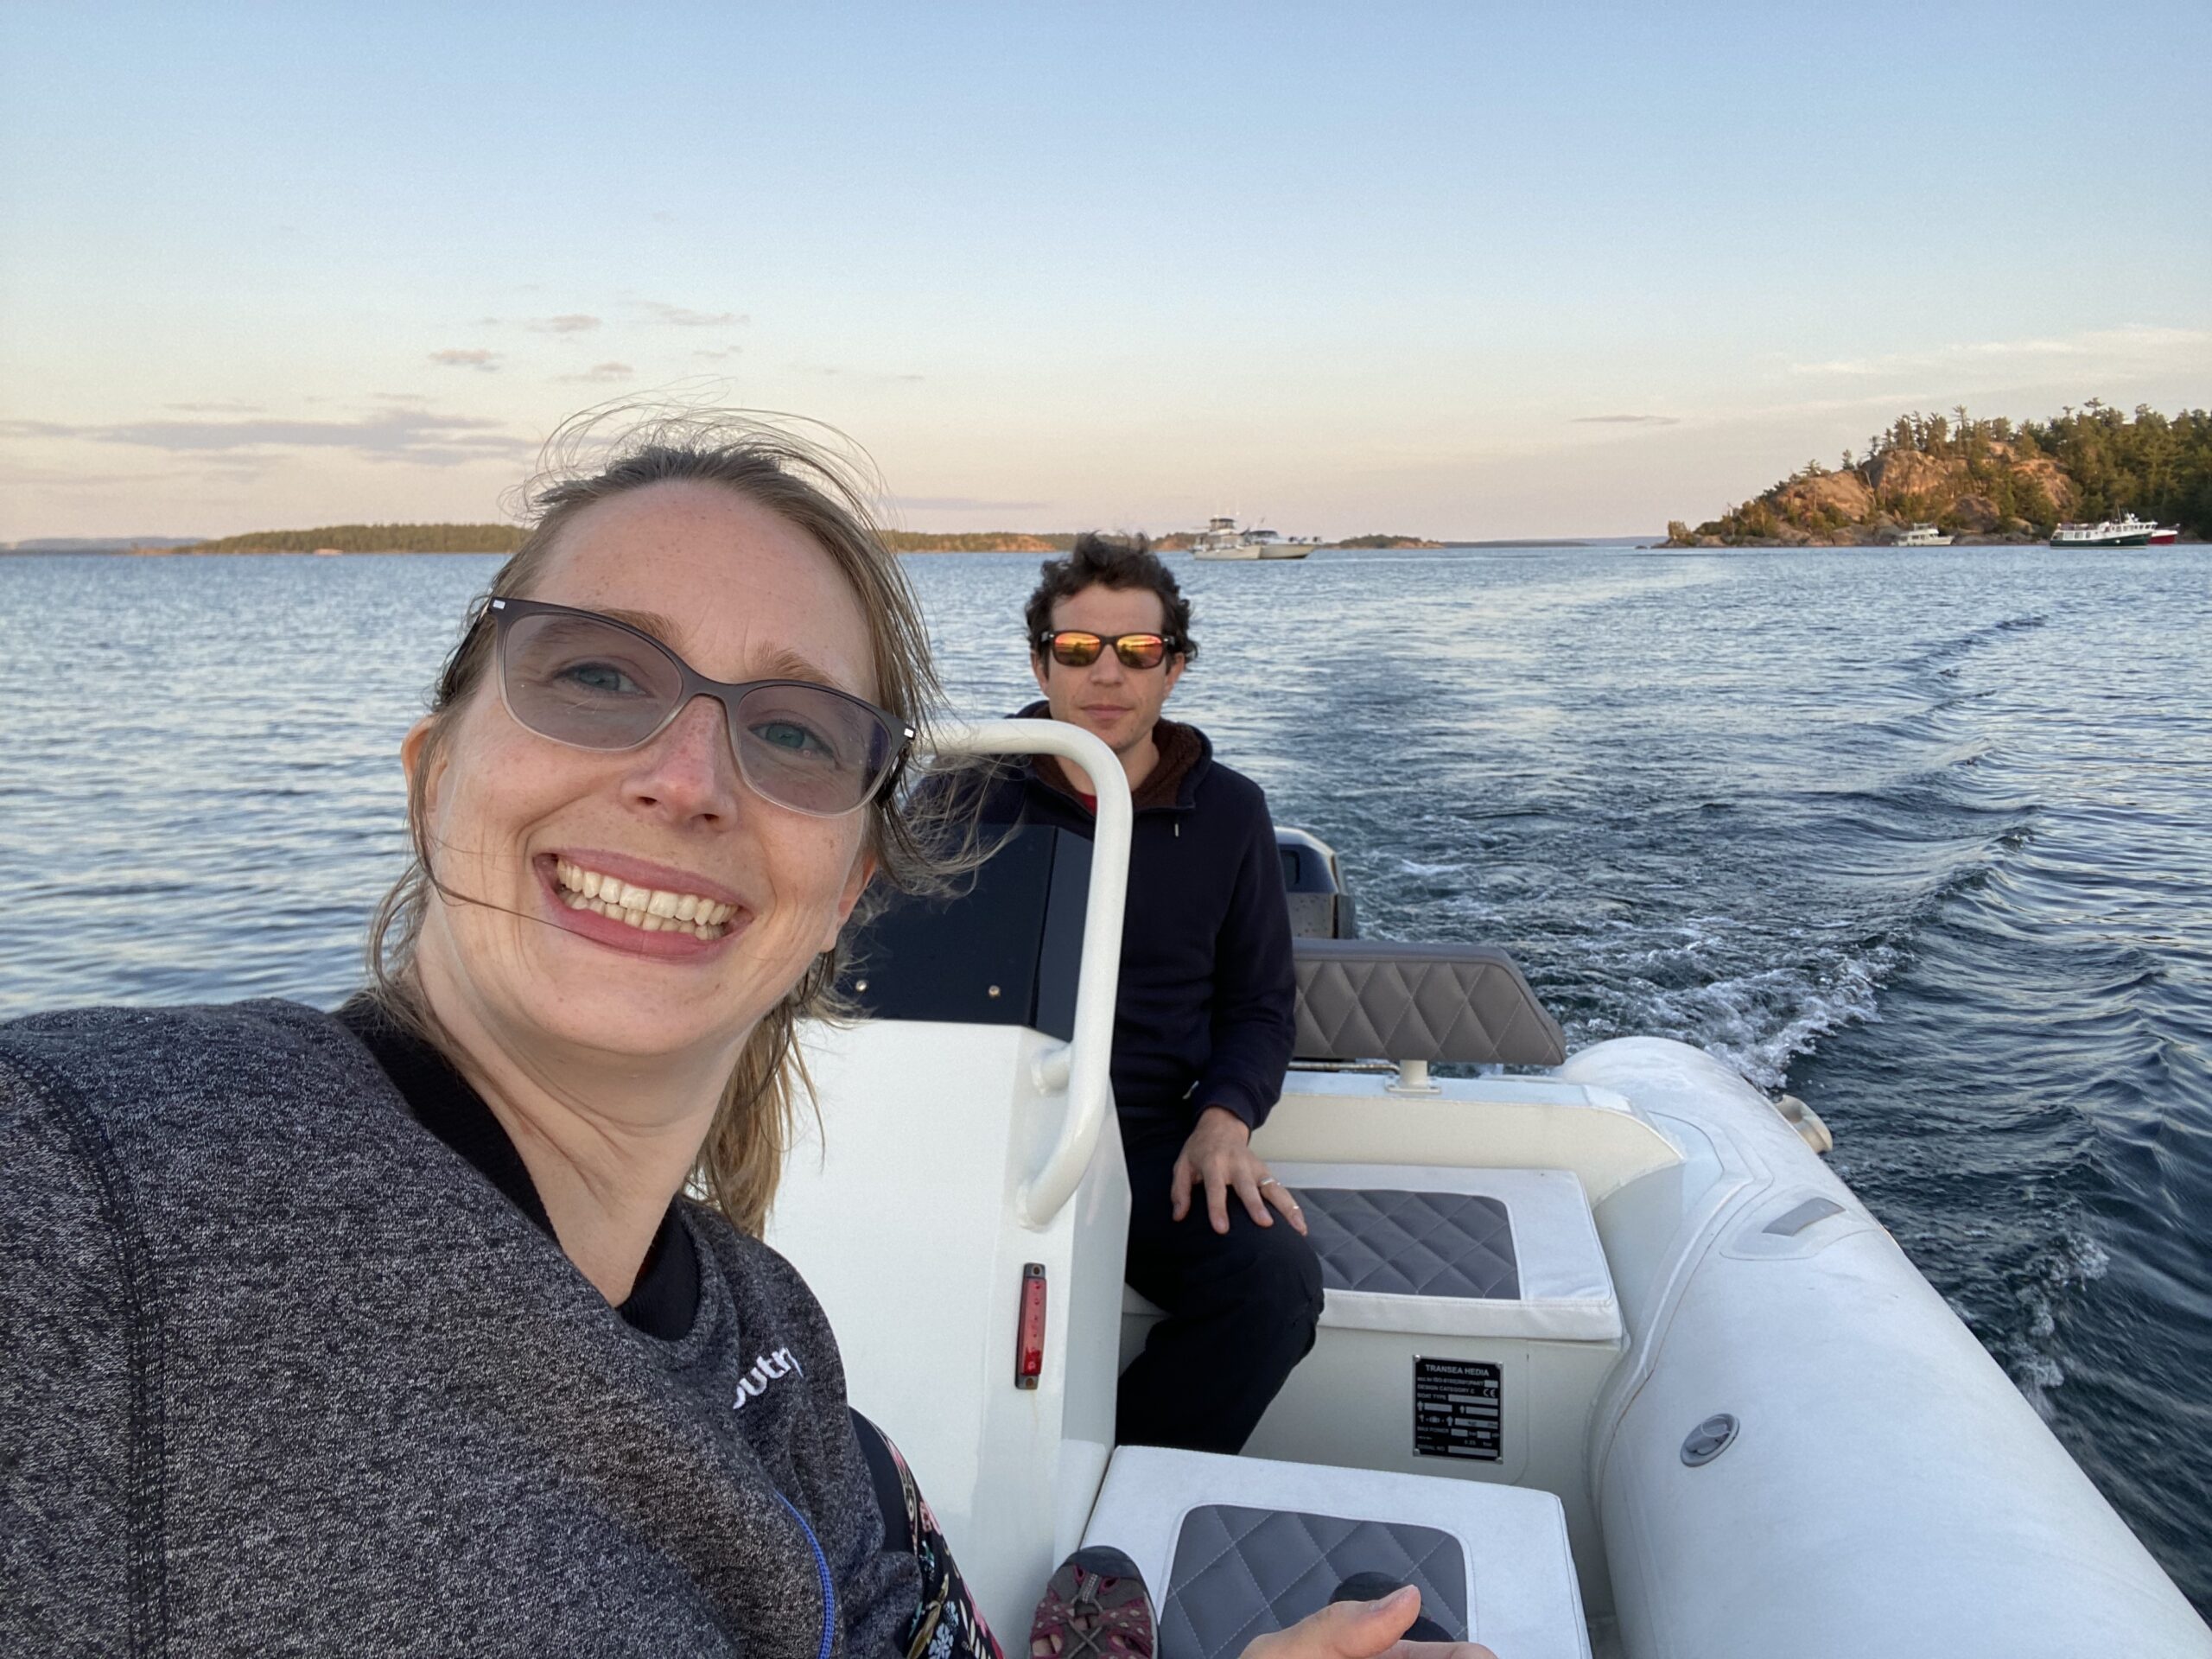
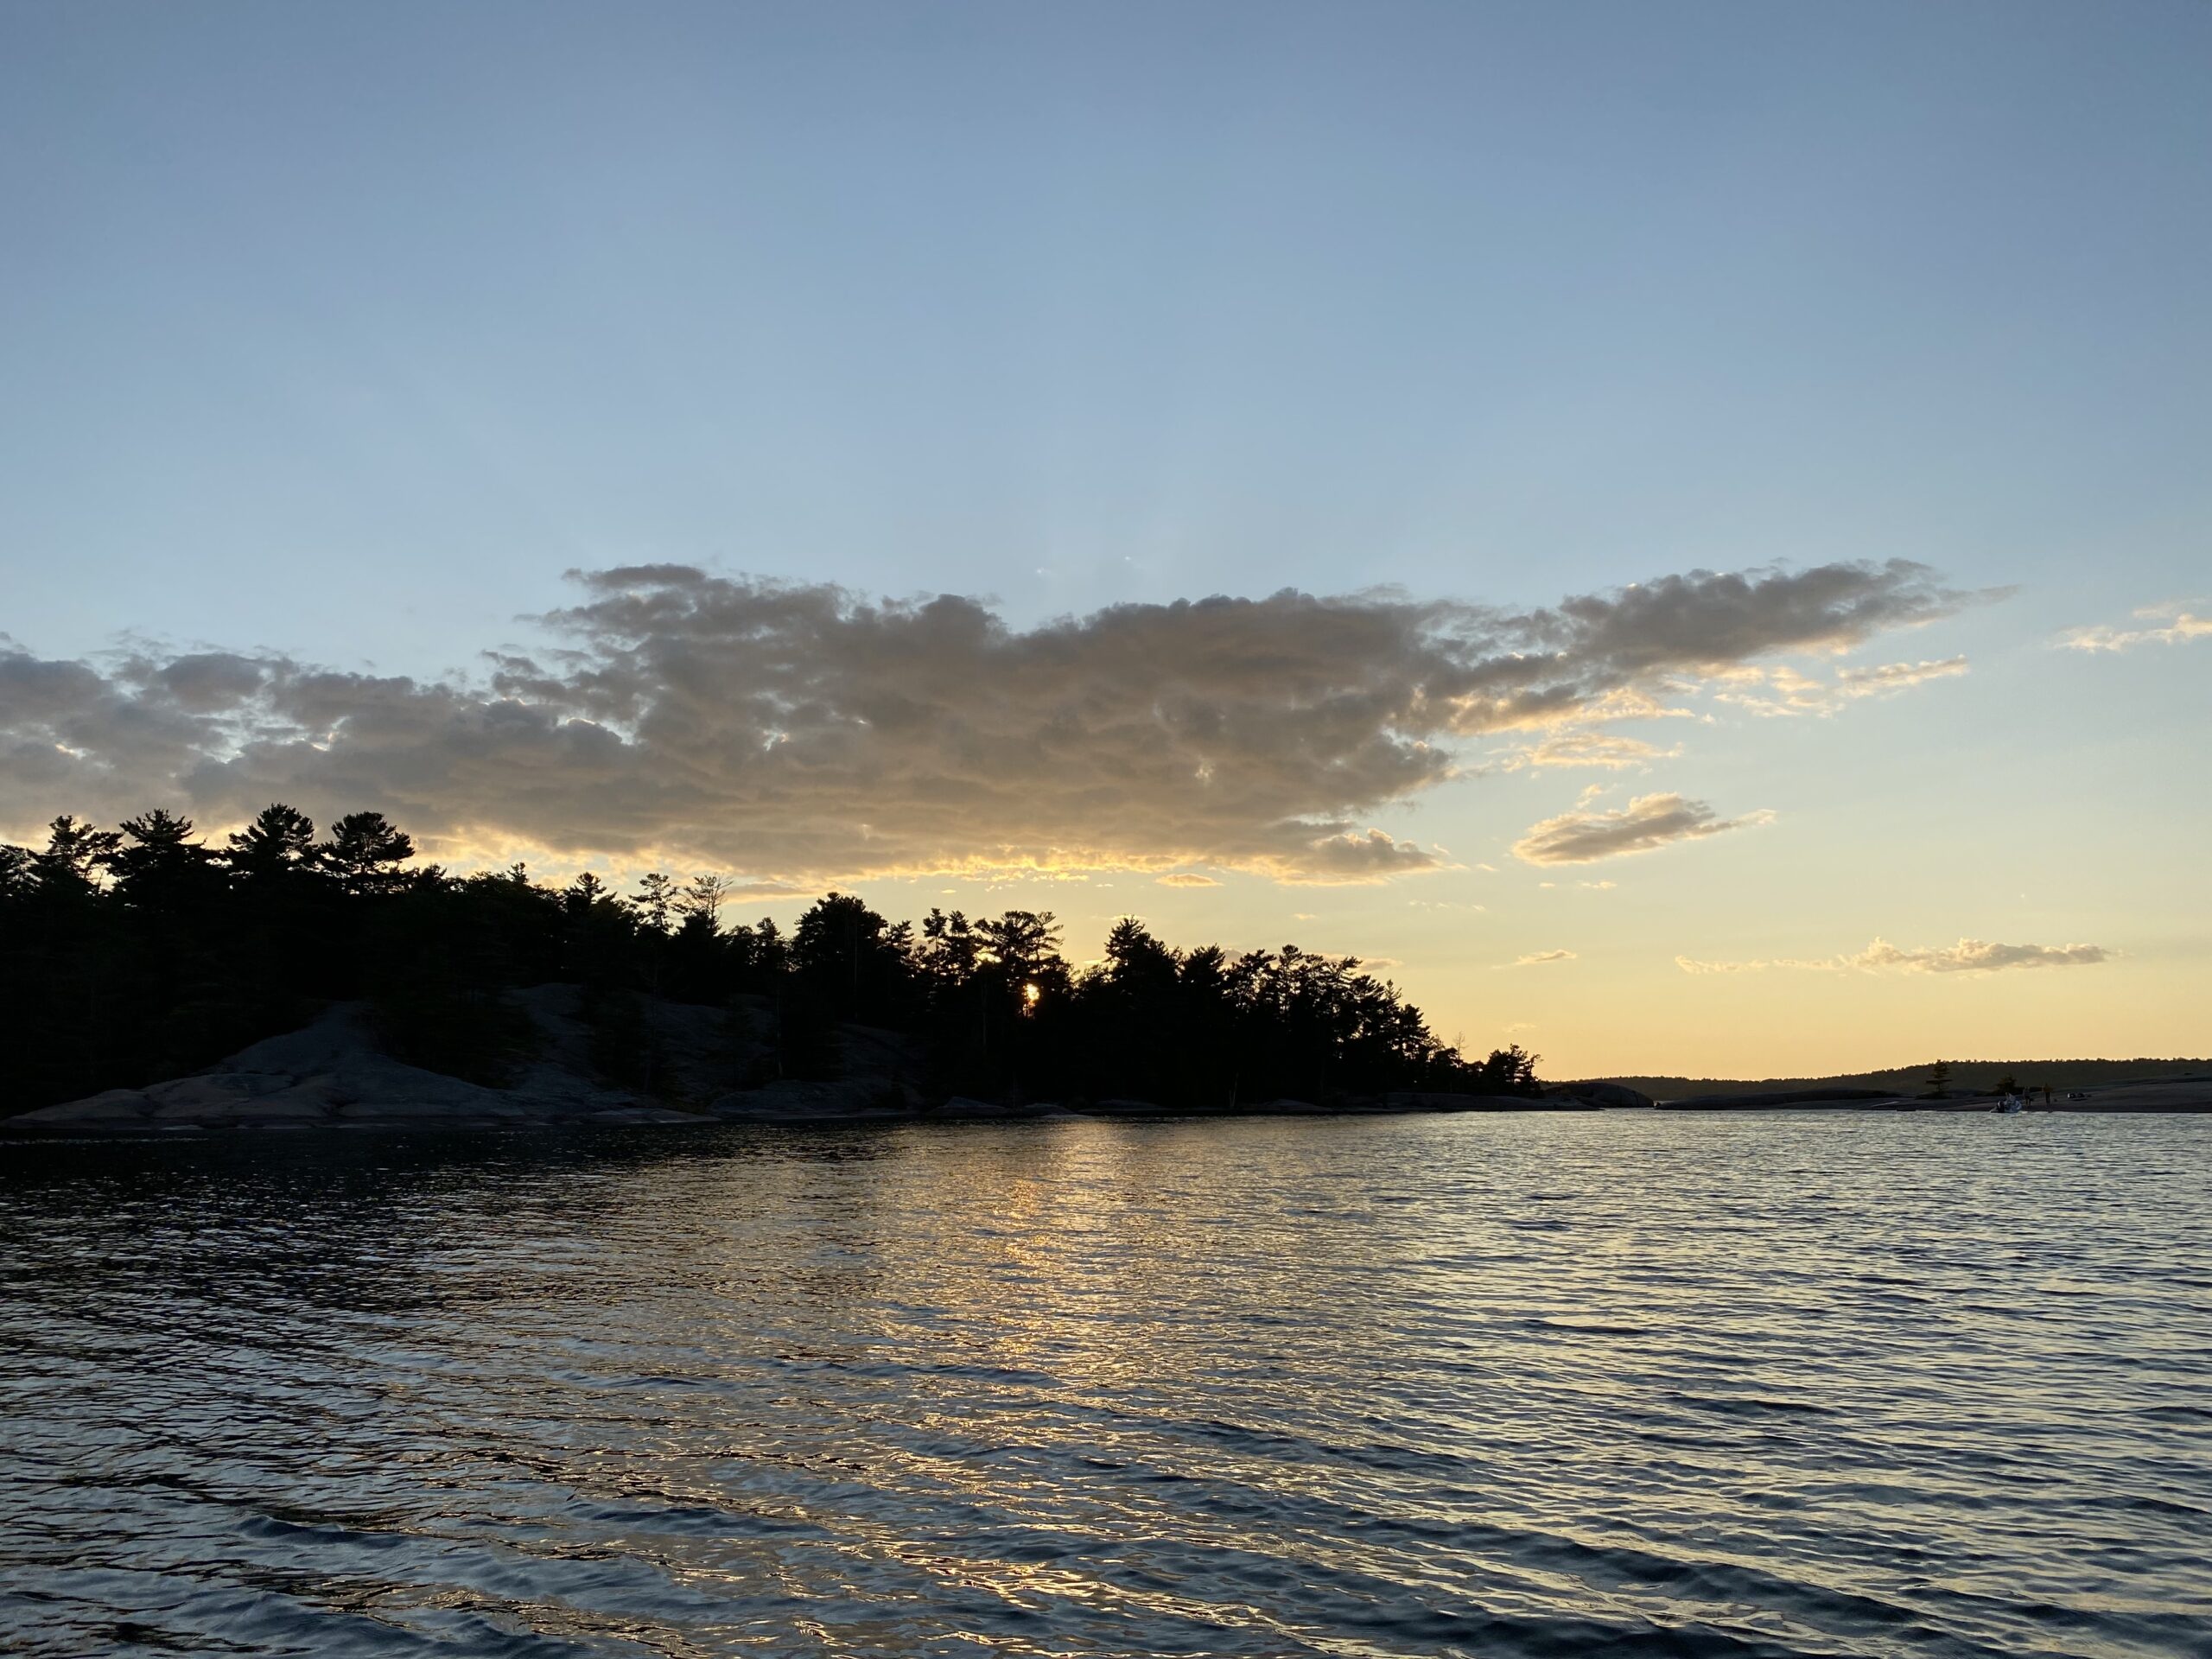


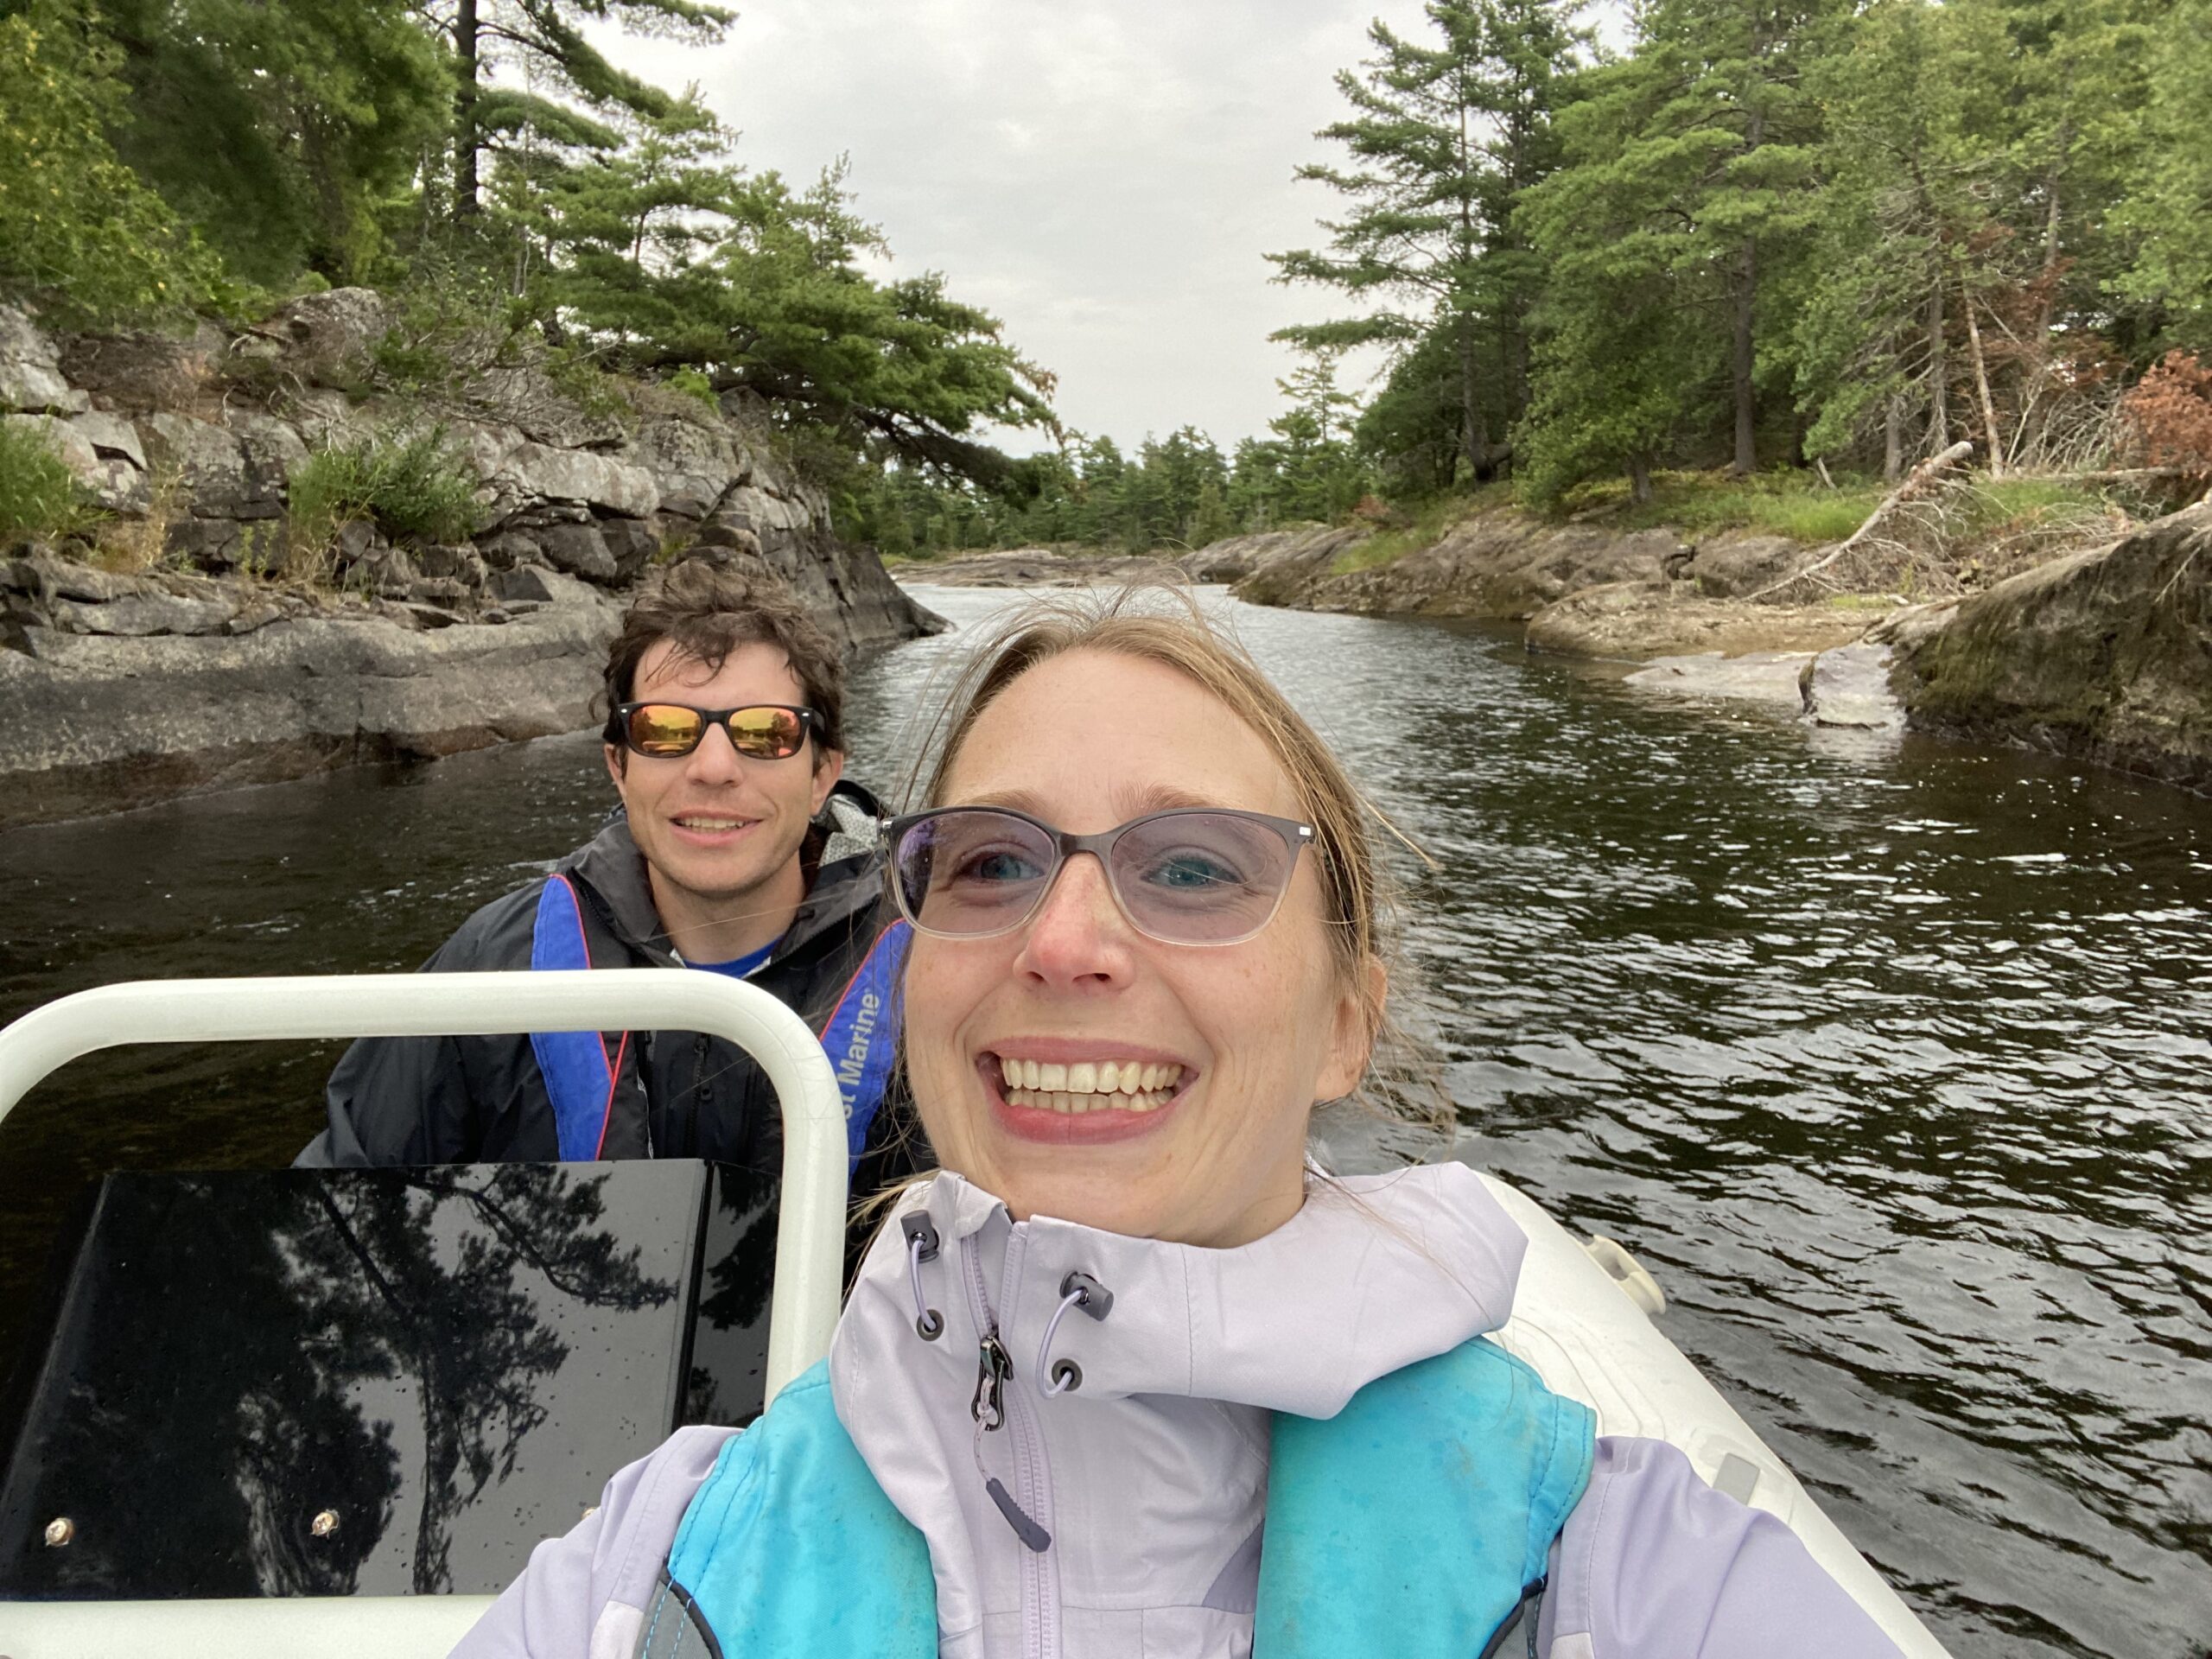

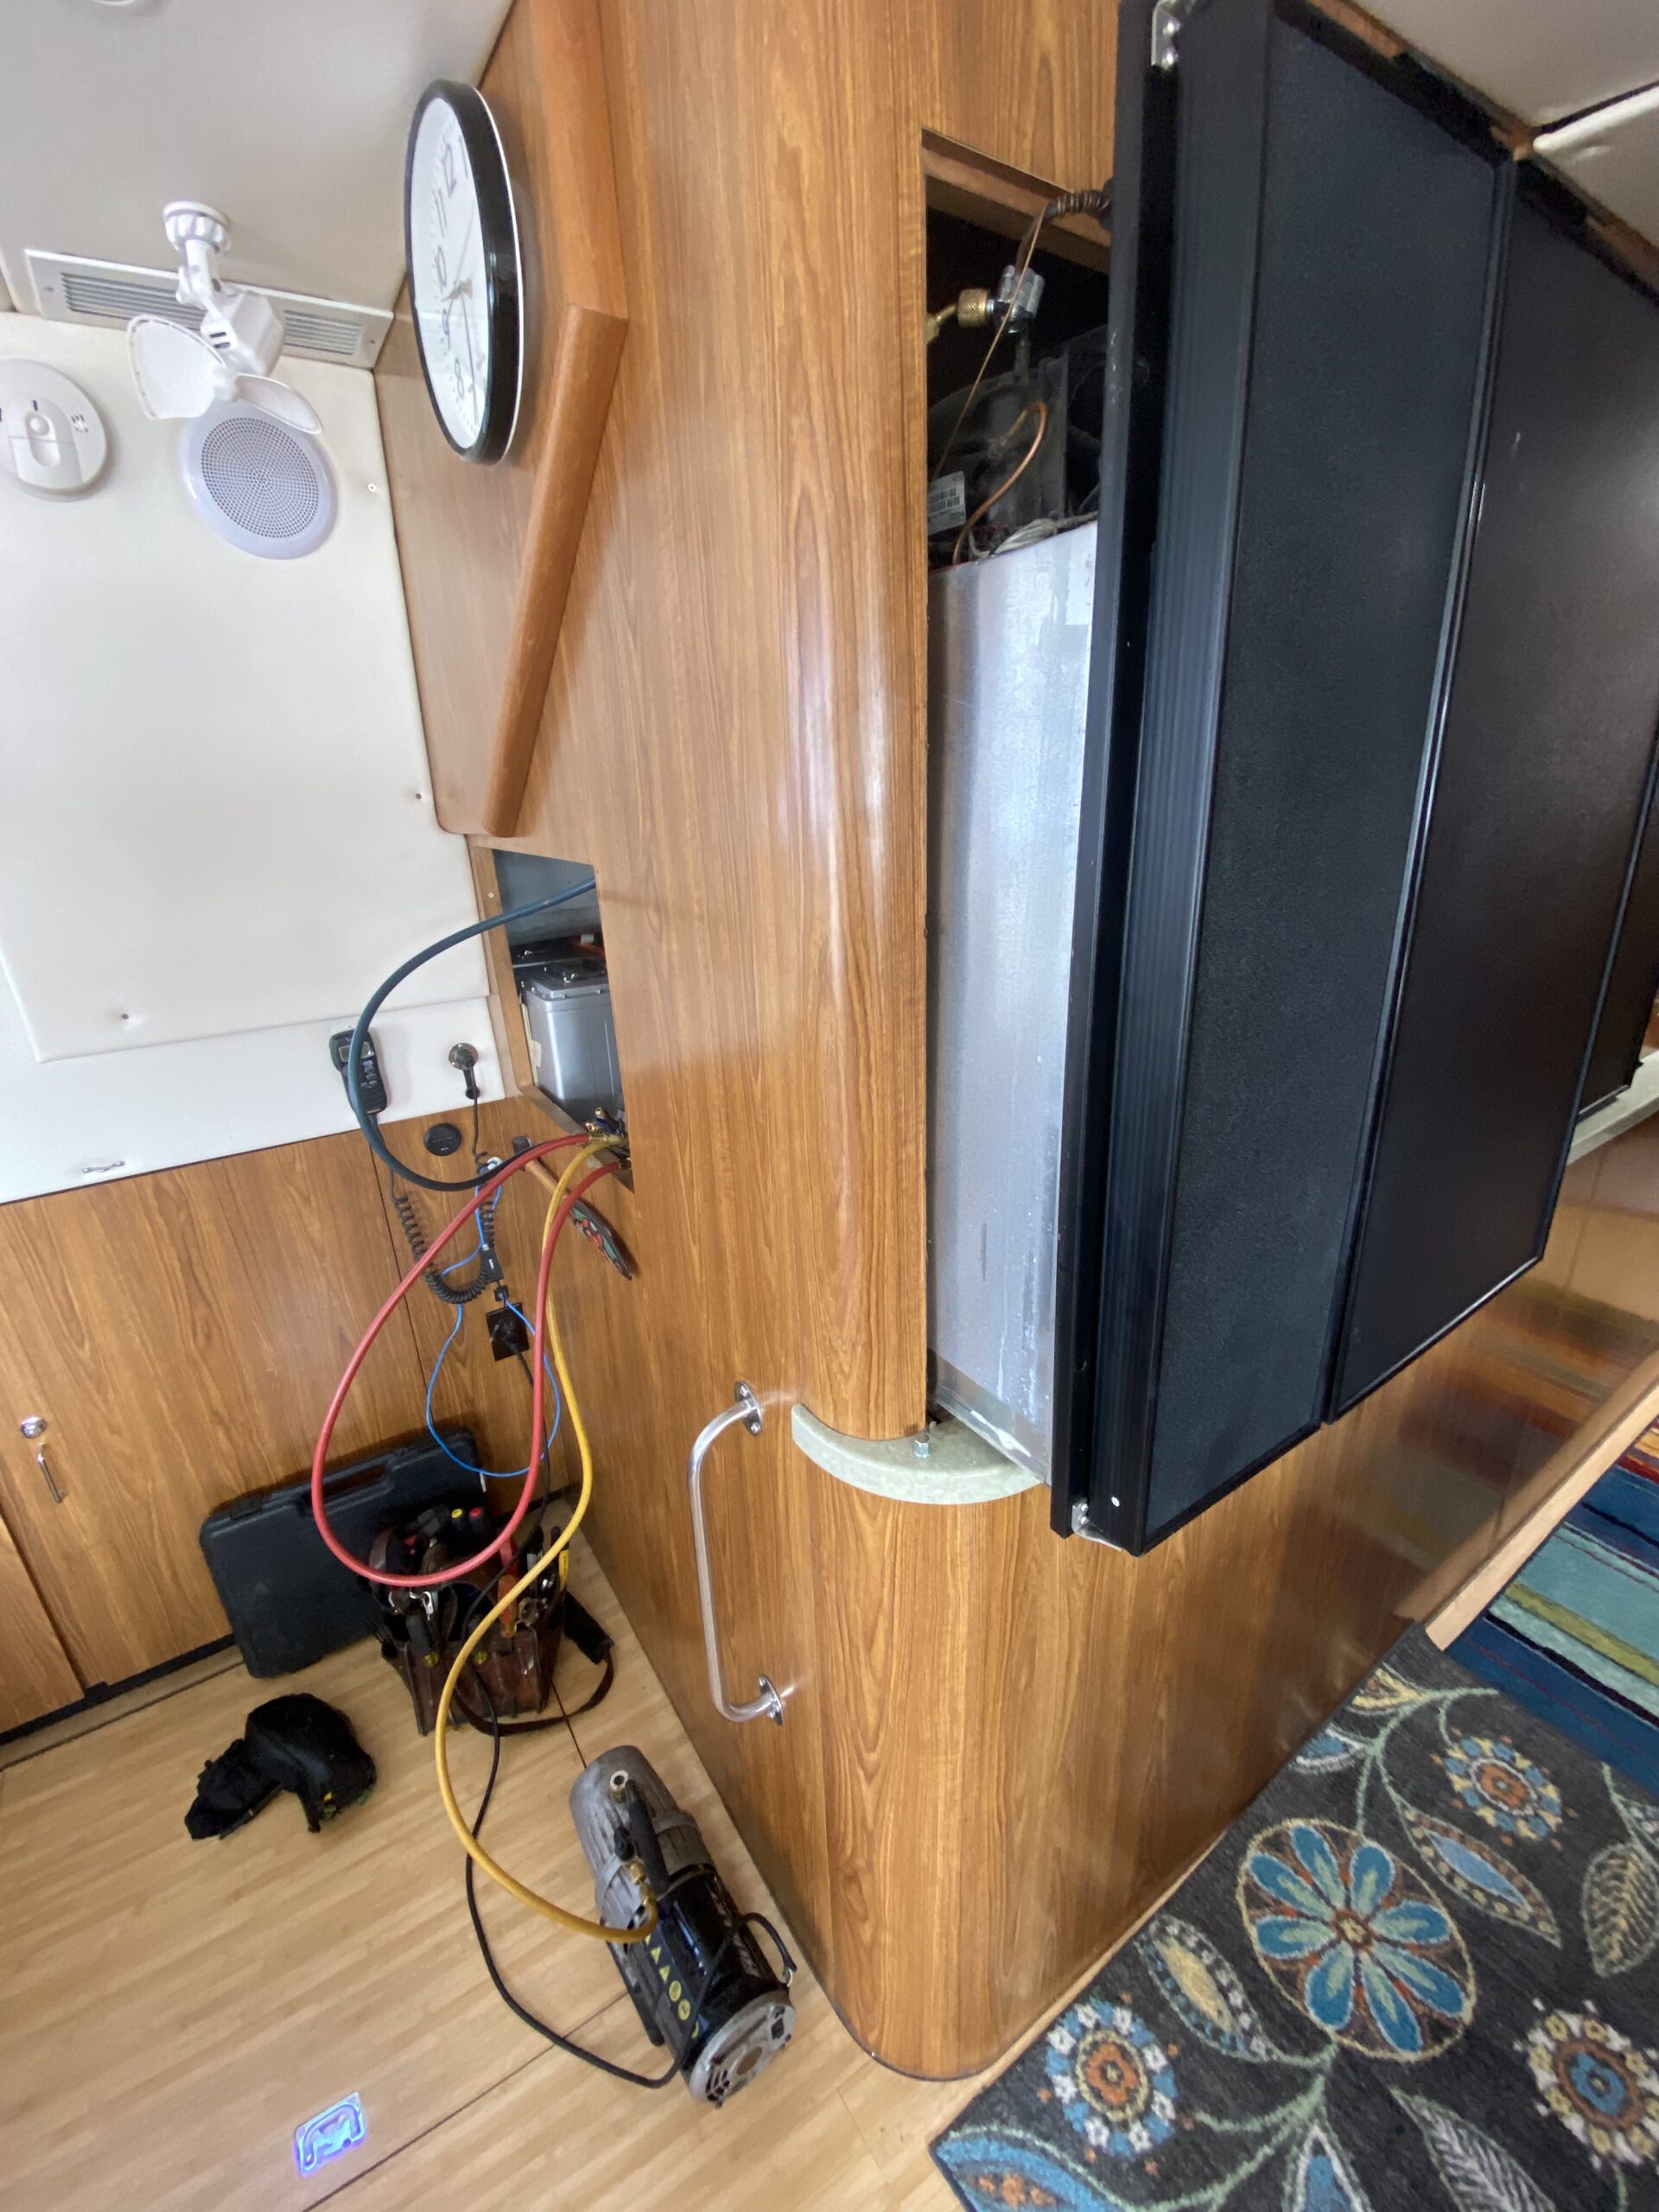
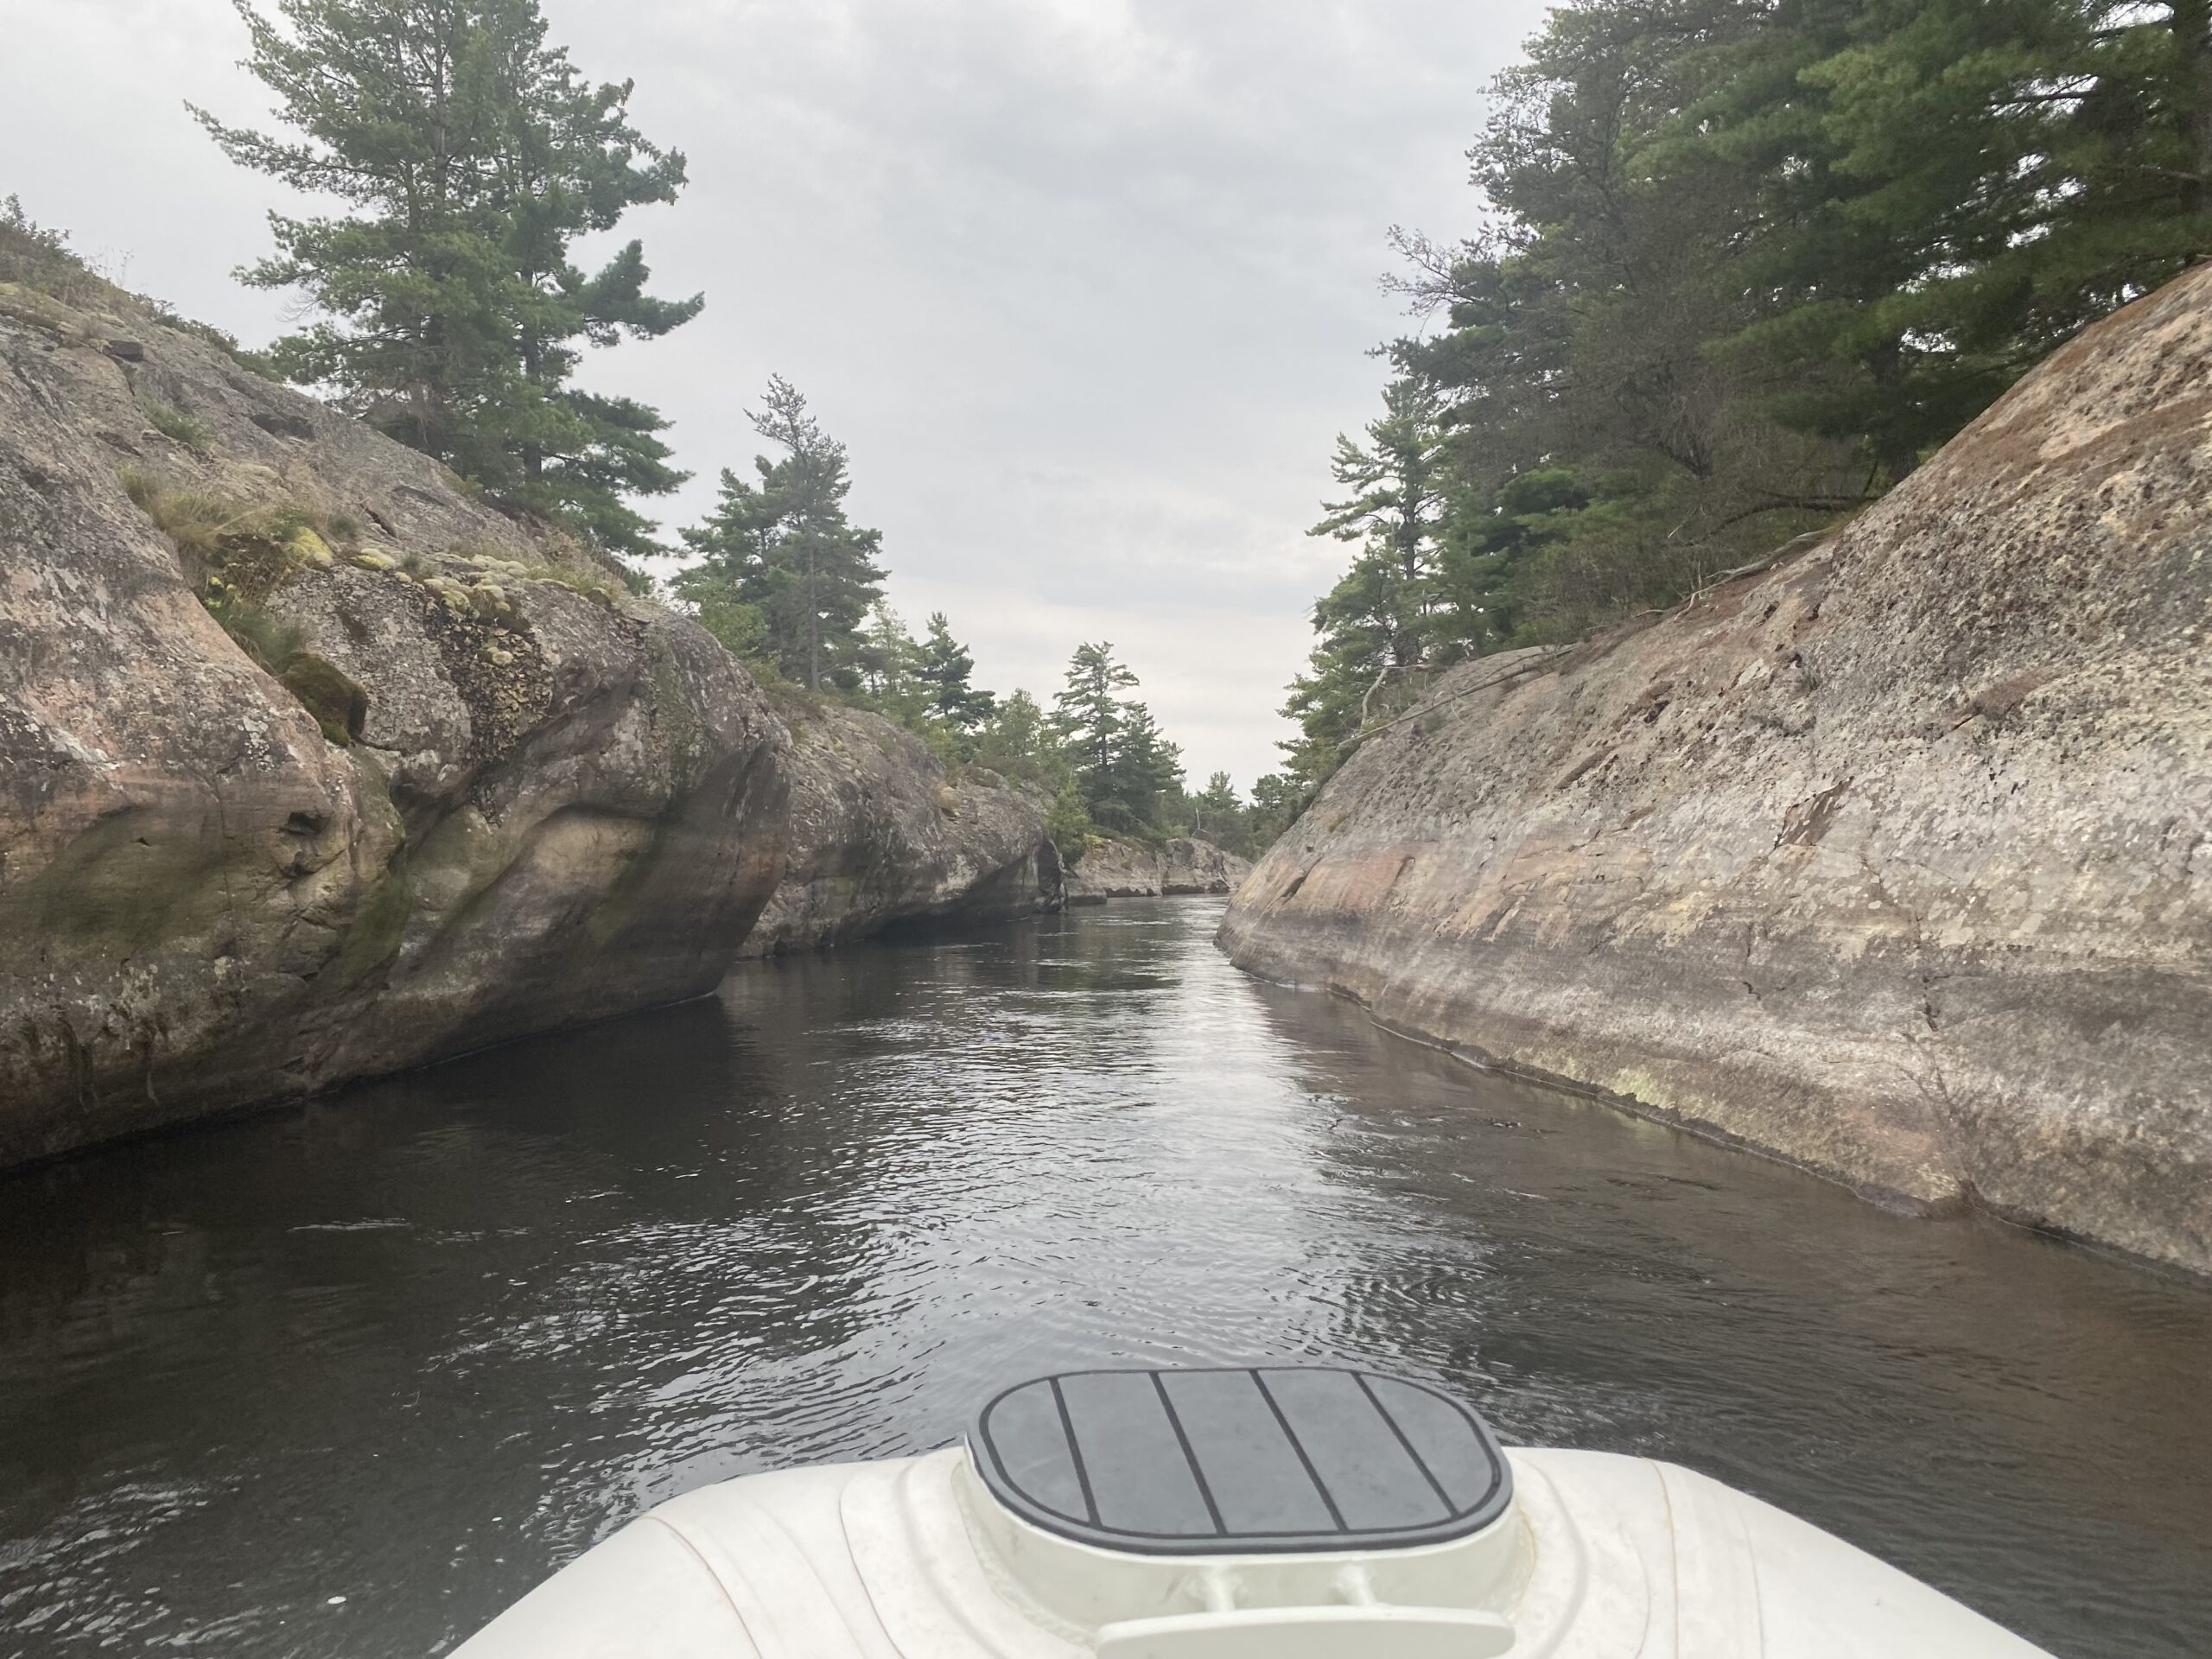


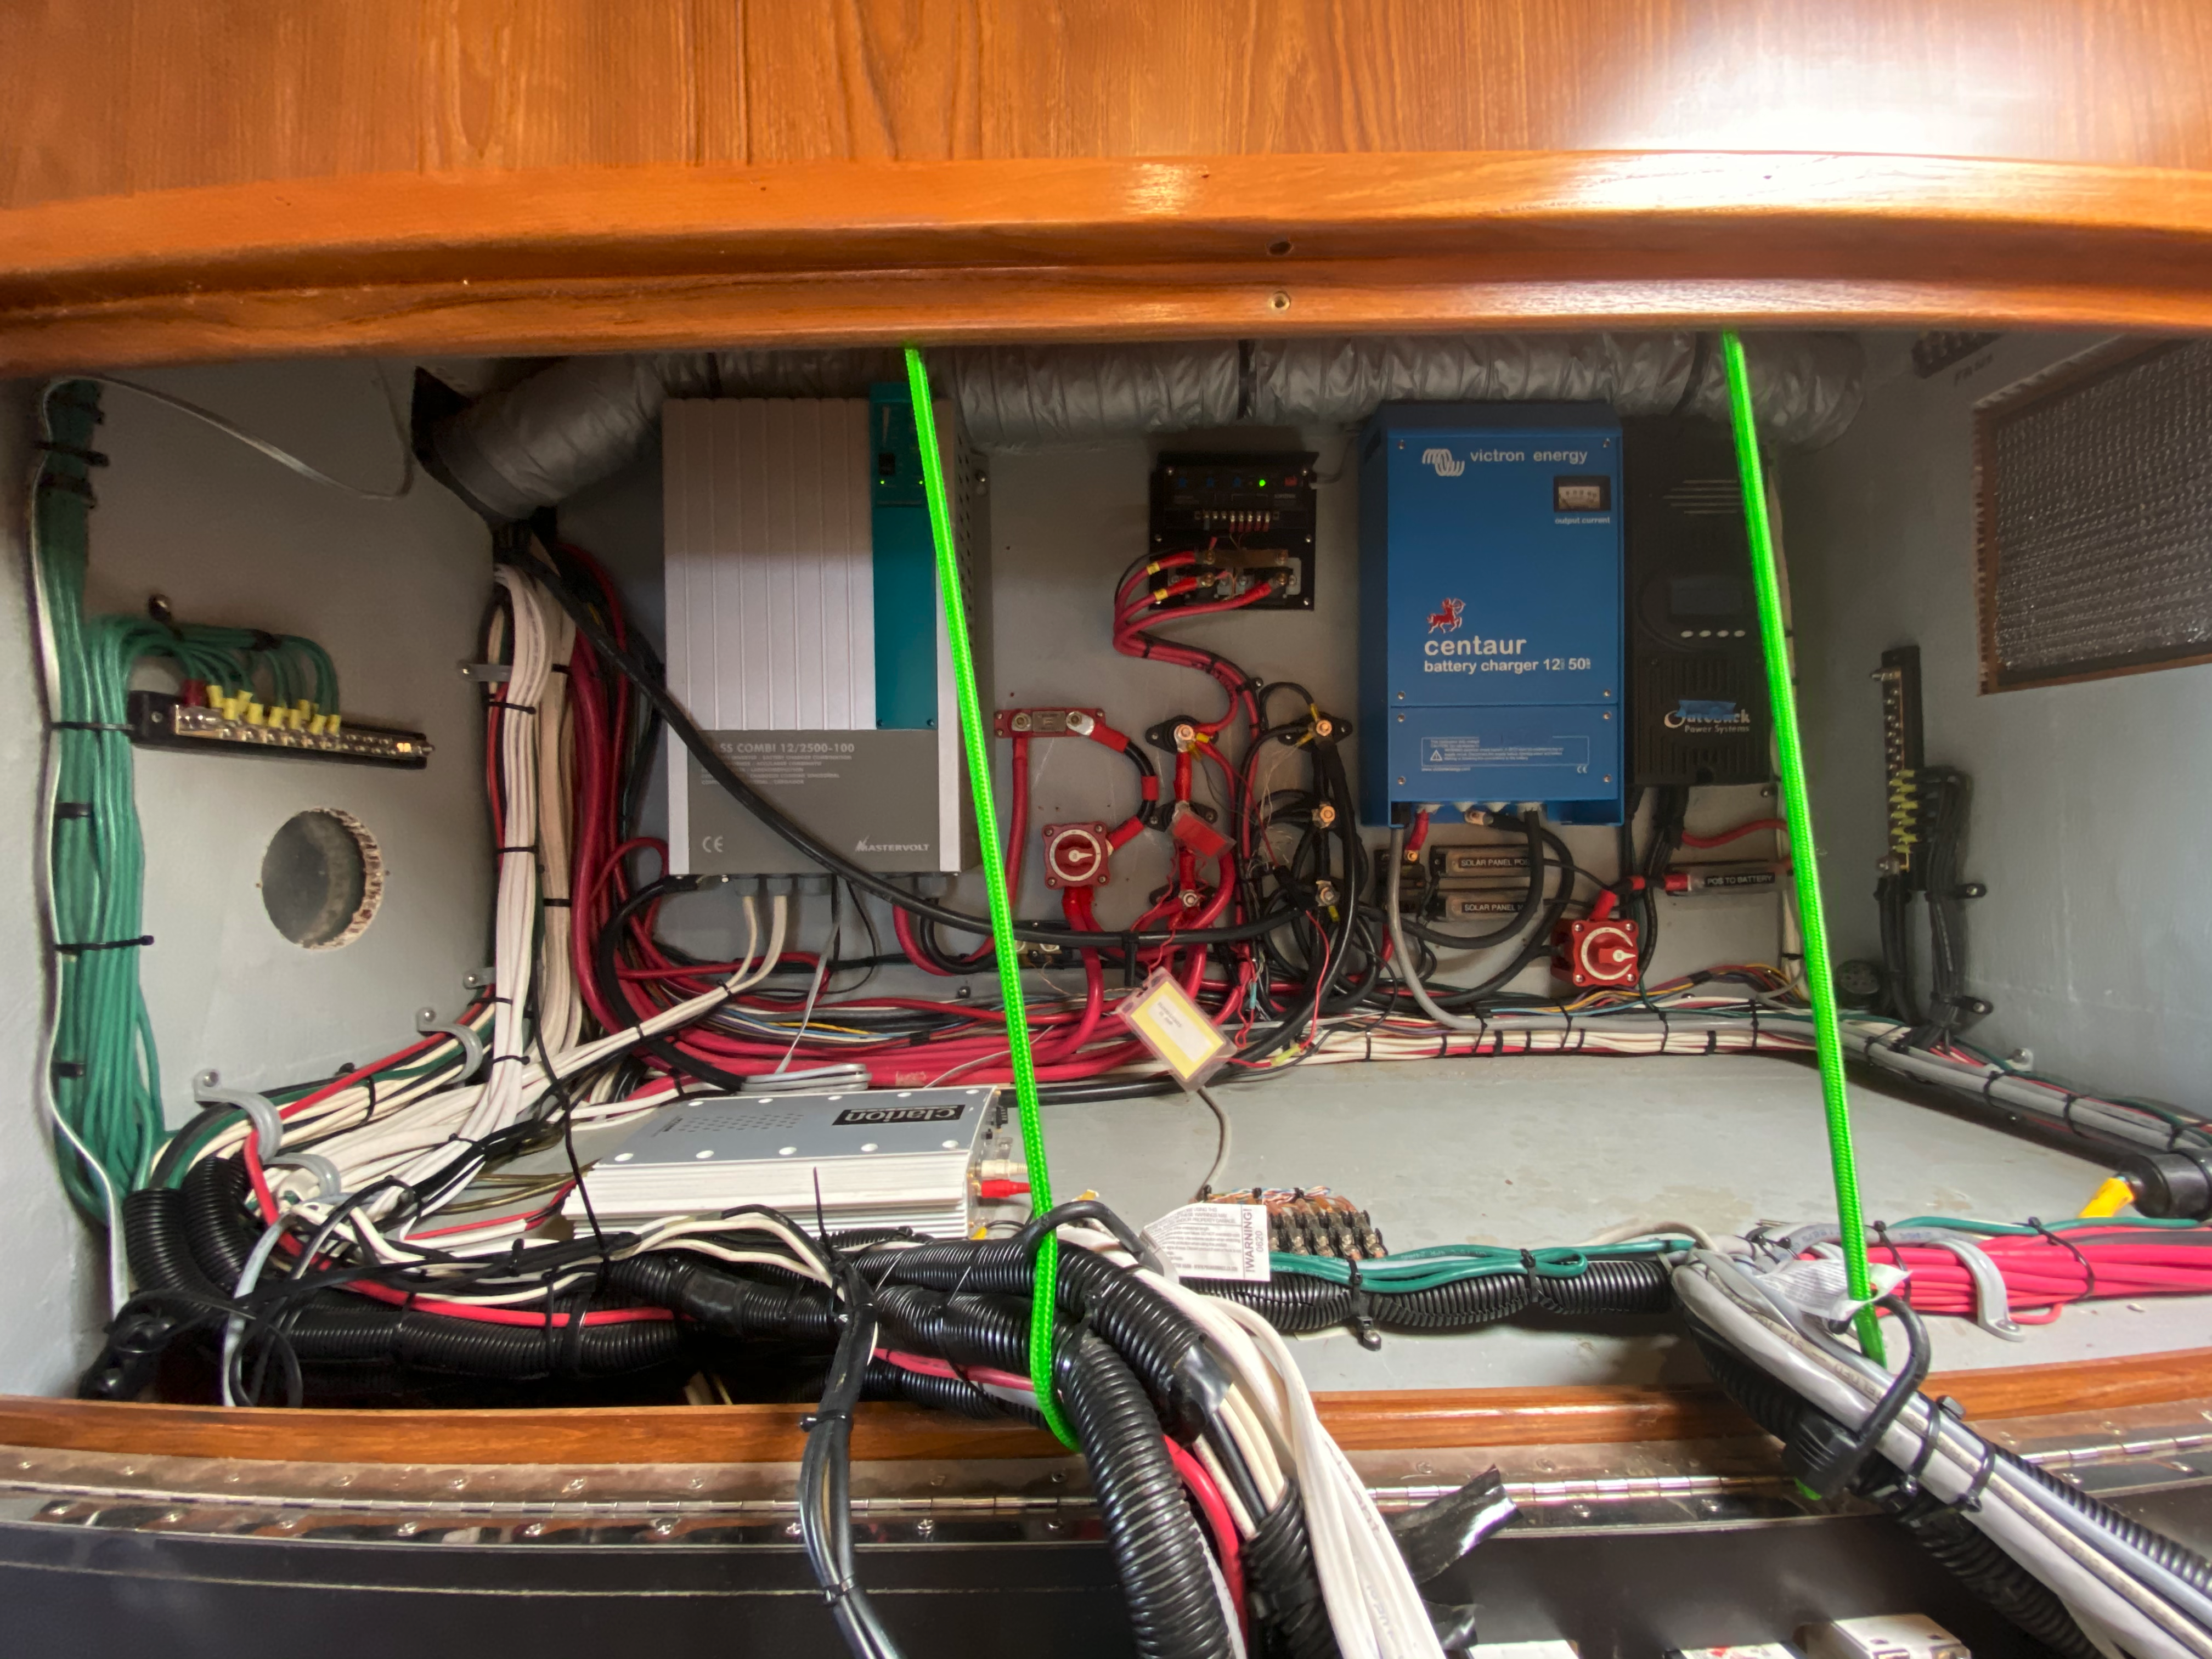
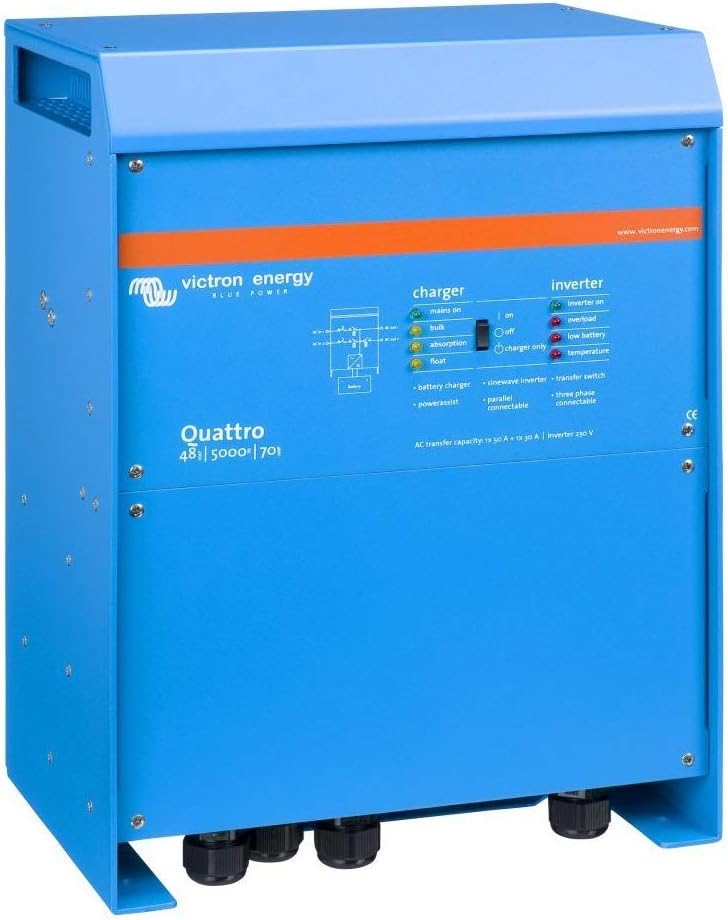


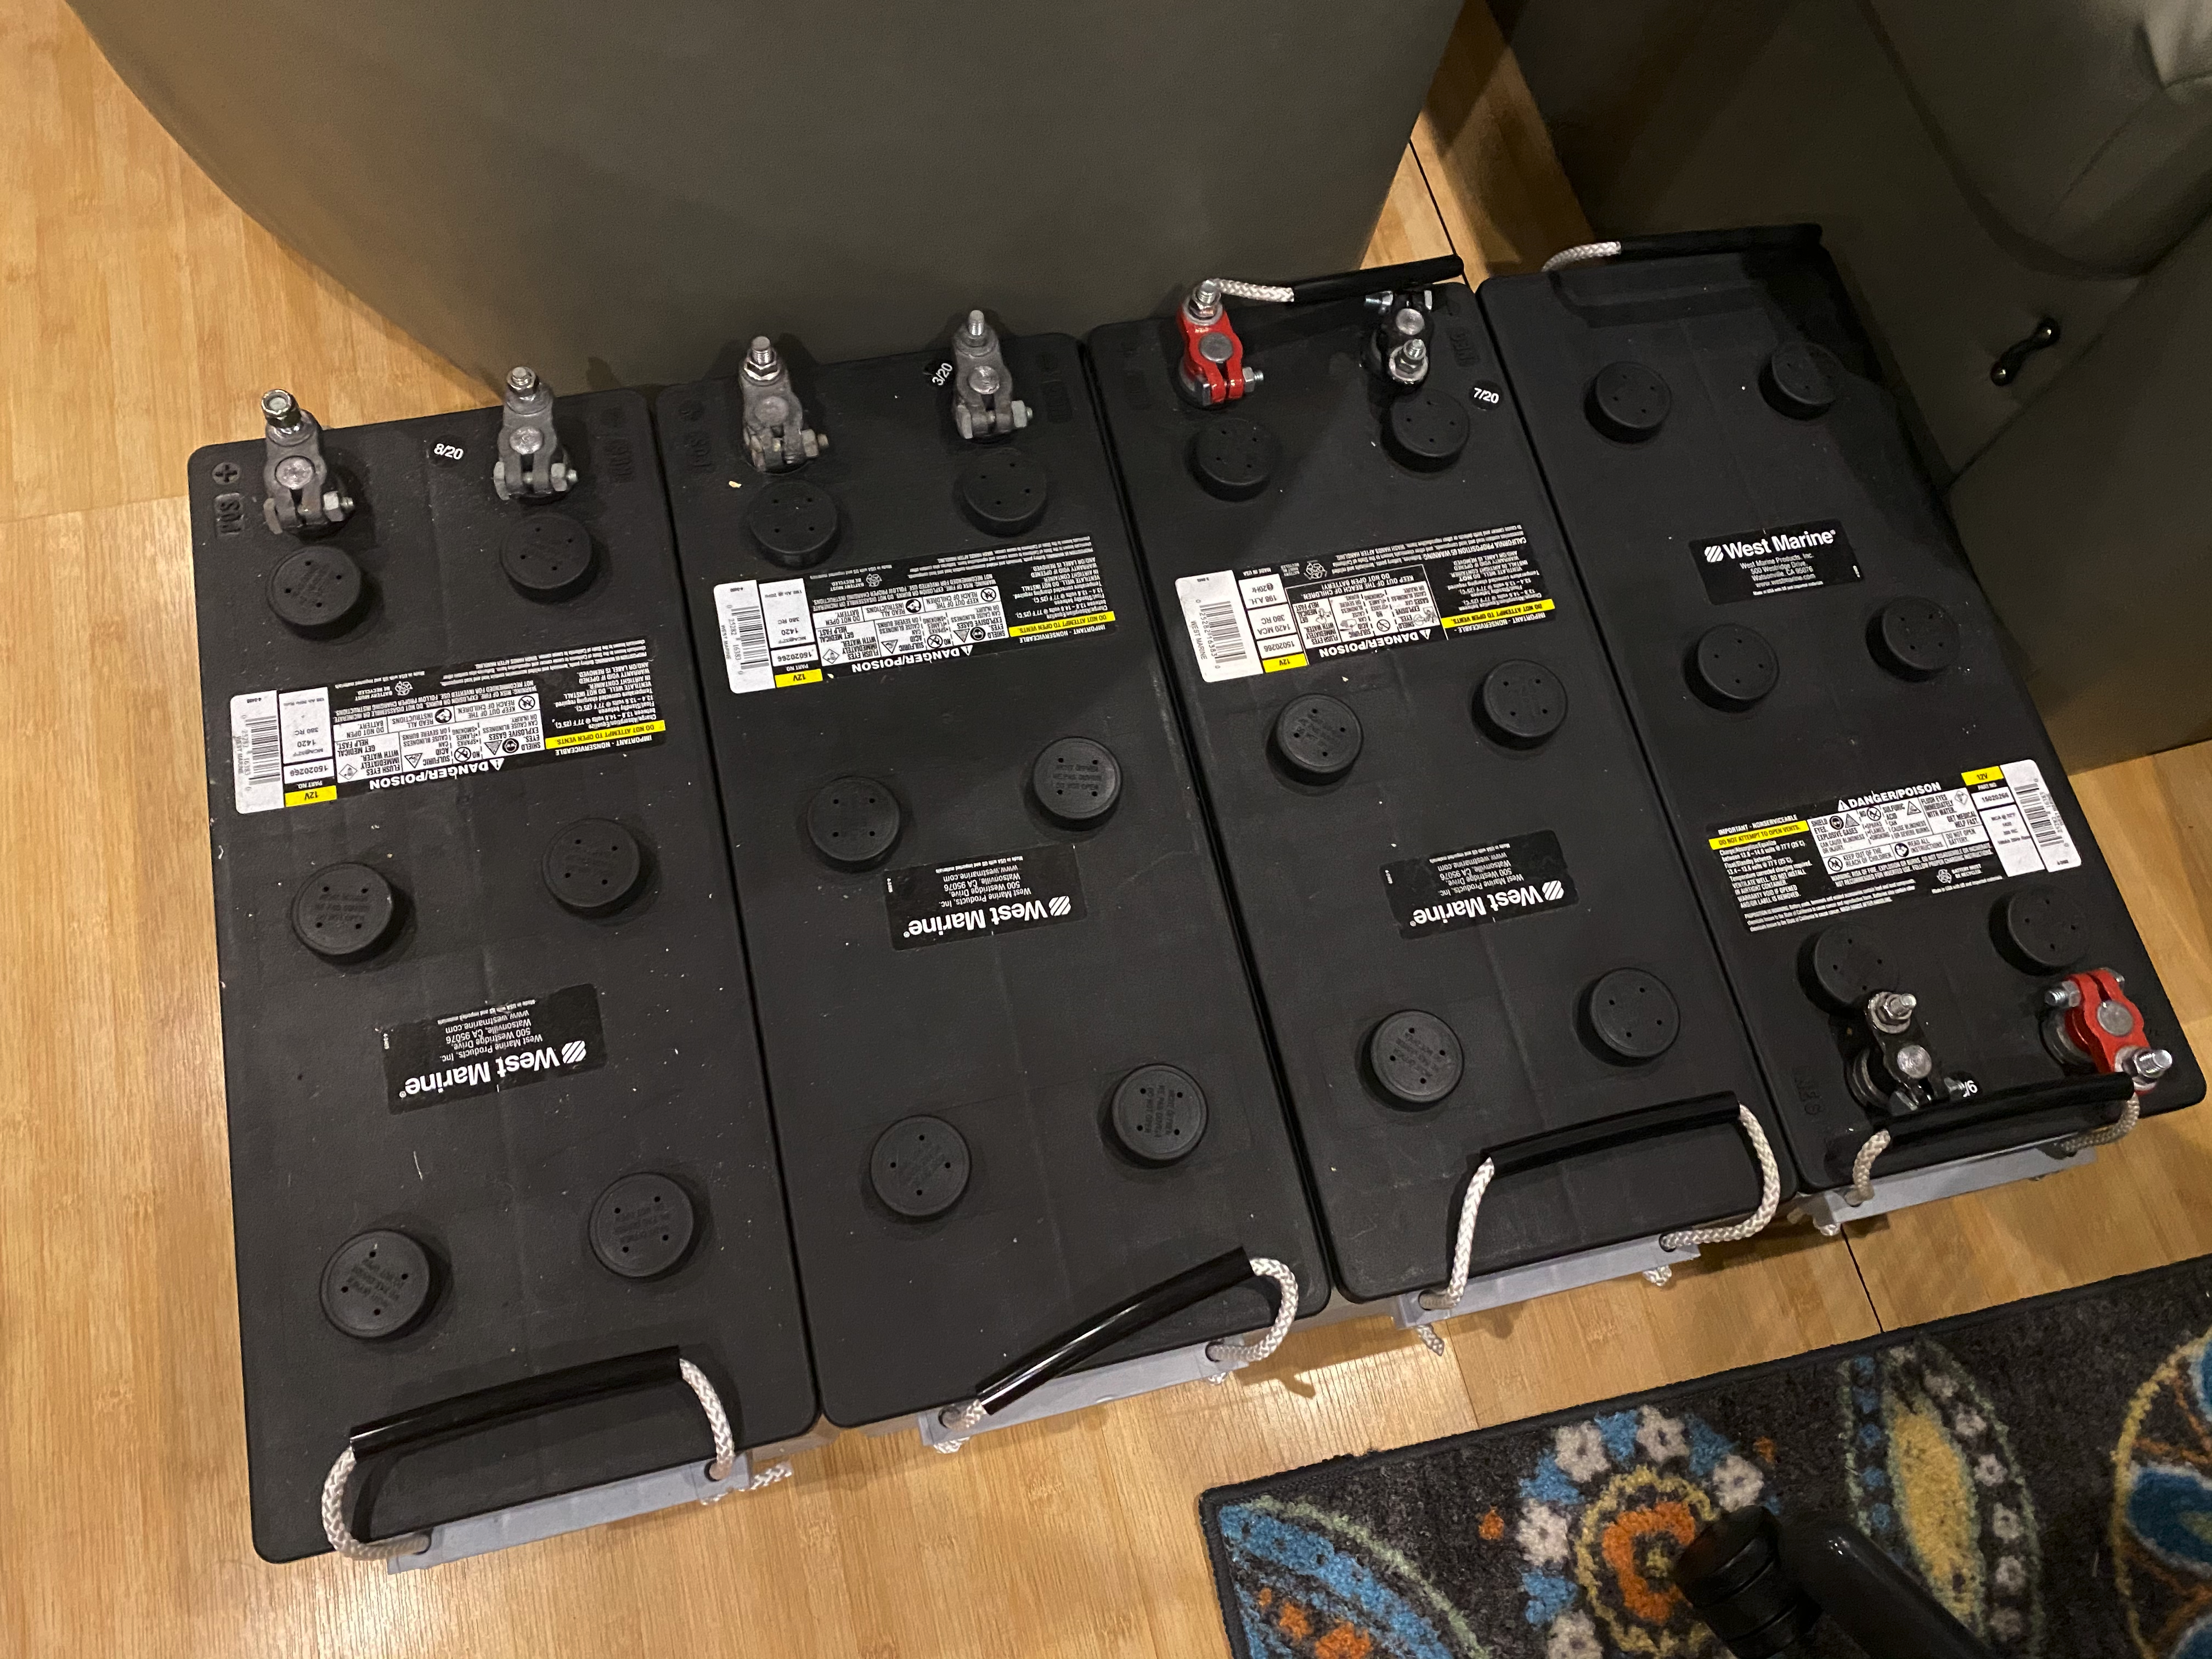


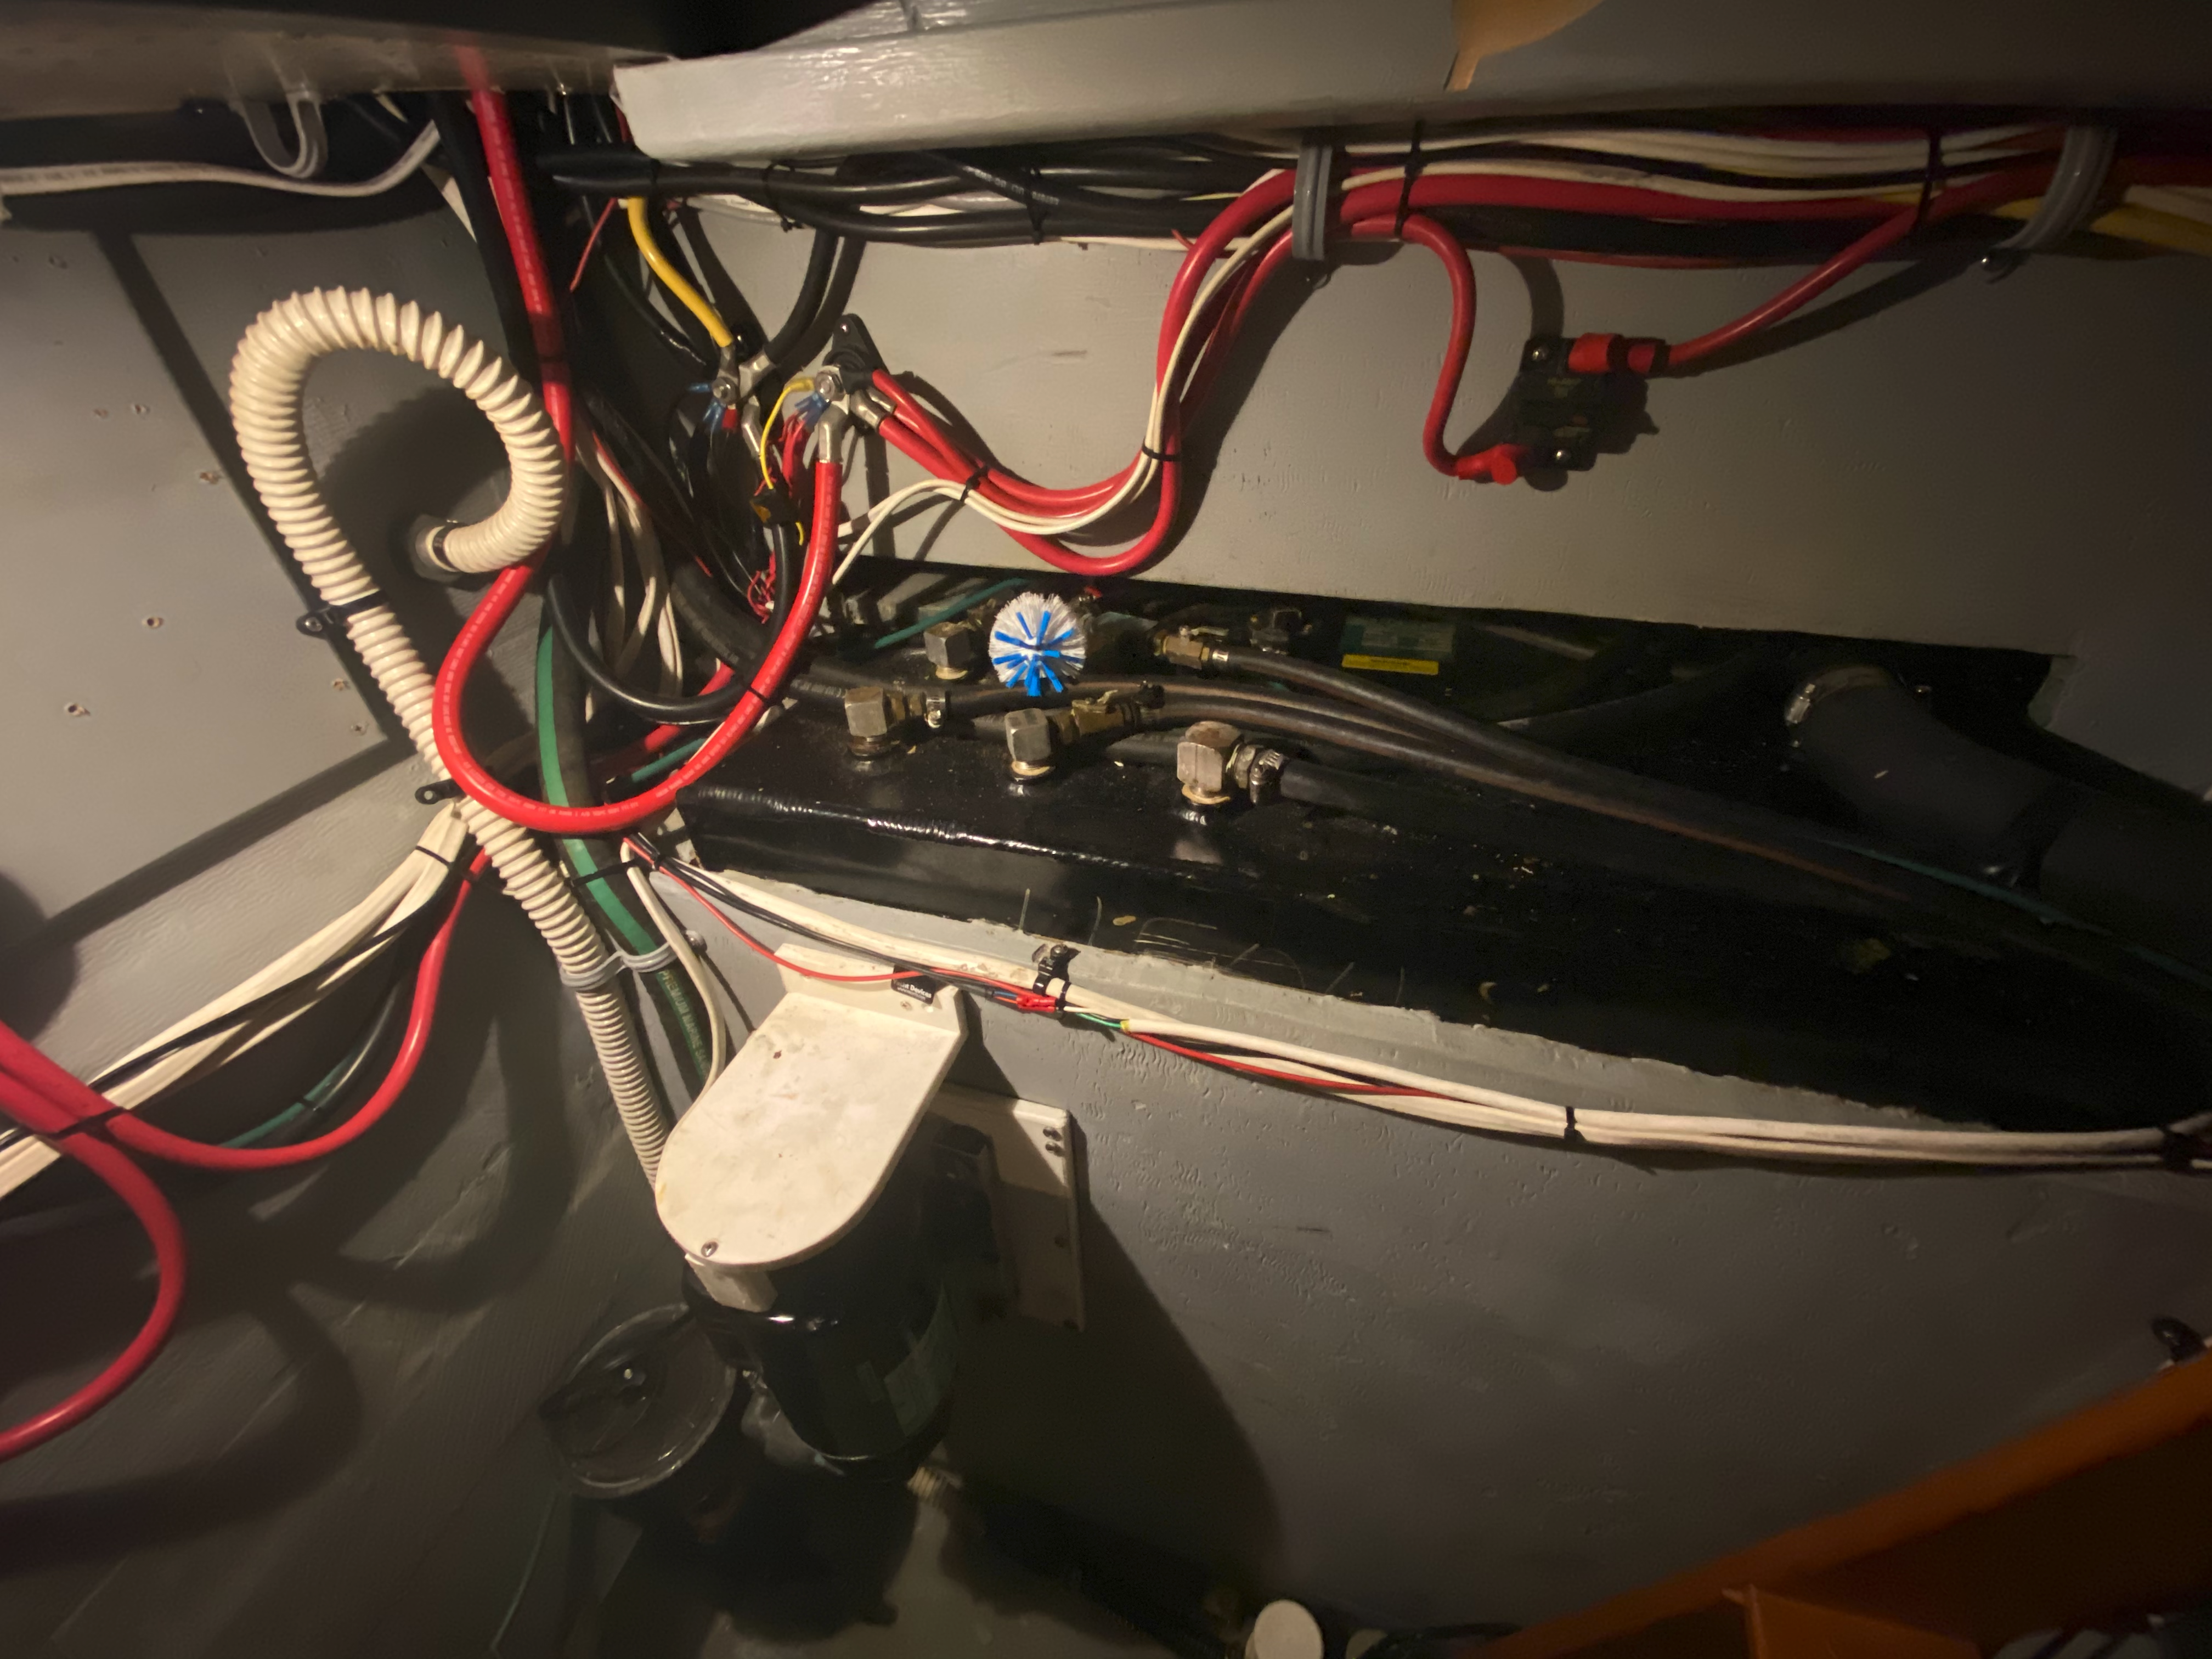
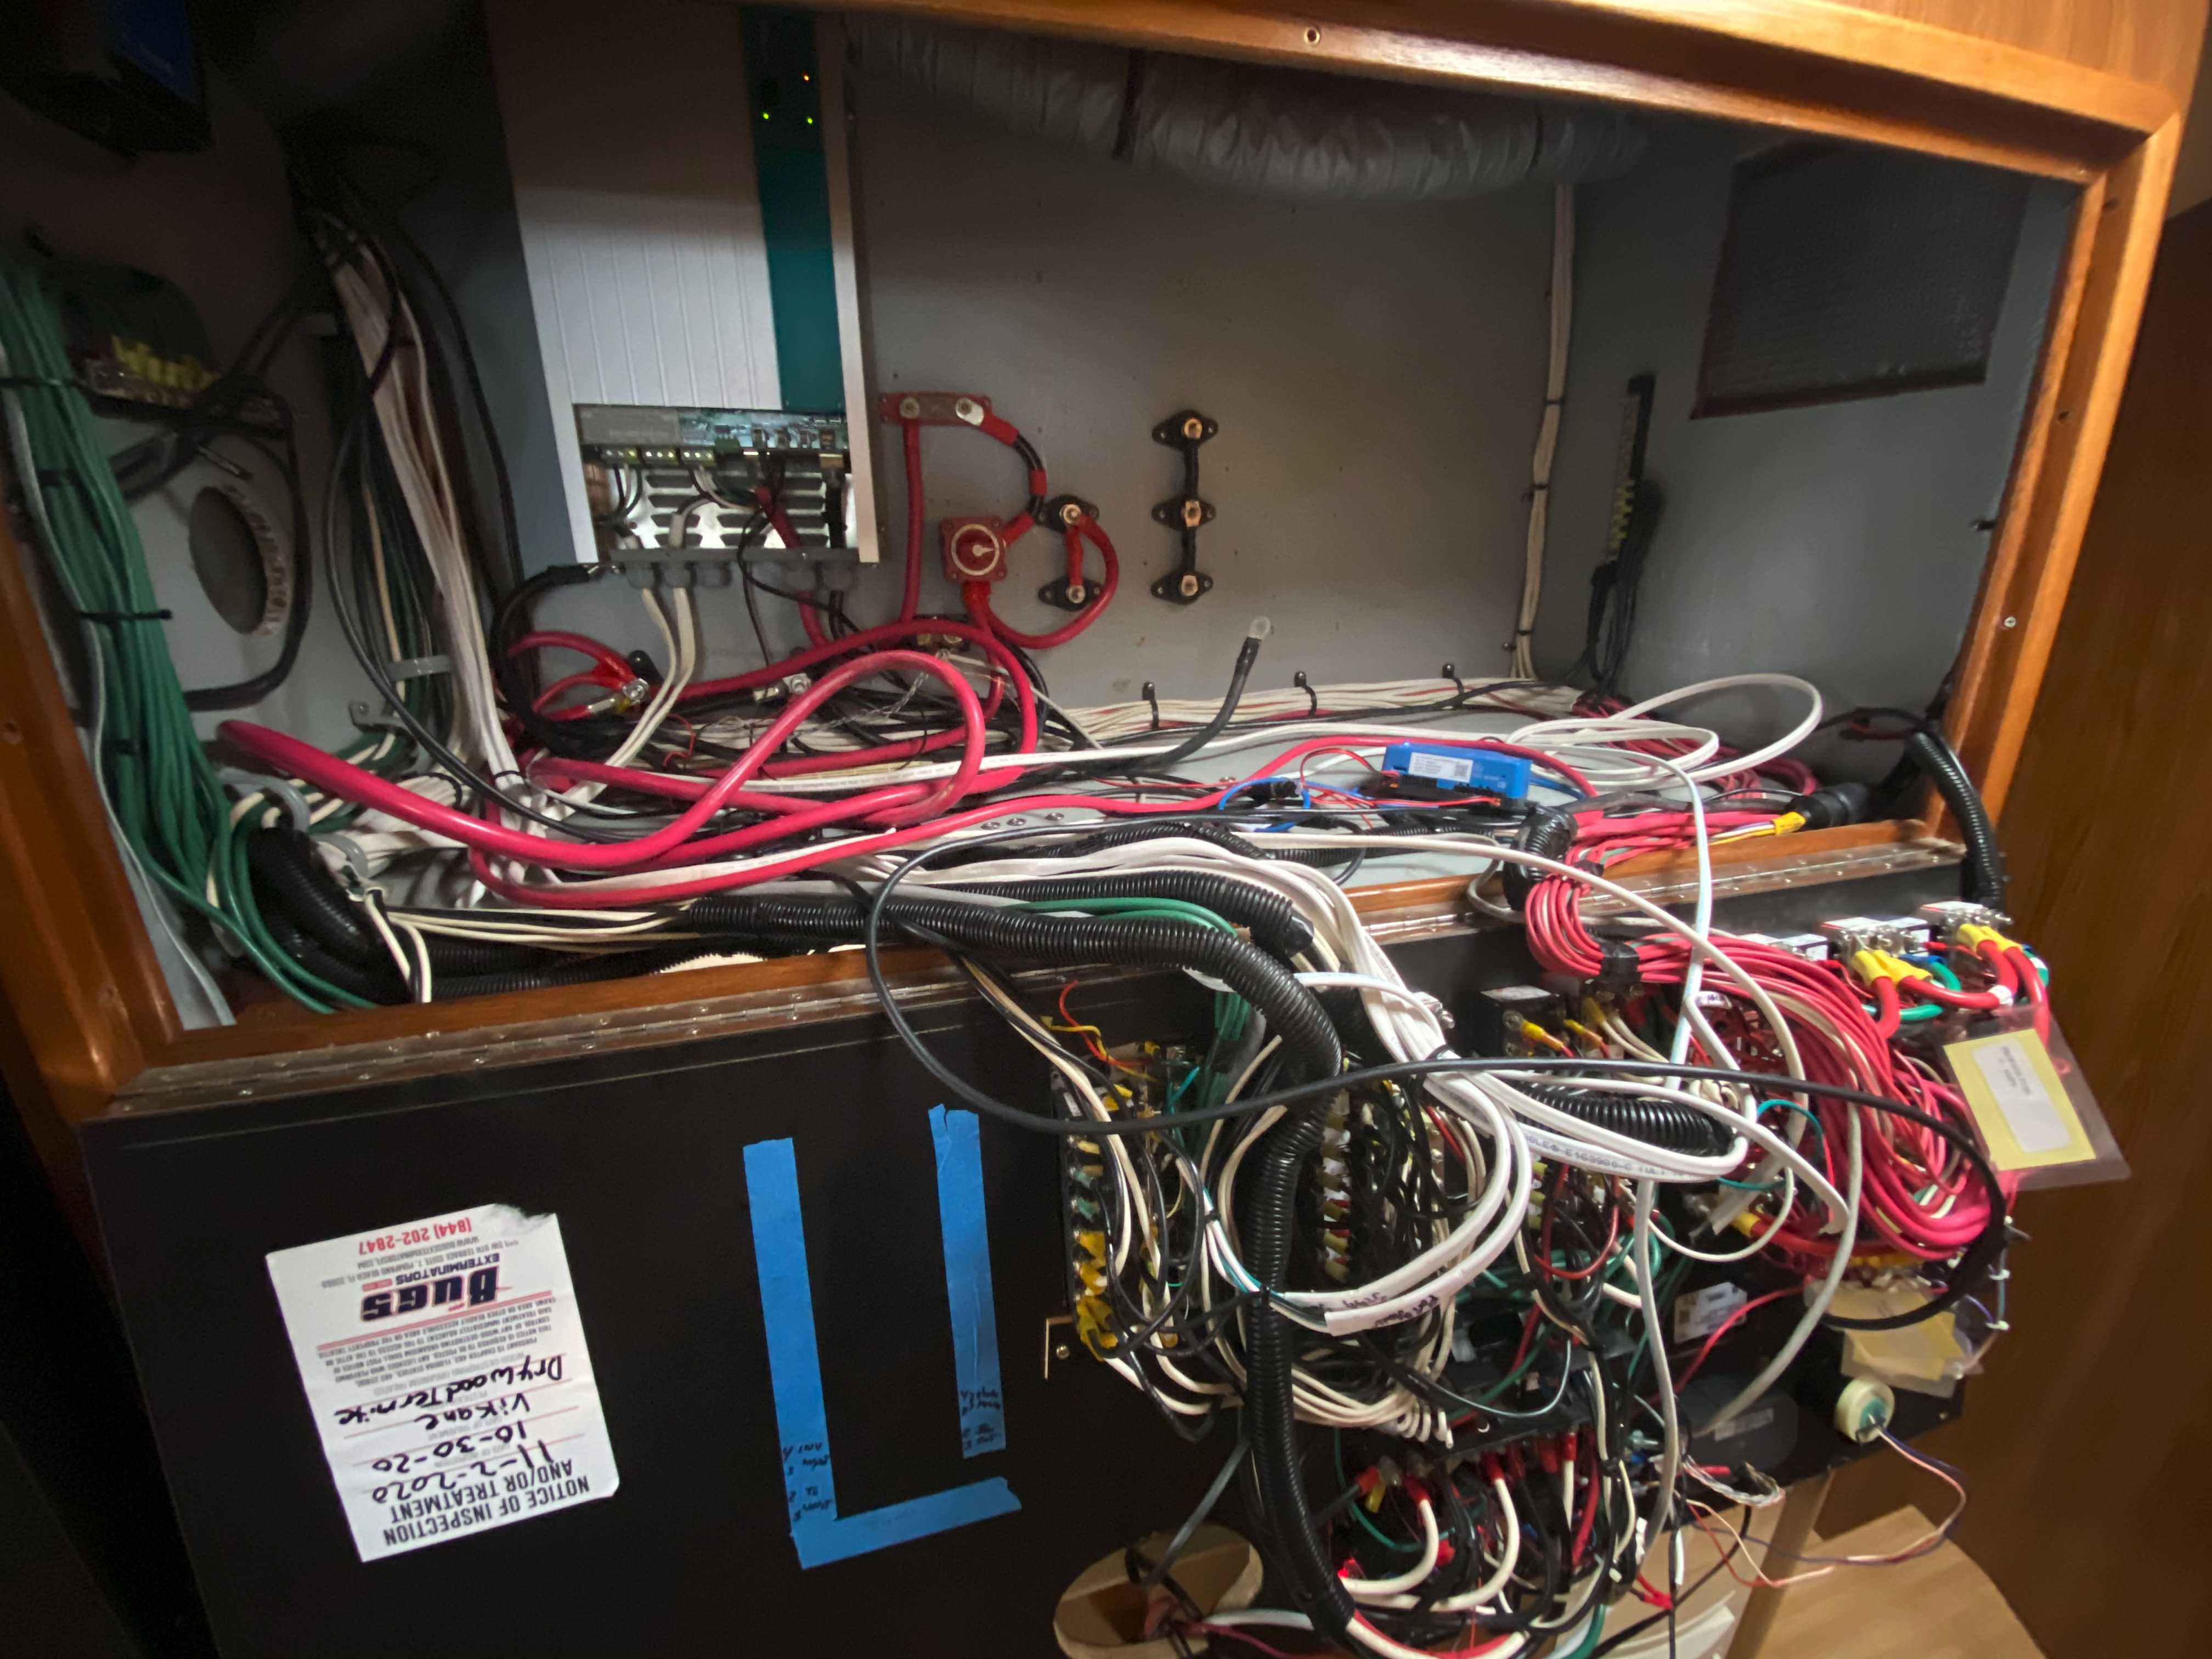
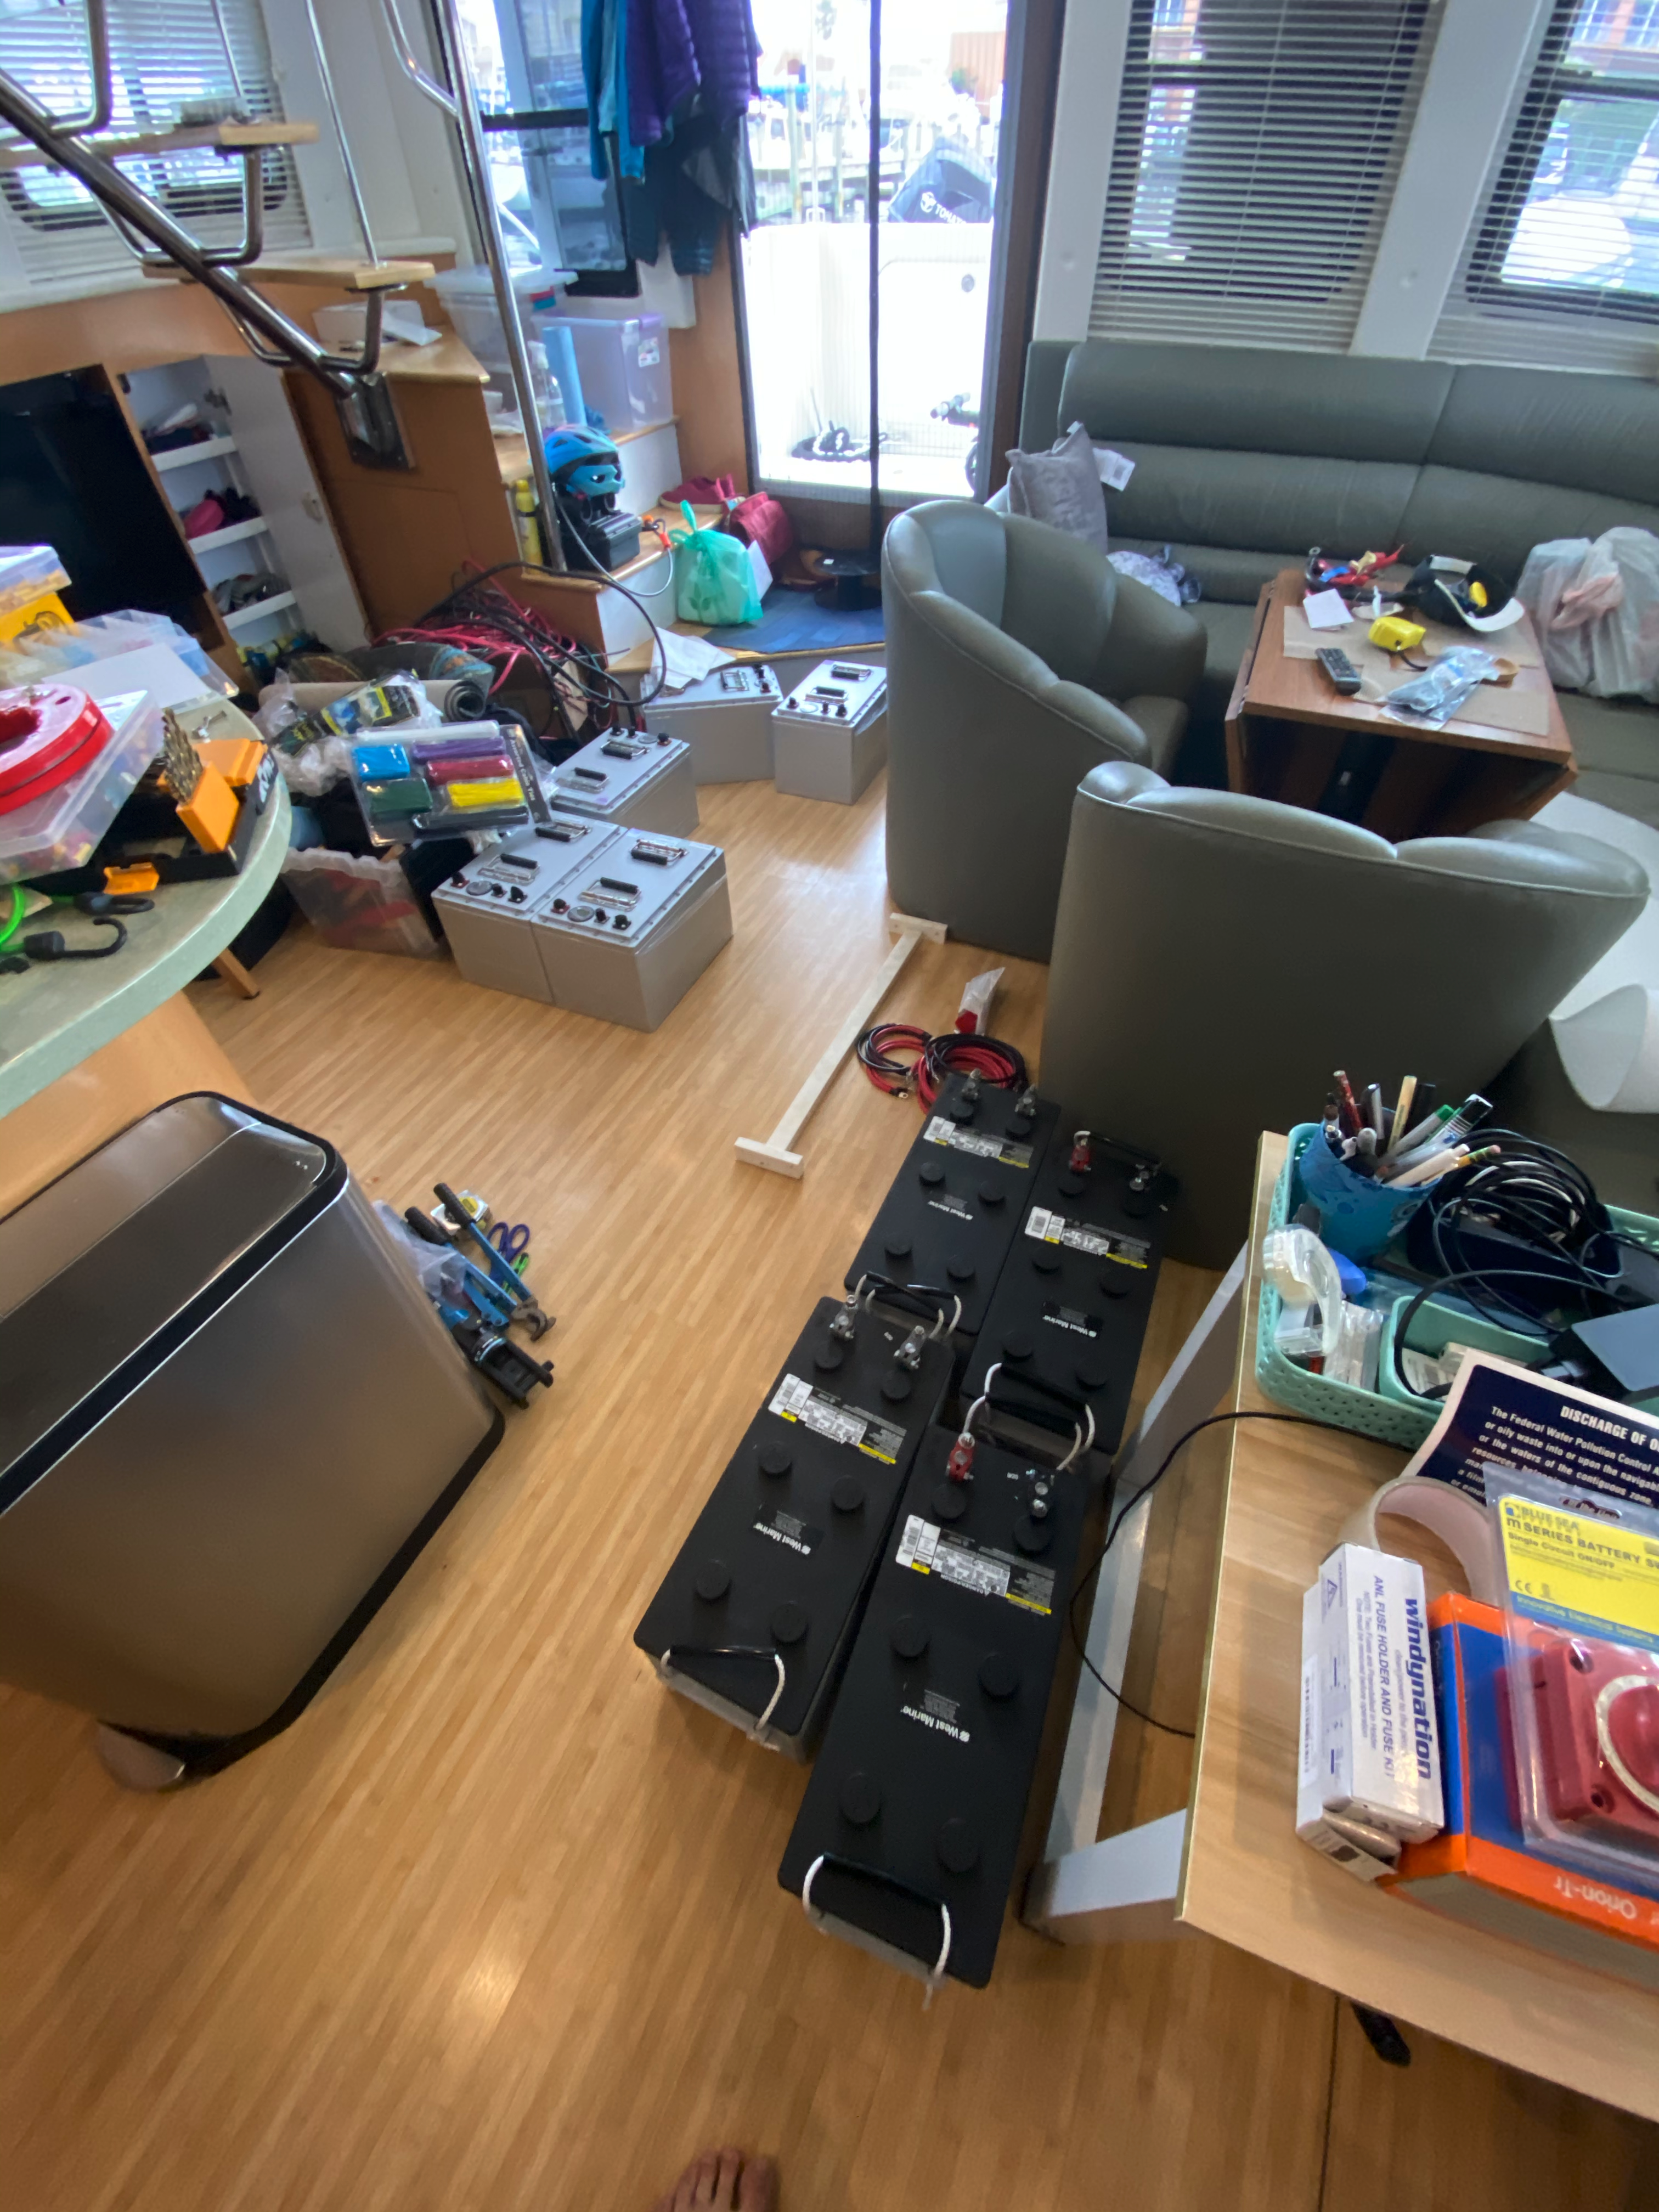
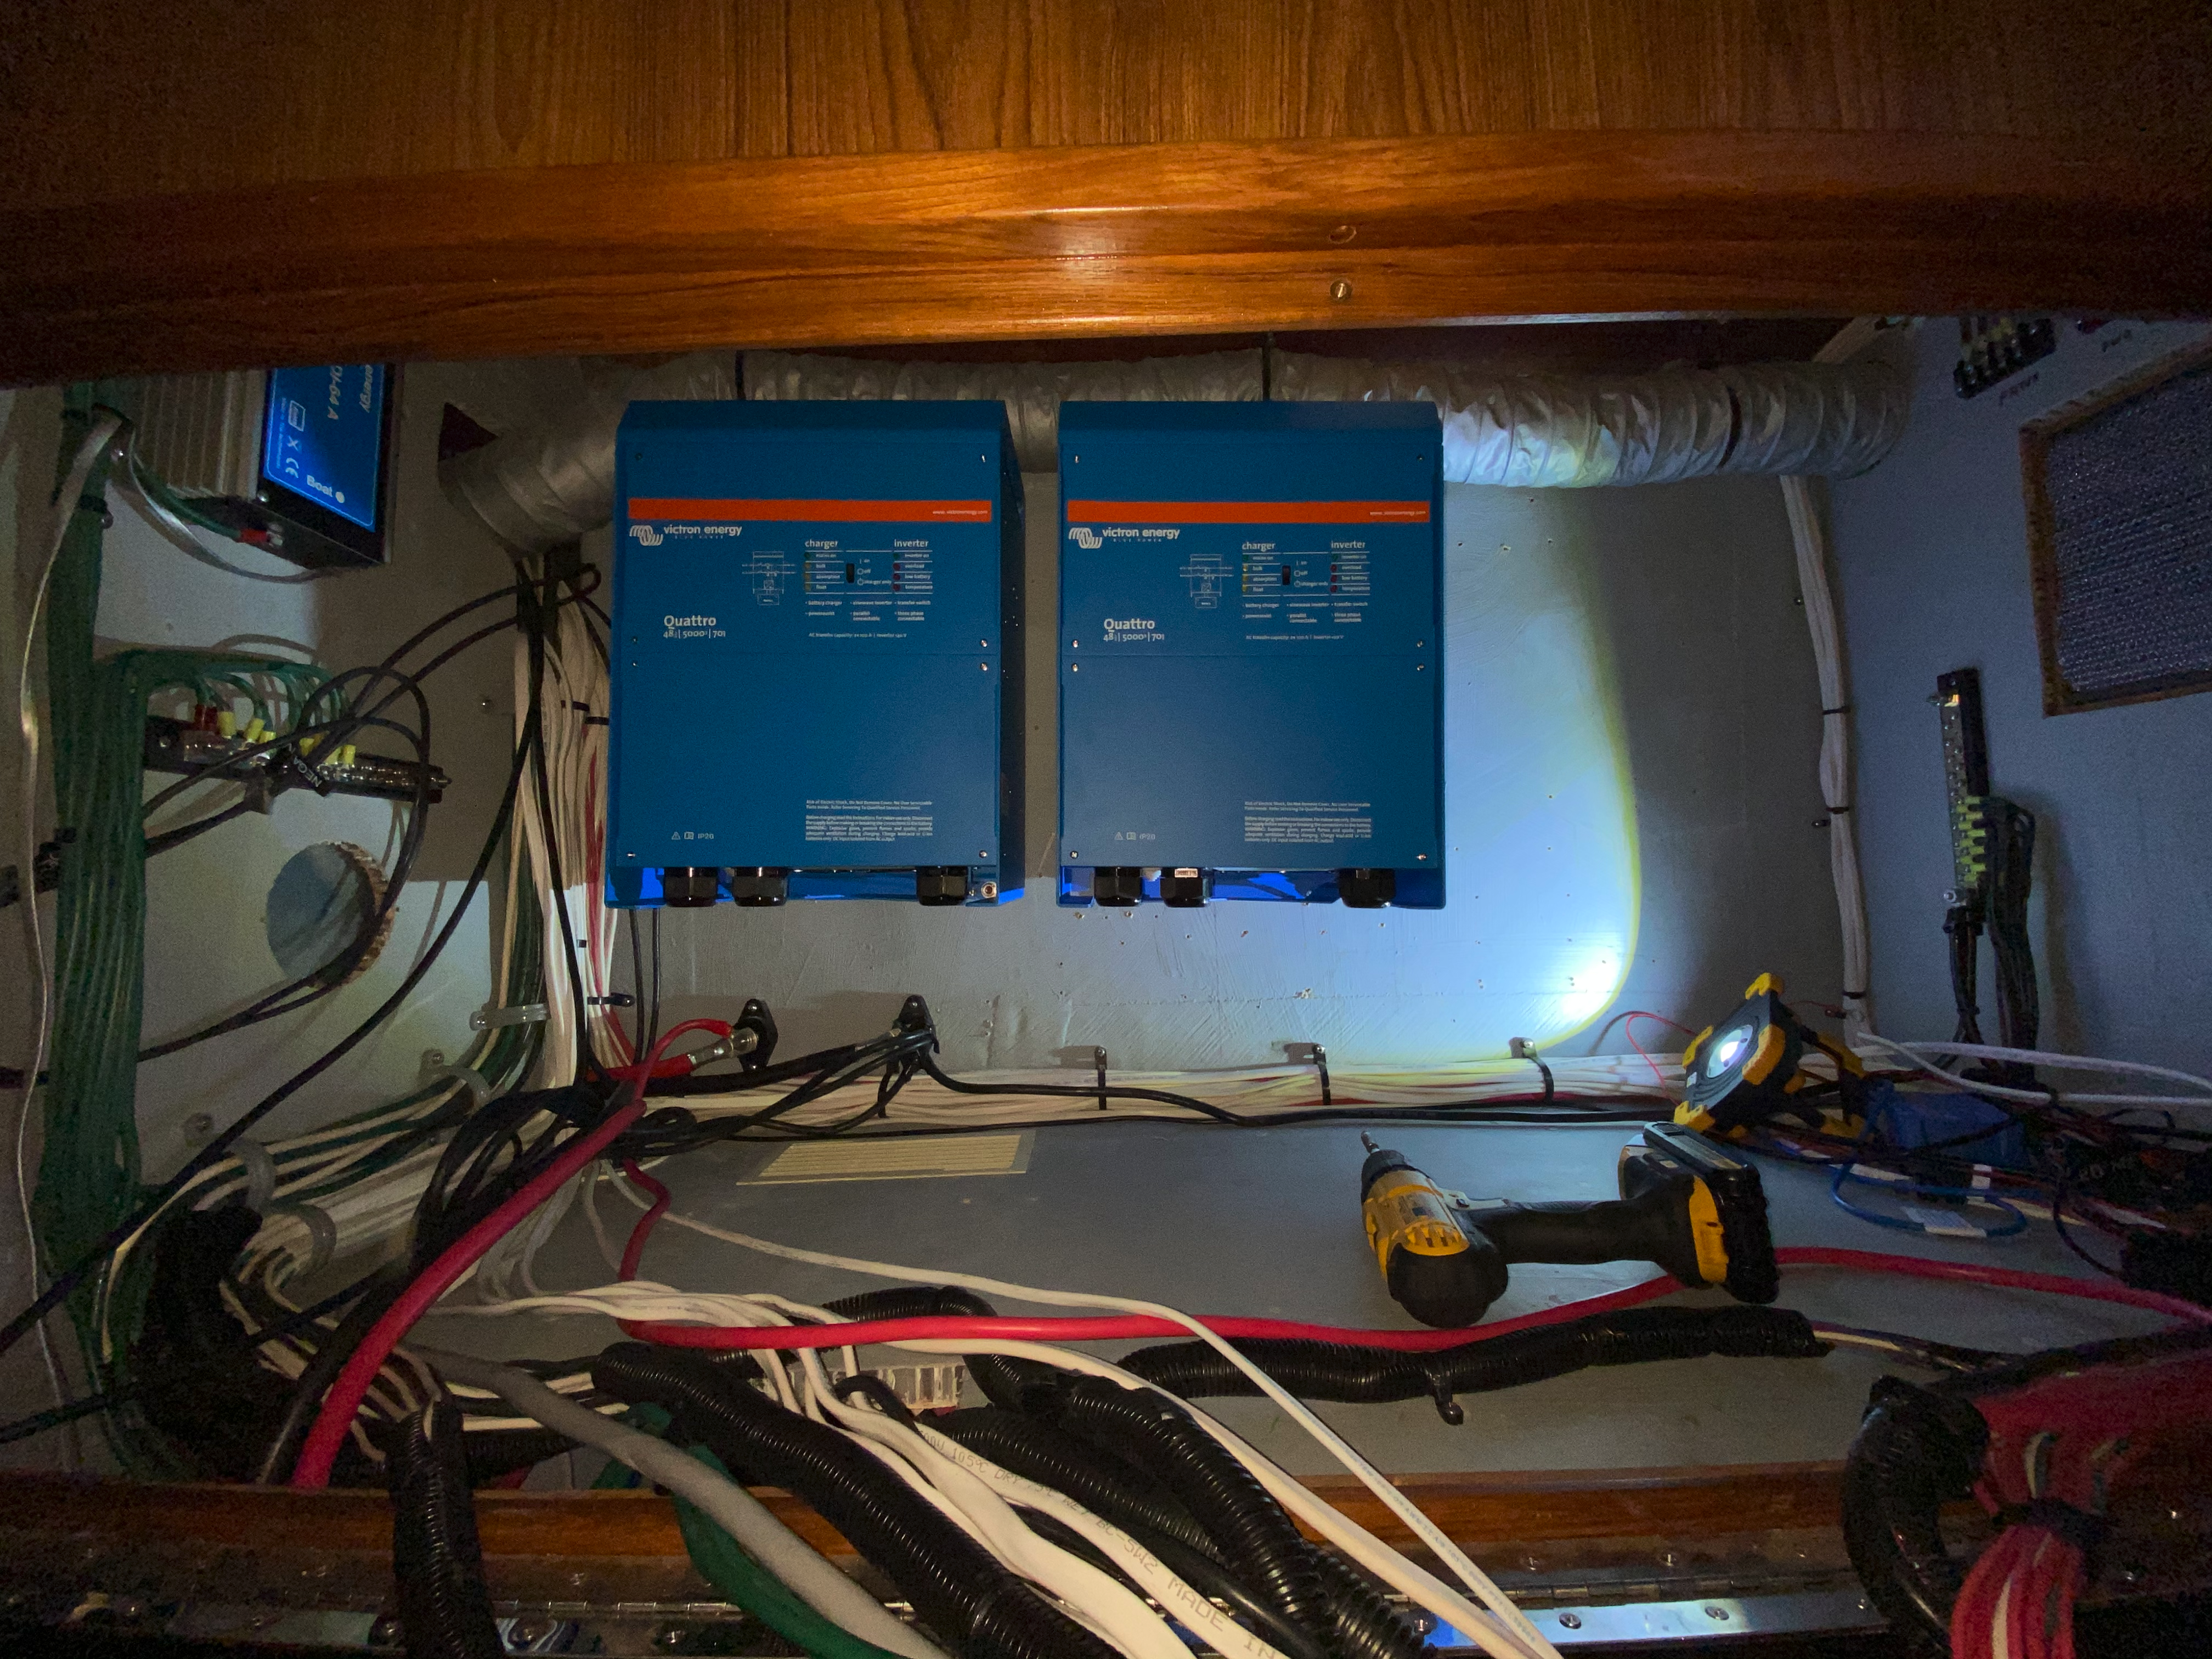
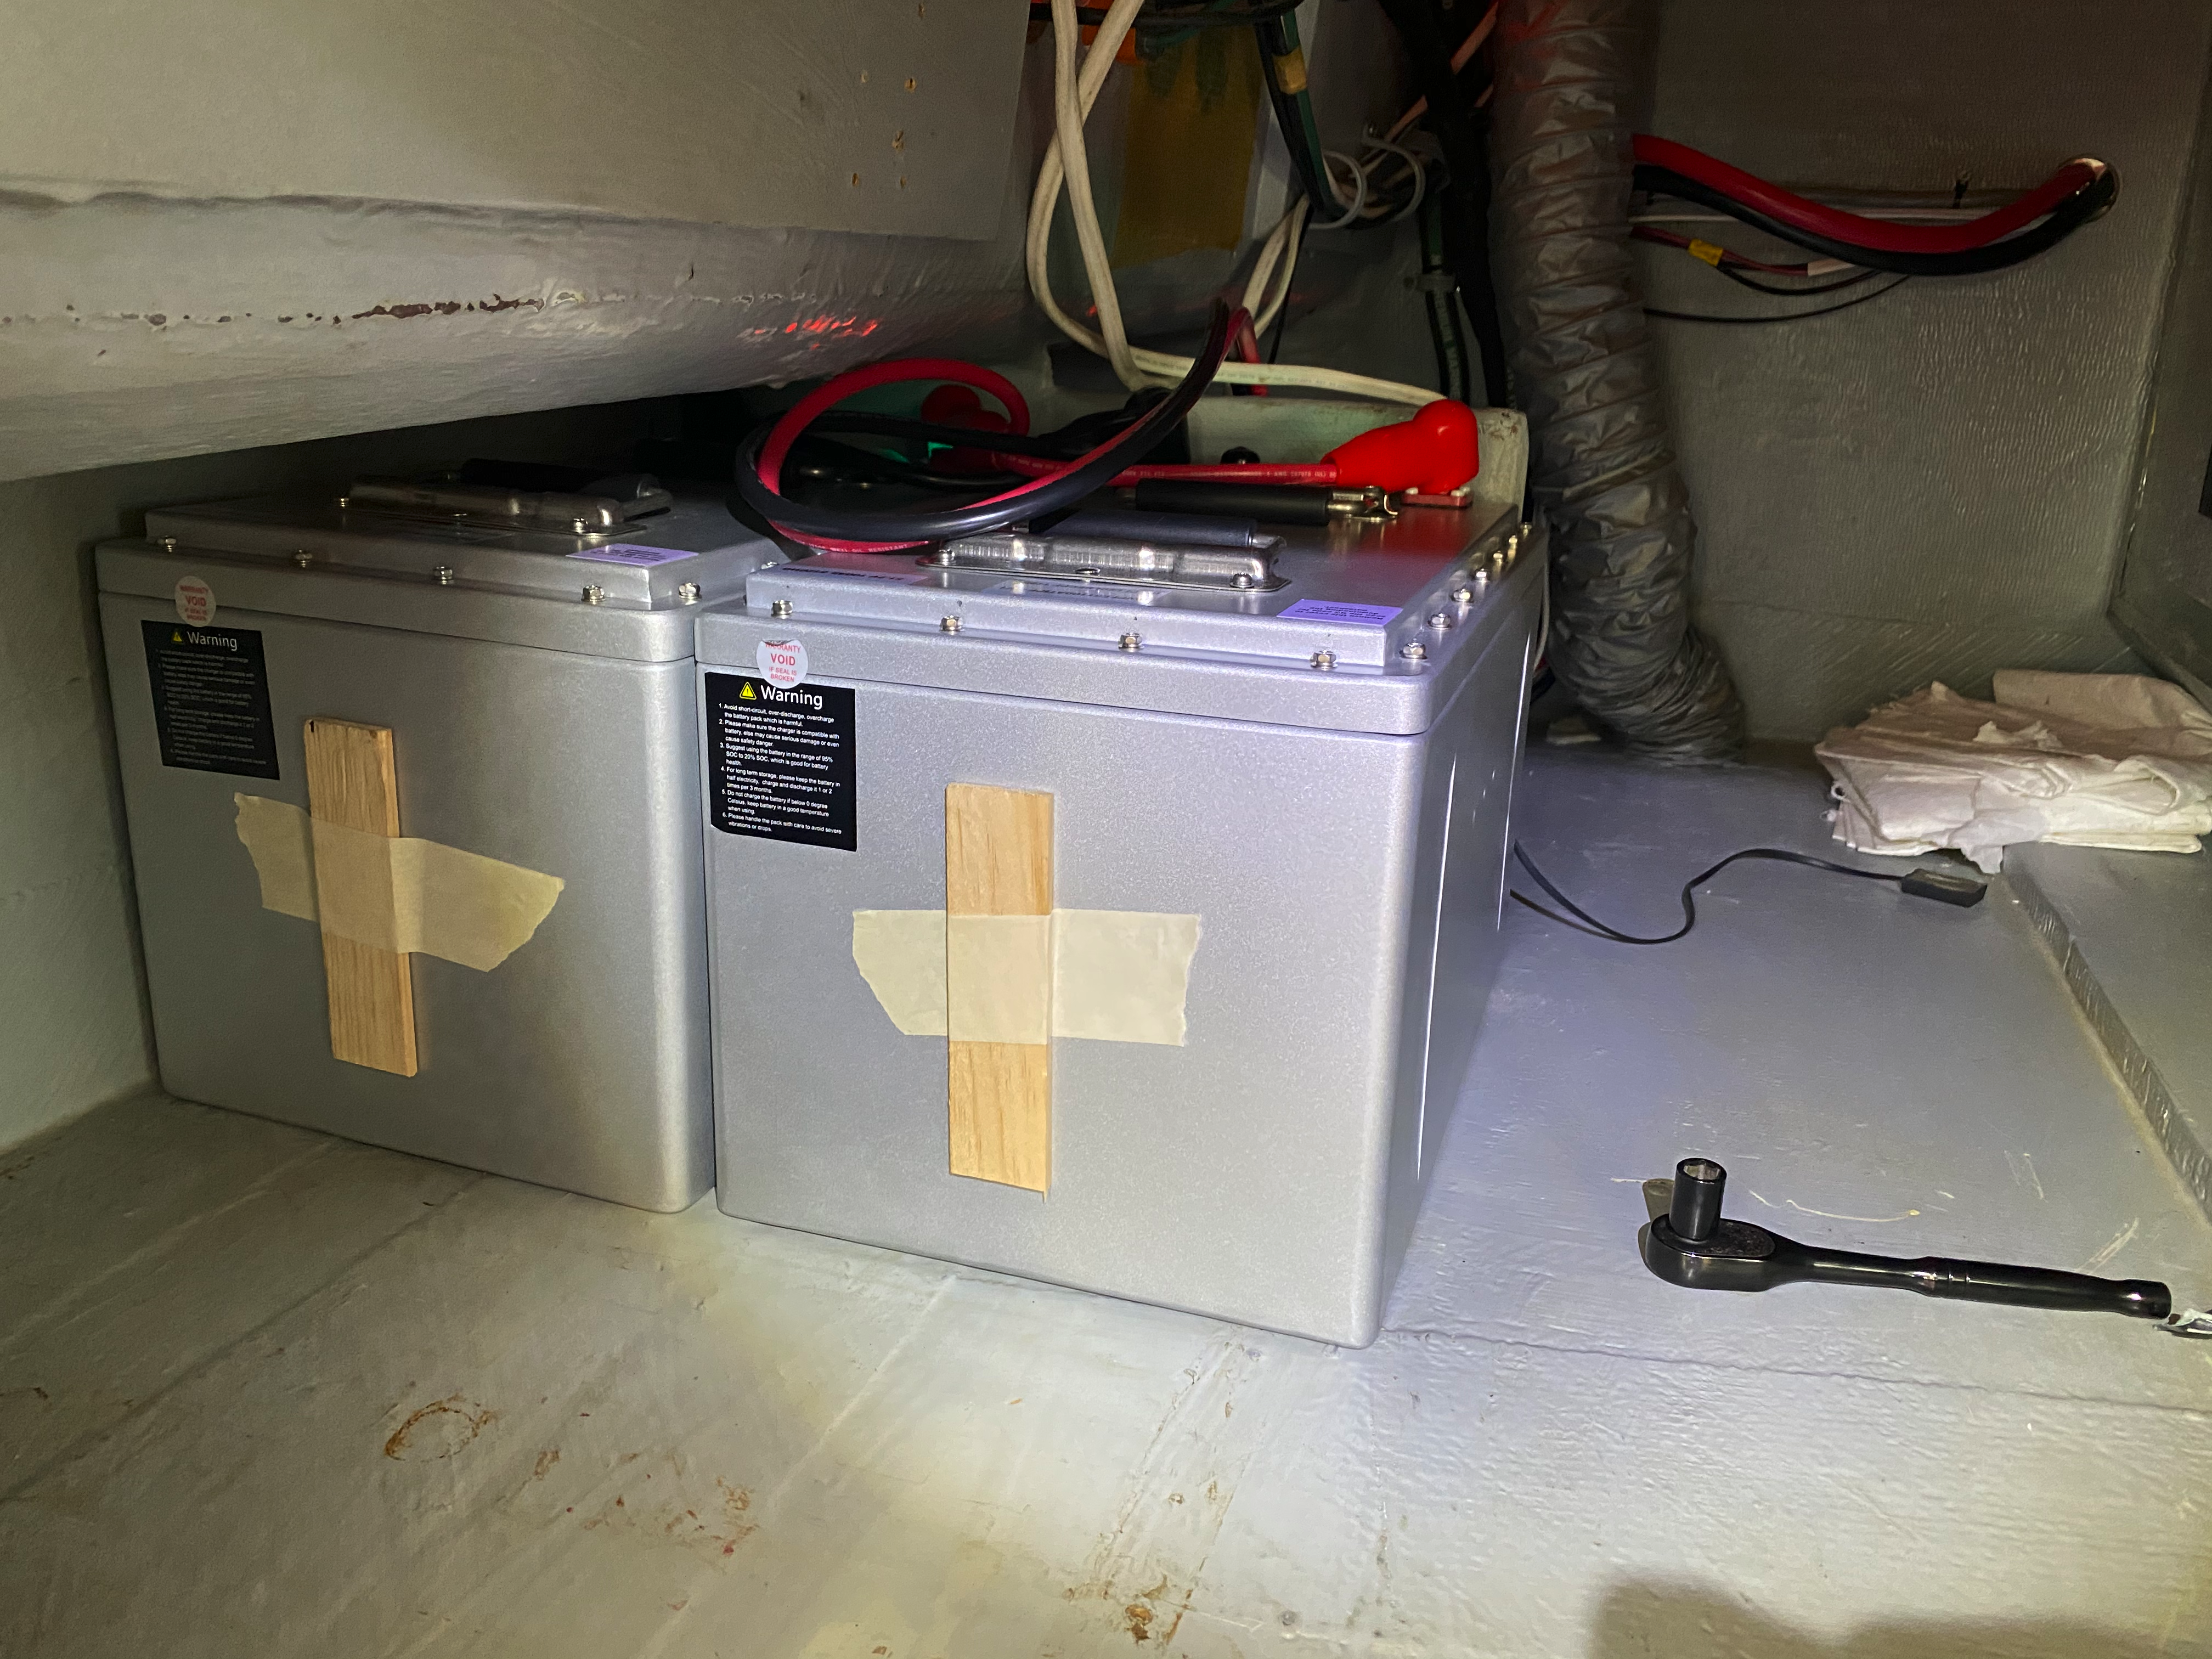


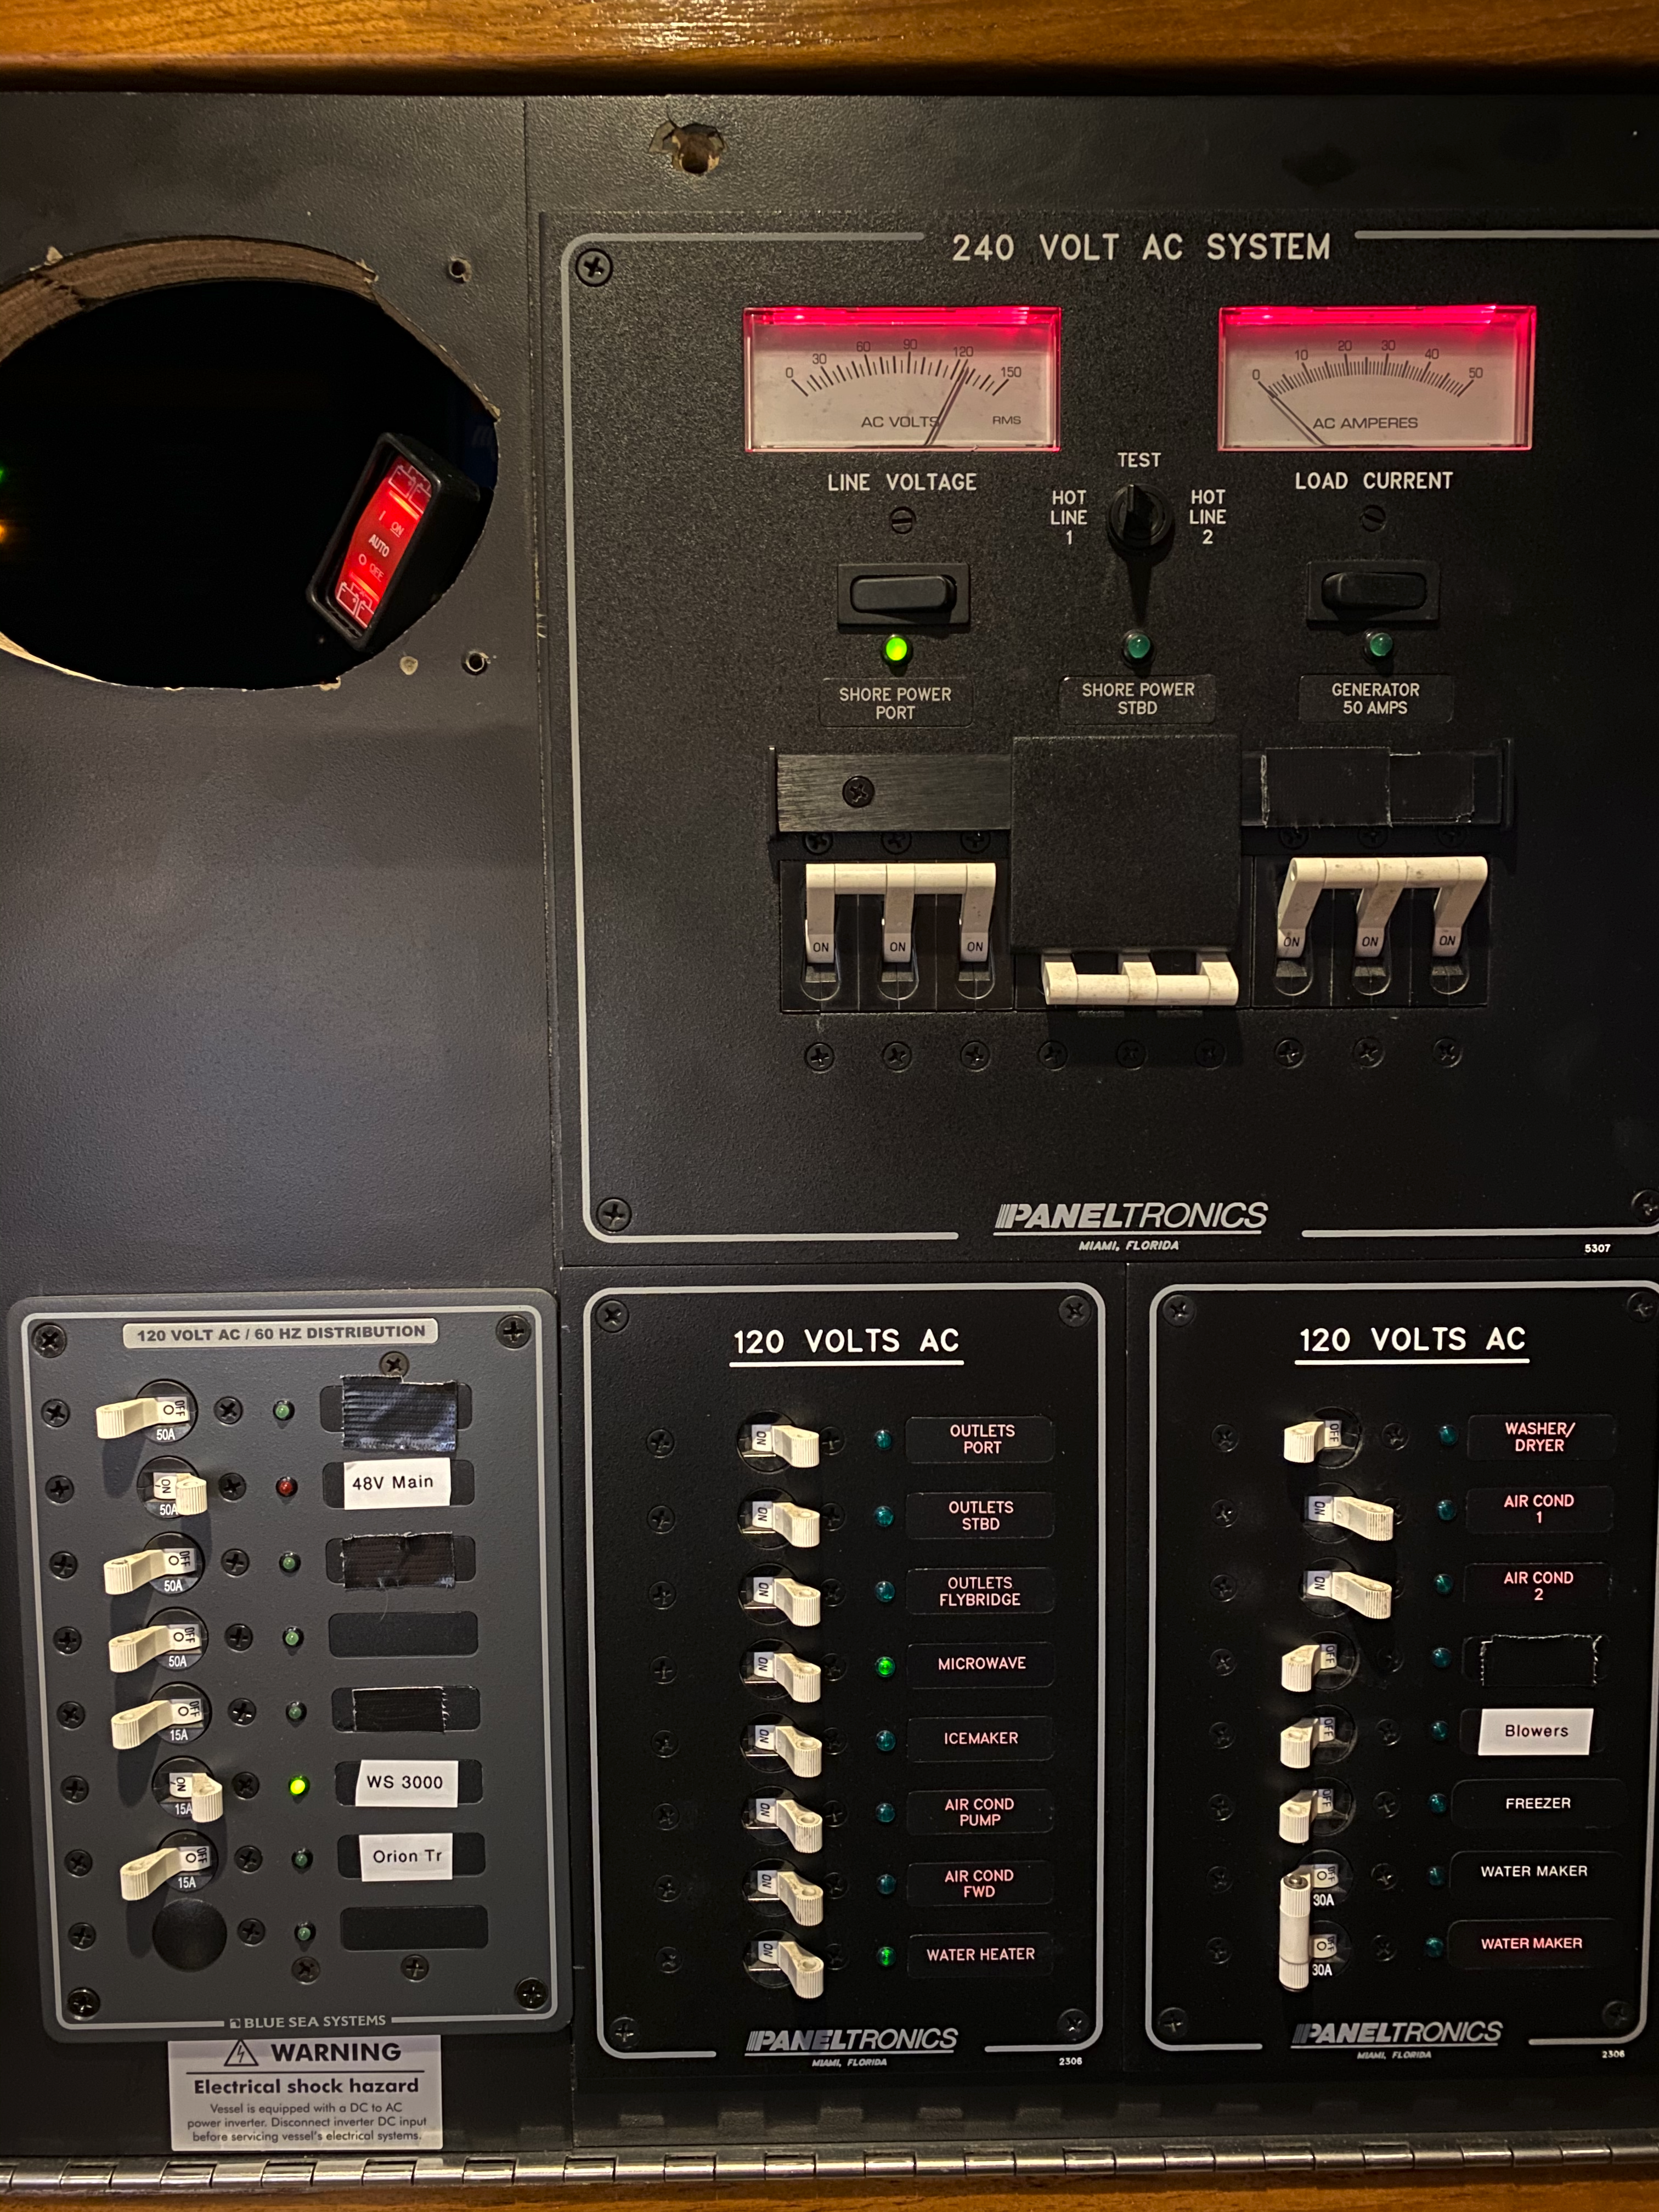
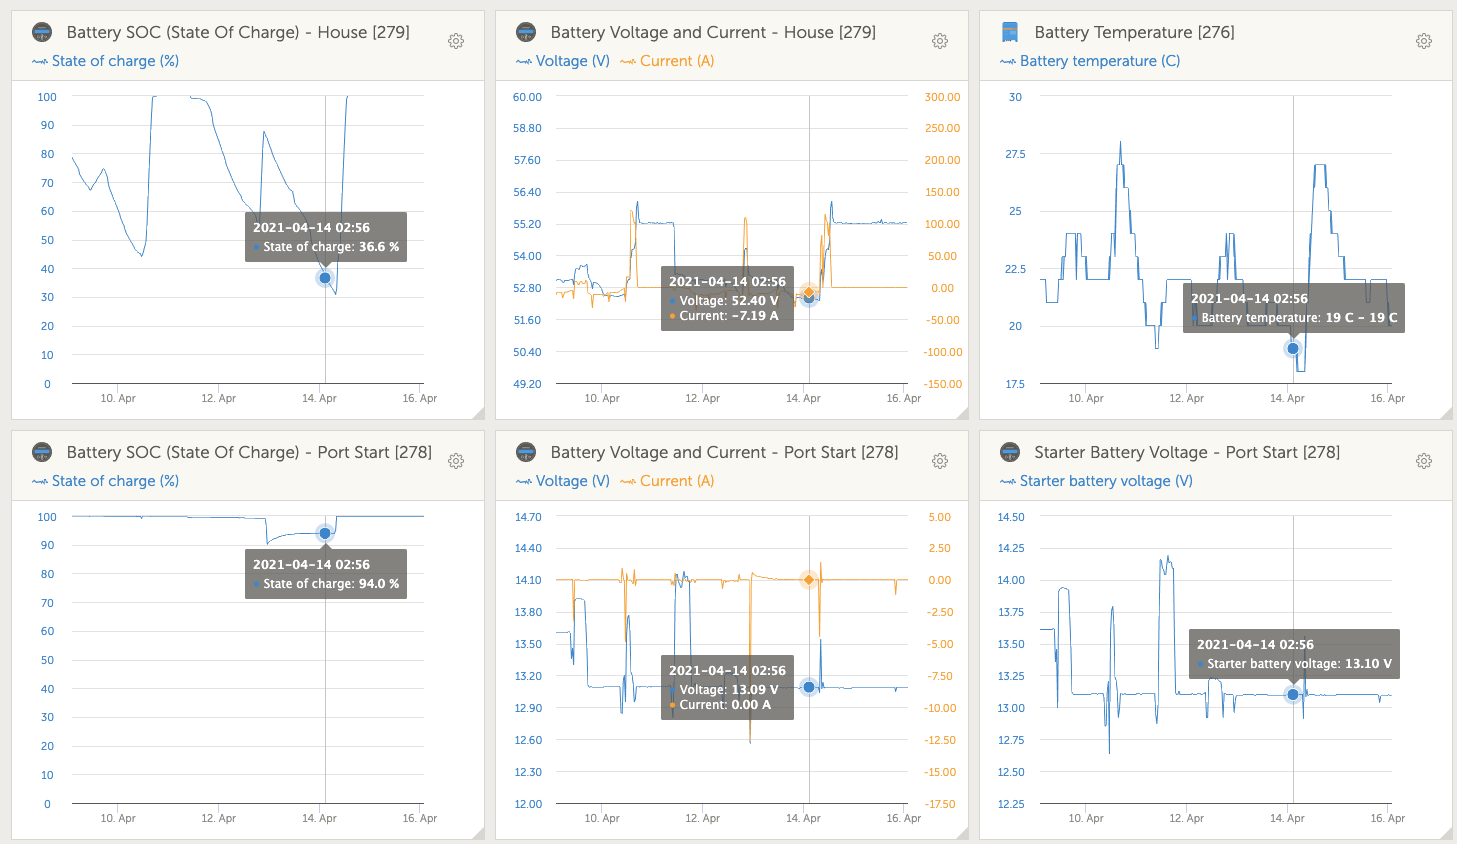


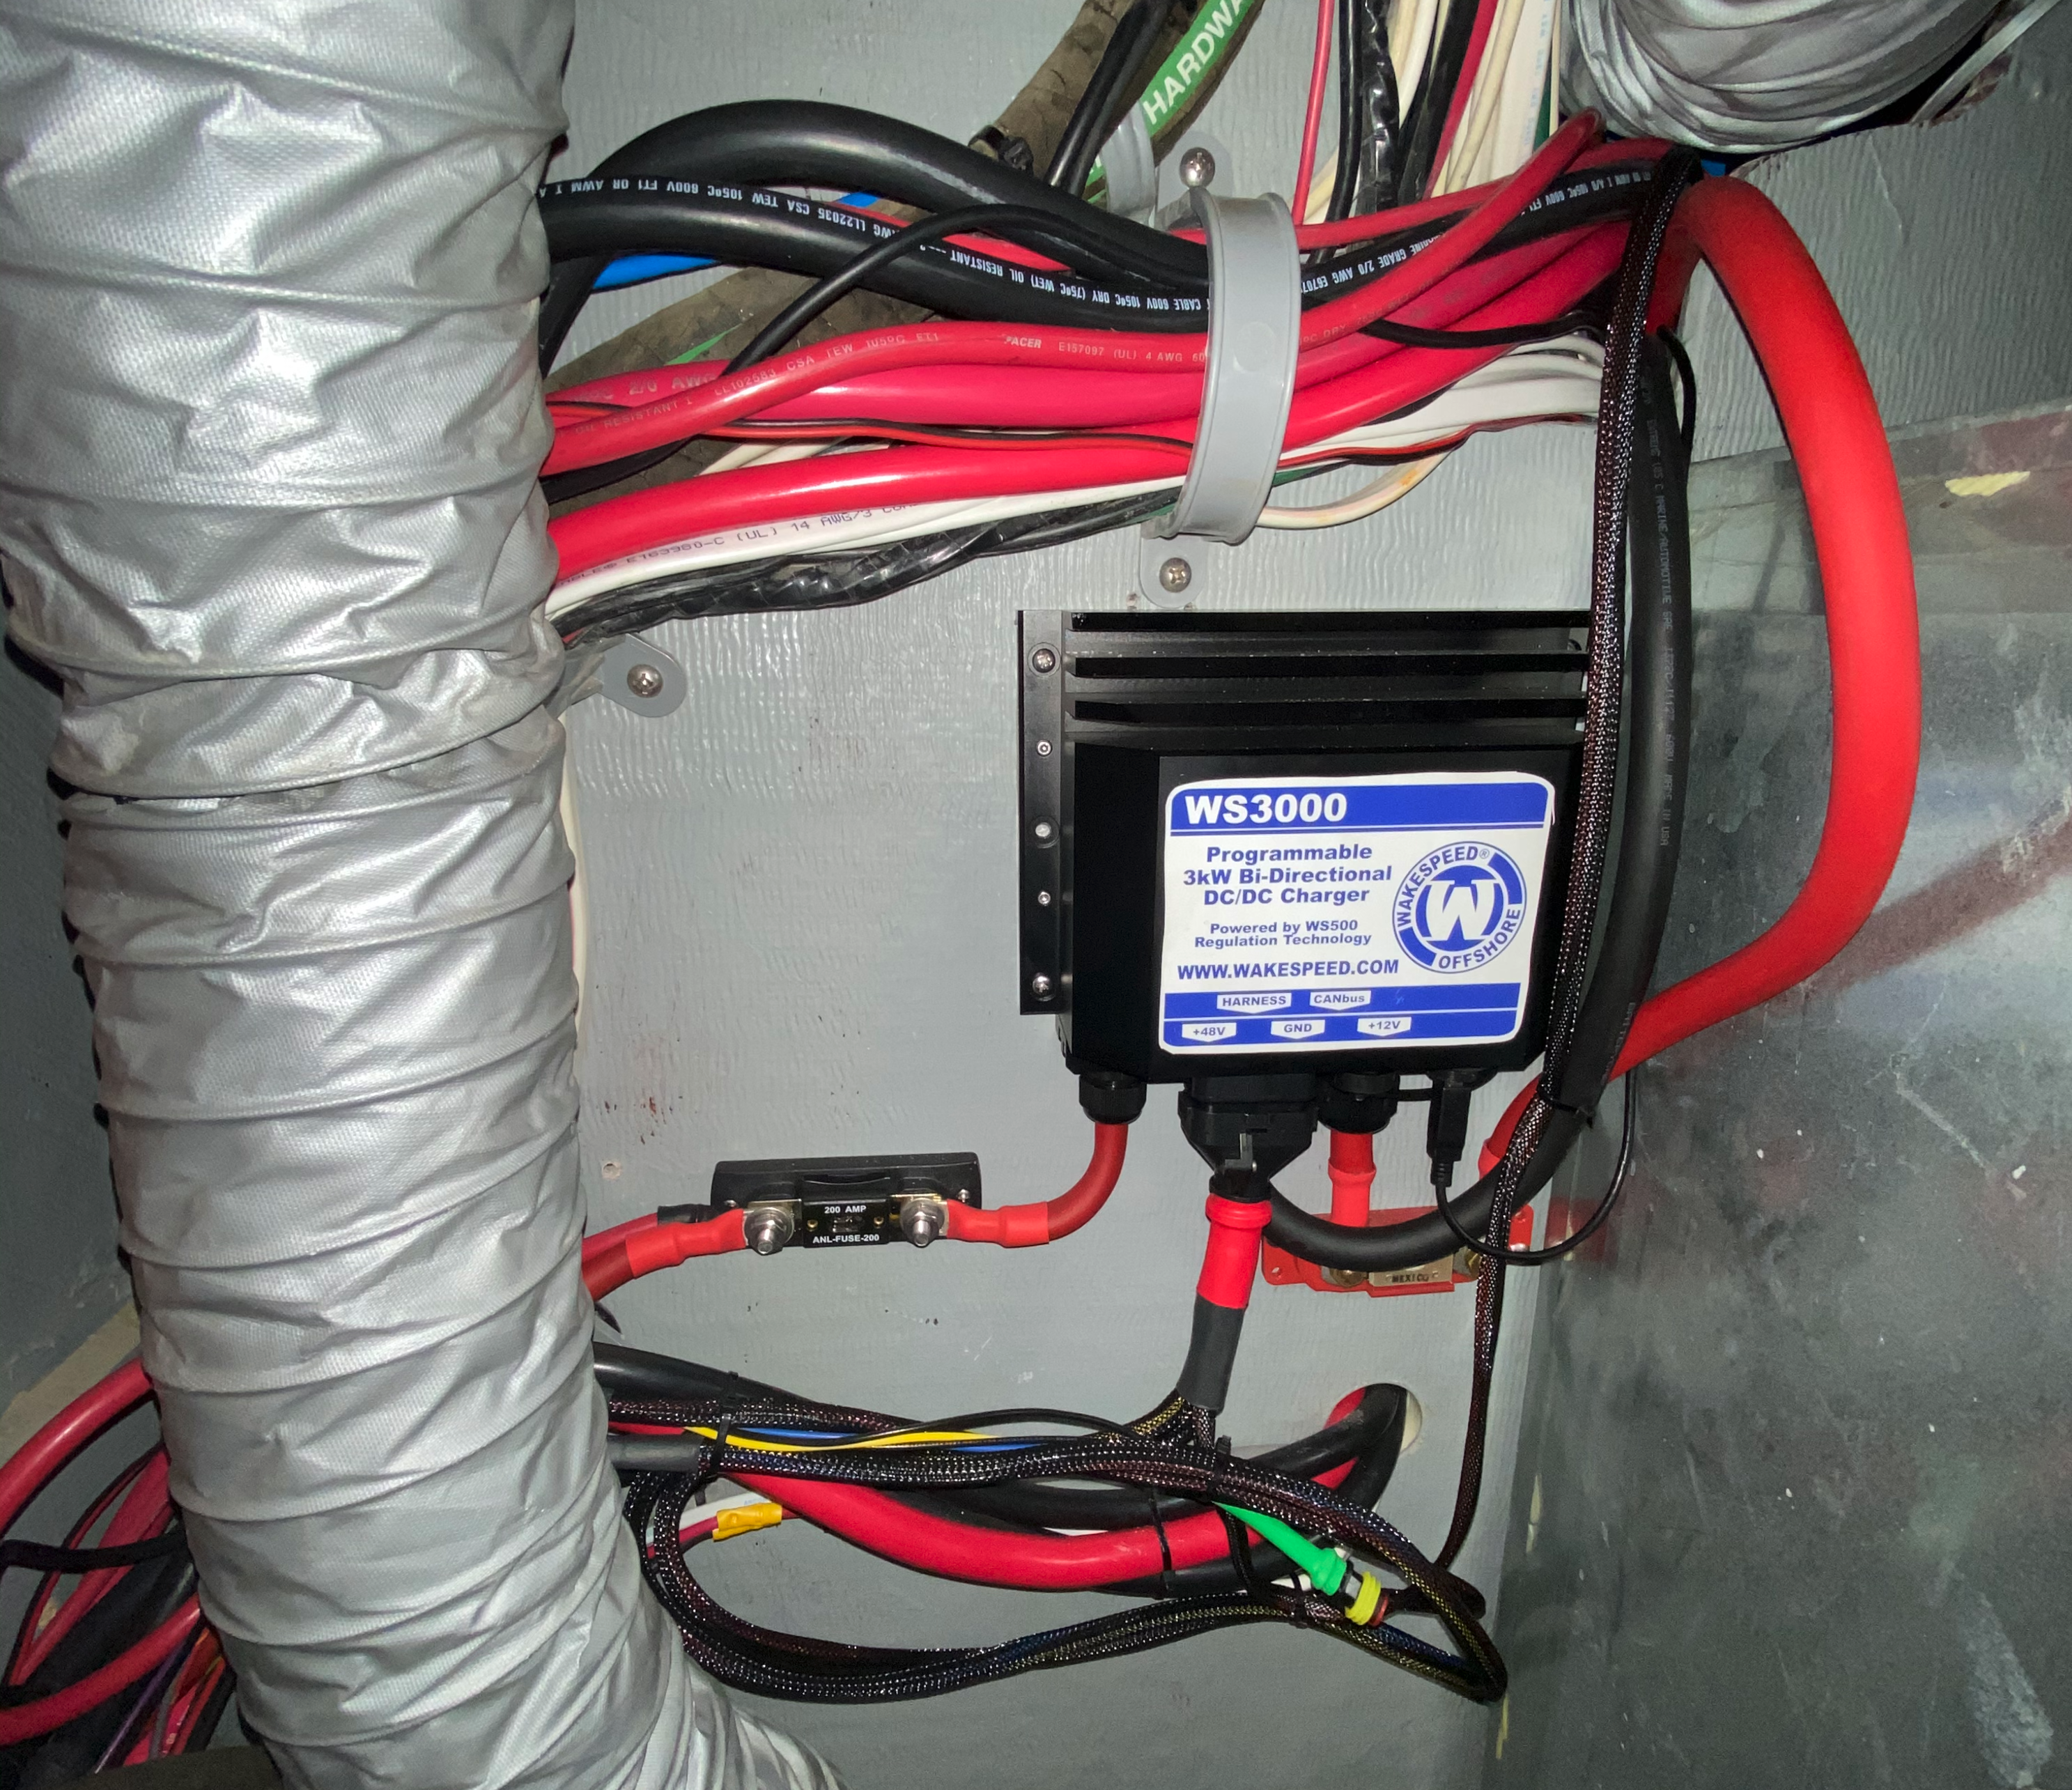
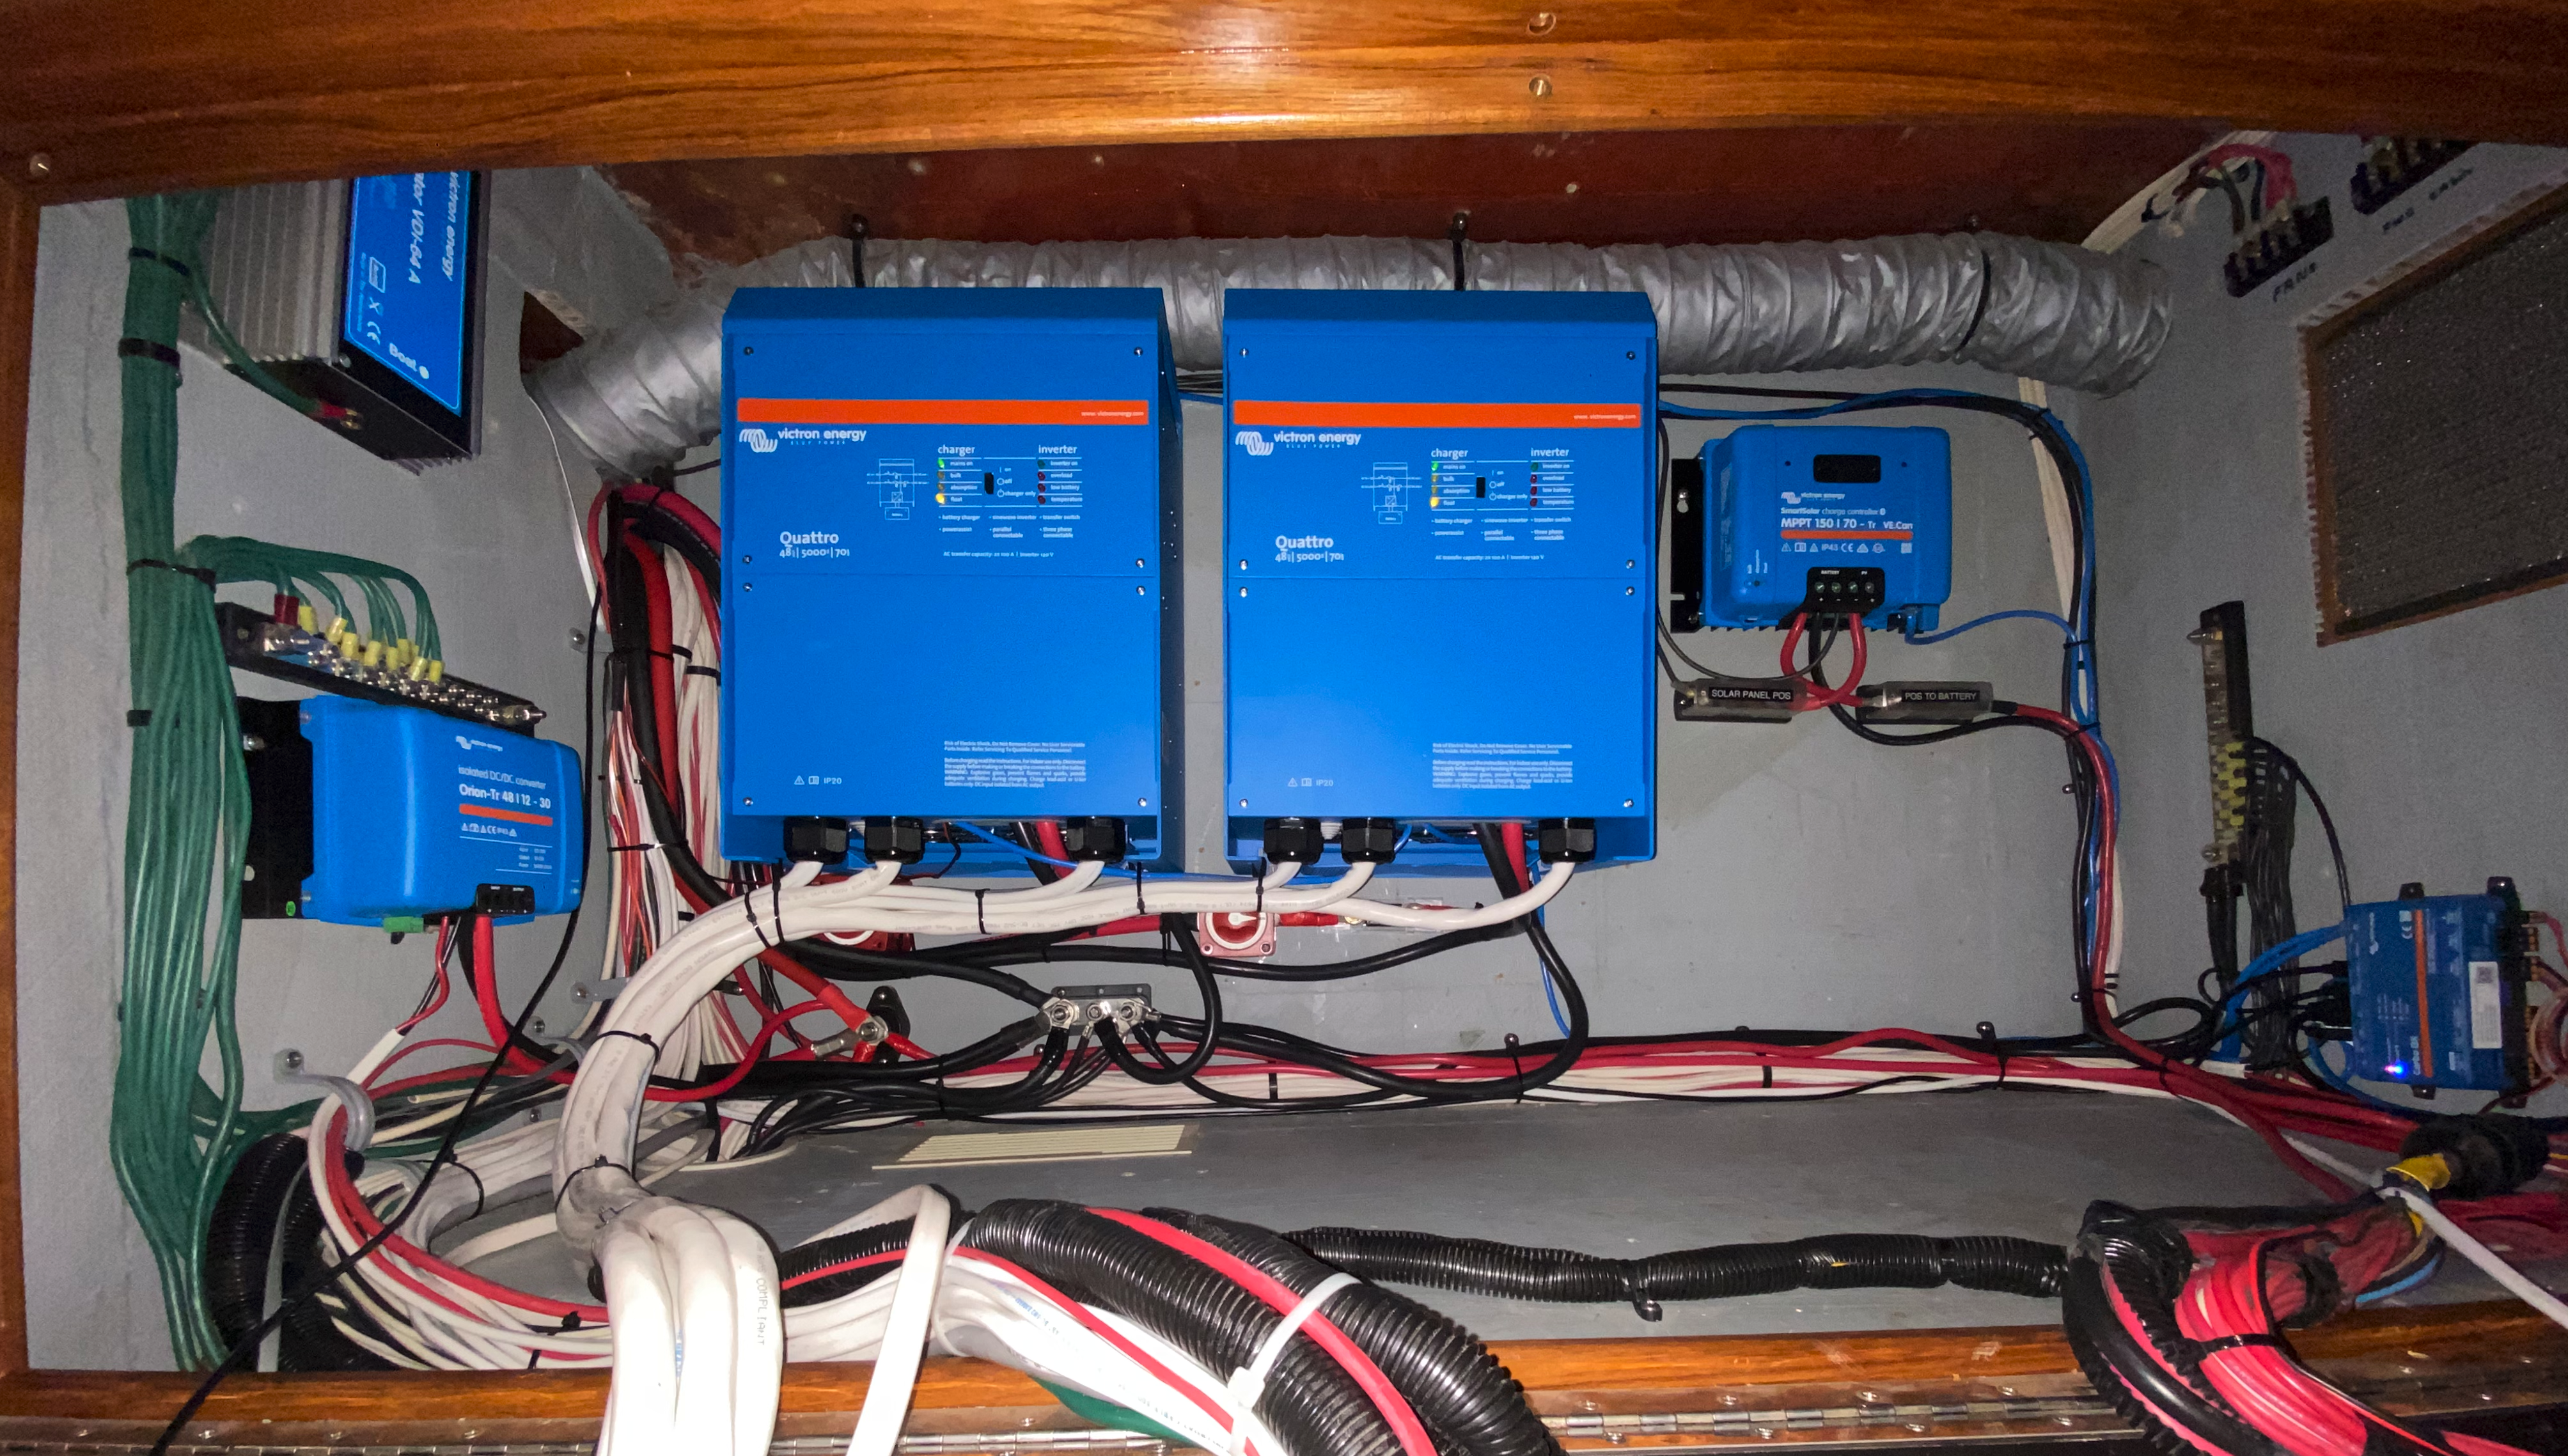


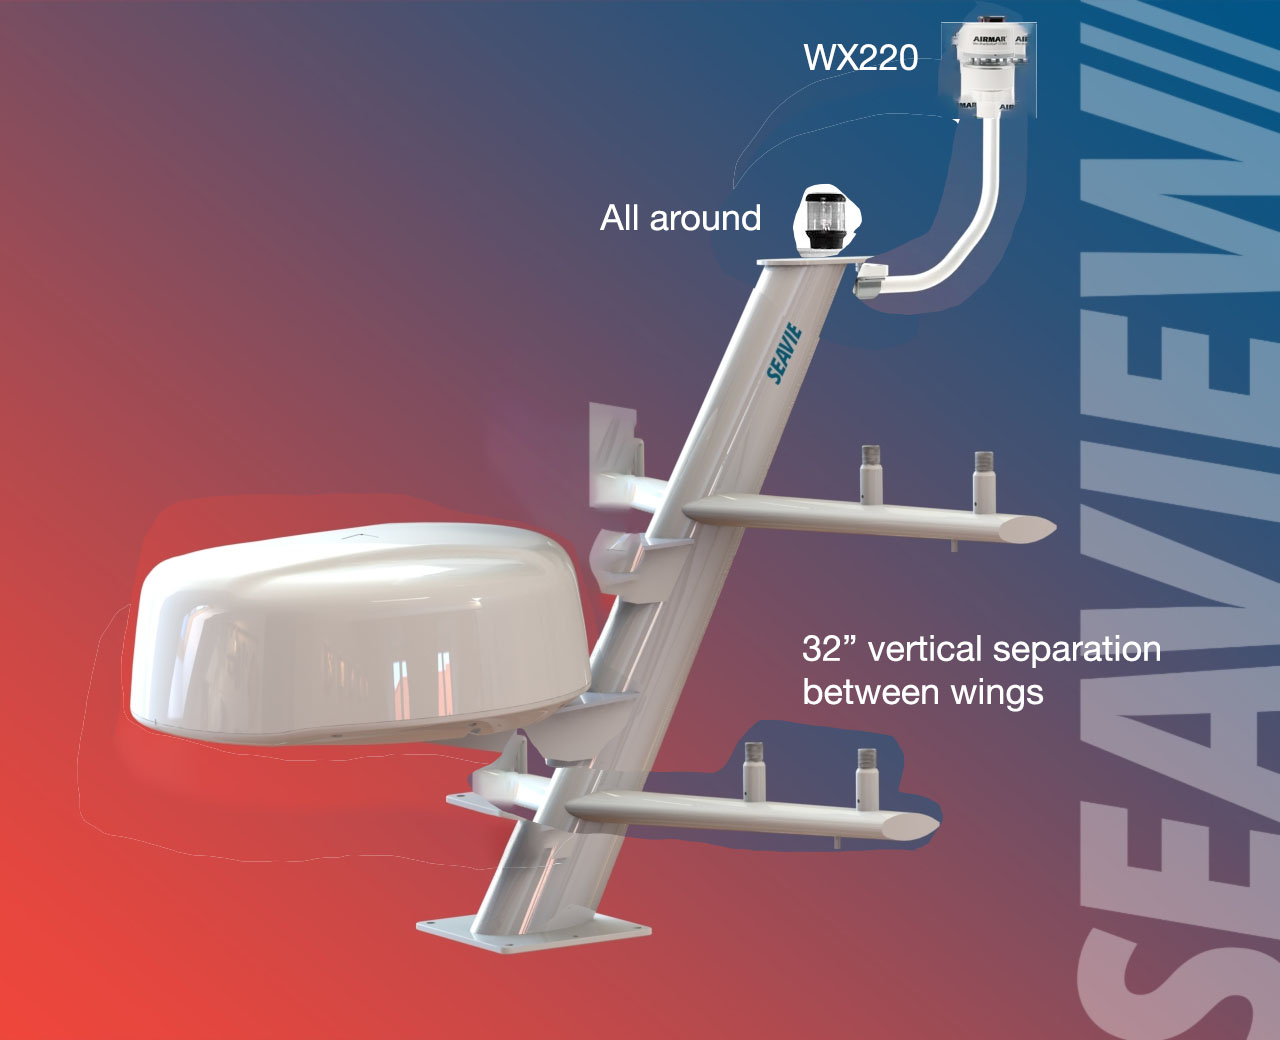


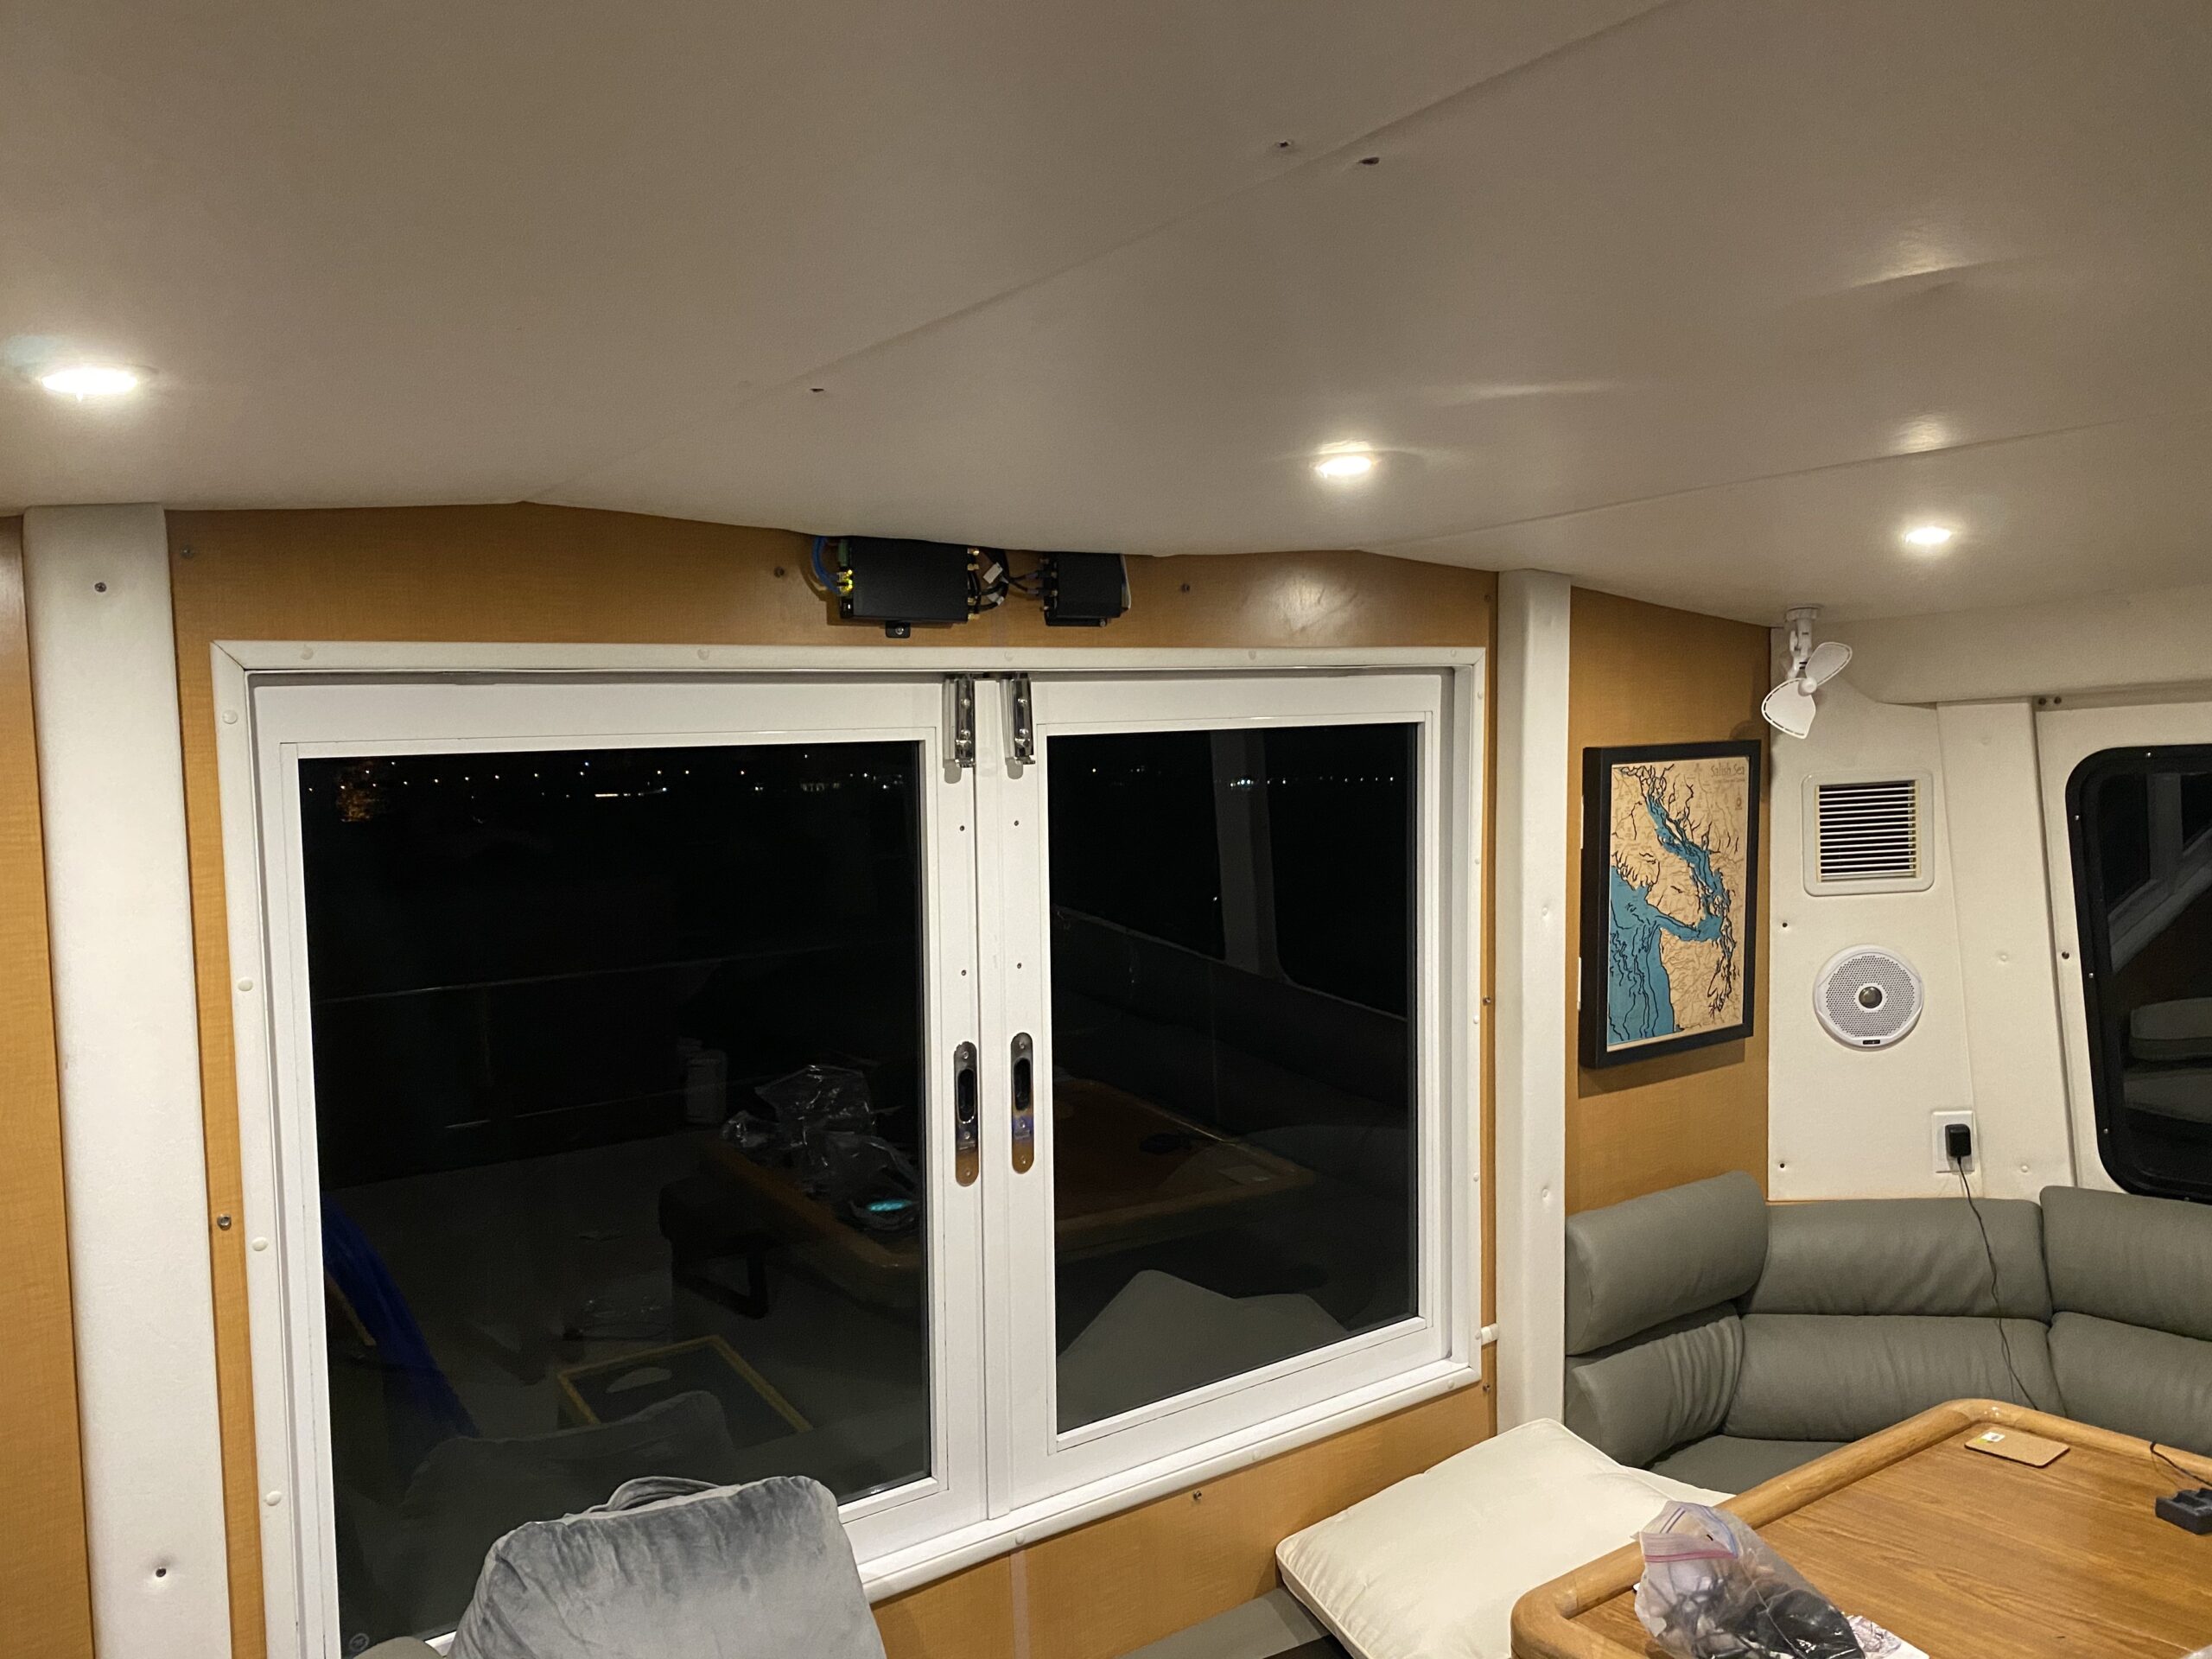
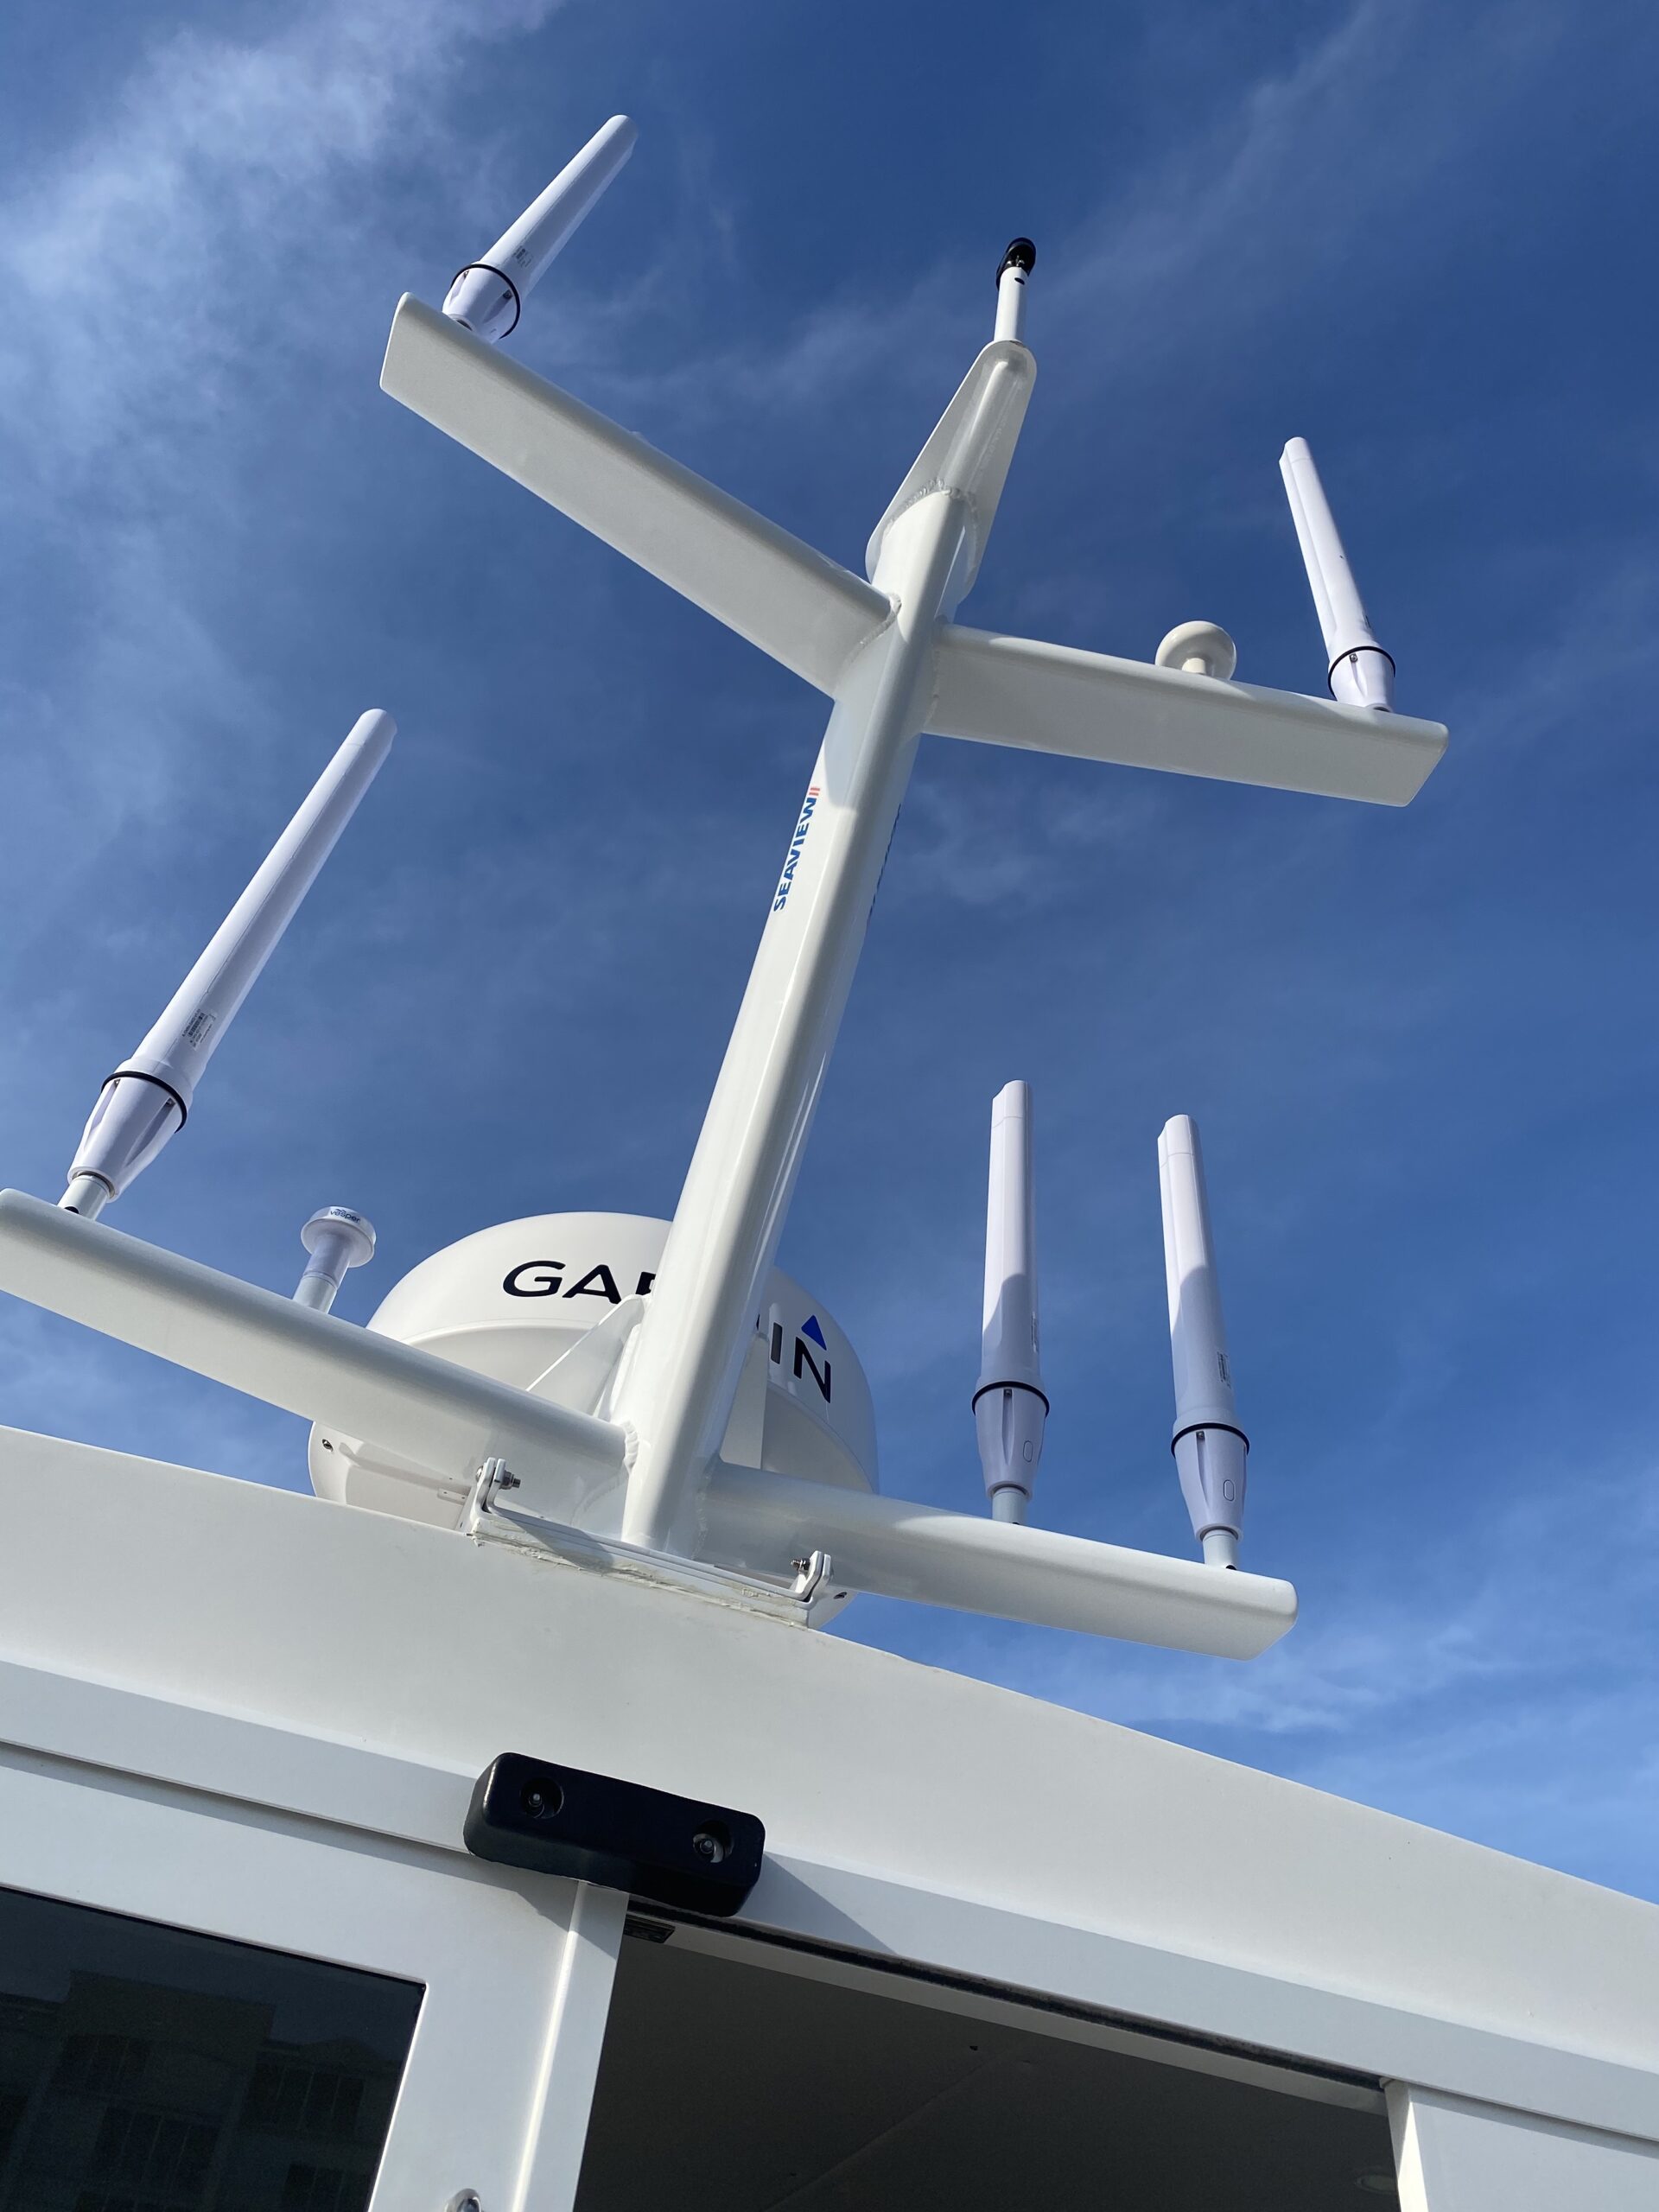
You must be logged in to post a comment.